Have you ever wondered where Apple Photos stores photos on your Mac? You most likely have, as these photos are nowhere to be found on your system as regular files.
The reason you can’t access the Photos app photos as normal files is that they’re stored inside a library file. These files don’t work like regular folders, so you can’t directly access them to view your photos.

However, there are ways to access the contents of these libraries, move these Apple Photos libraries to other locations such as to an external drive, and even change and create new libraries.
Apple Photos Library Location
Unless you or someone else has changed the path, you’ll find the Apple Photos library on the following path on your Mac. You need to replace the username with your username to access the library.
/Users/<username>/Pictures/

You’ll see an item named Photos Library in that folder. That’s the Photos app library for your images and that’s where Apple photos are stored. It contains the entire photo collection that you see in the Photos app.
Related: Whether you need to download a pic from the internet, save a screenshot, or move photos, we’ve got you covered with our guide on how to save images on Mac.
How To Backup Photos From An Apple Photos Library
One of the ways to export photos from an Apple Photos library is to use the Photos app itself. There’s an option that lets you export photos from your library to any location on your Mac or external drive.
However, if you don’t want to go that path for some reason, there’s another way to view and backup certain photos from your Apple Photos library. This method doesn’t require you to open the Photos app at all.
- Head over to the following path using the Finder to access your Apple Photos library.
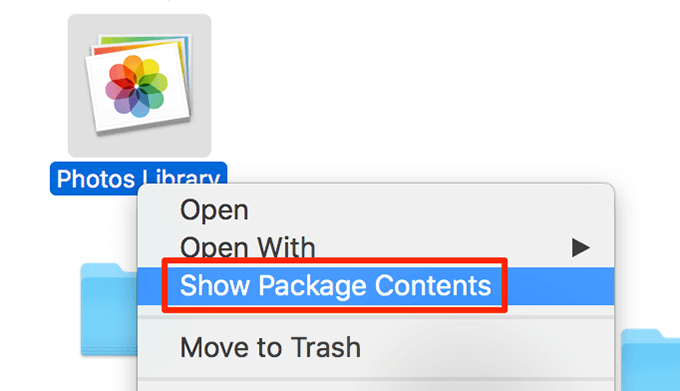
/Users/<username>/Pictures/ - Don’t double-click on the library or it’ll end up opening in the Photos app. Instead, right-click on it and select the option that says Show Package Contents. It’ll let you view what’s inside the library.
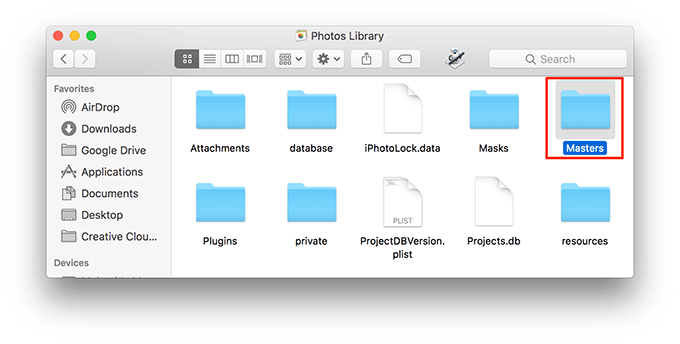
- You’ll find several folders inside the library file. Find the folder that says Masters and double-click to open it.
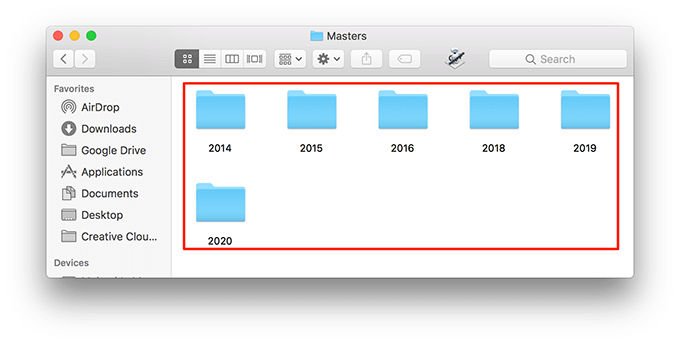
- You’ll see various folders for your photos. These are the folders where your library photos are stored and you can open any of these to access and view your photos.
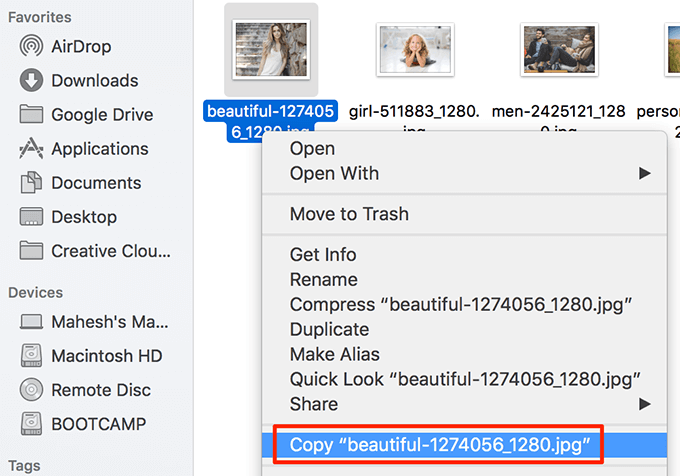
- When you find the photo or photos that you want to backup, right-click on them and select Copy.
- Open the folder where you want to save the photo, right-click anywhere blank, and select Paste Item.
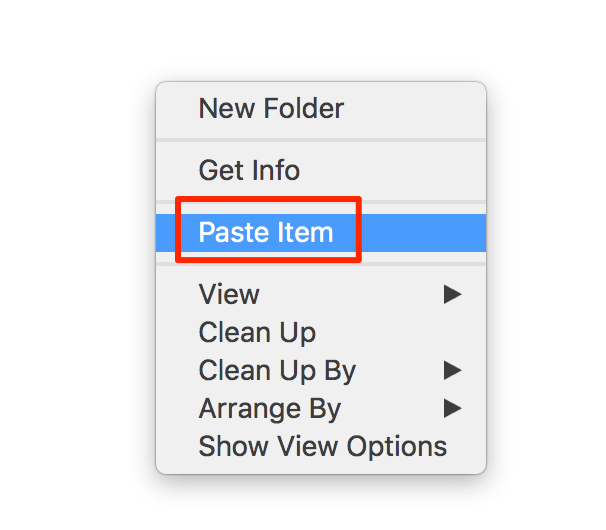
This method lets you use the Apple Photos library images as regular files on your Mac.
Change The Apple Photos Library Location
If your Photos library is consuming too much memory space on your Mac, you can move it to an external drive and save space on your machine. Your library will continue to work as it currently does.
You can also remove the library from one folder to another on your Mac with this method.
- Access your Apple Photos library at the following location on your Mac.
/Users/<username>/Pictures/ - Right-click on the library file called Photos Library and select Copy Photos Library.
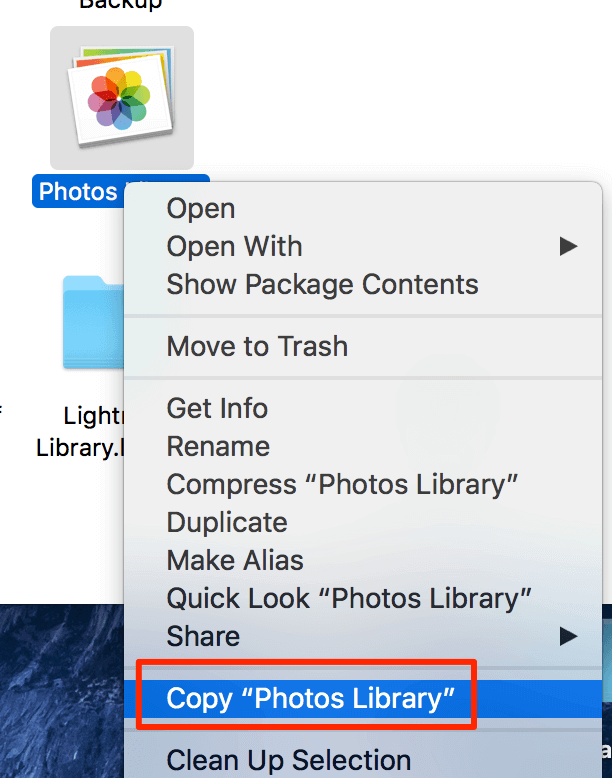
- Navigate to the folder where you want to move your library to either on your Mac or your external hard drive, right-click anywhere blank on your screen, and choose Paste Item.
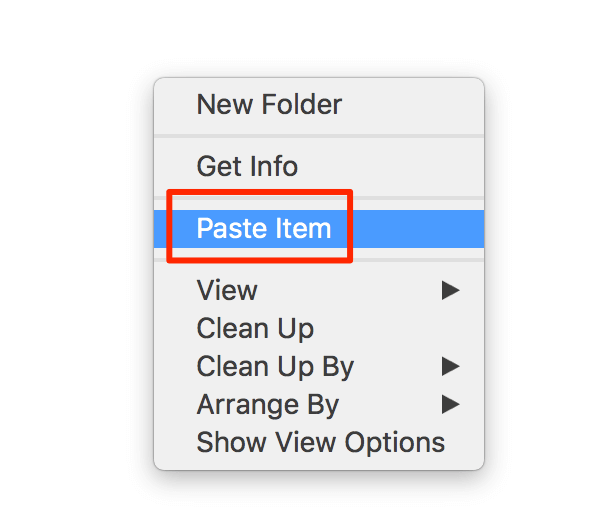
- Once the library is fully copied, double-click on this copied library file and it’ll open in the Photos app. The app now knows you’ve changed the location of your library and this will reflect in the app preferences panel.
- Once you’ve confirmed everything works with the newly moved library, you can get rid of the old library file. Head to the following folder using the Finder on your Mac.
/Users/<username>/Pictures/ - Find your library file, right-click on it, and choose Move to Trash.
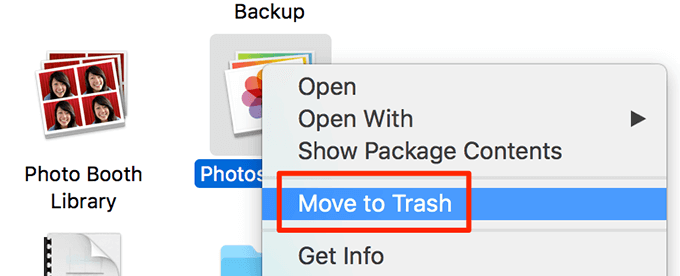
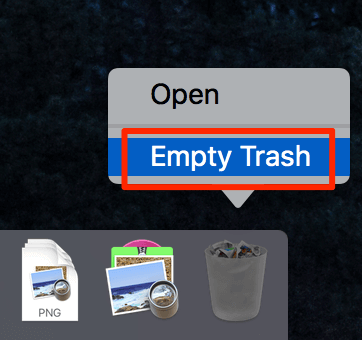
- Right-click on the Trash icon and choose Empty Trash to get rid of the duplicate library for good.
Use Other Libraries In Apple Photos
Apple Photos gives you the freedom to open and work with any library on your Mac or other drives. The only thing you need to do is select the library you want to open while launching the Photos app and that’s all.
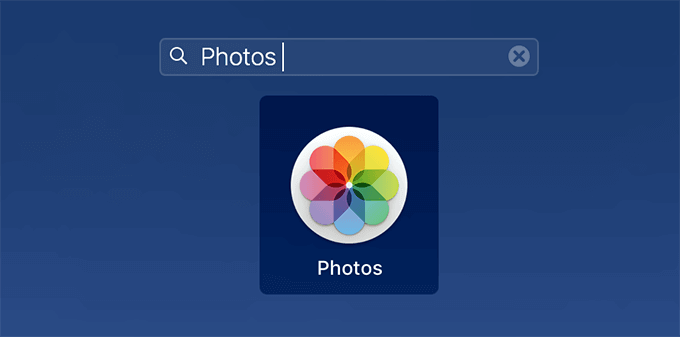
- Click on Launchpad in the Dock and search for the Photos app. Don’t launch the app just yet.
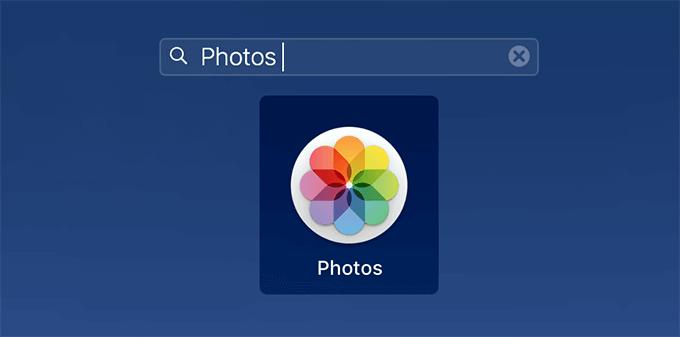
- Press and hold down the Option key on your keyboard and click on the app.
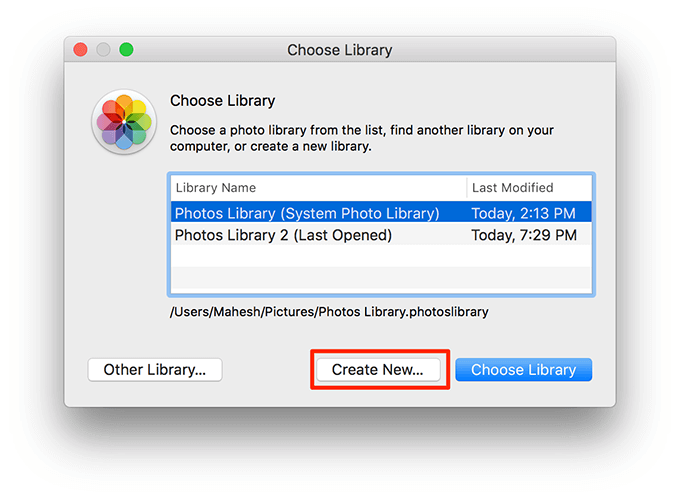
- You’ll get a prompt asking what library you’d like to open with the app. Click on the button that says Other Library to choose a library to load in the app.
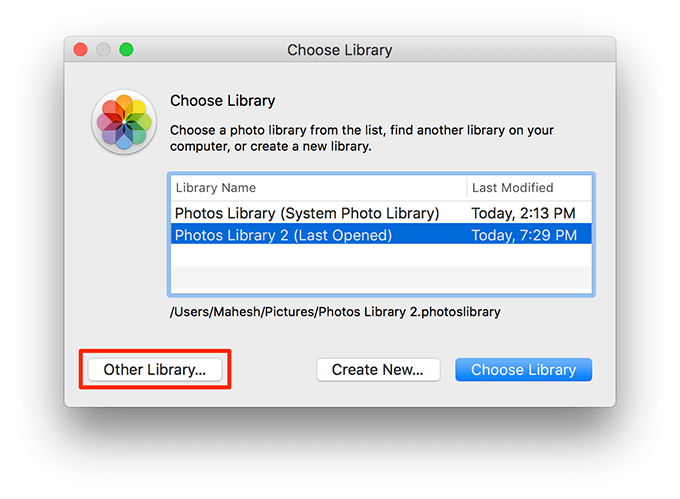
- Select the library file wherever it’s located on your Mac or external hard drive and it’ll open in the Photos app.
Create a New Library In Apple Photos
Sometimes you may run into an issue where the Apple Photos app refuses to load your default library. This may happen due to various reasons, but one common reason is your library file is corrupt.
If that ever happens, you can create a new library and get the app to launch successfully.
- Press and hold down the Option key on your keyboard and click on the Photos app in Launchpad to open it.
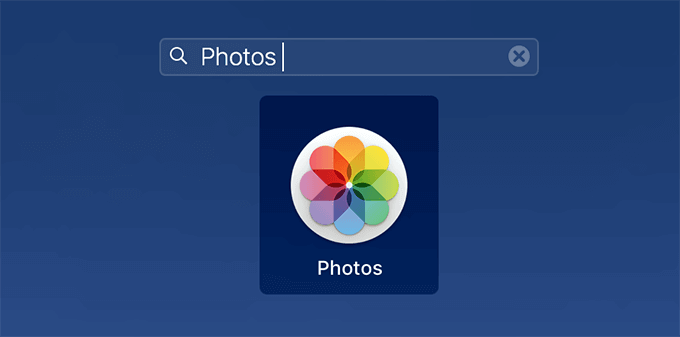
- Click on the Create New button to create a completely new library for your photos.
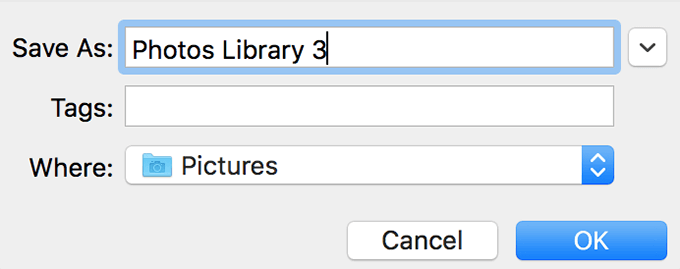
- On the following screen, enter a name for your library in the Save As box, select a folder where you want to save the library from the Where dropdown menu, and finally click on OK to create the library.
Define a Designated System Library In Apple Photos
To use features like iCloud Photos, Shared Albums, and My Photo Stream, you need to define a designated system library in the Apple Photos app. If you don’t do that and you try to access these features, you’ll get a message that looks like the following.
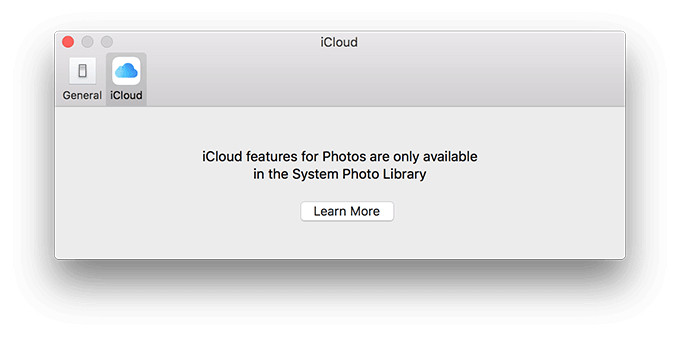
The good thing is you can make any one of your libraries the default system library.
- Press and hold down the Option key on your keyboard and click on the Photos app.
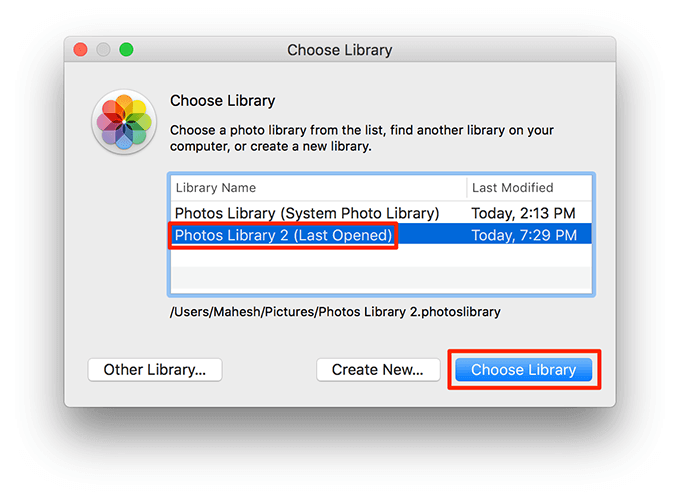
- Select the secondary library that you’d like to make the default library and click on Choose Library. Your chosen library will open in the app.
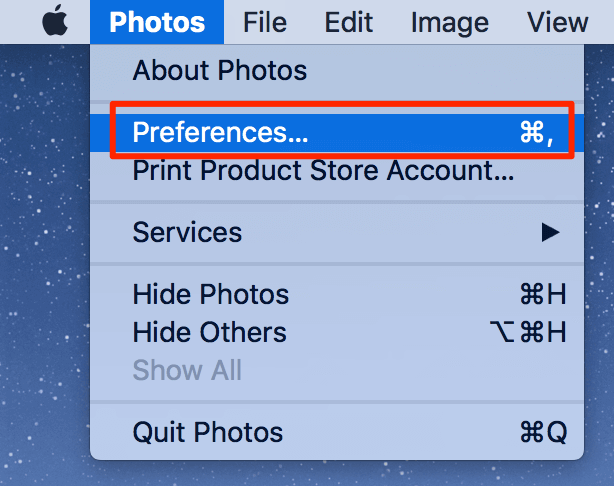
- Click on the Photos menu at the top-left corner of your screen and select the option that says Preferences.
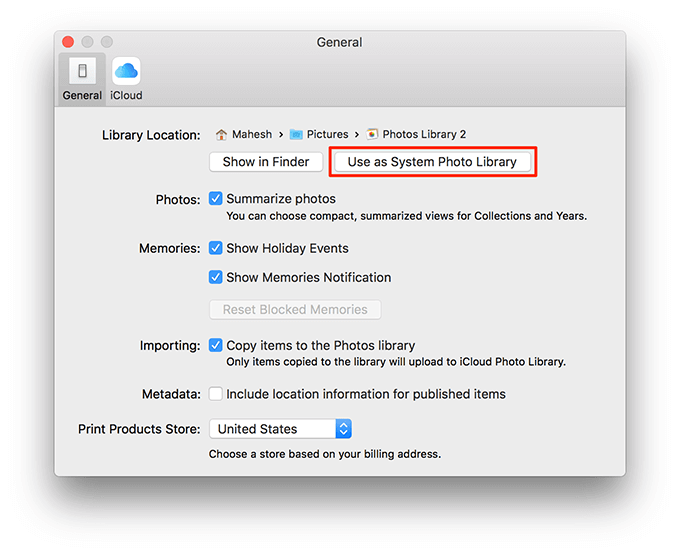
- Click on the General tab at the top if you aren’t already there.
- You’ll find a button that says Use as System Photo Library. Click on it and it’ll make your current library the default system library for the Photos app.
Now that you know where Apple Photos are stored, what are you planning to do with your photos? Will you move them to a new location such as an external hard drive or cloud storage? We’re curious to know in the comments below.
[related_posts_by_tax posts_per_page="5"]