Yesterday, I bought a new iPad – the 2019 iPad Air. This doesn’t happen very often. I tend to keep my devices until they are literally on their last legs, wheezing for breath. My old device, the 2013 iPad model, was struggling to operate iOS 10 so I decided to put it out of its misery once and for all.
It wasn’t until I began to think about setting the new iPad up that I realized there were a lot of things to remember to ensure a smooth transition between devices. Here is what I had to do – in this order. I did this on the iPad but it would also apply if you were transitioning to a new iPhone.

On The Old Device
You can’t just shut down the old device, start up the new one, and you’re done. There’s some housekeeping you need to do.
Backup Your Device To iCloud
I have previously discussed how to backup your device to iCloud using iTunes. I definitely recommend you do that before wiping your old iPad. But you should also backup to iCloud using the backup function on your iPad.
Doing this is easy. Go to Settings on the iPad, tap on your name at the top, and then tap iCloud.

Then on the next screen, tap iCloud Backup.

Make sure your iPad is connected to a power socket and then tap Back Up Now.

To be super-duper sure, you may also want to turn on Camera Uploads in Dropbox, Google Drive, or another cloud service. Then upload your iOS photo albums to the cloud.
Switch Off “Find My iPad”
Once backing up has been done, it’s time to switch off “Find My iPad”.
This is absolutely essential. If you don’t switch off “Find My iPad”, you won’t be able to transfer ownership of your iPad to anyone else. Even if your iPad is headed for the cupboard never to be used again, you will have it sitting on the “Find My iPad” map blinking at you. Better to switch it off completely.
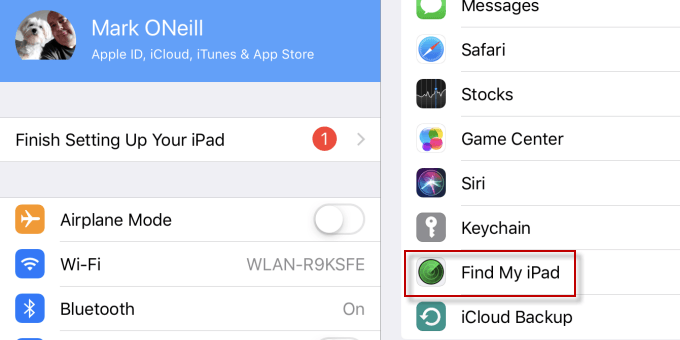
In Settings, tap on your name and then tap Find My iPad.

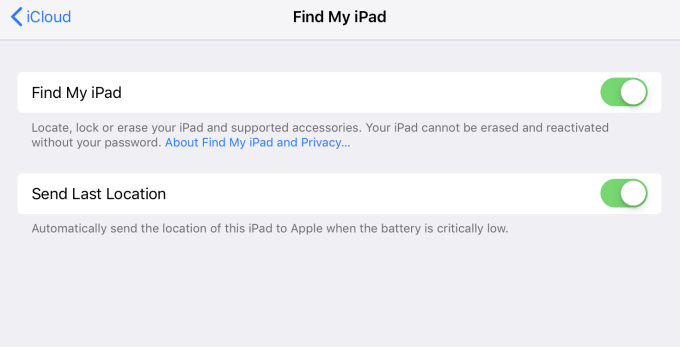
On the next screen, deselect both Find My iPad and Send Last Location. You will be asked to enter your Apple ID username and password to confirm you want to switch this off.

Disconnect Browser Sync
Next, you need to disconnect your browser if you are using the sync feature.
Both Chrome and Firefox use sync so you can seamlessly transfer your settings across your various devices. But if you don’t disconnect the browser from a device you are shortly about to retire, you will never get rid of it on your other computers. It’ll sit there like a “zombie” device.
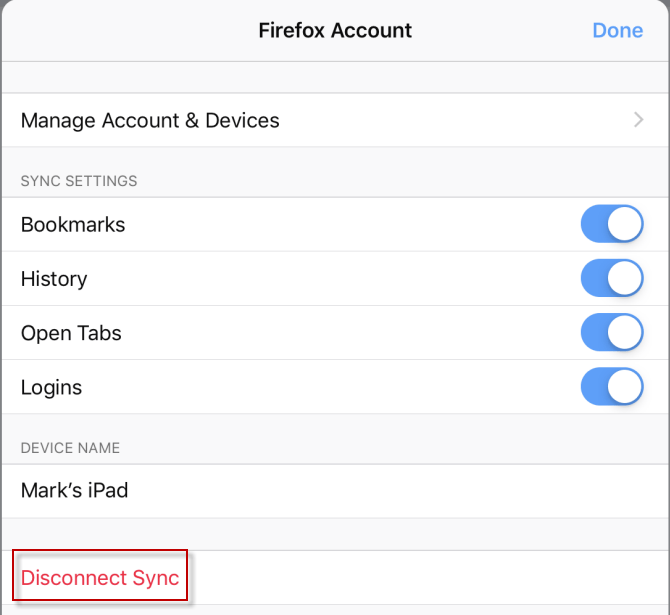
In the iPad version of Firefox, go to the settings, scroll to the bottom and select Disconnect Sync.

Chrome has a similar button in their options as well.
Reset The Device To Factory Settings
The last thing you need to do now is to completely wipe the iPad of all its contents and reset everything back to factory settings. This is completely irreversible so make sure you have done your backups first.
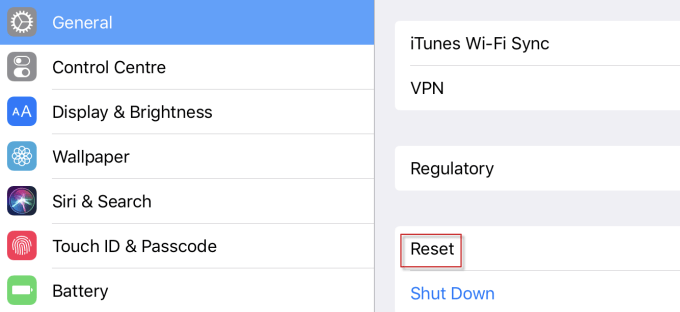
Simply go to General and then Reset in the Settings.

Then choose Erase All Content and Settings.
It will warn you that what you are about to do cannot be reversed. Go ahead and continue with the process. The iPad will now reset and reboot which takes about 5-10 minutes. When you see the white welcome screen, then that is when you know the iPad is ready for resale or disposal.

On The New Device

Apple more or less holds your hand while you are setting up the new device so you can’t really go wrong. But one neat feature which really saved me a lot of time was when I was able to transfer all of my settings from my iPhone 7 to the new iPad.
Apple has a great tutorial on their website and it saves you loads of time in setting up the new iDevice. It will even transfer over your WiFi password logging you in automatically.
Now it is just a case of selecting your recent iCloud backup and letting your apps install themselves. Transferring to a new device has never been easier.
[related_posts_by_tax posts_per_page="5"]