iMovie is a simplified video editing application for macOS and iOS. Perfect for beginners or those who don’t need professional-grade video editing software, iMovie is very easy to use. Still, for users who have no experience with video editing in general, the software can be a little daunting.
What is iMovie? When iMovie first launched on iOS devices, it was a very basic version of the desktop Mac application. Today, the two applications are very close to each other in features, although each one’s interface is adapted for the Apple device they were designed for.
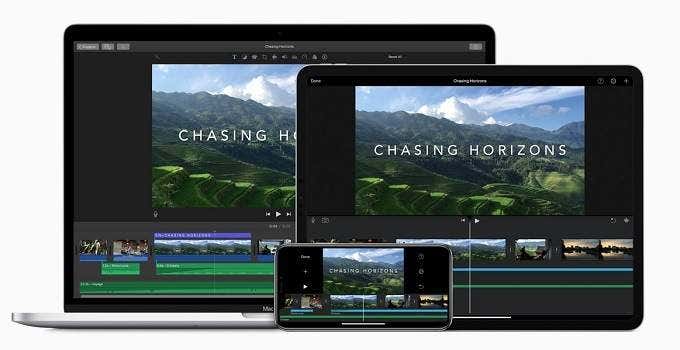
iMovie For macOS Vs iOS
Apple has specifically designed the two iMovie versions to work seamlessly with each other. This means you can start a project on your iPhone or iPad and then simply AirDrop it to your desktop machine or MacBook and keep editing from where you left off.
If you don’t have a macOS device at all, that’s not a problem. The iOS version of iMovie is more or less as capable as the desktop version. You can start, edit and finish complete projects simply using your iOS device.
However, as you can imagine, the two versions have slightly different interfaces. One is designed for touch and the other for mouse input. However, you can now also use a mouse with iOS!
In this guide, we are going to use the macOS version of iMovie as the basis, but the basics should all translate smoothly to the mobile edition.
What Can iMovie Do?
iMovie is based on the same software foundation as Apple’s Final Cut Pro package, a fairly expensive professional-grade video editor. So in terms of performance and stability, it’s right up there with Final Cut.
However, you should temper your expectations in terms of editing tools. iMovie has more than the bare bones, but only just, which is not necessarily a bad thing. Often less is more and for beginner users, there’s little use in being faced with a million control panels full of unfamiliar terms.

So with iMovie, you can do all the essential editing tasks. That includes importing media, cutting clips, arranging them on the timeline, and adding on-screen titles. iMovie also offers support for green-screen work, basic special effects, and color adjustments. With just these few features, you can create some pretty stunning fundamental video edits.
If you’ve just started filming with your new iPhone or are dabbling with drones like the Mavic Mini or Air 2, iMovie is a great way to elevate that content. From something your mom will like on Facebook, to something that millions of people will want to share all over the world.
Creating a New Project
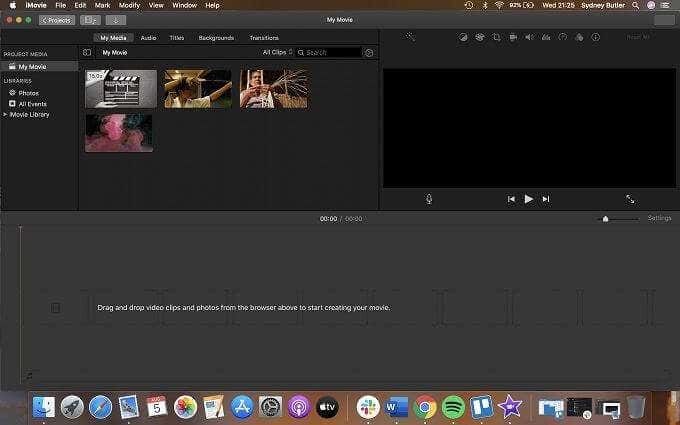
The very first step in your iMovie journey, after opening the app, is to create a new project. A project is the workspace you’ll use to get all the elements that will go into the final product together and then edit them into a final video.
So, with iMovie open, click Create New. Then click Movie.
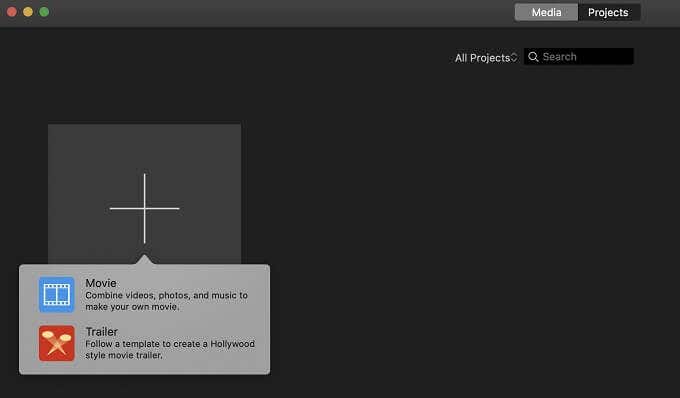
Now it’s time to grab some content.
The First Step: Getting Your Media
Now that you have a new project open, you need all of the media that you’re potentially going to use in your project. That can include video clips, sound clips, music, and the like.
Here we’re going to keep it simple and just use some video clips. We’ve just downloaded a few cool clips from Pixabay, which offers public domain and royalty-free content. If you like you can also grab music and photos from them as well.

Once you’ve downloaded your clips to a folder of your choice, you need to import them into your iMovie library.
To do this, simply click File and then Import Media, or click Import Media under the My Media tab in the iMovie Library.
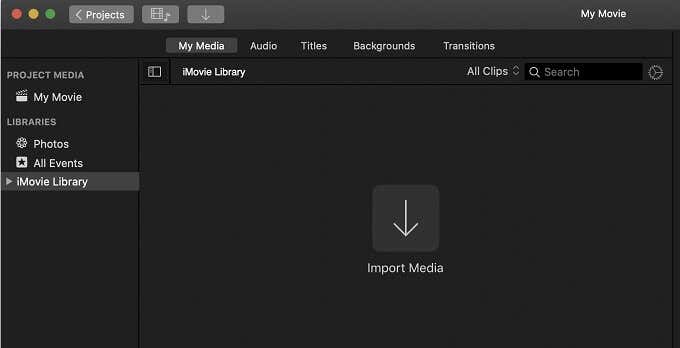
Now browse to where your clips are, select them, and then click Import Selected.
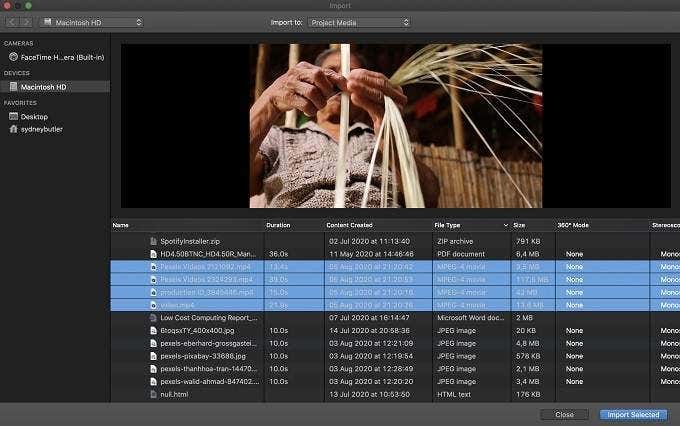
Once you’ve chosen all of the media to import, you’re ready to start assembling your video project.
Putting Your Clips On The Timeline
Your video is assembled on a “timeline”. Each clip is dragged onto the timeline in the order you want to use them. As you can see here, we’ve dragged our four clips onto the timeline in the order we’d like them. All you have to do is pull the relevant clip from the media library onto the timeline.
You’ll notice that the timeline also has different tracks. For example, there’s a dedicated track for background music.
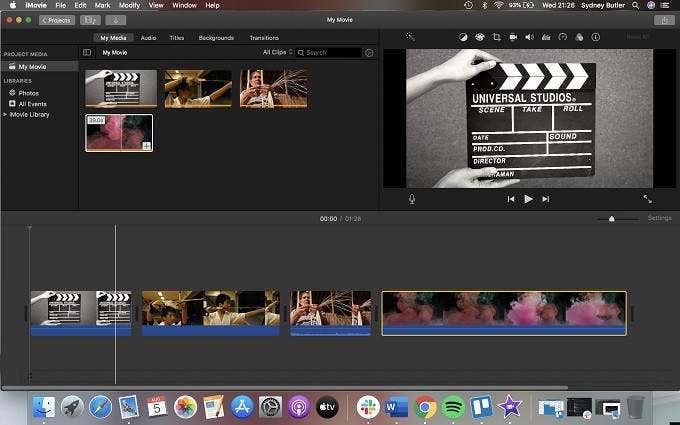
There’s a play head that “scrubs” across the timeline. Wherever the playhead is, you’ll see the current “frame” of your video displayed in the preview window, which is the total mix of all audio, video, text, and other elements you have composited at that position.
Splitting Clips
Now that you have your clips arranged, you’ll want to cut them into the right segments. To split a clip, simply move the play head to the point you want to make the cut. Then Alt-click on it and choose Split Clip.
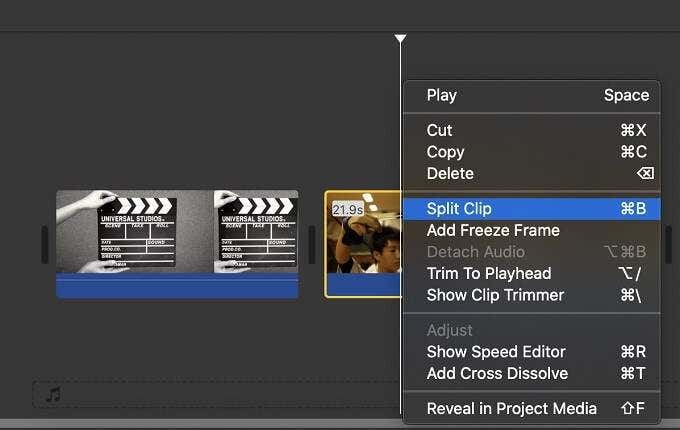
Your original clip is now magically two clips! You can move the two clips to any position on the timeline, but here, since you don’t want the remainder of the clip, just Alt-click on the bit you don’t want and click Delete.
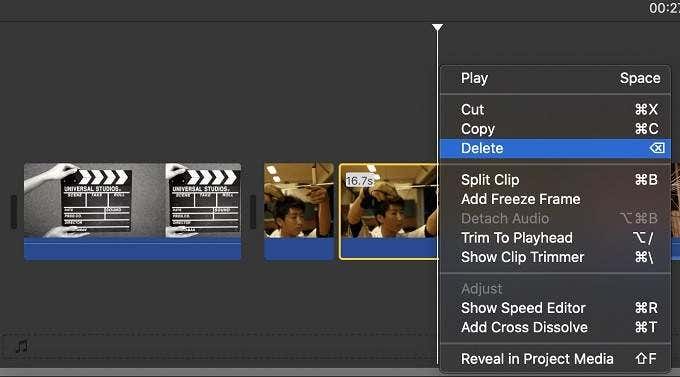
This is a good time to mention that editing videos with iMovie is non-destructive. The original clip is completely untouched. So feel free to chop and discard things on the timeline as you please.
Adding Titles & Transitions
So now we have our clips in the shape and order we want them to be. This makes it a good time to add a little more spice to the production. Titles are text elements that can be placed onto your clips. Handy if, for example, you want to tell the audience the name of your video or otherwise give them extra information.
To add a title, switch to the Titles tab. Then drag any title that catches your fancy onto the clip where you want the title to appear.
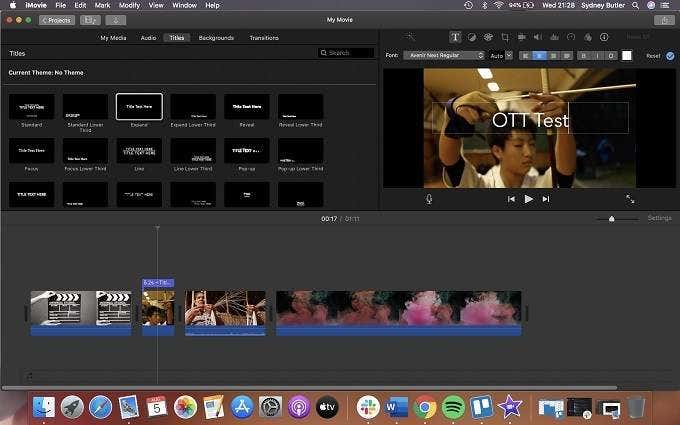
Now simply click on the dummy text in the preview window and type in your own.
Next, we’ll put in some interesting transitions between our clips. Simply switch to the Transitions tab and drag the transition into the space between the clips, where you want the transition to happen.
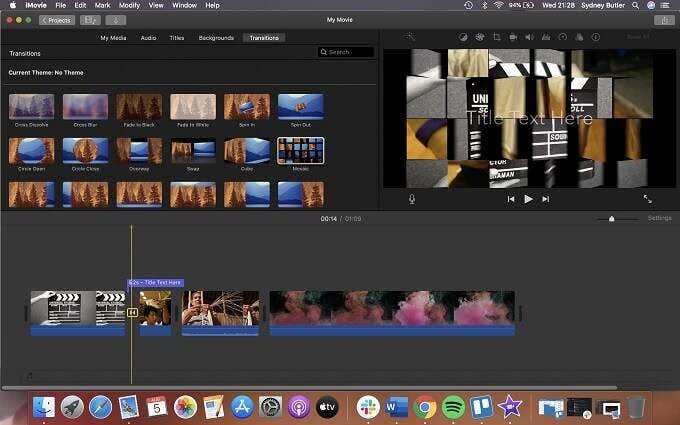
A Good Start
Congratulations! You’ve now learned enough about iMovie to put together a basic video. However, to make something that looks and sounds great, we suggest you look into the following iMovie functions next, once you feel comfortable enough to move on:
- Separating clip audio
- Cropping clips
- Adjusting color and contrast
- Replacing the background in “green screen” footage (Chroma Keying)
- Adding music to your project
Despite being a relatively simple program, there’s quite a bit of depth to iMovie. So take your time to explore its more advanced features.
Finalizing Your Movie
To end this basic tutorial about iMovie, let’s export the movie we have. Remember that exporting the movie is not the same as saving your project! Be sure to save your project through the File menu as you would in any other program.
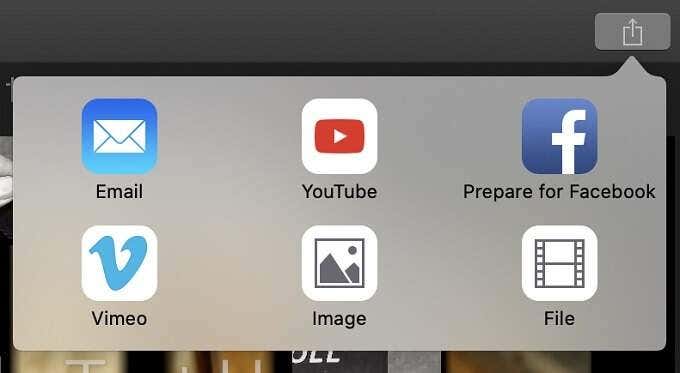
To export your movie, click the little share button in the top-right corner. Then click on File. Unless you want to, for example, send the video directly to YouTube.
In this window, you can see how long your clip will be and its estimated size. You can adjust its resolution and quality here, but most of the time it’s perfectly OK to simply leave the default values in place.
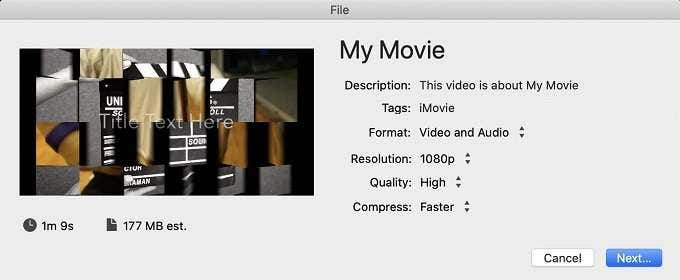
If you’re happy with these settings, click Next, choose a save location, and complete the export of your video. It will take a while to render, but at the end of the process, your masterpiece should be ready to show off to the world.
[related_posts_by_tax posts_per_page="5"]