You may have seen the term HDR on a television advertisement or seen the symbol on your iPhone camera. HDR stands for high dynamic range and means that photos and images can be displayed to show greater detail from high-contrast areas.
In other words, HDR can help you take better quality, more detailed photos, provided you use it correctly. HDR requires a bit more composition than just pointing and shooting–but by the end of this article, you will understand what HDR is and how to use it on your iPhone.
What Is HDR?
When you take a photo with your iPhone, you typically focus on one area. The camera will adjust the exposure to best show the details in the area around the focus, which results in parts of the photo being either under-exposed or overexposed.
HDR on your iPhone compensates for this by taking multiple photos and then merging them. One photo will be over-exposed, one will be under-exposed, and one will be a balance of the two. Often, there will be five or more photos taken to properly show all of the detail in an image.
As a rule of thumb, the more photos that are taken and merged, the greater the detail will be. Of course, this requires the camera to be held still and the subject to be stationary. Due to the extended time required for taking a photo in HDR, motion blur is a serious obstacle that can be difficult to overcome.
Different photography apps process HDR differently. However, the iPhone has built-in HDR capabilities. Your iPhone will automatically detect when to use HDR. If you wish to turn off automatic HDR on your iPhone, you can do so from the settings menu.
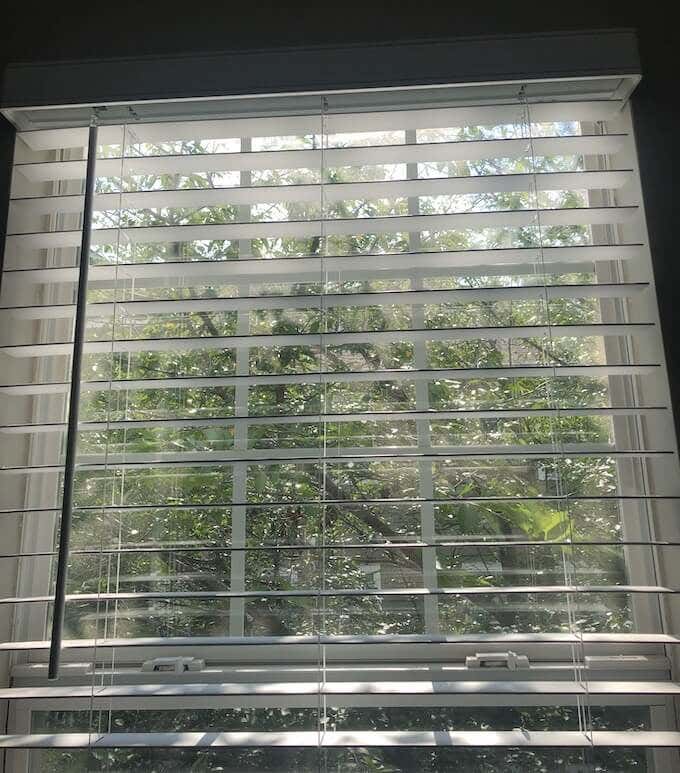
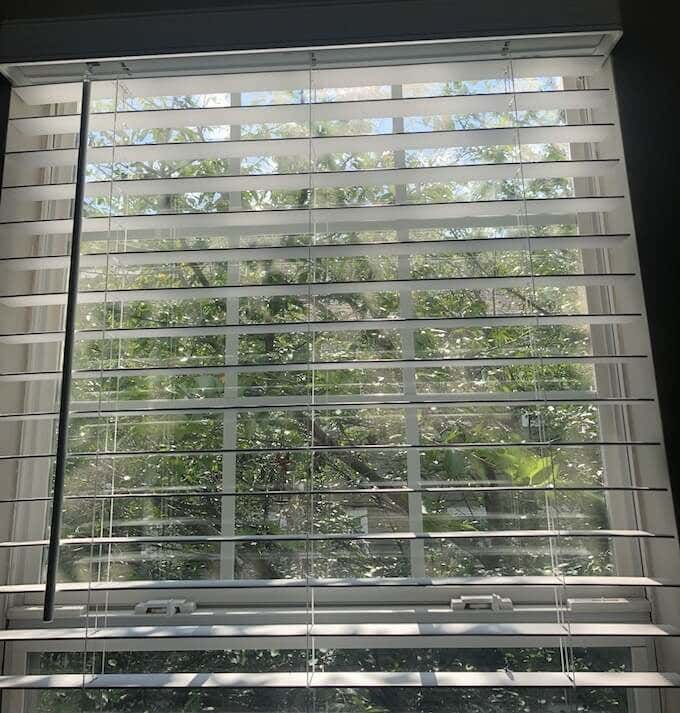
Take a look at the two photos below. The image on the top does not use HDR. While you can see through the window, the blue of the sky is washed out due to the light. The image at the bottom uses HDR, resulting in better clarity for both light and dark areas.
When Should I Use HDR?
It’s best to activate HDR on your iPhone camera when photographing landscapes and outdoor scenes. Harsh sunlight is often difficult to shoot in due to the way it tends to wash out colors, but HDR can help you take vibrant pictures even in the middle of the day.
If you’re a fan of shooting photos during Golden Hour, HDR will make that evening light even more impressive, especially if you’re shooting in dim areas.

However, HDR isn’t the right choice all the time. Moving objects do not turn out well in HDR due to motion blur, and if you’re trying to shoot a silhouette or create a certain atmosphere with a photograph, the multiple exposures can ruin the mood you’re trying to set.
For the average person, HDR is a specialized feature. You will only need it at certain times.
How To Turn On HDR
Open your iPhone camera. At the top of the screen, you’ll see an icon that says HDR. Tap that, and you’re given three options: Auto, On, or Off. Given the nature of HDR, it’s best to turn it off except when you intend to use it.
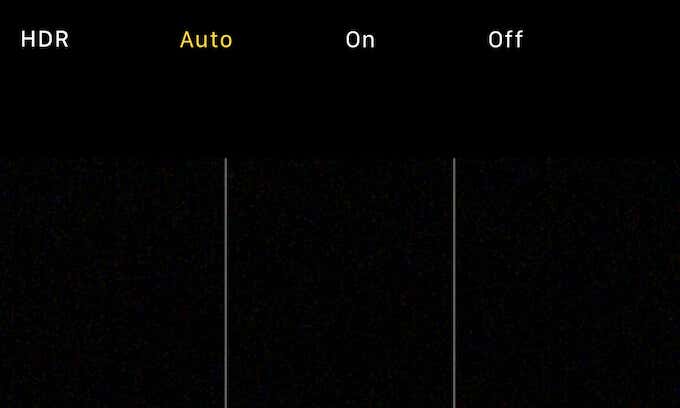
For example, if you want to take a quick photo of something, you don’t want to wait for all of the image processing. You might miss your shot. Auto HDR makes it harder to grab those snap photos. It’s better to instead learn where the HDR option is and turn it on for those specific instances when you need it.
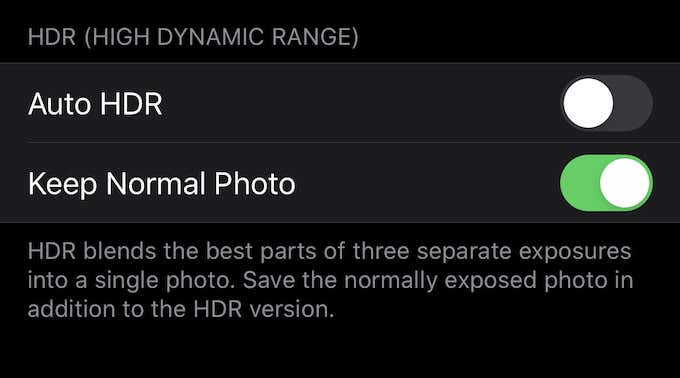
You should also note that the iPhone tends to merge photos and delete the other images when the final image is complete. If you would like to keep the non-HDR version of a photo, you will need to turn this on in Settings.
To do this, go to Settings > Camera and scroll down. At the bottom of the list of options, you will see two sliders: Auto HDR and Keep Normal Photo. Turn these sliders on or off to suit your preferences.
HDR photos tend to be larger than standard photos, so keep that in mind if you have a limited amount of storage on your phone’s drive.
Now that you know what HDR is on an iPhone camera and how to use it, go out and experiment. It’s a great feature to use in the right situations and can result in some truly Instagram-worthy photos.
Do you use HDR on your iPhone? Why or why not? Let us know in the comments below.