Are you trying to get your voicemail to work on your iPhone but not having any luck? We’ve all been there, and it can be frustrating. Luckily, there are different methods that may help you solve this issue. In this article, we’ll explore 11 fixes that will help get your voicemail working again.
Also, if you have an Android smartphone, check out our troubleshooting guide on fixing voicemail on Android.
1. Confirm That Your iPhone has Voicemail Set Up properly
Before you try any of the proposed fixes, you should check if your iPhone has its voicemail set up. Even if you are sure you didn’t touch the settings recently, and you simply stopped receiving voicemails, some iPhone updates can reset the settings.
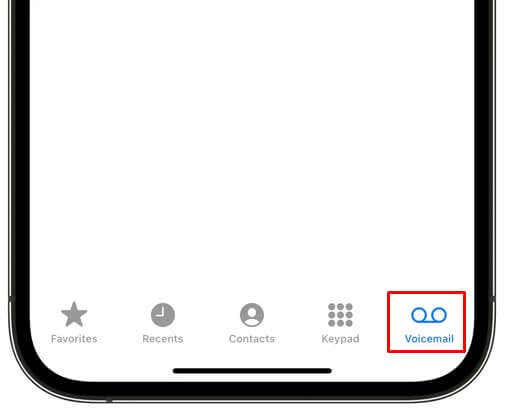
Open Phone and tap the Voicemail tab to see if it’s enabled.
You can also:
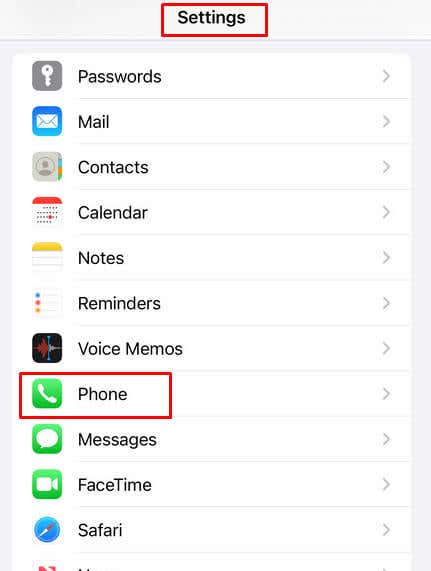
- Go to Settings.
- Select Phone.
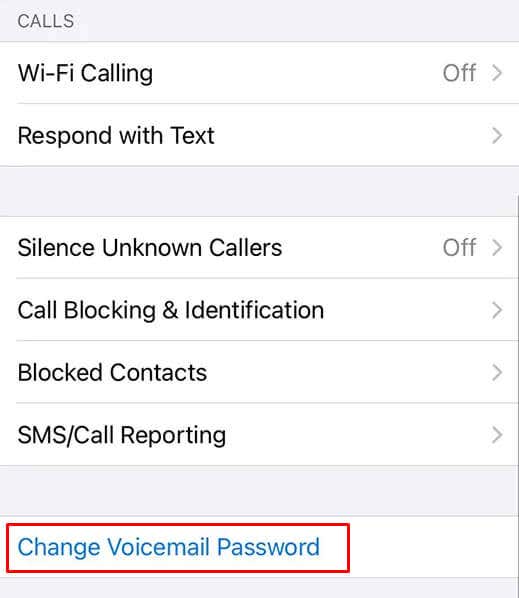
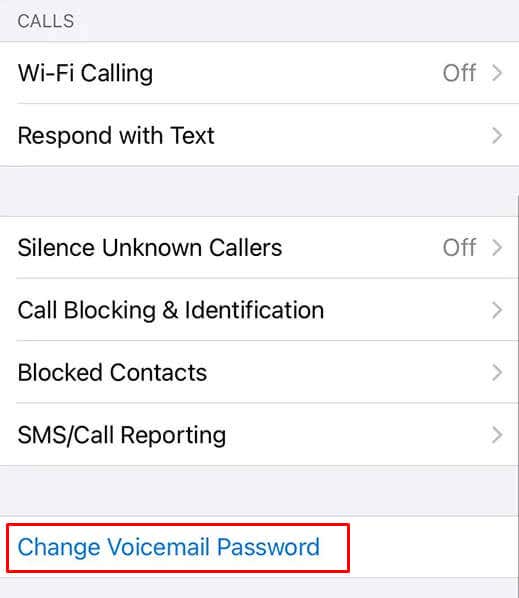
- Check if there’s a Change Voicemail Password option. If you can see it, your voicemail is set up.
2. Empty Your Voicemail Box
If your iPhone voicemail inbox is full, you won’t be able to receive new voicemail messages. Voicemail storage is limited, and with today’s many spam calls, it can get filled up pretty quickly. Here’s how you can delete old voicemails:
- Go to Phone app.
- Tap the Voicemail tab.
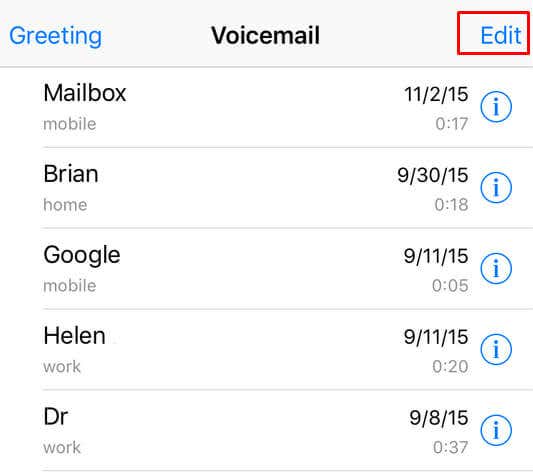
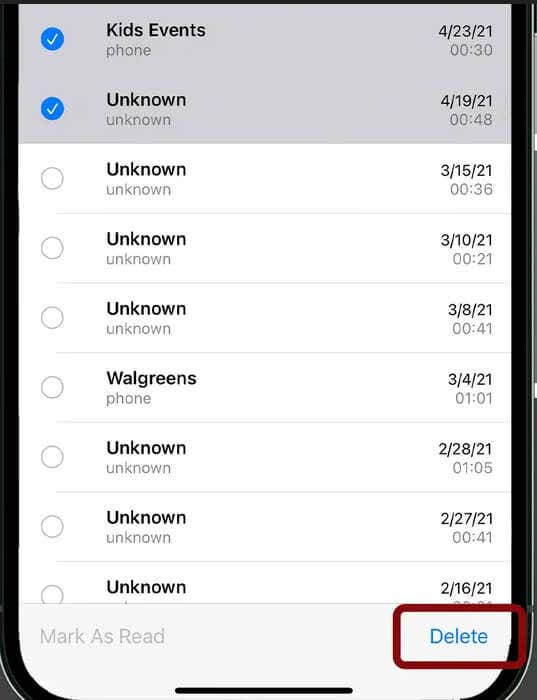
- Tap Edit at the top-right corner and select the voicemails you’ll delete.
- Tap Delete at the bottom right corner of the screen.
- If you have some important voice messages you’d like to save, it would be smart to perform a backup.
3. Call Your Voicemail Directly
Perhaps you’re receiving voicemail but the iPhone’s visual voicemail isn’t working. You can always check your voice messages the old-fashioned way, by calling the voicemail.
To do this:
- Open the Phone app.
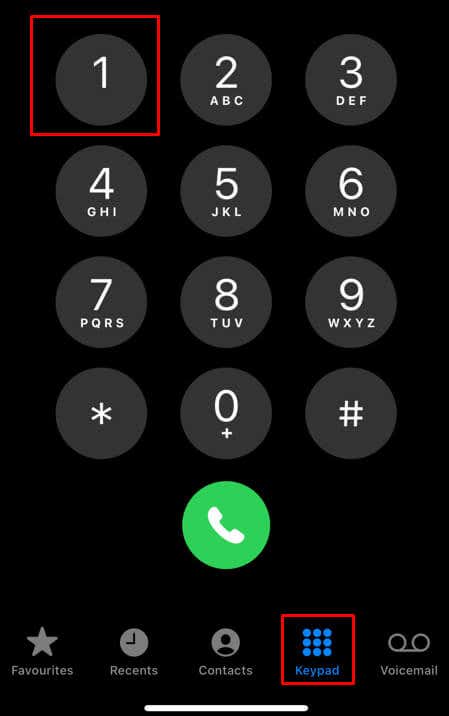
- Make sure you are on the keypad. Press and hold number one.
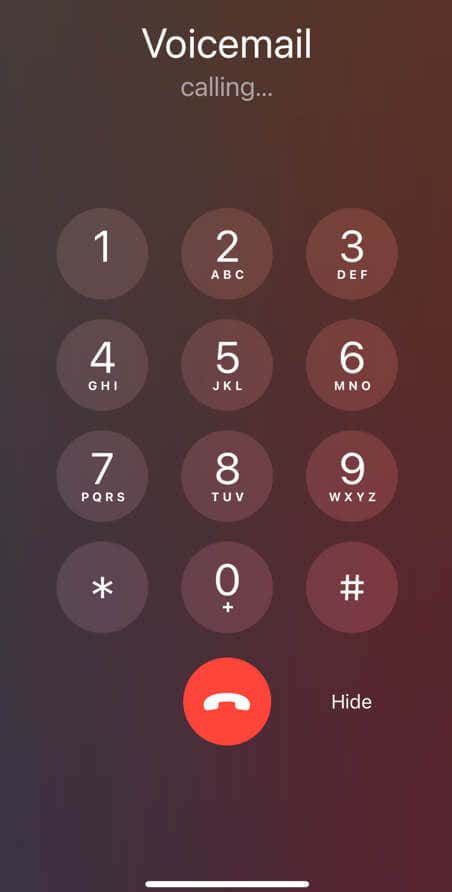
- This’ll call your voicemail.
- Check your messages from there.
4. Check for Carrier Settings Update
The carrier settings need regular updating. These updates are not released very often, but when they are, they can fix many issues related to your carrier’s call features. One of them is getting voicemails on your iPhone.
Updating carrier settings is easy:
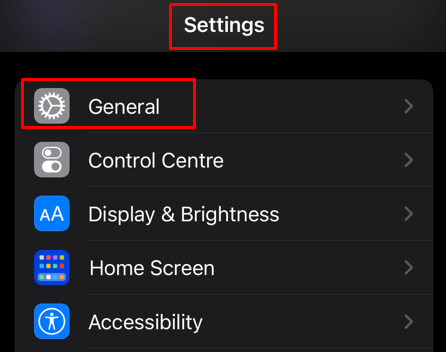
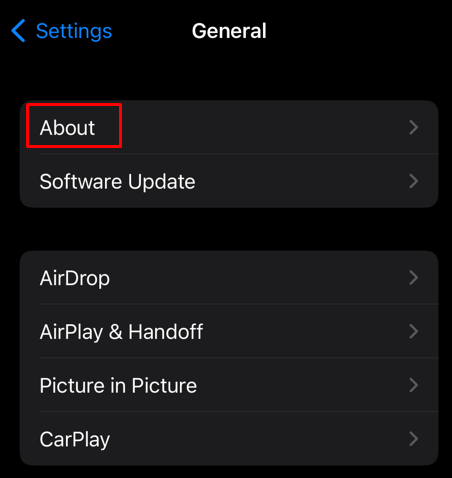
- Go to Settings. Select General.
- To view your carrier settings go to About.
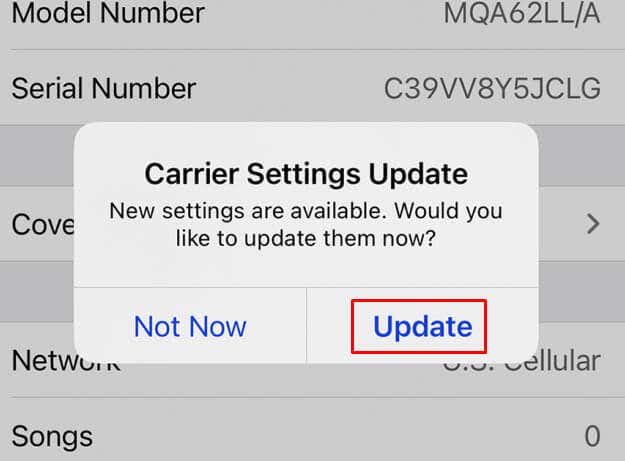
- If there’s an update available, you’ll see the Install a carrier update message. Tap Update and wait while your phone downloads and installs it.
5. Restart Your Phone
It’s possible you are not receiving any new iPhone visual voicemail because the issue is with your iPhone’s software. A simple restart might resolve this issue. How you restart your iPhone will depend on the model you have.
For the newer models, iPhone X, iPhone 11, and later, press and hold either of the volume buttons and the side button simultaneously, until the power-off slider appears.
For later models, press and hold the side button until the power-off slider appears.
Check our detailed article on how to restart your iPhone if you need more help with this step.
6. Turn the Cellular Service Off and On Again
Resetting the cellular network service may fix the voicemail problems, especially if they are not downloading fast enough. If you receive a voicemail notification hours after you receive a missed call, it means you have cellular service issues. To resolve it, simply turn it off and on again.
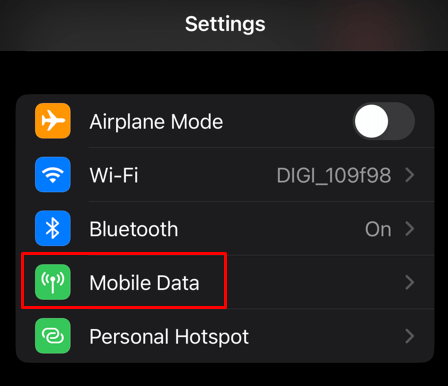
- Go to Settings.
- Select Cellular or Mobile Data.
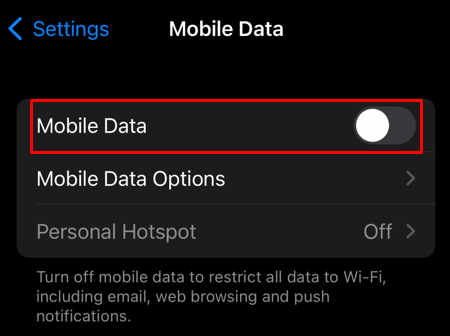
- Toggle off Cellular Data or Mobile Data.
- Wait for around 30 seconds and toggle it back on.
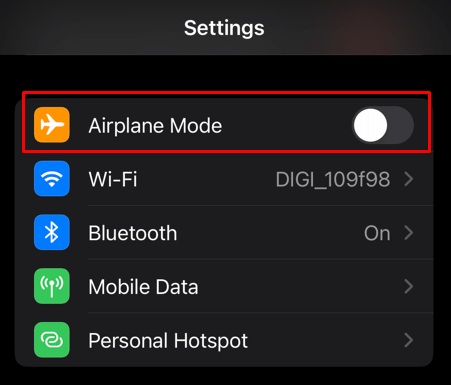
You can do this by restarting your iPhone, or by switching it to Airplane mode and out of it.
If you’re still having issues, try switching to a Wi-Fi network and see if this fixes the voicemail issue.
7. Enable Wi-Fi Calling
Another way to make your voicemail download faster is to enable Wi-Fi Calling on your iPhone. This is especially true if you live in an area with a poor cellular connection.
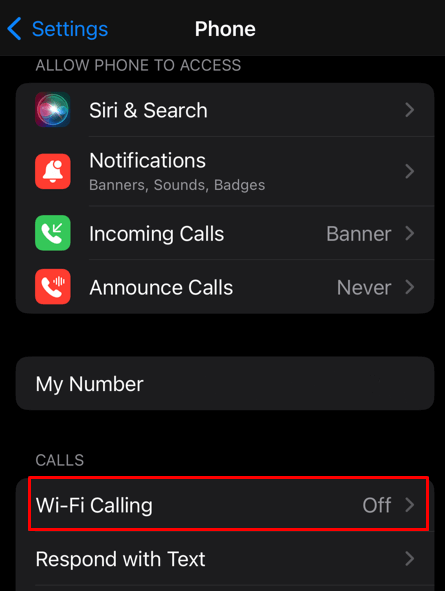
- Go to Settings and tap Phone.
- Select Wi-Fi Calling.
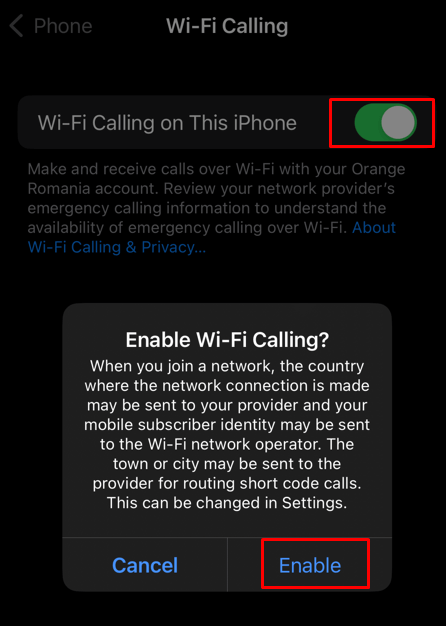
- Tap Wi-Fi Calling on This iPhone. When a dialog box pop-up, tap Enable.
And that’s it, you successfully turned it on.
8. Make Sure Call Forwarding Is Off
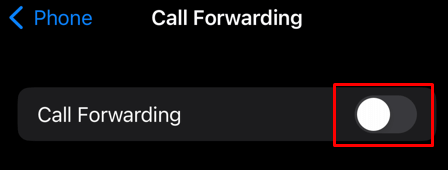
Call Forwarding redirects all calls to another phone number. If you have this enabled, it’s no wonder why you are not receiving any new voicemails. Call Forwarding is disabled by default, but you might have turned it on by accident if you played around the Settings.
To disable Call Forwarding:
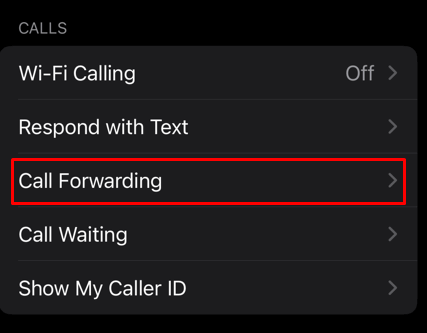
- Open the Settings app and Select Phone.
- Tap Call Forwarding.
- Toggle it off.
If you don’t see this option in your settings, don’t worry. Not all carriers have this service enabled.
9. Reset Voicemail Password
Changing your voicemail password might help you with not receiving any new voicemail on your iPhone. The best way to do it is to call your carrier’s customer service, or by logging into their website. Some carriers might let you change your voicemail password directly from their app.
You can also do it from Settings on your iPhone.
- Go to Settings and select Phone.
- Tap Change Voicemail Password.
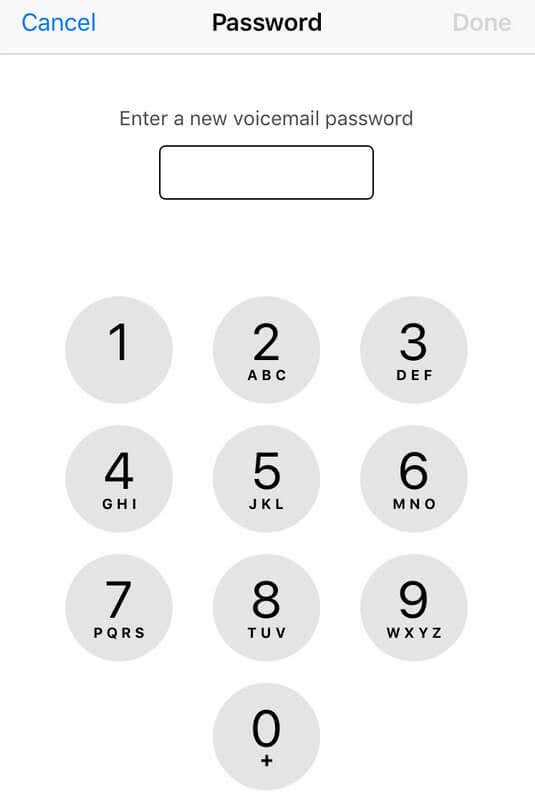
- Enter and re-enter the new password (passcode) when prompted.
10. Reset Network Settings
If none of the proposed fixes helped your voicemail issues, you should try resetting the network settings. This can also help with any other network issues you might experience such as mobile data issues, dropped calls, or getting missed calls all the time.
To reset network settings:
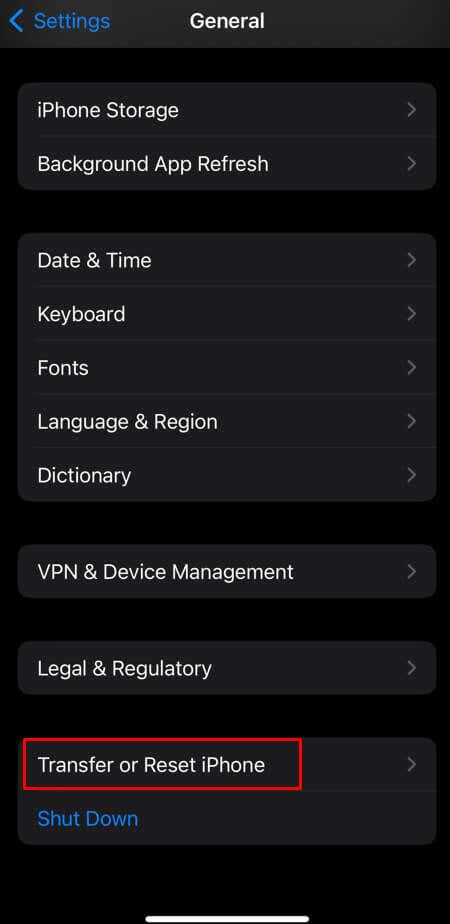
- Go to Settings and tap General.
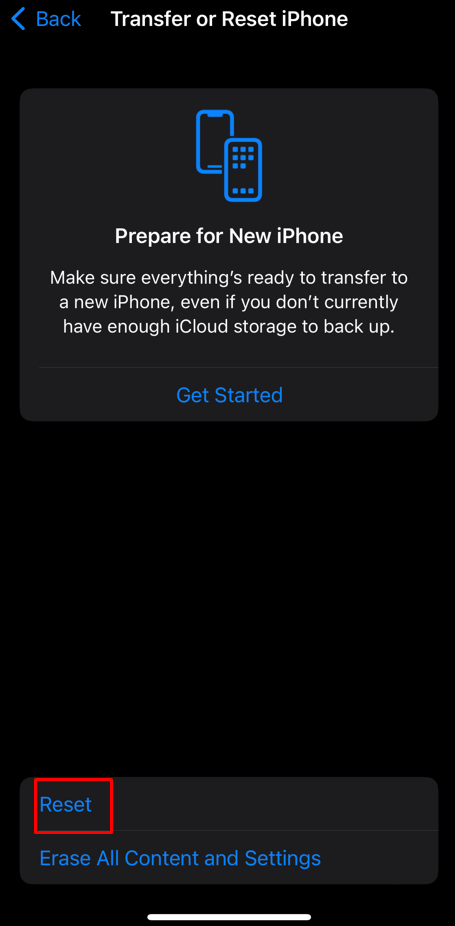
- Scroll all the way down and select Transfer or Reset iPhone.
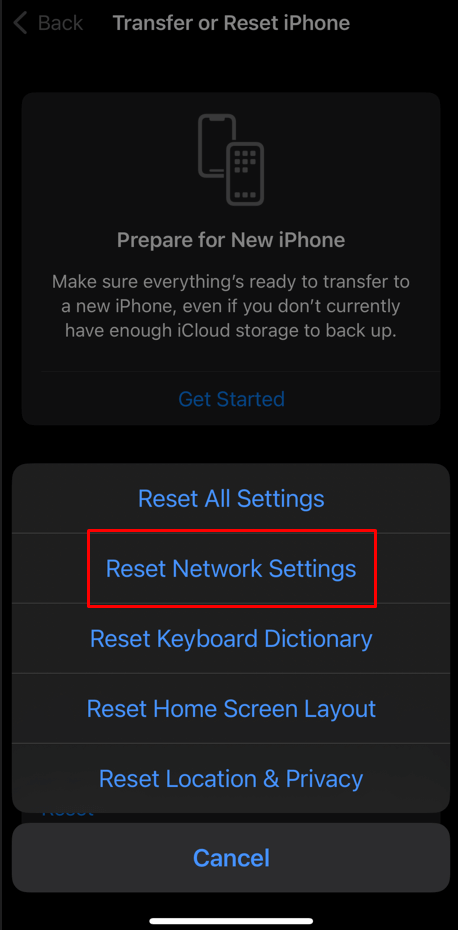
- Then tap Reset.
- And finally select Reset Network Settings.
Note: you don’t have to worry about losing any stored data.
11. Contact Your Carrier and/or Apple Support
If none of the above methods helped you, you should try contacting your carrier for further assistance. They might have an insight into what’s wrong with your iPhone or their service. Follow their instructions and hopefully, you can fix the voicemail not working on your iPhone soon. The last resort would be contacting Apple to see if they can fix your phone. The experts at an Apple store can usually make quick work of any issues you’re having with your phone, but that might end up costing you some extra cash.
