Do you want to take your visual experience with Mac to a new level? Dark Mode is here to help you. Since the feature’s first appearance, people have been trying to enable Dark Mode everywhere: from single apps like YouTube to system-wide like Windows 10.
The scientific reason is that Dark Mode actually helps minimize your eye strain. So if you spend long hours in front of your computer for work or pleasure, Dark Mode is one of the ways to reduce the harm. But that’s not what made it so popular.
The truth is, Dark Mode looks cool. It’s fun and more user-friendly. Sure, it gives everything a more dramatic and mysterious look, but it also makes the content pop. That in turn helps you stay focused on whatever you’re doing, minimizing the background distractions thanks to the darkened colors and tones.
Here’s how to enable macOS Dark Mode, as well as a few hidden tips to make the most out of it.
How To Enable macOS Dark Mode
The proper full version of Dark Mode is available in macOS Mojave or later. Even though you could have had dark mode in High Sierra, it just wasn’t system-wide.
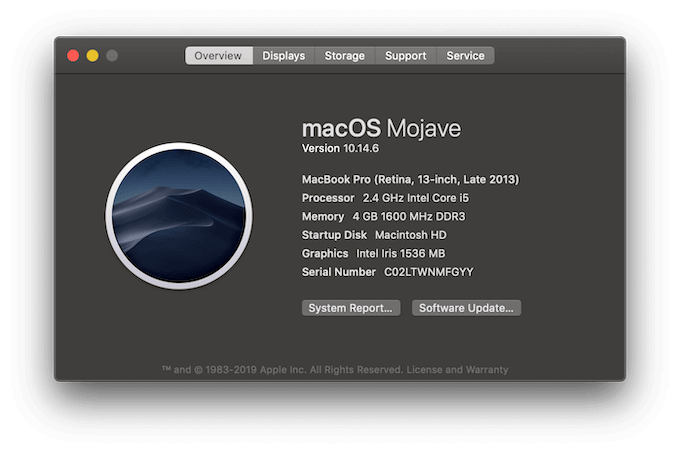
Before getting started with Dark Mode, check if your Mac is on the list of supported computers:
- MacBook models introduced in early 2015 or later.
- MacBook Air models introduced in mid-2012 or later.
- MacBook Pro models introduced in mid-2012 or later.
- Mac mini models introduced in late 2012 or later.
- iMac models introduced in late 2012 or later.
- iMac Pro.
- Mac Pro models introduced in 2013 or later.
If your Mac computer is on the list, here’s how to enable Dark Mode in three easy steps.
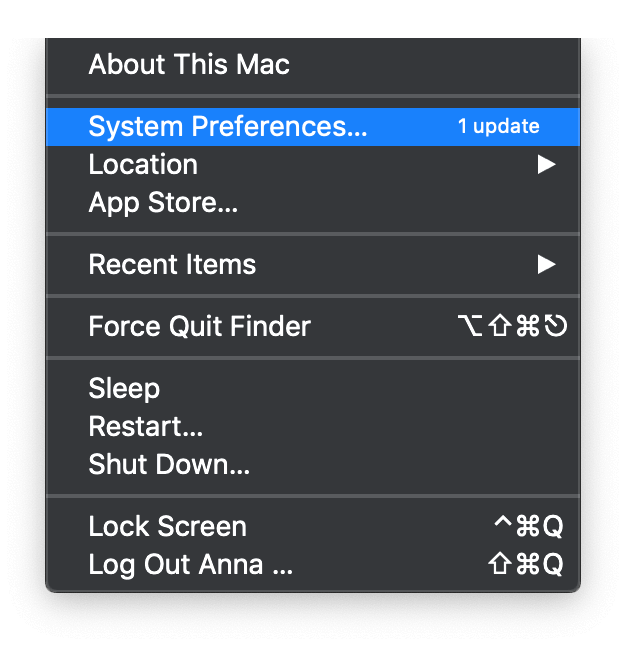
- From the drop-down Apple menu, choose System Preferences.
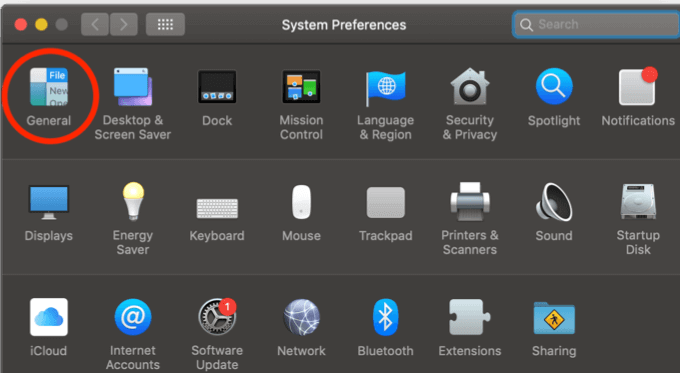
- Go to General.
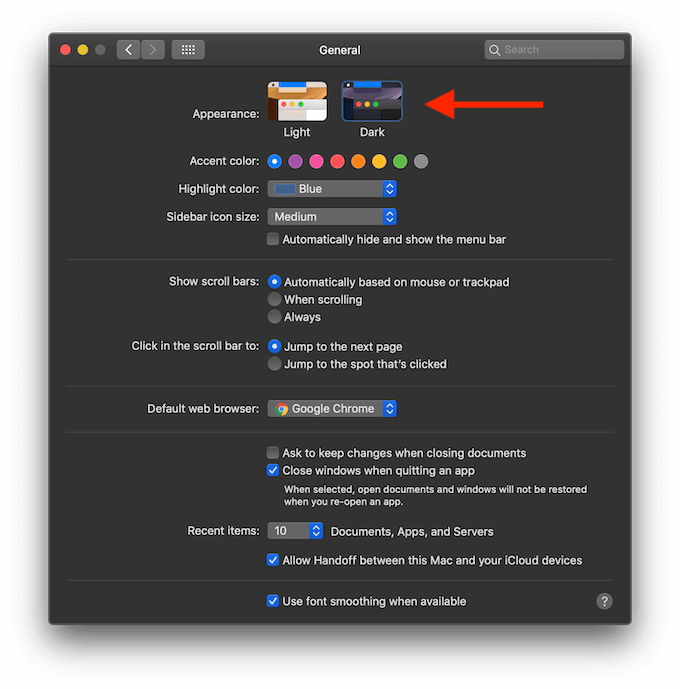
- Under Appearance, you’ll find options to change your Mac theme. Light or Dark for macOS Mojave, or Light, Dark, and Auto for macOS Catalina.
In Catalina, the added Auto option will change from the Light to Dark theme automatically depending on the time of day.
How To Configure macOS Dark Mode In Apps
Dark Mode is a color scheme that your computer adopts, and it works system-wide. That includes the built-in Mac apps, as well as third-party apps that can adopt Dark Mode.
For the sake of better performance, you might want to customize some apps, their settings, and their behavior in Dark Mode.
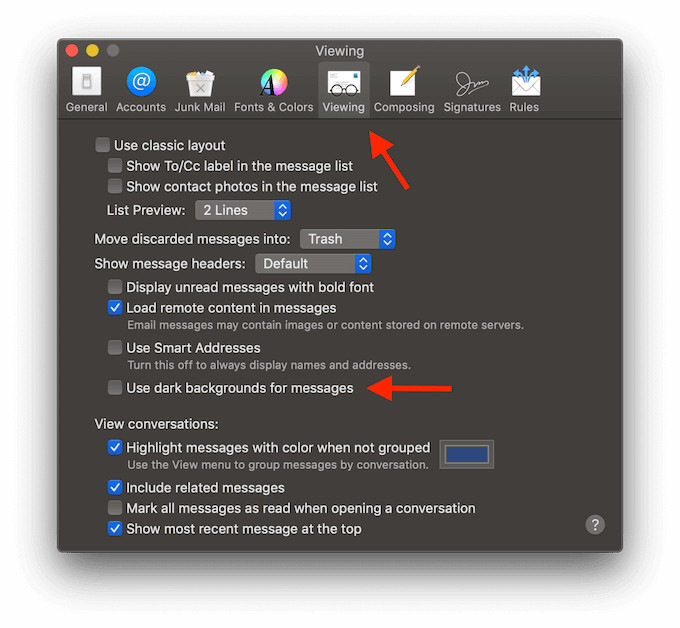
In macOS Dark Mode, Mail will automatically set a dark background for messages. If you prefer the light background, go to Mail Preferences > Viewing > and deselect the Use dark backgrounds for messages box.
Notes
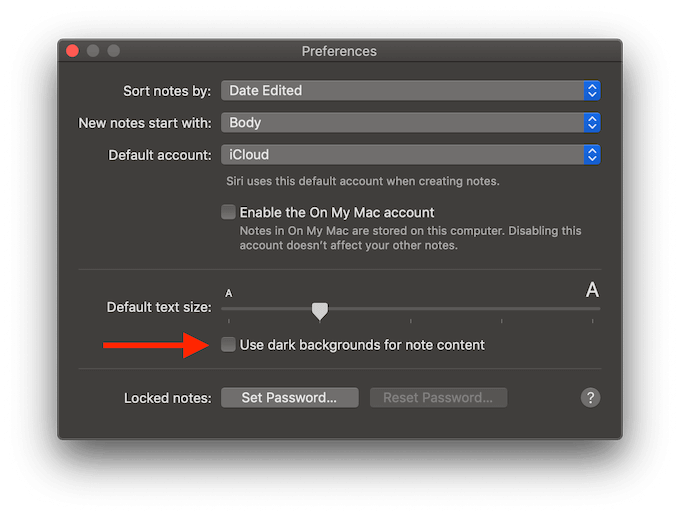
Similar to Mail, the option to configure your background back to a light one lies in Preferences. Deselect the Use dark backgrounds for note content to bring back the needed contrast.
Maps
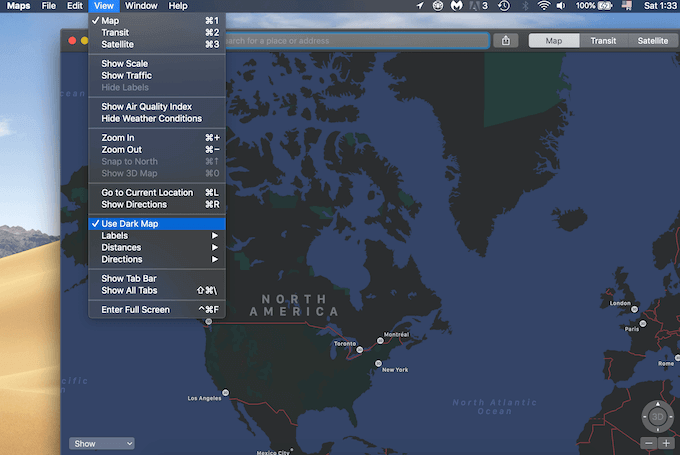
If for whatever reason you don’t enjoy the somewhat mysterious look that Dark Mode brings to the Maps app appearance, it’s also an easy fix. Choose View from the app’s ribbon menu, and deselect the Use Dark Map box.
Desktop Image
It’s only fair that your desktop wallpaper is in sync with the new stylish look of your Mac. If you’re looking to reduce visual distractions, try one of these minimalist desktop looks for your computer.
If you were using Dynamic Desktop, the Dark Mode might change to the still image when you turn it on.
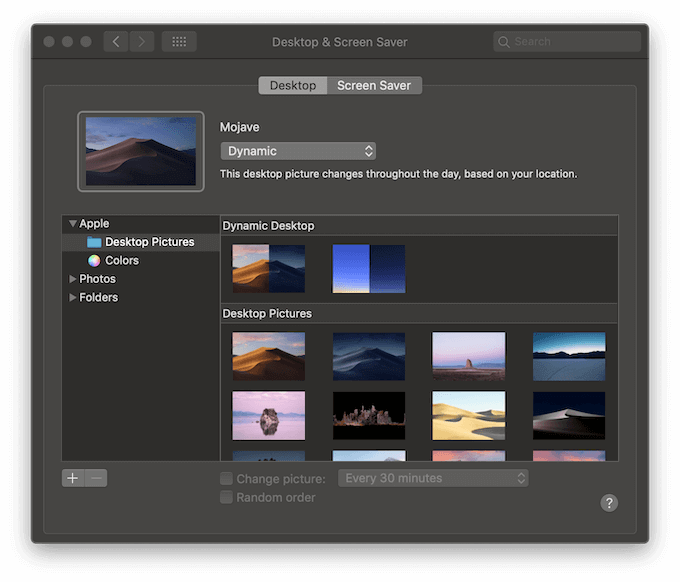
To revert it, go to the Apple menu > System Preferences > Desktop & Screen Saver. Then choose from the default options or create your own Dynamic Desktop wallpaper.
These are just a few examples of how to customize Dark Mode in apps. For other apps, you can find the option to configure it in the View section of the app’s settings, or the app’s Preferences.
Use The Hidden macOS Dark Mode Tips & Tricks
For those of you looking to achieve more with the Dark Mode, we have a few more tricks that you can use on your Mac. For better productivity and even more style.
Night Shift
Night Shift is a feature you can use within Dark Mode that changes your display color depending on the time of day. It will turn the colors a little warmer and more orange at night to reduce your eye strain. A good find for someone spending a lot of screen time overnight.
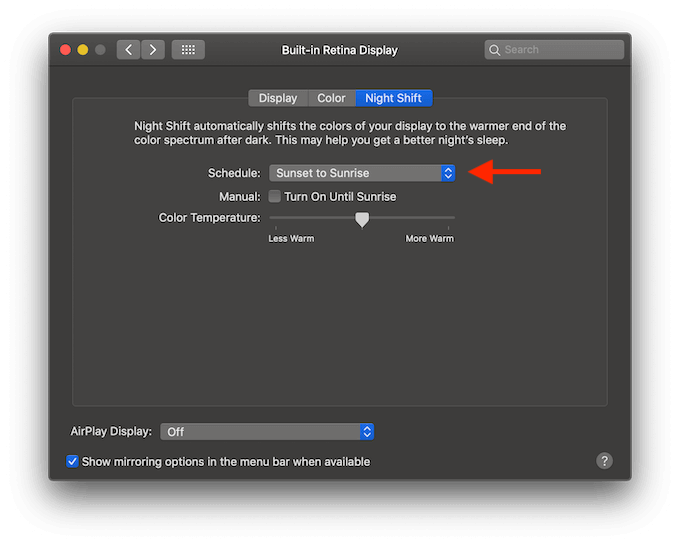
To enable Night Shift, go to System Preferences > Displays. In the Night Shift tab, under Schedule choose Sunset to Sunrise. That way, the colors will automatically revert to normal blue shades at sunrise.
Turn Dark Mode Even Darker
That’s right, you can bring even more contrast and style into your Mac with the hidden darker version of the Dark Mode theme.
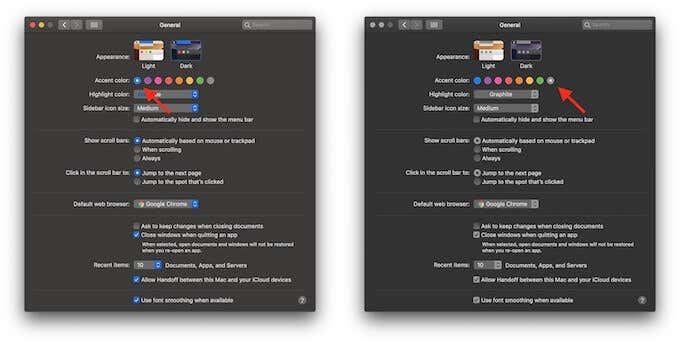
To enable it, go to Apple menu > System Preferences. Under Accent, select Graphite instead of the default blue color.
You might not notice the difference straight away, but the theme will gain darker colors and higher contrast. Try switching between different accent colors over time and see which one works for you best.
Master The Dark Mode On Mac
According to the developers, MacOS Dark Mode helps you focus better on your tasks, thus helping you avoid distractions and waste less time.
Are you a fan of Dark Mode? Does the Dark Mode help you stay focused, or is it just another stylish tool for your Mac? Share your thoughts with us in the comments below.
[related_posts_by_tax posts_per_page="5"]