When you want to capture something on your screen, a screenshotwill do. However, screenshots don’t work in all cases. Sometimes you may need to grab a clip, film a tutorial, or record something as it happens on your Mac.
Luckily, Macs have a native screen recording feature that allows you to record and save part or all of what’s playing on your screen. You can also record external audio or anything coming in through your mic.

Follow along to learn how to screen record on Mac.
How to Screen Record on Mac Using Screen Capture Tool in macOS Mojave
You can record your entire screen or a selected part of it using the screen capture tool baked into macOS. The screen capture tool was added in September 2018 as part of the new features that came with the macOS Mojave operating system.
With the tool, you can capture videos of your screen using on-screen controls for quick access. You can also set a timer and choose where to save the screenshots or recordings.
To access the screen capture tool, press Shift + Command + 5 keys on your keyboard to open the screenshots toolbar.
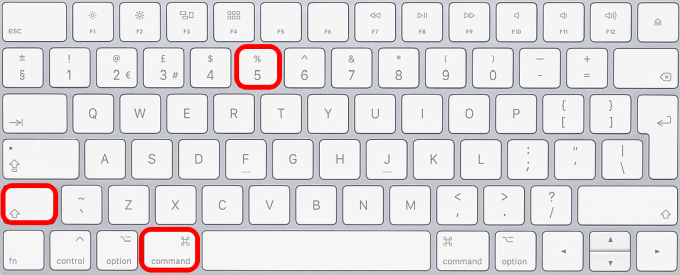
The toolbar has on-screen controls that you can use to record a selected portion of your screen or the entire screen or capture still images.

How to Record a Portion of Your Screen Using Screen Capture Tool
- Select the Record Selected Portion icon on the screenshots toolbar.

- Next, drag to select the area of your screen that you want to record, and then select Record from the on-screen controls to start recording your screen.

- When you’re done recording, you can press Command+Control+Esc or select the Stop button in the menu bar.
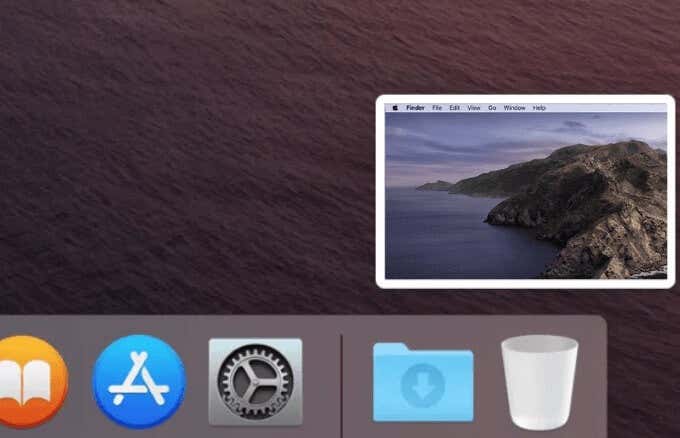
- A floating thumbnail of your recording will appear in the bottom right corner of your screen. From here, you can click on the thumbnail to open your recording and edit or share the video. You can also swipe the thumbnail to the right to save the recording or drag the thumbnail to move the video to a different location.
- There are other settings you can change from the Options section in the screenshots toolbar. These settings include:
- Save to, which lets you choose a location where your recordings will be automatically saved to.
- If you’re filming a tutorial or guide, you can select Microphone to record your voice or other audio together with your screen recording.
- The timer option allows you to choose when to start recording, which can be immediately, or a few seconds after you click to record.
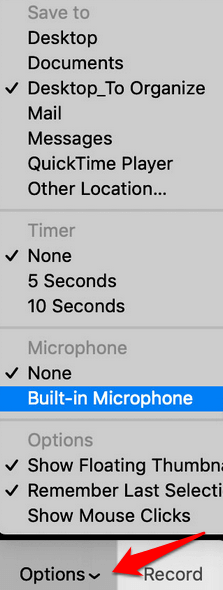
Note: You can choose whether you want a black circle to appear around your pointer as you click different areas of the screen while recording your video. To do this, select the Show Mouse Pointer (or Clicks) option to enable it.
How to Record Your Entire Screen on Mac Using Screen Capture Tool
- Select the Record Entire Screen button on the screenshots toolbar.

- Once your pointer changes to a camera, click the screen you want to record and then select the Record button from the on-screen controls to start recording it.

- When you’re done recording, you can press Command+Control+Esc or select the Stop button in the menu bar.

Your Mac saves the screen recording as “Screen Recording [date] at [time].mov”. You can change the file name to whatever you want to call it for your reference. You can also use the editing options (trim, share, save) once the recording is available.
Note: You can use the Escape (Esc) key if you want to cancel making the recording before clicking to record.
How to Record Your Entire Screen on Mac Using Quicktime Player
If your use case involves complex filters, annotations, and editing, you can use QuickTime Player to record your screen on Mac. QuickTime Player is an easy and reliable screen recorder and video player, which comes free with your Mac.
- To record your screen using QuickTime Player, open the player and then click File > New Screen Recording.
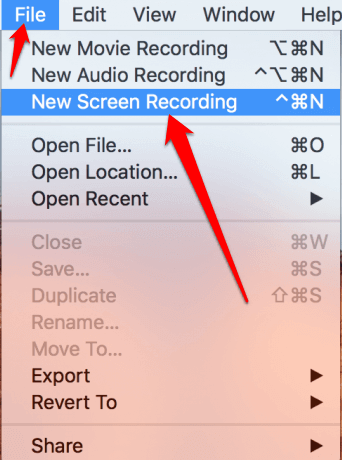
- A popup screen capture menu will appear. The popup offers options that allow you to record your screen and audio on Mac.
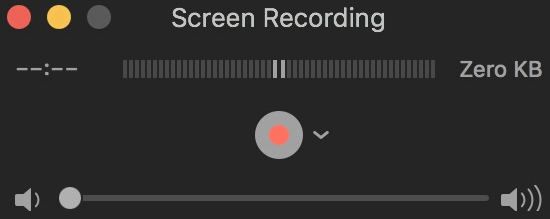
- Select the area of your screen that you want to record, and then select a microphone from the arrow next to the Record button to add audio.
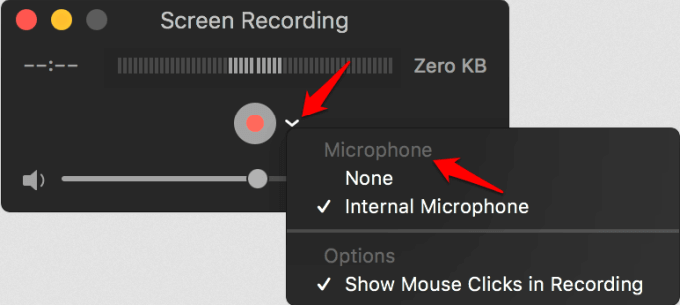
Like the native screen capture tool, QuickTime Player also offers the Show Mouse Clicks in Recording option to show a black circle around your pointer when you click.
- Select the Record button to start recording. To record a portion of the screen, drag to select the area you want to record and then select the Start Recording option within the selected area. You can also click anywhere on the screen to start recording the entire screen.
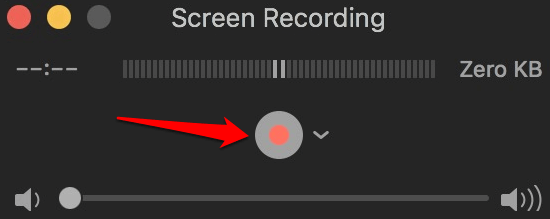
- Once you’re done recording, select the Stop button to stop recording, or press the Command+Control+Escape keys.
QuickTime Player will automatically open the recording, and you can use the video editing tools such as trim, split, and rotate to edit your video. You can also play or share the video, and use the app to convert videos from one format to another based on your preferences.
Note: While QuickTime Player allows you to record your screen, there are other apps like DVD Player that don’t allow screen recording on their windows.
If the built-in screen capture tool and QuickTime Player doesn’t have everything you’re looking for in a screen recorder tool, you can use other third-party tools. There are many excellent feature-packed screen recorder apps for Mac with fully-fledged video editors. These apps include Camtasia, SnagIt, ScreenFlow, and Movavi.
How to Record Your Screen and Audio on Mac
You may want to record your screen for training or educational purposes such as onboarding new hires or teaching a group of students online. You can record your screen and audio on Mac to help others easily understand what you need to say.
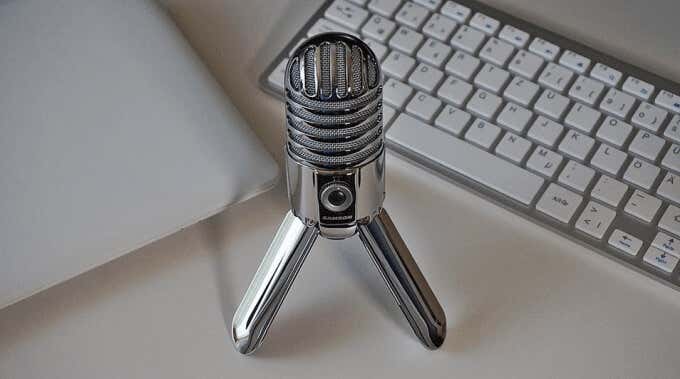
Macs don’t have a dedicated tool you can use to screen record with audio. However, you can use the native QuickTime Player as explained in the previous section to narrate what’s happening on your screen.
There are other third-party apps you can use to record your screen with voice-over or audio like CleanShot X or Dropshare. These apps let you create professional screen recordings, edit, and share as needed. You can also fade audio in or out, and mute it to get professional sound without any keyboard or click noises.
Record a Video of Anything on Your Mac
Screen recording makes it easier for others to follow what’s happening on your screen while solving the problem of having to write out descriptions for everything you need to say. Plus, if you’re doing a FaceTime call or Zoom meeting, you can record the videos and preserve them for safekeeping.
[related_posts_by_tax posts_per_page="5"]