After installing the newest iOS updates, restoring your iPhone, or even attempting a call, your iPhone could be at risk of being locked into a continuous boot sequence. The iPhone boot loop. This means that every time you attempt to open your device, it may reach the primary home screen but then immediately reboot itself all over again on a continuous loop.
This can happen during updates with an unstable connection, especially through iTunes, where the update gets stuck halfway through and is unable to pick up where it left off. Jailbreaking your iPhone can also cause unforeseen complications which include the continuous iPhone boot loop if not pulled off perfectly.
Even if you have not yet faced this issue, it is one of the more common problems iOS users face. It can happen at any time and cause enough frustration that you may want to repeatedly slam your phone against a hard surface in hopes of knocking some sense into it.
Thankfully the issue is resolvable and each method mentioned in this article should work on almost all iOS devices.
How To Fix An iPhone Boot Loop
If you’re currently facing this issue, don’t be discouraged. We’ve taken the opportunity to provide you with plenty of fix-it options that should get your iPhone back on track and working normally.

Force Restart The iPhone
- Hold down the Power and Home buttons simultaneously until you can visibly see the Apple logo appear on-screen.
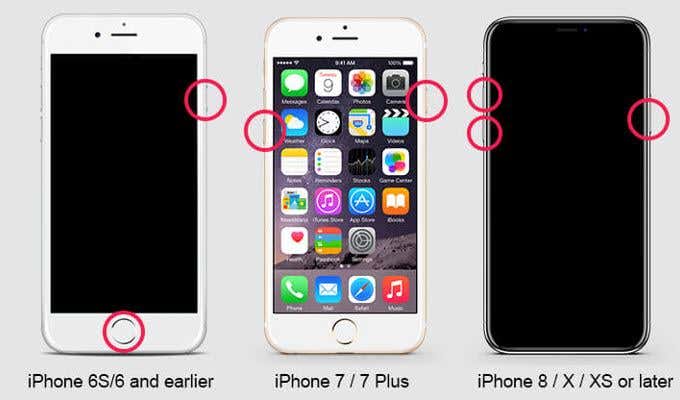
- For some versions of the iPhone, you may need to hold down the Volume button in place of the Home button.
- Once the logo is visible, release the buttons.
This is the standard first step in most iPhone recovery scenarios and may not always fix the problem.

Update Your iTunes
Receiving the boot loop while attempting an iOS update via iTunes can be the result of performing the action on an older version of iTunes. If this is your primary method for updating your iPhone you may need to check your iTunes and see if an update is available.
For iTunes on the Windows operating system :
- Launch iTunes and open the menu.
- Select Help, followed by the Check for Updates option.
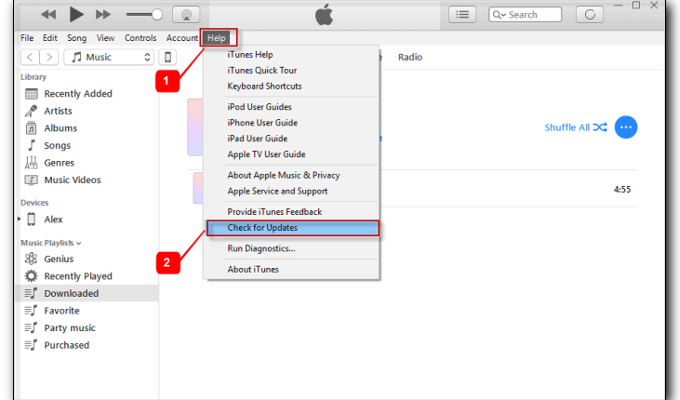
- Follow the on-screen instructions for installing the newest version.
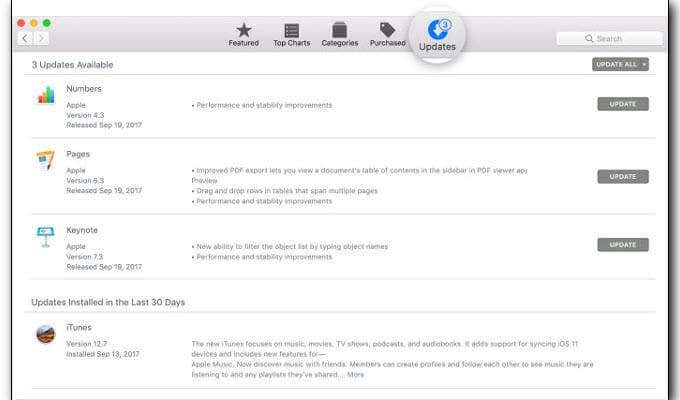
For iTunes on the Mac operating system –
- Head into the App Store.
- Click on Updates to begin the installation of the newest version.
Third-Party Repair Tool
Seeing as a continuous iPhone boot loop is often the result of a software error, it may benefit you greatly to use a professional iOS repair tool to find a fix. These particular repair tools not only help to correct boot loops but can also help with constant freezing issues, specific errors, and other iOS complications.

We recommend using iMyFone Fixppo to resolve your boot loop problem. It supports all iOS devices including XS and XR versions and has been recognized by Cnet, Cult of Mac, and Makeuseof for its positive results. Best of all, the program will fix your issue without any data being lost.
- Download and install iMyFone Fixppo on your computer and run the program.
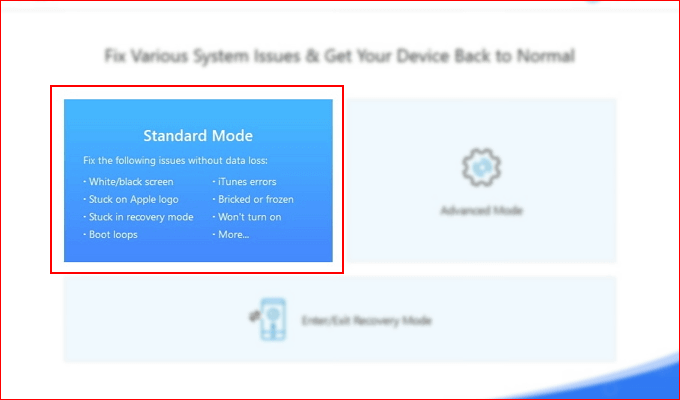
- From the options given, select Standard Mode.
- Connect your iPhone to your computer and click Next. Wait for your iPhone to be recognized by the program.
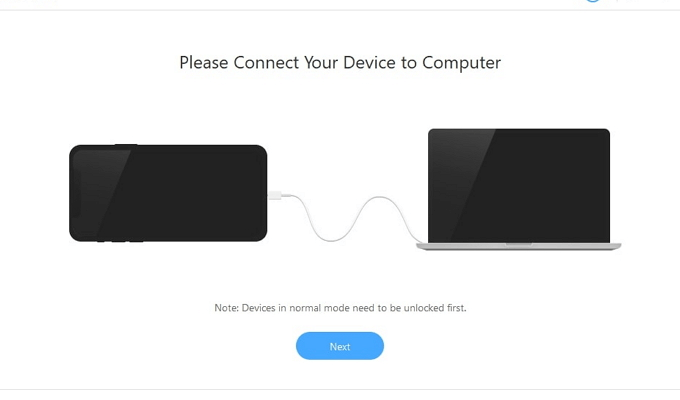
- If your iPhone is unrecognized, follow the on-screen instructions on how to enter recovery mode. This will allow iMyFone Fixppo to recognize it.
- Select the firmware that you like most and click Download. This part of the process will take several minutes to complete.

- Once the download is complete and the firmware verified, click Start to begin the repair process.
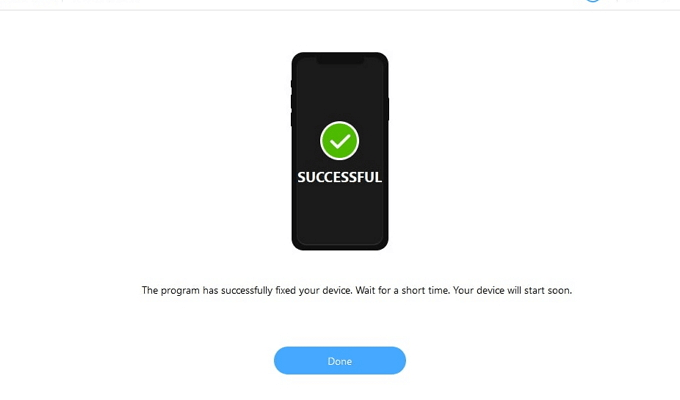
- After a few minutes, your iPhone will be back to normal and boot loop-free.
Restore Via Backup
This fix only works if you’ve created a previous backup to restore your iPhone to a previous state. Of course, this also means that every piece of data between now and then will be lost once the restore takes place.
The process is a great way to fix the iPhone boot loop problem but comes at a cost that you may not wish to pay. Think twice before making your decision. If you’ve made up your mind, here are the steps to performing an iPhone recovery using a backup.
- Connect your iPhone to your computer and launch iTunes.
- Click the icon of your device when it is recognized.
- Click on the Restore Backup button located on the main screen.
- Select the preferred backup from the pop-up window and click Restore to proceed.
Recovery Mode
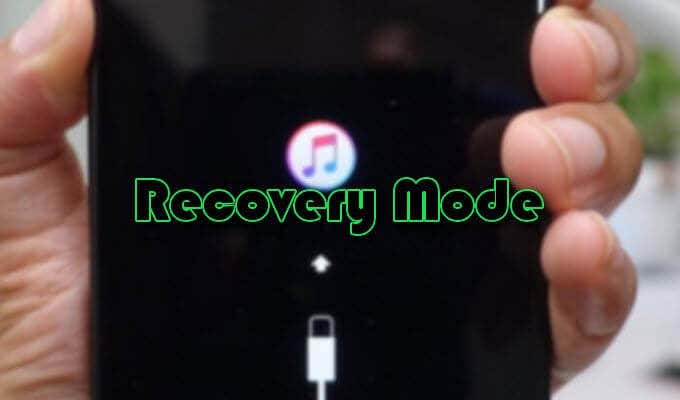
By placing your iPhone into Recovery Mode, you can easily restore it to its former glory via iTunes. This is very similar to the previous fix with a couple of additions. Understand that this method will also erase all data from your iPhone so make sure that you’re okay with it before moving forward.
- Connect your iPhone to your computer and launch iTunes.
- Hold down both the Power and Home buttons simultaneously on your iPhone just as you would during a power cycle. DO NOT release when you see the Apple logo. Instead, wait until you see the iTunes logo.
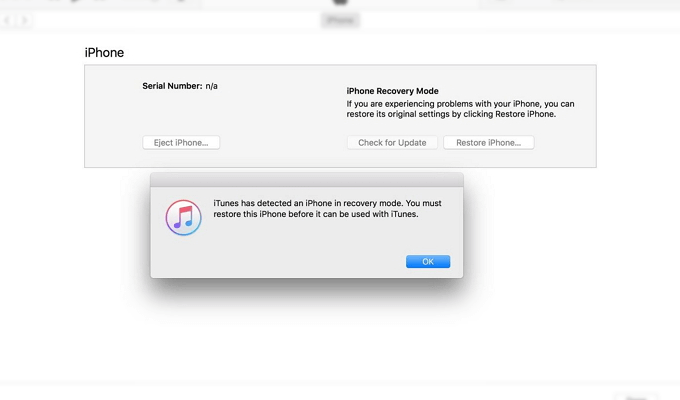
- Once you see the iTunes logo pop-up on-screen, this indicates that the iPhone is in Recovery Mode.
- Click Restore iPhone. This will have iTunes attempt to reinstall iOS without wiping your data but more often than not, the data will be overwritten.
- The process should not take more than 10 minutes and your iPhone will be boot loop-free once complete.
Hardware Problems
This could indicate a problem with the battery connector. A malfunctioning battery connector can cause the very same persistent boot loop problem you’re facing now. The only solution is to fix the battery connector. If you don’t feel savvy enough to do it on your own, we suggest seeking the help of an Apple Support Center.
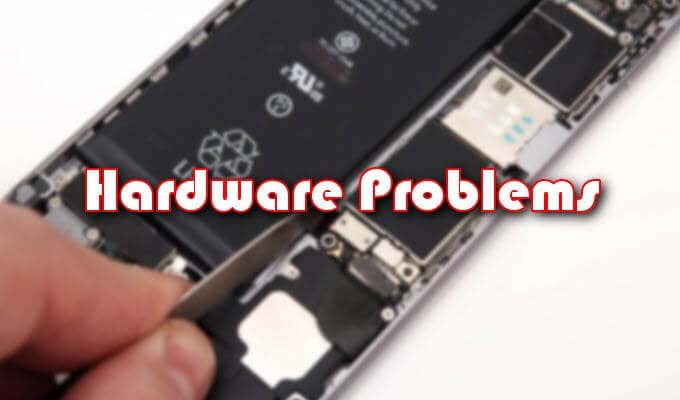
With all of the above-mentioned methods, your iPhone should be free from the irritation that is the continuous boot loop. If for some reason none of the fixes worked, your iPhone may be facing a serious hardware problem as opposed to a simple software one.
Improper hardware changes are a definite cause of device malfunctions and an Apple agent should be able to help with the problem. This is also true should the complications stem from something deeper, such as a motherboard malfunction. In either case, your local Apple Store will have the answers you seek.