iMovie is a free, easy-to-use video editing application you can use on any Apple product. Using iMovie on the iPad especially has a simple and minimalistic interface. This makes it an ideal choice to do some simple video edits on your videos or photos. The program has a good variety of options for editing if you just need to do something simply and quickly.
It’s also a better option than more professional editing software if you aren’t looking to add sophisticated effects or changes, as it’s entirely free to use. Also, unlike a lot of free editing software, iMovie doesn’t leave any watermarks on your finished project.
Despite iMovie’s ease of use, though, there are a lot of things you might miss that could greatly enhance the quality of your end product. Whether you want to just cut a few clips together or make something a little more involved, knowing the ins and outs of the app will make using iMovie on an iPad much easier.
Starting a Project
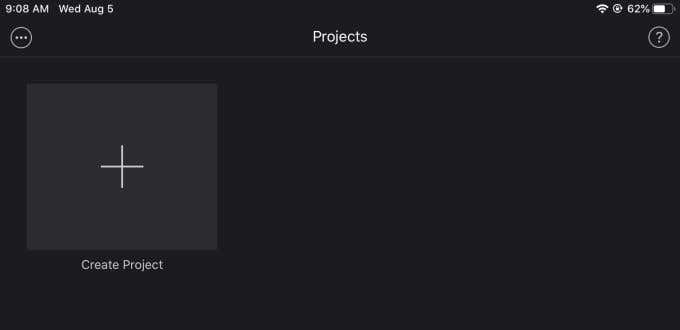
When you first open iMovie on your iPad, you should see a gray box with a plus sign that is labeled Create Project. Tapping on this will let you choose whether you want to make either a Movie or a Trailer.
The Movie option is better in order to have total control over the project, but if you want to follow a template, you can choose Trailer.
Once you’ve chosen Movie, you’ll be brought to a screen where you can choose what media you’d like to add to your project. You can choose from your photos, videos, or other albums on your iPad.
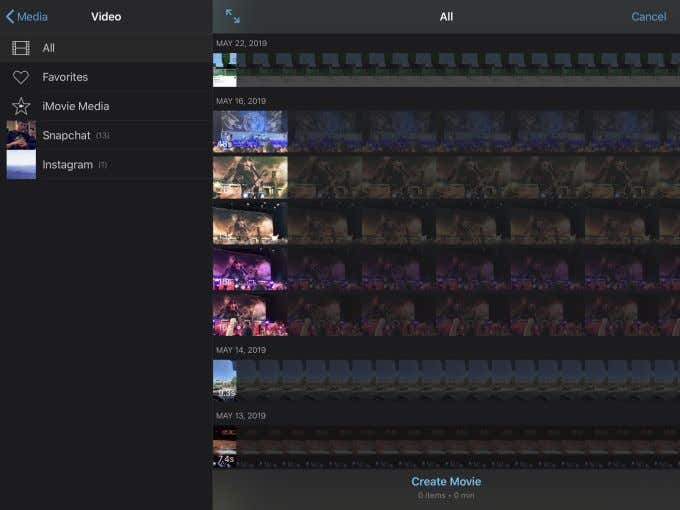
When you tap on a piece of media, click on the checkmark to add it to your project. Once you’ve added all the media you want, tap Create Movie on the bottom screen. You will then be brought to the main editing screen.
Ways To Edit Your Project
To start editing the media in your project, just tap on the clip in your timeline (the bottom half of the screen). Some tools will come up and the clip you’ve selected will be highlighted yellow. There are five different sections with more options within each one.
Actions
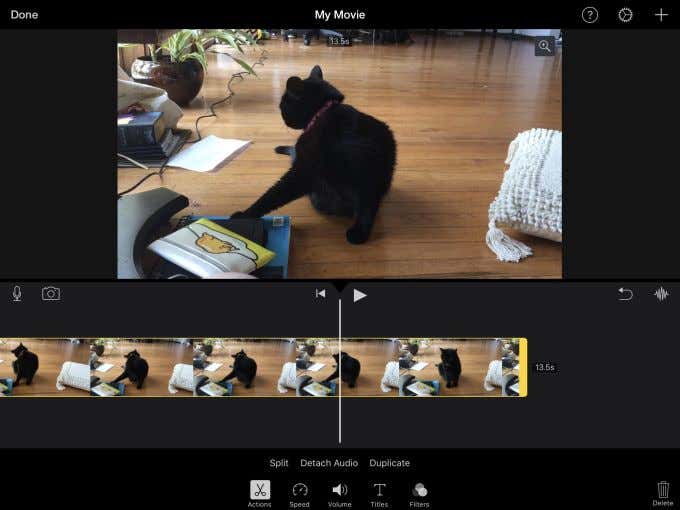
Under the scissor icon, you can choose Split to cut your clip where the cursor is at. You can also separate the audio from the clip by choosing Detach Audio. Finally, you can copy the entire selected clip by tapping Duplicate.
Speed

When you tap this, a yellow bar will appear in the selected clip in your timeline. You can move this bar from each end of the clip to choose which part you’d like to choose the speed of. You can either slow or speed up the chosen portion of the clip by moving the white circle in the line underneath the clip. The right side with the rabbit is to speed it up, and the side with the turtle is to slow it down.
You can also make a freeze frame of the frame your cursor is on by tapping Freeze.
Volume

Using the scrollbar below the timeline, you can make the audio in the selected clip higher or lower.
Titles
Under this option, there are many different premade titles and title animations you can add to your video. You can also choose to center the text or lower it to the left-hand corner of the video by tapping on Center or Lower below the text options.
Filters

If you choose to add any of these filters, they’ll change the look of the selected video. You don’t have much freedom in changing how the filters look, but if you like how any of them look in your project it’s an easy way to stylize it.
Other Options In iMovie
Besides these tools, you also have some other options for editing your project within iMovie that you may not notice at first.
Add Audio And Video Directly From iMovie

On the left-hand side of your screen you should see icons of a microphone and camera. By tapping the microphone you can record audio from your iPad and it will be added to your project. You can do the same with video by tapping the camera icon.
Undo
On the right-hand side of your screen, there is an icon of a U-shaped arrow, and tapping this will undo the last action you did in iMovie.
See Your Audio
Right next to the Undo button is an icon of a waveform, which allows you to see any audio that’s in your project. This will let you see what you’re doing if you change the volume, or want to clip portions of audio.
Changing The Project Settings

On the top right, there is a gear icon you can tap to bring up more settings for your project. On the top, there are filters you can add which will be applied to your entire project instead of only a selected clip.
Underneath that are themes you can add, which are some animations and graphics that will be automatically put in your project. The switch directly under the themes allows you to turn on and off the Theme soundtrack, which are the music and sounds already added to a specific theme.
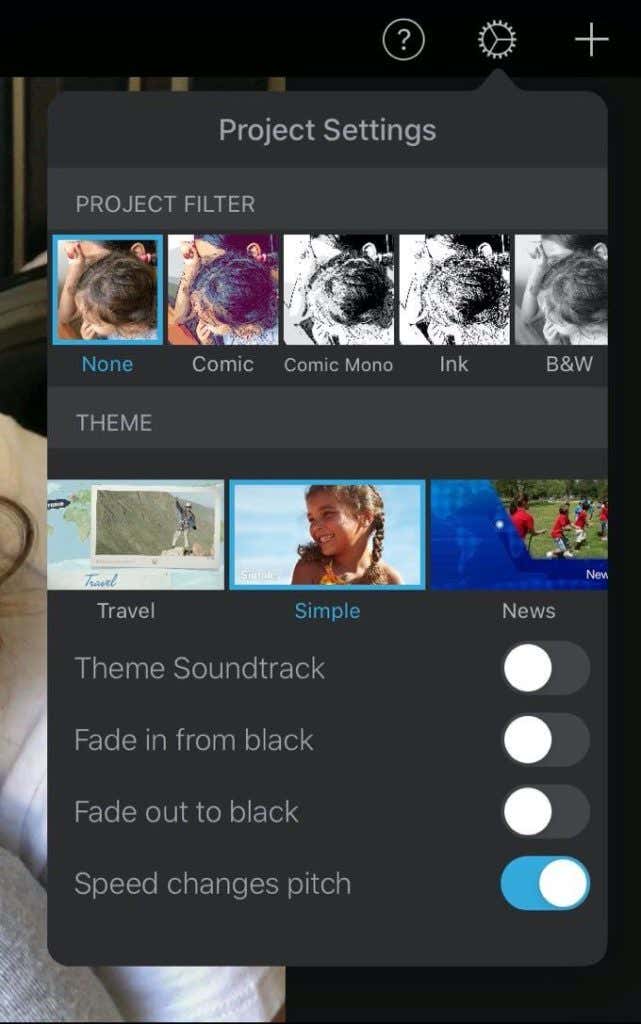
You can also choose for the project to fade in or out to black, and at the bottom, you can choose whether changing the video’s speed also changes the pitch of the video’s audio.
Finishing Your Project
When you’re done editing and are happy with what you’ve done, you can hit Done in the top left corner of the screen to finish.
On this screen, you can preview your full project, and rename it to whatever you wish by tapping on the premade My Movie title. If you decide you want to go back into editing, you can tap Edit.
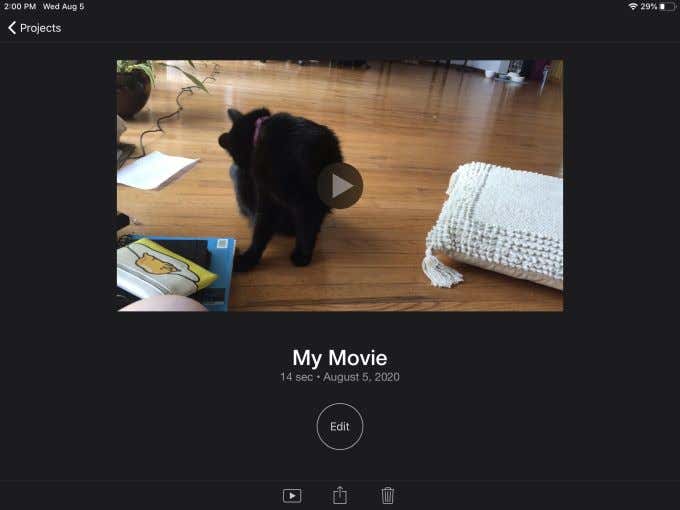
On the bottom of the screen, you can tap on the first icon with the play button to preview your project in full-screen. The icon with the box and upwards arrow is the Export button, which will let you share, export or save the video to your iPad.
If you decide you want to completely delete the video, you can tap the trash can to do so.
[related_posts_by_tax posts_per_page="5"]