When you type the name of a website into your browser’s address bar, it gets referred to a DNS or domain name system server, which translates the friendly web URL to an IP address pointing to a specific server.
Your service provider will usually run its own DNS server and your router will default to this. However, you can set that router or individual devices to use the DNS of your choice. There are many reasons to do this, but the bottom line is that a good DNS server will:
- Improve your page loading speeds
- Offer better privacy and security
- Remove any censorship that may be present in your current DNS
On desktop and laptop computers, I’ve already written about the best public DNS servers you can use and five programs you can use to find the fastest DNS server near you and have it changed for you automatically.
That’s all fine and dandy, but when it comes to iOS devices, Apple has made a rather odd decision. While you can freely choose your DNS for any WiFi network you connect to, you can’t customize your mobile network DNS at all. Luckily, one sharp-eyed app developer has produced a cheap solution to getting around this problem.
DNS Override to the Rescue
The app in question is DNS Override. Yes, you need to pay a small fee via in-app purchase to get this functionality, but it is well worth it.
To get DNS override, download it from the App store.
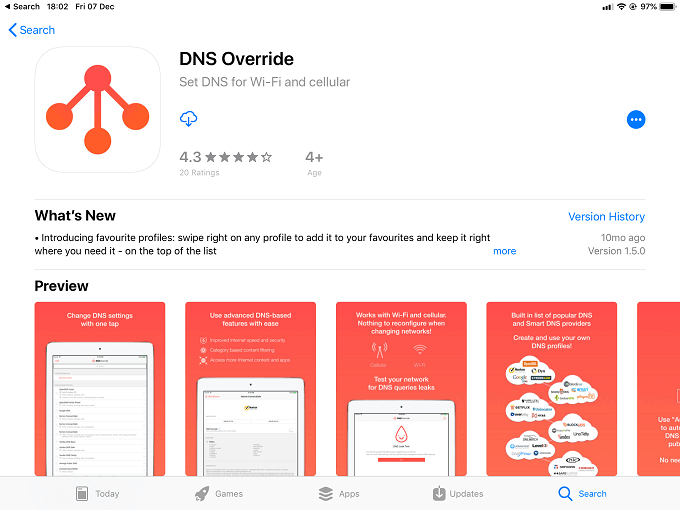
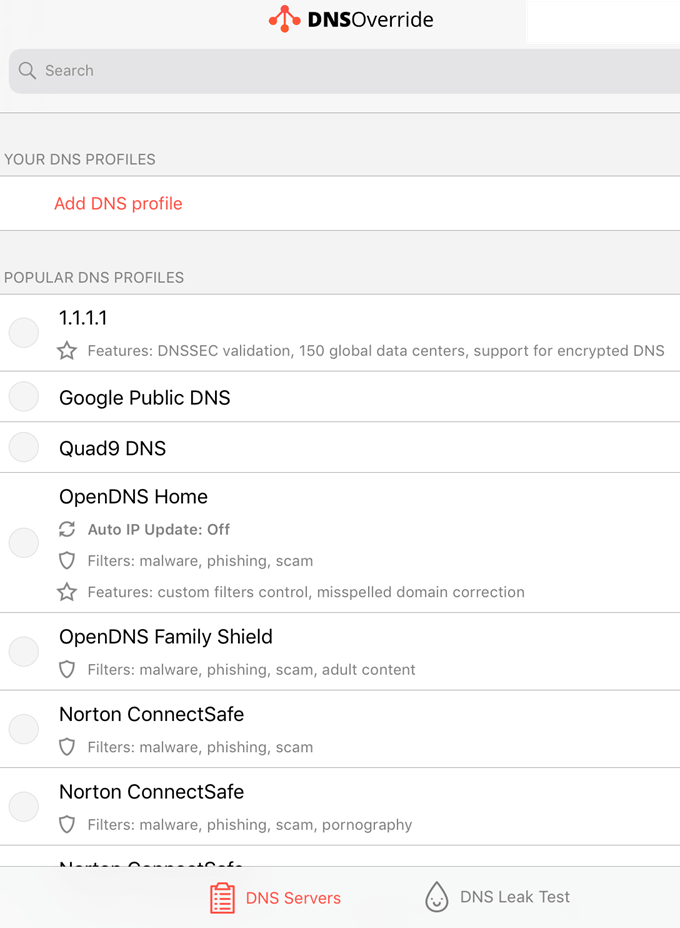
After downloading the app and paying the in-app fee for DNS switching, select the DNS of your choice. Here we are choosing Google’s Public DNS service, which is usually much faster than the typical default DNS server.[
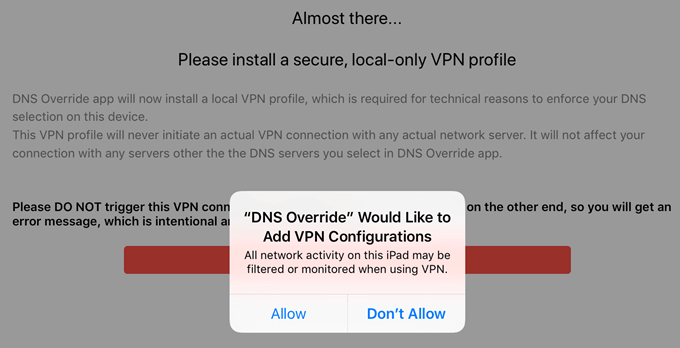
Once you have confirmed the DNS selection, you’ll be prompted to install a dummy VPN profile on your device. Just tap “Install VPN profile”.
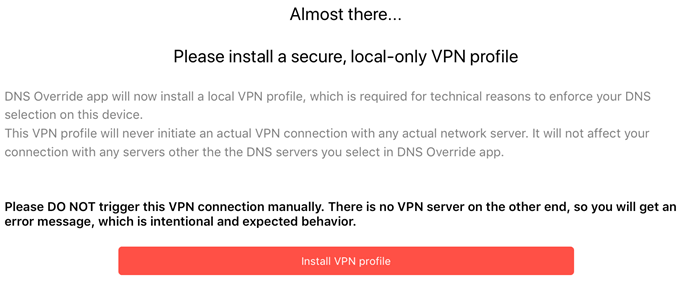
Don’t worry, you won’t actually be creating a real VPN connection and you should never try to connect to this dummy VPN. This is just how DNS Override fools iOS into letting you change the DNS settings for your cellular connection.
iOS will prompt you to approve the creation of the profile. Simply tap Allow to proceed.
If all goes well, you’ll see this confirmation screen.

Now you’re using a much more advanced, high-performance DNS server when you’re connected to LTE/4G/5G. The difference should be apparent immediately. Welcome to a much more civilized Internet experience.
Related Posts
- How to Delete Multiple Apps (At Once) On Your iPhone/iPad
- How to Restore the Missing Phone Icon on iPhone/iPad
- How to Dismiss the “Update Apple ID Settings” Notification on iPhone and Mac
- How to Change Your Game Center Nickname (iPhone, iPad, and Mac)
- Guided Access Not Working on iPhone/iPad? Try These 9 Fixes Now