Plus, why you may need to do this
AirPods may be a perfect example of Apple’s “it just works” philosophy in practice, but they aren’t without problems. Connectivity, audio, and microphone-related issues can often crop up and put a dent in your listening experience.
Apple knows that which is why you have the option of resetting the AirPods, AirPods Pro, and AirPods Max. So in this tutorial, you’ll learn how to revert Apple’s iconic wireless earbuds or headset to factory defaults.
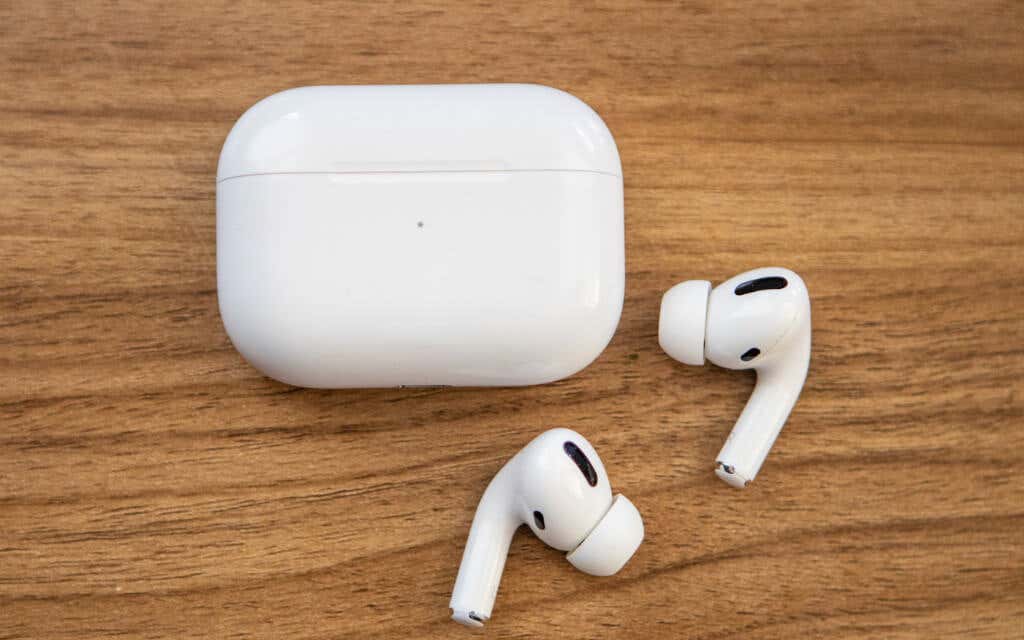
Note: All iPhone-related instructions also apply to the iPad.
Why You Must Reset Your AirPods
You must reset your AirPods to factory settings if you keep running into a persistent issue that you just can’t seem to resolve with standard troubleshooting. For example, you might have a pair of AirPods that refuse to connect to your Apple Watch or Mac. Or they may connect but fail to output audio.
Resetting the AirPods automatically unpairs them from all of your Apple devices and reverts every customization option to its default setting. The procedure itself is relatively uncomplicated. But you’ll have to spend time re-modifying any settings after pairing them again with your iPhone or Mac.
However, before you start, you may want to try updating the software that makes the hardware on your Apple AirPods work—the device firmware. Newer firmware versions fix known issues, improve connectivity, and even introduce extra features. Learn how to update the firmware on your AirPods.
Remove AirPods on iPhone & Mac
Before you reset your AirPods, AirPods Pro, or AirPods Mac, it’s a good idea to remove them from your Bluetooth devices list on iPhone or Mac. This is optional, but it does help resolve potential issues caused by a corrupt Bluetooth configuration.
Removing the AirPods from a single Apple device will also remove it from any other devices you’ve signed in to with the same Apple ID.
Remove AirPods on iPhone
1. Open the Settings app on your iPhone.
2. Tap Bluetooth and select the Info icon next to your AirPods.
3. Tap Forget This Device. Then, tap Forget Device to confirm.

Remove AirPods on Mac
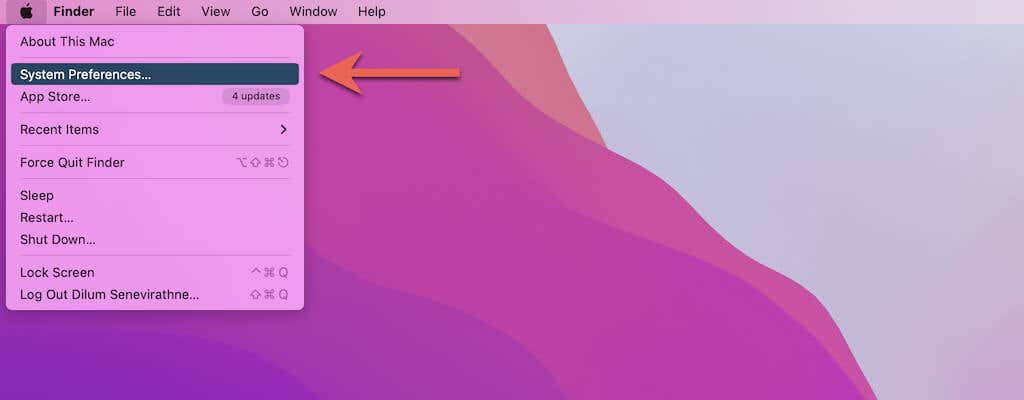
1. Open the Apple menu and select System Preferences.
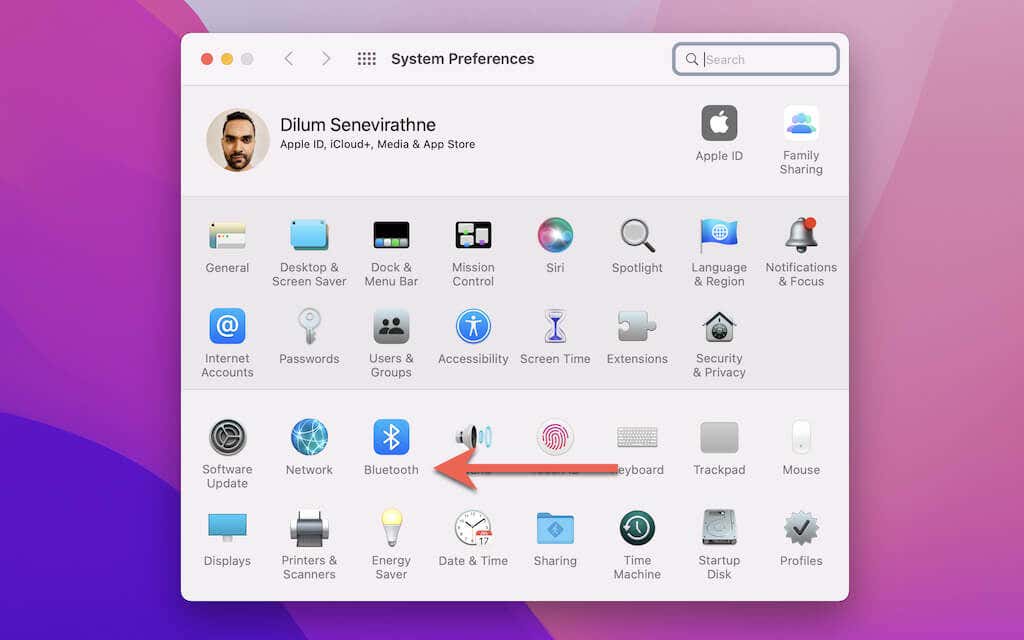
2. Select Bluetooth.
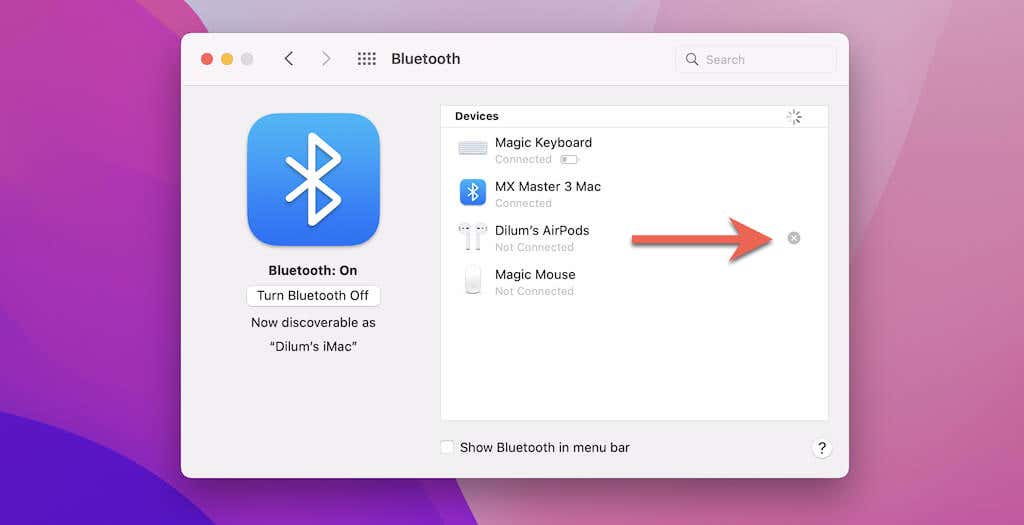
3. Select the X-icon next to your AirPods and select Remove.
Reset AirPods & AirPods Pro
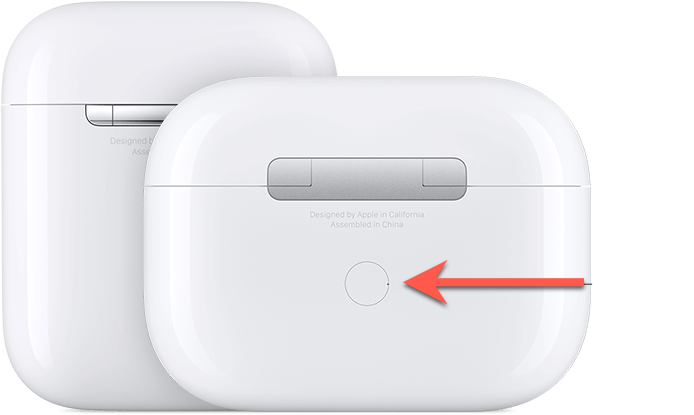
The first, second, and third-generation AirPods and the AirPods Pro involve the same factory reset procedure.
1. Put your AirPods, AirPods 2, AirPods 3, or AirPods Pro inside the Charging Case and close the lid.
2. Wait for at least 30 seconds and open the AirPods charging case lid.
3. Press and hold the Setup button at the back of the case for 15-20 seconds. Release when the status light rapidly flashes an amber color, then white.
Reset AirPods Max
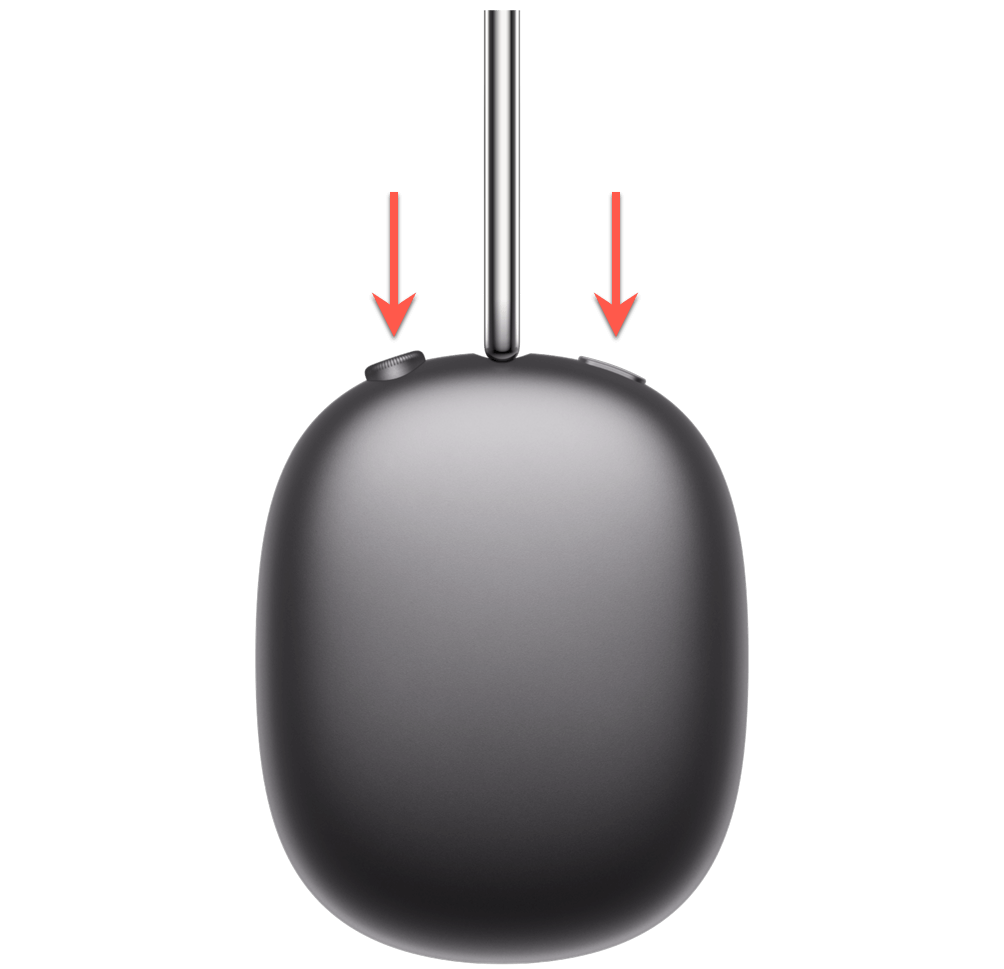
The AirPods Max requires a slightly different reset procedure.
1. Charge the AirPods Max for a few minutes.
2. Press and hold the Digital Crown and the Noise Control button for 15-20 seconds.
3. Release when the status indicator rapidly flashes amber, then white.
Reconnect AirPods to iPhone & Mac
After resetting your AirPods, you must pair them with an iPhone or Mac. Doing that once will automatically pair it with any other Apple devices you’ve signed in to with the same iCloud account.
Reconnect AirPods to iPhone
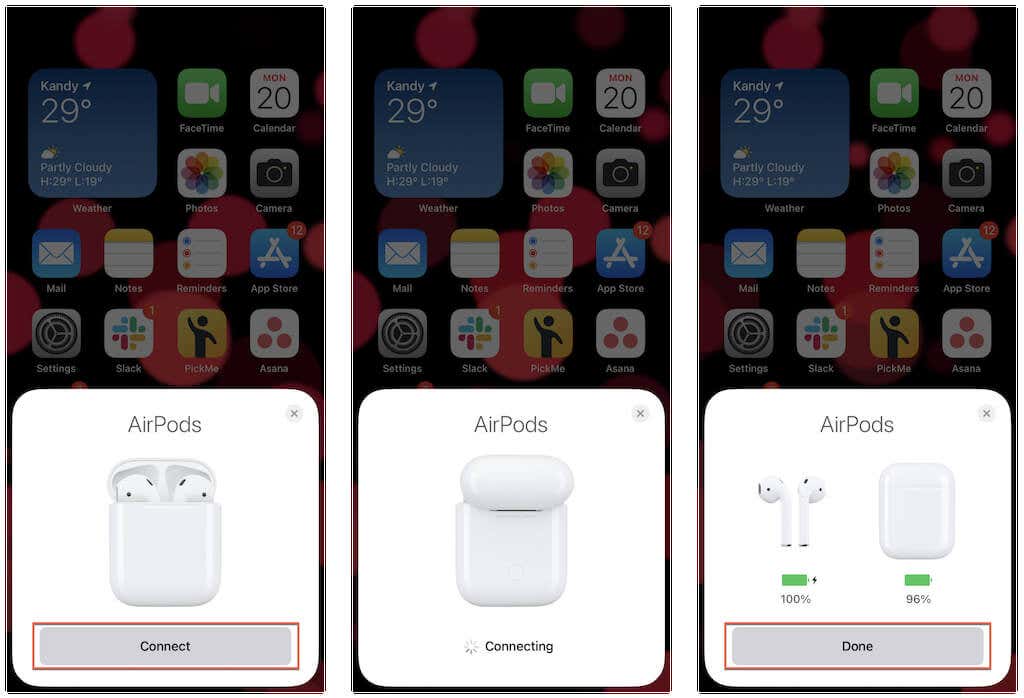
1. Hold your AirPods or AirPods Pro with the Charging Case open next to an iOS or macOS device and wait for the pairing animation. If you use an AirPods Max, put it inside its Smart Case, wait for 30 seconds, and take them out.
2. Tap Connect.
3. Tap Done.
Reconnect AirPods to Mac
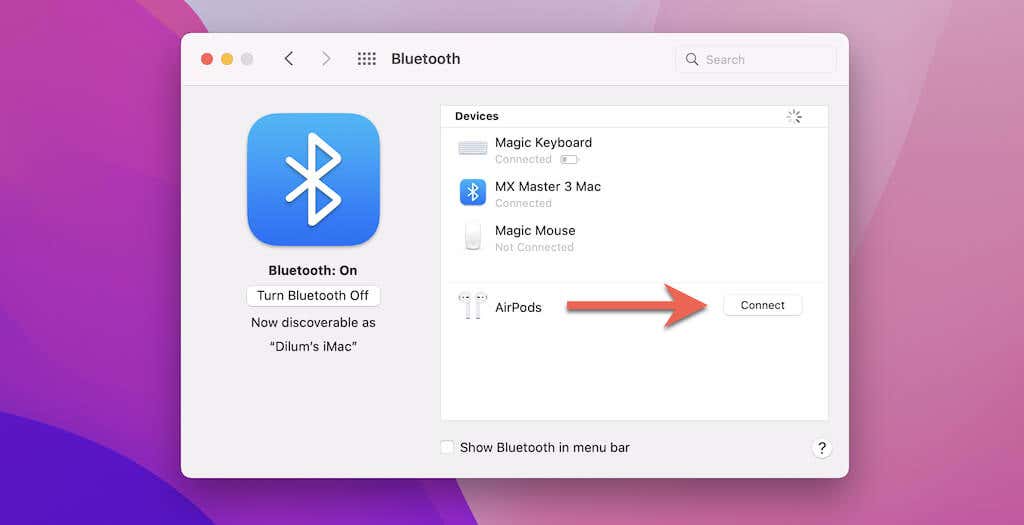
1. Open the Apple menu and select System Preferences > Bluetooth.
2. Open the case lid of your AirPods or take your AirPods Max out of its Smart Case.
3. Select Connect.
[08 – Reconnect AirPods on Mac]
Re-adjusting AirPods Settings
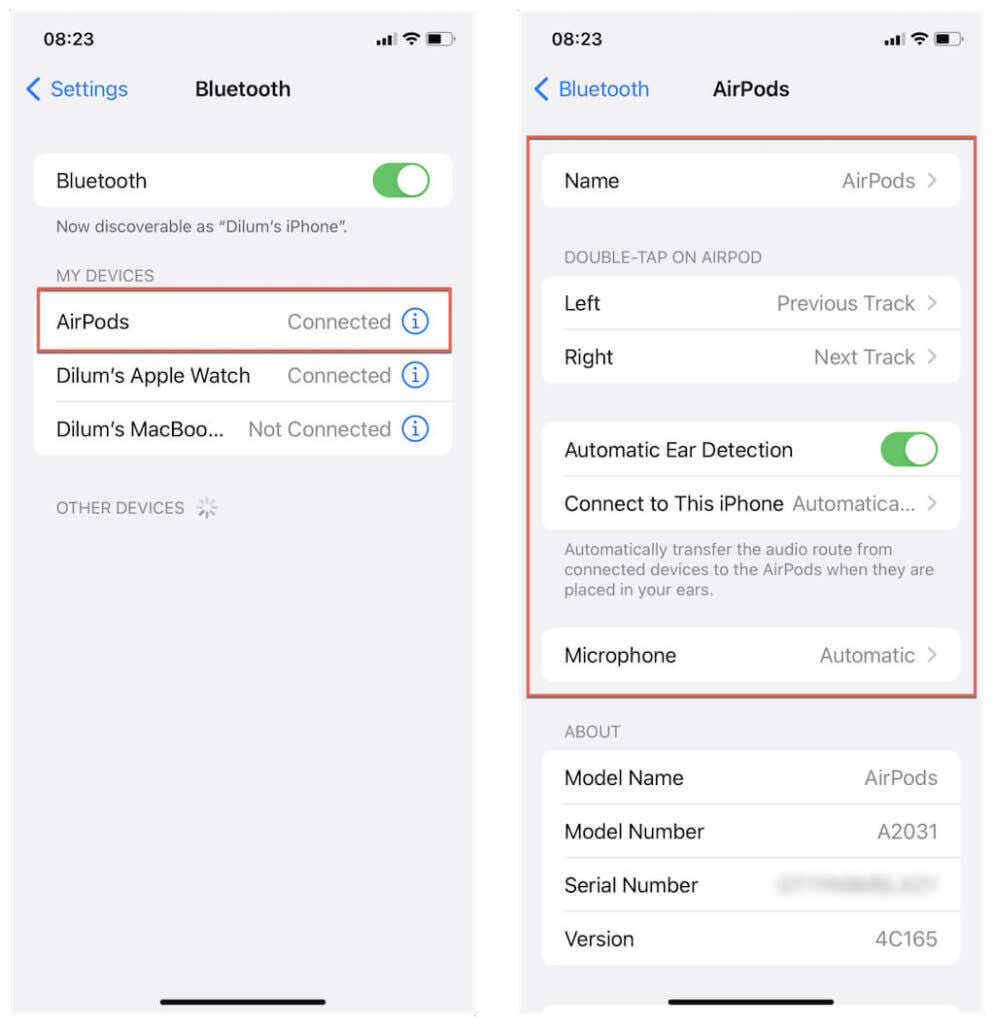
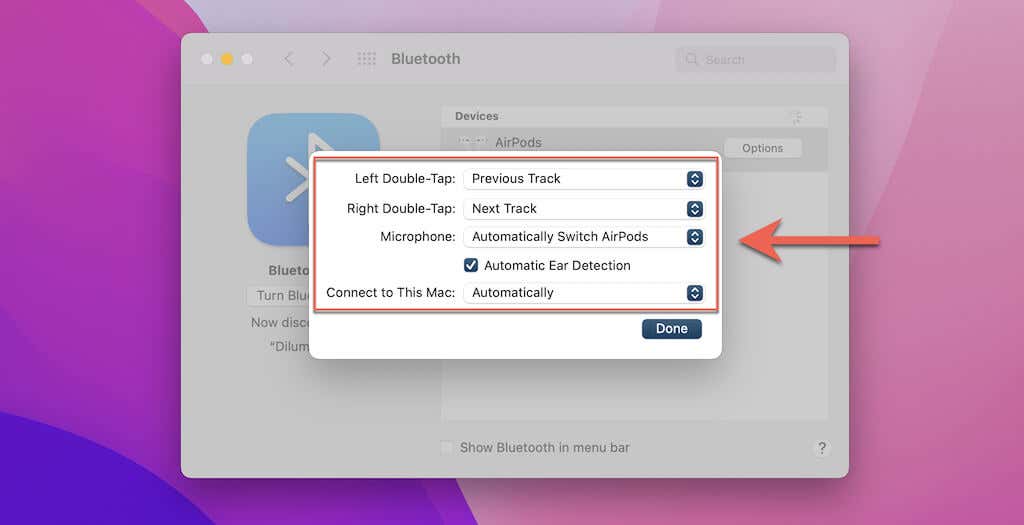
Resetting your AirPods reverts all settings to factory defaults. You can set up everything as usual again and make even further modifications by heading over to your Bluetooth settings on the iPhone and Mac.
Access AirPods Settings on iPhone
1. Connect the AirPods to your iPhone.
2. Open the Settings app on the iOS device and select Bluetooth.
3. Tap the Info icon next to your AirPods.
4. Make any adjustments to the options present on the screen.
Access AirPods Settings on Mac
1. Connect the AirPods to your Mac.
2. Open the System Preferences app on your macOS device and select Bluetooth.
3. Select Options next to AirPods.

4. Make the necessary modifications and select Done.
Customizable Options for AirPods
Depending on the model of your AirPods, here’s a brief rundown of the options that you can customize:
- Name: Add an identifiable name for your AirPods. On the Mac, you must control-click the AirPods within the Bluetooth devices list and select Rename.
- Double-Tap on AirPod: Set the default double-tap action for the 1st and 2nd generation AirPods.
- Press and hold AirPods: Set an action when squeezing the left and right AirPod on the AirPods 3 and AirPods Pro.
- Automatic Ear Detection: Enable or disable automatic ear detection on AirPods and AirPods Pro.
- Connect to This iPhone/Mac: Automatically connect to your iPhone or Mac when playing audio.
- Microphone: Set the default microphone to the left or right on the AirPods and AirPods Pro.
- Noise Control: Switch between the Noise Cancellation, Off, and Transparency options for the AirPods Pro.
- Button Cycles Between: Determine the order that the Noise Control button switches between the Noise Cancellation, Transparency, and Off options on AirPods Max.
- Digital Crown: Modify how the Digital Crown controls volume and media playback on AirPods Max.
- Automatic Head Detection: Enable or disable automatic head detection for the AirPods Max.
AirPods Fully Reset
A factory reset can play a significant role in getting your AirPods back to working as usual. Just remember to re-configure them afterward.
However, if an issue persists regardless of a reset, you must contact Apple Support for additional help. You may have to replace your AirPods if the problem is hardware-related.


