Does this sound familiar? You want to start a podcast. You’re on a budget. You’ve already decided to use GarageBand and found the perfect mic, but after a little bit of research, you realize the sound quality would be significantly improved using two microphones instead of one. The problem is that GarageBand won’t recognize the secondary input.
It seems like it should be easy to connect two different microphones to your computer, but it’s not as straightforward as it seems. Even if you do connect two separate microphones, you can end up with two individual audio streams.
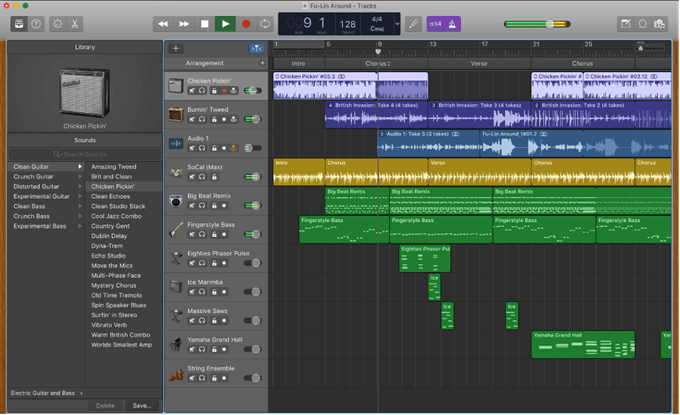
Here’s how to record input from two separate microphones into a single audio stream. Also, check out my previous post on using GarageBand to record a real instrument playing.
How to Connect Two Microphones to GarageBand
GarageBand only recognizes a single input, but it is possible to record using two separate devices. You just have to trick the program into thinking two connections are one. Here’s how to do it.
1. Open Finder and choose Go > Utilities, or hit Command + Shift + U with Finder open.
2. Open the Audio MIDI Setup application.
3. At the bottom left corner of the screen, click the “+.”
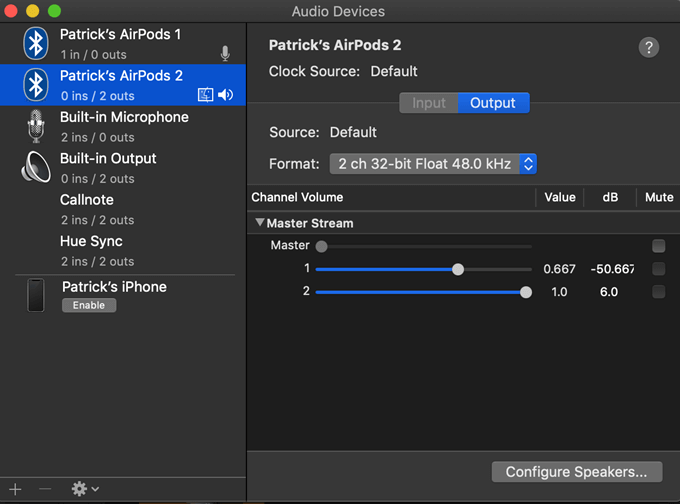
4. Choose Create Aggregate Device.
5. When you do this, a new aggregate device will appear in the list above. Double-click the device name to rename it.
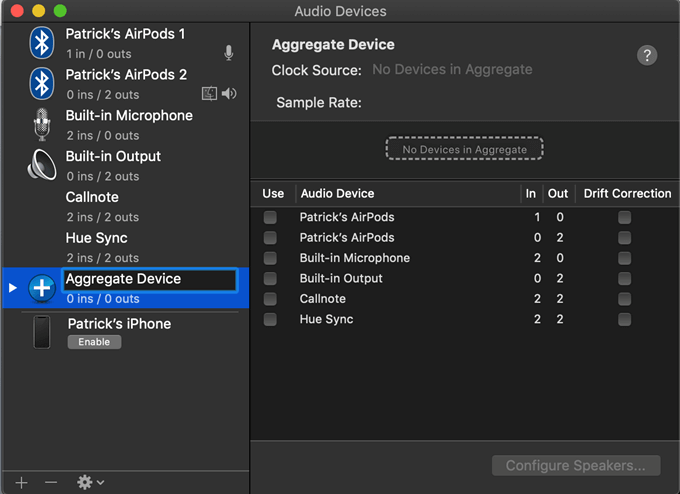
6. With this device selected, you will see a list of all available audio devices in the Audio Devices window. Select the inputs you want to use. You would select the two microphones you want to use, but make note of the order you select them in. The order they are checked determines the order the system will view the inputs.
7. When you select multiple devices, you will have the option to select the clock source. Without getting too technical, this will be the audio input the time is based on. Choose the source with the most reliable clock speed.
8. When you have selected the two microphones you intend to use, exit from the Audio MIDI Setup.
Choosing the Aggregate Device in GarageBand
Now that you’ve created an aggregate device, it’s time to go back into GarageBand and select the proper device.
1. Go to File > New and select the type of project you wish to use.
2. Look in the bottom left corner and click on the arrow beside Details.
3. Click Input Device and select the aggregate device from the list.
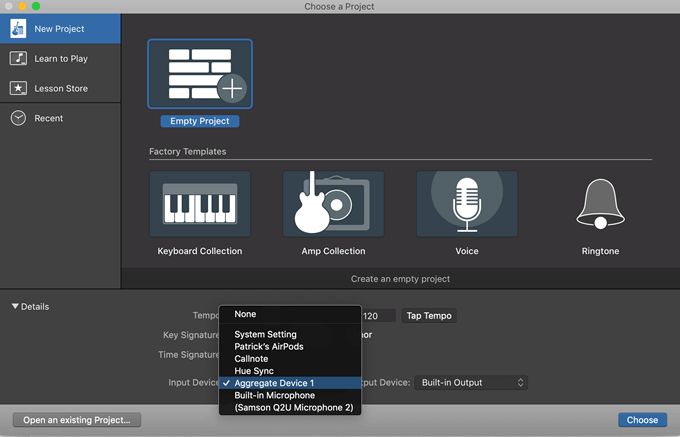
4. Choose the output device you want to use. Note: you do not want to use the Built-in Output, as it can cause audio distortion in the recording. Instead, use headphones or another output source.
5. Click Choose.
6. Next, go to GarageBand > Preferences and select Audio/MIDI.
7. Select Aggregate Input from the Input Device menu.
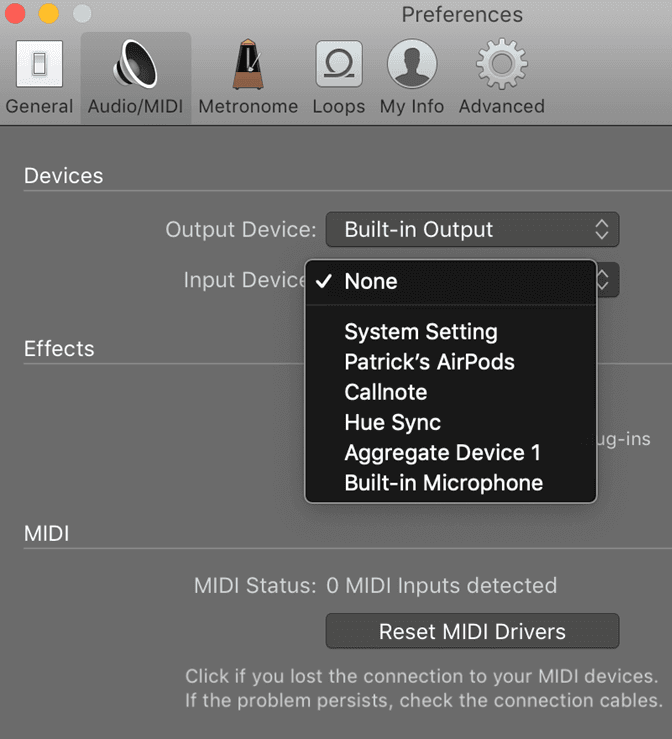
8. From there, navigate back to the GarageBand screen and press the Smart Controls button (or just hit the B key.)
9. In the Smart Controls menu, select Input and choose Aggregate Device from the list if it isn’t already selected.
And with that step, you should be set up and ready to record from two microphones. There are still a few issues that may arise, however. If you have two identical USB microphones, it can be difficult to get the computer to recognize them as individual devices because their digital signatures are identical. This may be easier to pull off using separate types of microphones.
If you try to record and find one of the microphones isn’t working, don’t make the mistake we did and repeat every step above—not at first, anyway. The first step should be to check that the second microphone is turned on. Congratulations, and good luck with recording.