Every Mac user knows the Dock—it sits at the bottom of the screen, giving you quick access to your favorite and currently open apps and folders. Using the Mac Dock shortcuts, you can launch Finder and Launchpad, throw files into the Trash folder, as well as access your Downloads folder directly.
To keep your Dock icons tidy, you can begin to categorize the apps on your Dock into shortcut folders. This will let you organize the Dock better, reducing clutter and letting you focus on your most important apps. Here’s how you can create Mac Dock shortcuts quickly, as well as some tips on how to use the Dock more effectively.
Customizing Mac Dock Shortcuts
Before you begin adding Mac Dock shortcuts, you should customize it to suit your needs. You can change the size of the Dock, including the size of the icons, as well as reposition the Dock from the bottom to the left or right side of your screen. You can also set the Dock to automatically hide when you’re not using it.
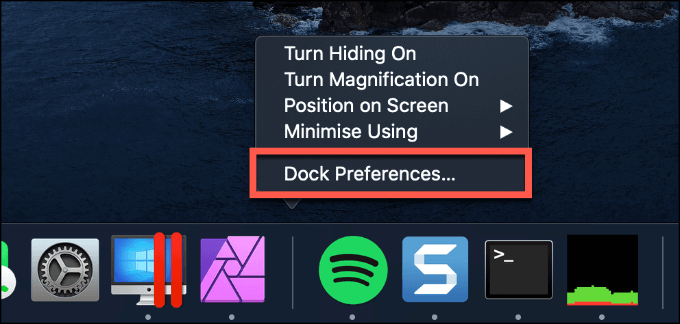
- To access the settings for the Dock, right-click the Dock area and click Dock Preferences. Alternatively, click the Apple menu in the top-right, then click System Preferences > Dock or launch System Preferences from the Launchpad.
- Modify the sliders to increase the size of your Dock app icons, or use the radio buttons to change the position of the Dock. Click the Automatically hide and show the Dock checkbox if you want the Dock to disappear when it isn’t being used.
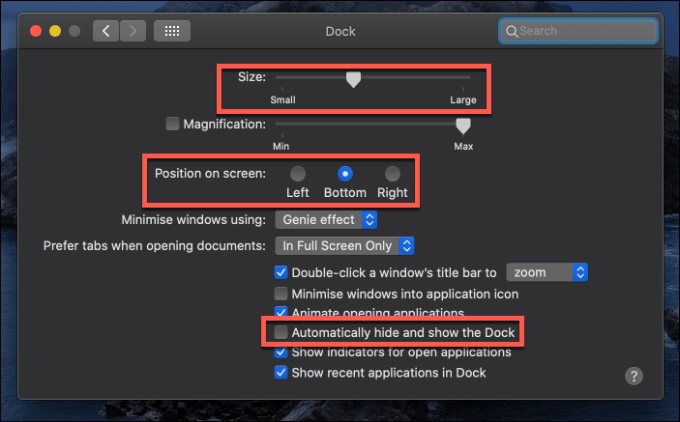
Once you’ve made your changes, close the Dock settings window. The changes you make will be applied automatically.
Adding New Mac Dock Shortcuts
When you first set up a Mac, a few default apps are already in place as Dock shortcuts. These include Launchpad, Finder, and various Apple apps like FaceTime and Photos. Any software that is currently running will appear next to these icons in the Dock.
- To add running apps to your Dock permanently, right-click on an app icon in the Dock, hover over Options, then click Keep in Dock.
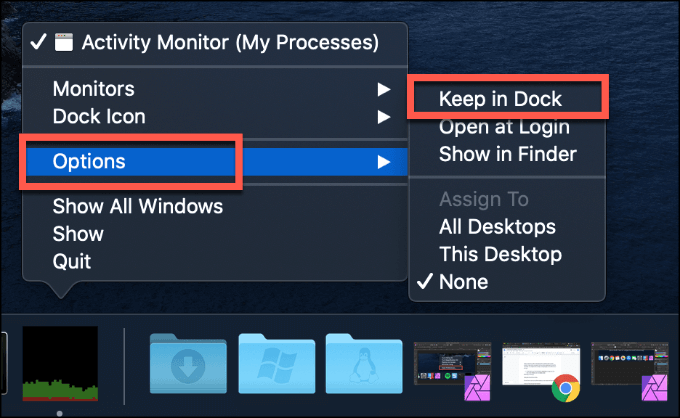
- You can also remove surplus apps from your Dock using the same menu. For system apps, right-click the app icon, then click Options > Remove from Dock. For non-system apps, simply uncheck the Keep in Dock icon to remove it.
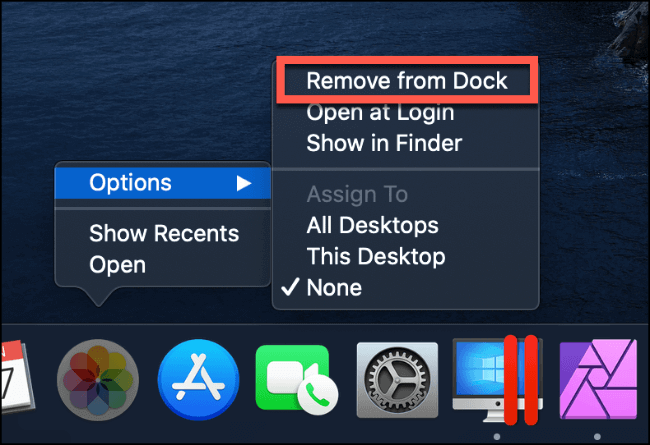
Once your app icons are in place, you can move them around using your mouse or touchpad to suit your needs by dragging the icon and moving it to a new position.
Adding New Mac Dock Shortcut Folders
Shortcut folders help you categorize your Mac Dock shortcuts into categories. Work apps, for instance, could be placed in a single folder, while games could be separated into another.
While Dock shortcut folders won’t hide running apps, they can give you easy access to launch any software you run often without cluttering the Dock or having to launch the app from Finder or Launchpad instead.
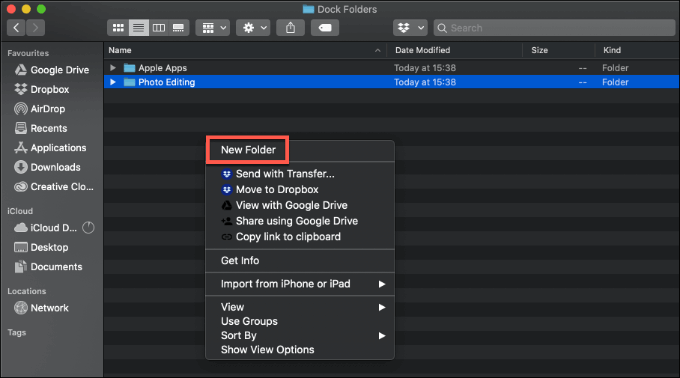
- To start, open Finder by clicking the Finder icon in the Dock. Head to your Desktop folder, then right-click and press New Folder to create a new folder. Give this a name like Dock Folders. Inside this folder, create another folder (or several new folders) to match the app groupings you want to create on your Dock, giving them a suitable name as you do.
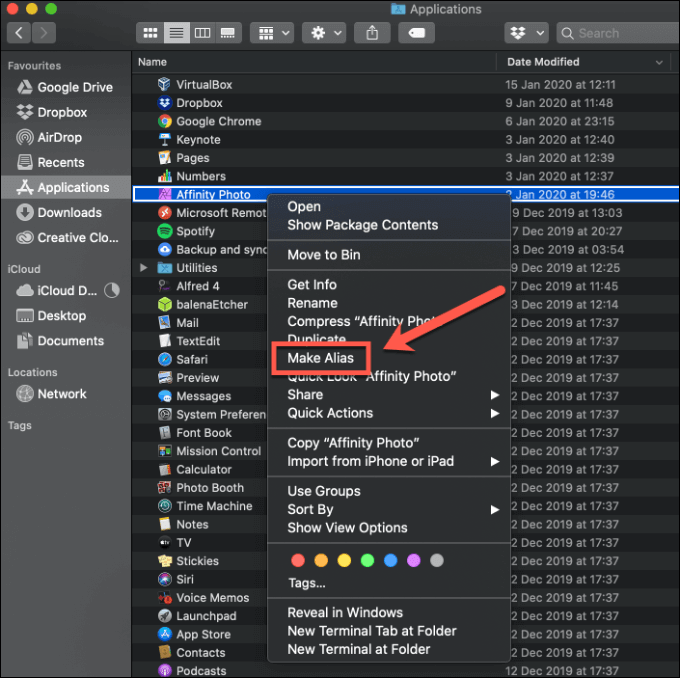
- With your folders created, open a second Finder window by right-clicking the Finder icon, pressing New Finder Window, then opening the Applications folder in the left-hand menu. Right-click (or press Control + click) on any app you wish to create a shortcut of, then click Make Alias.
- A new listing for your chosen app will appear in the Applications folder, with the word alias attached to the name. With both Finder windows visible on your screen, drag the alias app from your Applications folder to the shortcut folder you’ve created on your Desktop.
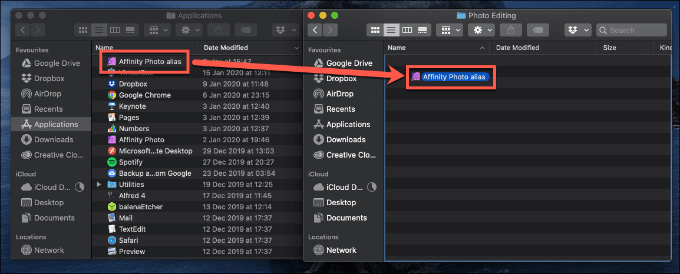
- Repeat the step until you’ve created shortcuts for all of your chosen Dock apps and placed them in suitable folders. Once the Dock shortcut folders are ready, drag the shortcut folders using your mouse onto the Folders area of the Dock, next to your Trash icon.
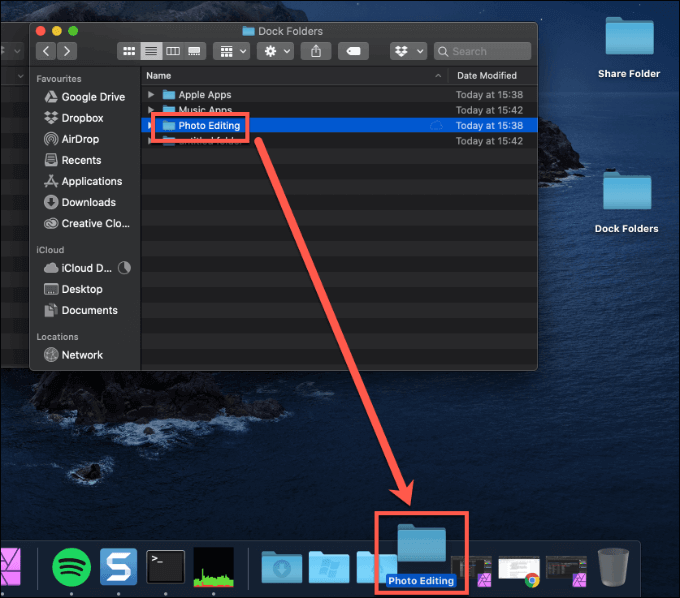
- With the shortcut folder in place, you can access your apps by clicking on the shortcut folder icon and pressing one of the app shortcuts within.
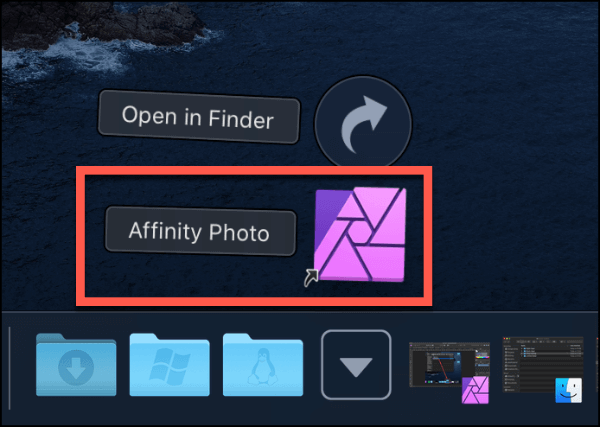
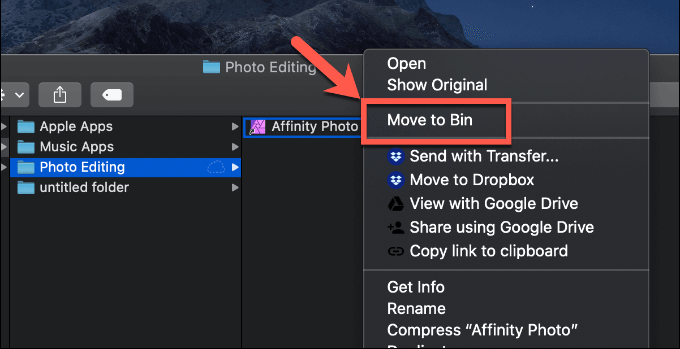
As the Dock shortcut folder is itself a shortcut to a folder, you can open it in Finder to add or remove apps by retracing the steps above. Right-click any app in your Dock shortcuts folder in Finder and press Move to Trash to remove it.
Using Keyboard Dock Shortcuts
If you want to start using your Dock better, then consider using keyboard shortcuts. These time-saving shortcuts will help you interact with the Dock using only your keyboard, saving you the extra time it would take you to use your mouse or trackpad.
- Option + Command + D: Hides the Dock or makes it reappear if it’s already hidden.
- Command + M: Minimizes an open window to the Dock.
- Control + Shift + Command + T: Adds an item in Finder as a Dock shortcut quickly.
- Control + F3 (or Control + Function + F3): Assume keyboard control of the Dock, allowing you to move around it with your keyboard keys.
- With the Dock keyboard control shortcut above used, press the Up arrow to access the Dock menu, or Return to open an app or shortcut folder. With an app icon selected, press Command + Return to open the location of that app or shortcut in a new Finder window.
- To hide all open windows except for the app icon selected, use the arrow keys to select an app icon, then press Command + Option + Return. This will minimize other apps, leaving only your chosen app in view.
How to Use the Dock More Effectively
Adding Mac Dock shortcuts and organizing them into folders is just one way you can use the Dock more effectively on macOS. As we’ve mentioned, you could decide to use macOS keyboard shortcuts to quickly launch apps from your Dock, or customize the Dock to list recent apps in their own folder.
If you’re running Windows, you can install your own third-party Windows app docks instead.
[related_posts_by_tax posts_per_page="5"]