Recent iPhone and iPad models have brought with them really large and crystal-clear screens so you can view your content and the objects in them easily. However, there are still a few occasions where these large screens aren’t large enough to project your content.
These are usually the occasions when you want to mirror the screen of your iPhone or iPad to an audience, say of 10 people. Even if these people gather around your device, they’ll still not be able to easily view your content.
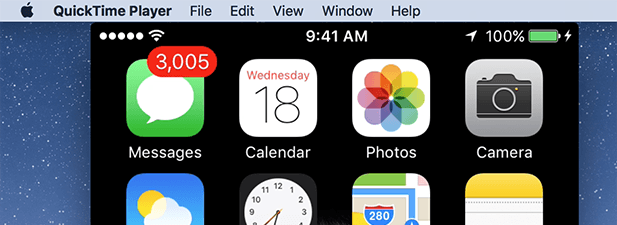
That’s where screen mirroring for your iPhone or iPad comes into the picture. It’s a feature on your iOS device that allows you to mirror the screen of your iPhone or iPad to a large TV, computer monitor, or laptop. You don’t need any physical equipment to use it and the following guide shows how you can do it.
Screen Mirroring the iPhone/iPad Screen To Your Computer
Screen mirroring your iOS device’s screen to your Windows PC or Mac is so easy that you don’t even need a cable to connect your device to your computer. As long as you can connect to a WiFi network, you’re ready to do screen mirroring on your devices.
What makes it possible for you to mirror your iOS device’s screen to your Windows PC, Mac, or any other compatible device is a feature called AirPlay. Originally, the feature was built to help you mirror your devices to your Apple TV, but with the advent of new software, it’s now possible to convert your existing computer to an AirPlay receiver.
You use the AirPlay option on your iOS device to send your screen content over to an AirPlay receiver, which in this case is your Windows PC or Mac.
Mirror An iPhone/iPad Screen
Since Windows and Mac aren’t AirPlay-enabled by default, you’re going to need to install an app on your computer to add support for screen mirroring.
Many apps in the market will help you do it and we’re going to use one of these apps called LonelyScreen. It’s available for both Windows and Mac platforms and is pretty easy to set up and use.
Ensure that both your iOS device and your computer are connected to the same WiFi network. If they are not, you’ll need to connect them to a single WiFi network or you won’t be able to find your computer in the devices list on your iPhone or iPad.
Head over to the LonelyScreen website [note: no longer working] and download and install the app on your computer. Launch the app when it’s installed.
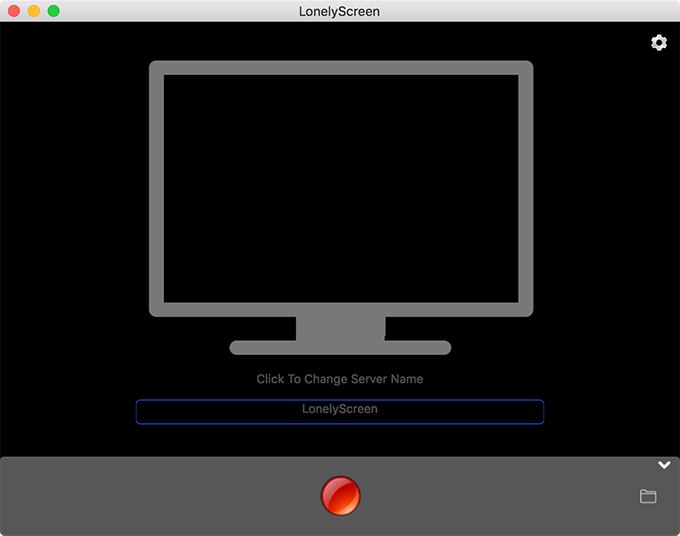
When the app launches, you’ll see a black screen with a red button. There isn’t anything that you need to configure for the app to work. It has installed everything in the background for you.
However, if you want to make a change, you can do so to the name of the receiver. By default, it uses LonelyScreen but you can have it changed to something of your liking and it’ll then appear on your iOS device.
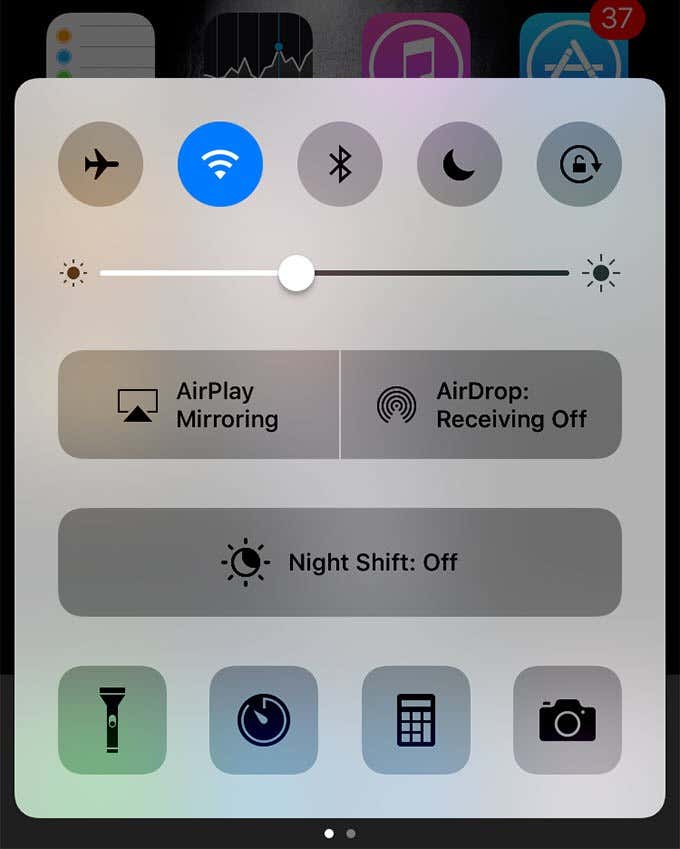
Open the Control Center on your iPhone or iPad. On an iPhone, you can do it by swiping upwards from the bottom of your screen. On newer iPad models, you’ll need to swipe downwards from the top-right corner.
When Control Center opens, you’ll find an option saying AirPlay Mirroring. Tap on it.
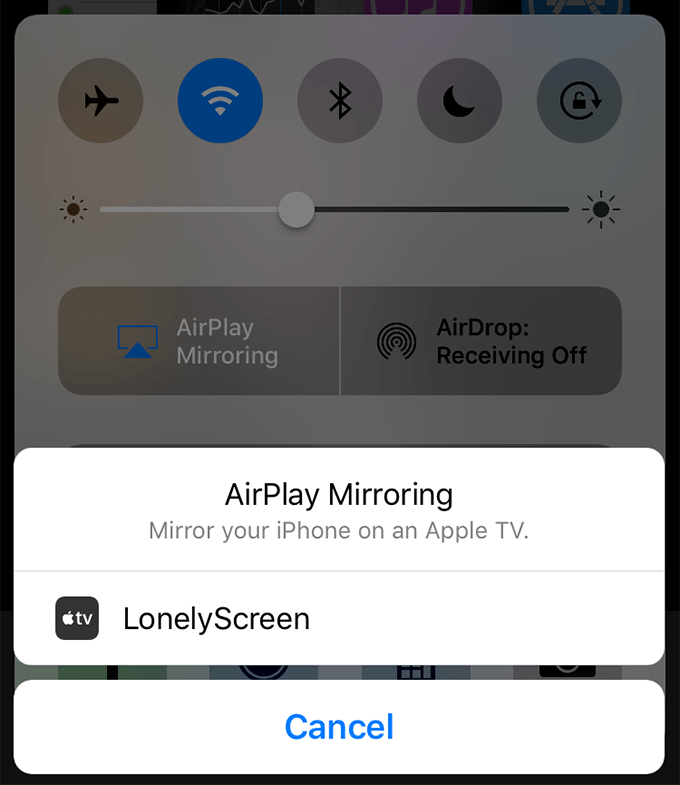
It’ll search for all the available AirPlay receivers on your network. You’ll find LonelyScreen in this list. Tap on it to start mirroring your device.
You’ll instantly see the contents of your iOS device on your computer. Any actions that you perform on your device will reflect on your computer in real-time.
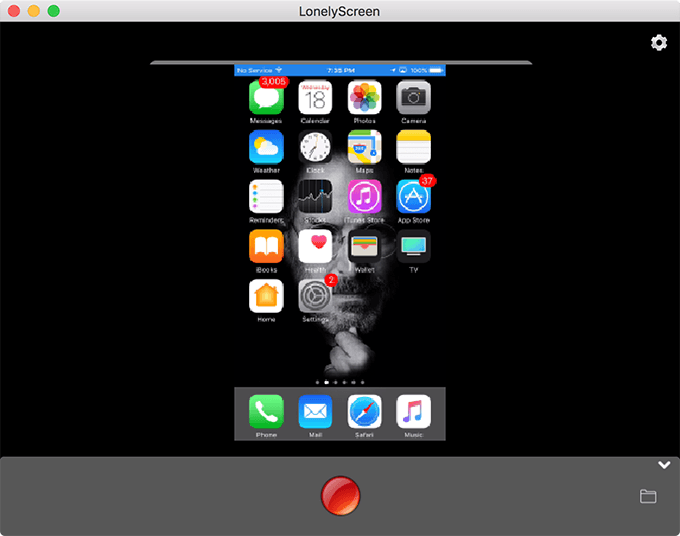
You can now mirror whatever photos, videos, websites, apps, games, etc, you want from your device to your computer.
Once you’ve finished playing with the feature, you may want to turn it off. Reveal Control Center on your iOS device and tap on LonelyScreen. Then select Turn Off AirPlay Mirroring to stop the feature.
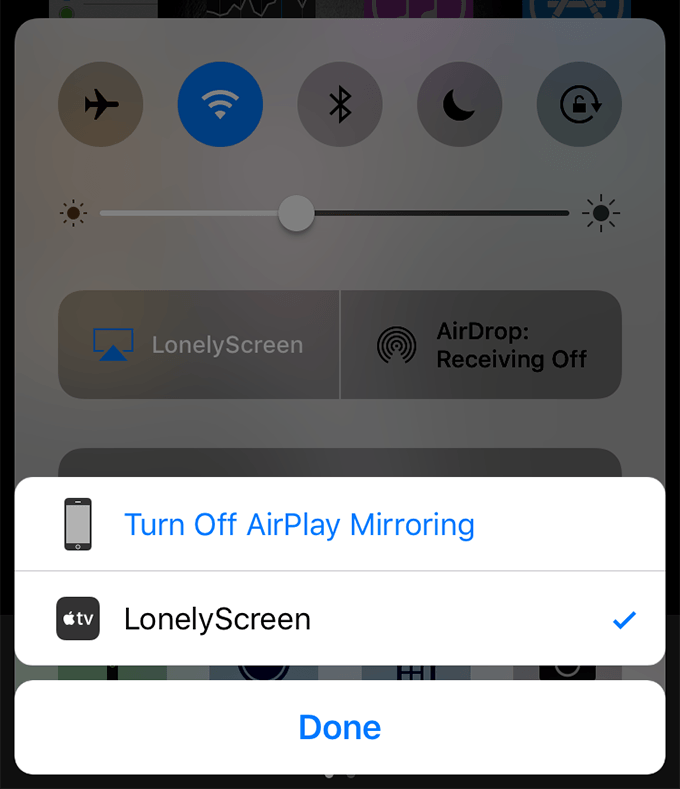
LonelyScreen is just one of the many apps that let you use AirPlay on your incompatible devices. If it doesn’t work for you for some reason, you have a few other alternatives available as well such as X-Mirage.
Mirroring An iOS Device To a Mac Using a Cable
If you’re experiencing any lags in the wireless connection or if you don’t want to install an app to mirror your iPhone or iPad to your computer, you can use one of the built-in apps on your Mac to do the task.
The app that you’re going to use is QuickTime Player and you’ve likely used it to play media content before. But it can be used to mirror phone screens as well. The following is how you do it.
Connect your iPhone or iPad to your Mac using a compatible cable.
Click on Launchpad in your Mac and search for and click on QuickTime Player to launch the app.
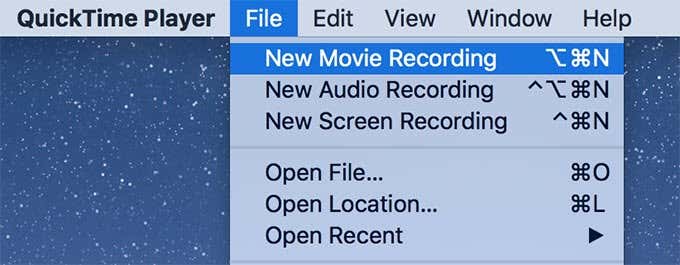
When the app launches, click on the File menu at the top and select New Movie Recording. You aren’t going to record any movie but the feature you want is located here.
Ignore yourself showing up on your Mac’s screen and click on that down-arrow icon next to the red record button.

You’ll now see the devices you can use with the app. Select iPhone or iPad from the list.
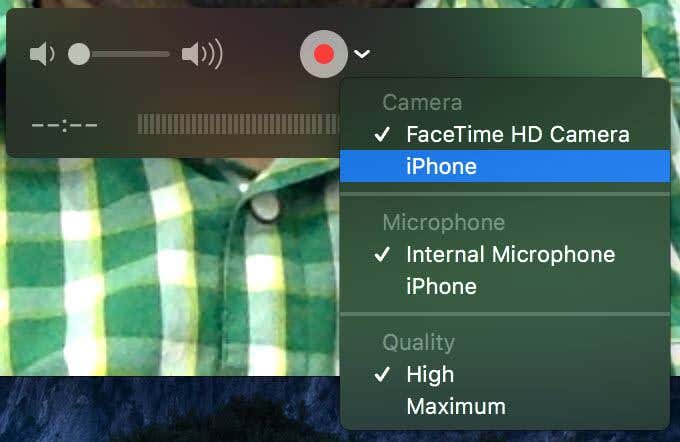
QuickTime Player will now start showing your iOS device’s screen on your Mac screen.
You’ll see all the content changing in real-time on your Mac. And if you want to record your screen, you can do that too using the same app. Just click on the red record button to start recording your device’s screen.
When you’ve finished using the feature, close the window, and screen mirroring will stop.
Conclusion
If you aren’t comfortable sharing the content available on your device with someone but you’d still like for them to see it, screen mirroring is your best solution and it can be used for professional meetings as well.