One of these will help you get it back
The Mac’s Screenshot app provides multiple ways to grab screenshots quickly and easily. But despite being integrated into macOS, it can occasionally cease to function correctly.
For instance, the Screenshot app may refuse to show up, and its keyboard shortcuts might also not respond. Or, it could appear to take screenshots but fail to save them.

Bugs and glitches, insufficient permissions, and conflicting settings are some of the things that may lead to screenshots not working on the Mac. When that happens, the list of fixes below should help you sort things out.
1. Restart Your Mac
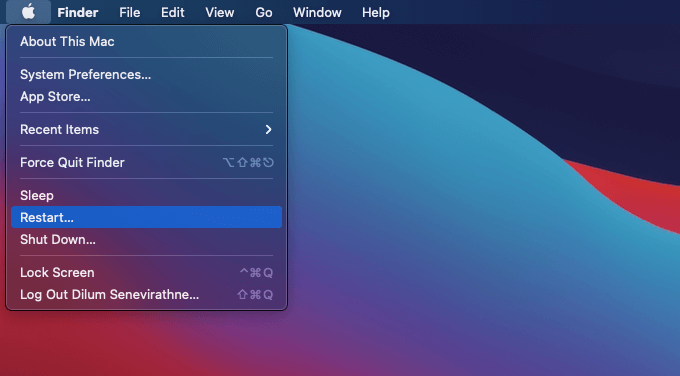
If you were taking screenshots on your Mac without any trouble just a moment ago, you’re probably dealing with a minor glitch in the Screenshot app. The best way to fix that is to restart the Mac. Do that now before moving on with the rest of the fixes.
2. Update Your Mac
If you’re using an early iteration of a major macOS release (say macOS Big Sur), it’s a good idea to apply any pending system software updates. Doing so resolves known bugs that interfere with system-related functionalities—such as the Screenshot app—from working correctly on the Mac.
1. Open the Apple menu and select System Preferences.
2. Select Software Update.
3. Select Update Now to install any pending updates.
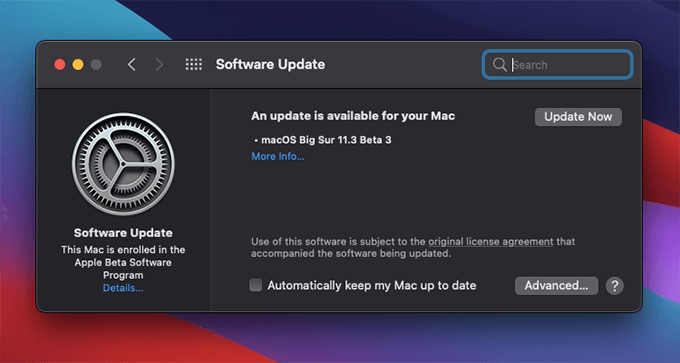
Beta versions of macOS can also cause problems on the Mac. Make sure to update it to the latest beta release or downgrade to the stable channel if none of the fixes below work.
3. Restrictions May Play a Factor
Some programs and websites—such as Apple TV and Netflix—prohibit you from taking screenshots. That happens due to complications with copyrighted content. If your screenshots appear blank with nothing in them, that’s probably the reason why.
4. Check Screenshot Keyboard Shortcuts
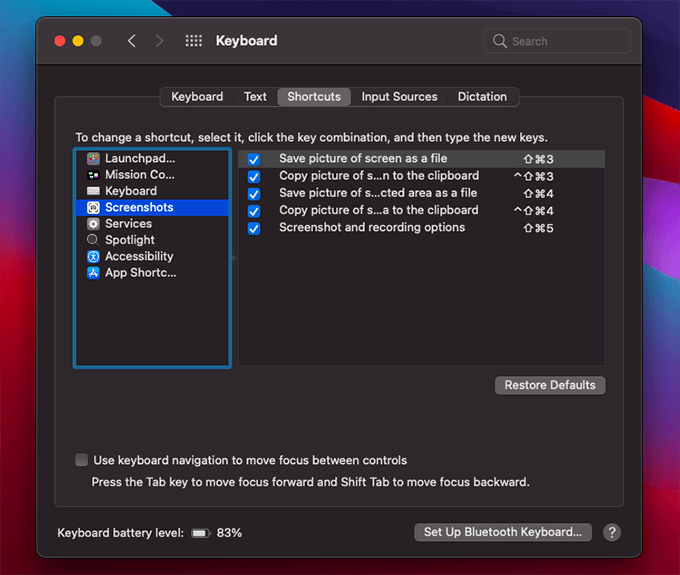
If you have trouble using the Screenshot app’s keyboard shortcuts, you must review them for inactive or incorrect key combinations.
1. Open the Apple menu and select System Preferences.
2. Select Keyboard.
3. Switch to the Shortcuts tab.
4. Select Screenshots.
5. Double-check the keyboard shortcuts and activate or modify them as needed.
5. Set Screenshot Save Location
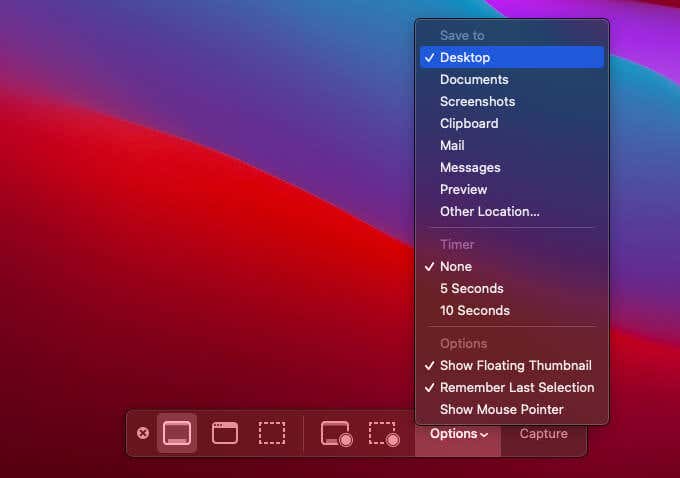
By default, the Mac saves screenshots to the desktop. However, if you can’t find your screenshots after taking them, you might have specified a different location previously. You should double-check that.
1. Press Shift+Command+5 to bring up the Screenshot app. Or, go to Finder > Applications > Utilities and open Screenshot.
2. Select Options on the floating toolbar.
3. You should see the current save location under Save to. You can pick an alternative destination from the list or choose another directory using the Other Location option.
6. Modify Save Location Permissions
If your screenshots still don’t appear on the desktop or the chosen save destination, you must check the directory’s read and write permissions.
1. Open Finder. Then, locate and control-click the save destination (e.g., Desktop).
2. Select Get Info.
3. Expand the Sharing & Permissions section.
4. Make sure to select Read & Write next to your Mac account name.
5. Additionally, make sure to uncheck the box next to Locked under the General section.
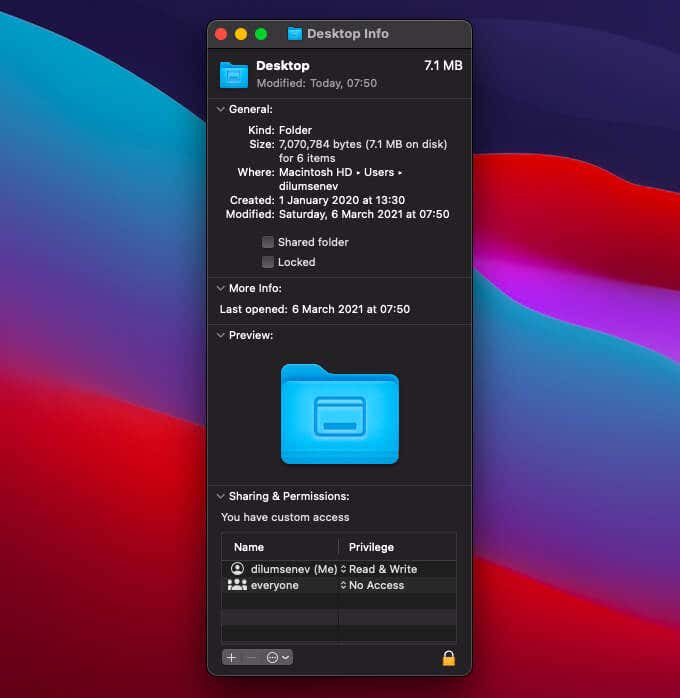
6. Close the Info pane.
If you had to make modifications in steps 4 or 5, your screenshots should save correctly going forward.
7. Check Third-Party Cloud Storage Services
Do your screenshots disappear from the desktop as soon as you take them? If you have a third-party cloud storage service installed on your Mac, it’s probably automatically moving them to its sync folder. Here’s how to stop that on OneDrive and Dropbox:
Disable Screenshot Backups in OneDrive
1. Select the OneDrive icon on the Mac’s menu bar.
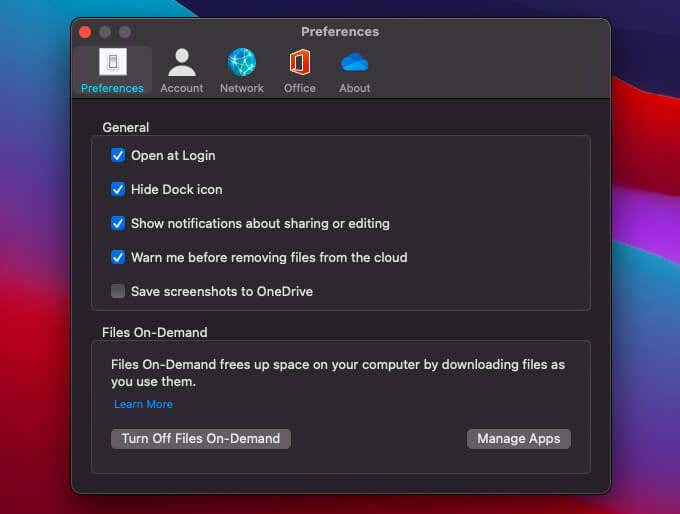
2. Select Help and Settings > Preferences.
3. Under the Preferences tab, uncheck the box next to Save screenshots to OneDrive.
Disable Screenshot Backups in Dropbox
1. Select the Dropbox icon on the Mac’s menu bar.
2. Select your profile portrait and choose Preferences.
3. Switch to the Backups tab. Then, uncheck the box next to Share screenshots and screen recordings using Dropbox.
8. Launch Your Mac in Safe Mode
Booting your Mac into Safe Mode often helps resolve system-related flaws that crop up randomly. If you continue to experience issues with the Screenshot app, you should do that now.
Depending on whether your Mac has an Intel or an Apple Silicon chipset, you need to follow one of slightly two different procedures to get into Safe Mode.
Macs With Intel Chips
1. Turn off your Mac.
2. Wait for 10 seconds. Then, hold down the Shift key and turn on your Mac.
3. Release the Shift key once you see the Apple logo.

Macs With Apple Silicon Chips
1. Turn off your Mac.
2. Wait for 30 seconds. Then, press and hold the Power button until you get to the screen with the startup disks.
3. Select the macOS startup disk.
4. Hold down the Shift key and select Continue in Safe Mode.
5. Release the Shift key.
Once your Mac boots into Safe Mode, try taking a screenshot. If that works, reboot your Mac normally and take another screenshot. In most cases, both the Screenshot app and its shortcuts should start to work again as usual.
9. Scan for Malware on Your Mac
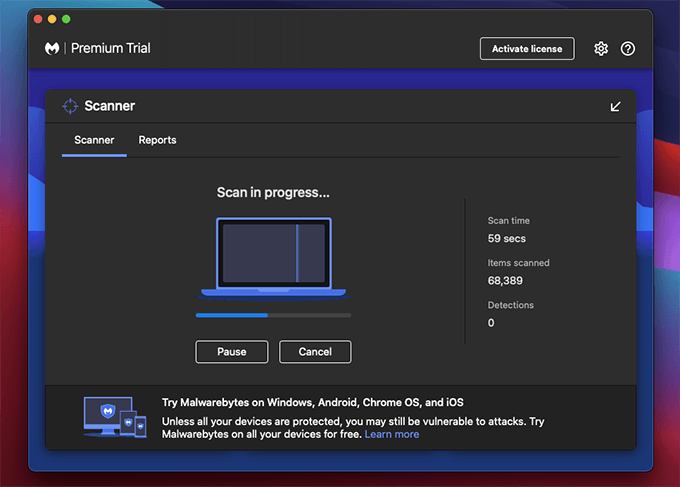
You might’ve heard about Macs being insusceptible to malware, but that’s not necessarily true. Malicious programs can hijack macOS functionalities and shortcuts, so you must rule that out if the Screenshot app still causes trouble.
Malwarebytes is a dedicated malware remover that can help you with that. Use it to perform a scan and check if it detects anything dangerous on your Mac.
10. Reset Your Mac’s NVRAM
The NVRAM (non-volatile random-access memory) on the Mac holds tiny amounts of miscellaneous data that can go obsolete and impede various functions in macOS. Hence, resetting it may fix the Screenshot app. You can, however, only do that on Macs with Intel chipsets.
1. Turn off your Mac and wait for 10 seconds.
2. Reboot your Mac but hold down the Option, Command, P, and R keys together at the same time.
3. Release the keys after your Mac plays the startup chime for the second time. If your Mac has an Apple T2 Security Chip, release the keys once the Apple logo shows up and disappears twice.
That should reset the NVRAM. For comprehensive step-by-step instructions, check out this post about resetting the NVRAM on your Mac.
You Can Take Screenshots Now
Screenshot-related problems on the Mac are typically easy to resolve, and the fixes above hopefully helped you with that. If a specific issue crops up repeatedly, the best way to rectify that is to install any new system software updates on the Mac as soon as they become available. You can also clear the Mac’s system cache and see if that makes a difference.
Besides Mac’s Screenshot app, a less convenient but native way to capture screenshots is to use the Preview app (select File > Take a Screenshot). You can also take a look at the top third-party snipping alternatives for the Mac.


