A Microsoft Teams meeting doesn’t always require you to activate your camera. However, if you want to switch it on and let everyone see you during a meeting, you must ensure the camera is working first.
If your camera isn’t working in Teams on your Mac, you will be faceless. To troubleshoot the problem, follow these steps.
1. Restart Microsoft Teams (or Your Mac)
If your Teams camera isn’t working on your Mac, try some of the more straightforward steps first to resolve the problem. The first (and simplest) step is to restart Teams and, if that doesn’t work, to restart your Mac.
A simple restart will clear active memory and often fix many short-term issues with apps, including your Teams camera not working on your Mac. Follow these steps to restart both Teams and your Mac, if necessary.
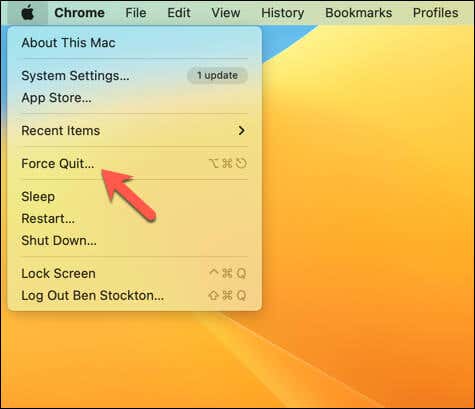
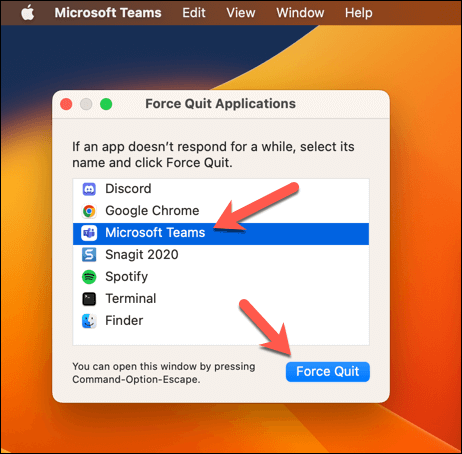
- If you need to force Teams to quit, press the Apple menu icon > Force Quit.
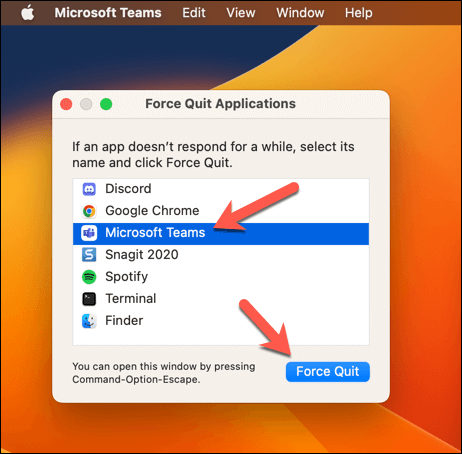
- Select the Microsoft Teams app in the Force Quit Applications window before pressing Force Quit.
- After quitting Teams, relaunch the app via the Launchpad, Dock, or the Applications folder in the Finder app.
- If your Teams camera still isn’t working after this, restart your Mac by pressing the Apple menu icon > Restart.
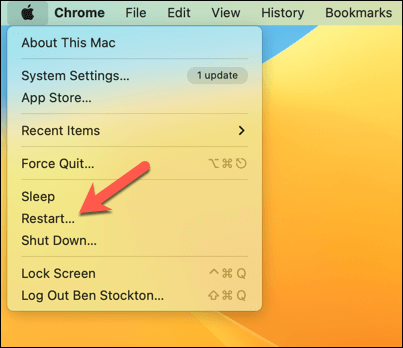
After the full restart, launch your Teams app again and check if your camera works.
2. Close Any Other Applications Using Your Mac Camera
If another application has access to your Mac camera, Teams won’t be able to push it out of the way—only one app can use the camera at any time. This can happen if you have another communication app open, like FaceTime.
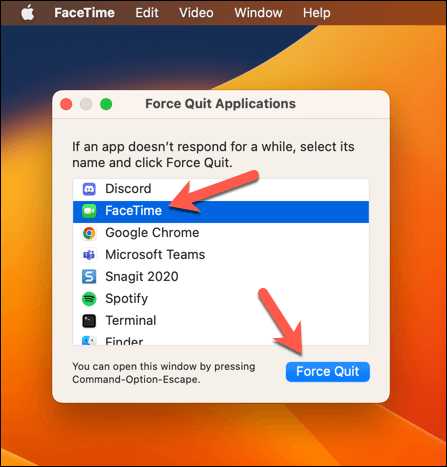
To resolve the problem, you’ll need to make sure any other applications with camera access are closed. You can use the Force Quit menu to force this to happen by pressing the Apple menu icon > Force Quit and choosing the application in the menu.
Once you’ve exited any other app with camera access on your Mac (either gracefully or by force), relaunch Teams to see if it resolves the camera issue.
3. Check for macOS and Microsoft Teams Updates
It’s always a good idea to keep your Mac up to date. The latest updates for macOS, as well as for Teams itself, can come with bug fixes for certain features (such as your camera) that previously prevented you from using it in Teams.
To check for new macOS updates, follow these steps.
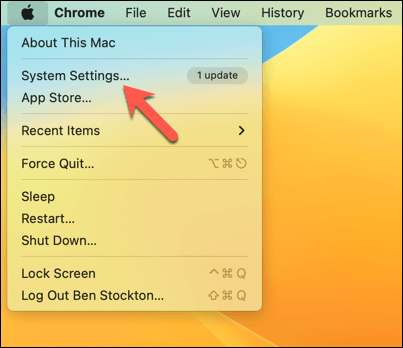
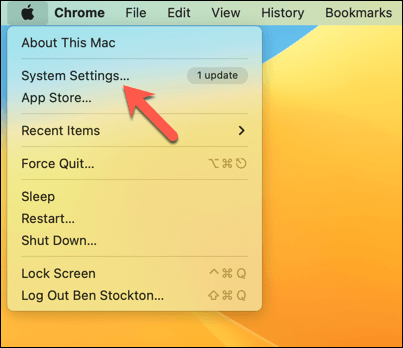
- Press the Apple menu icon and select System Settings.
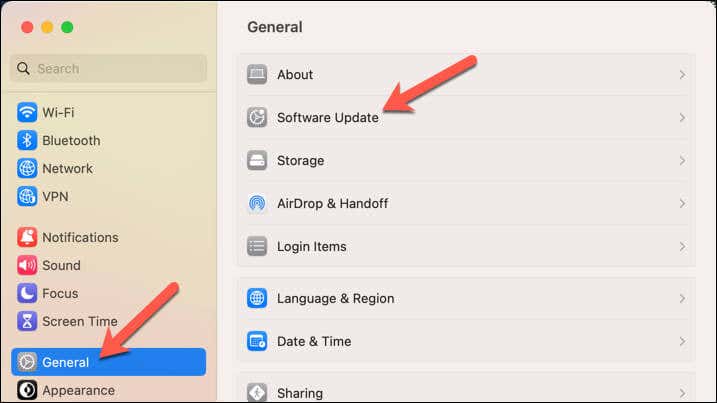
- In System Settings, press General > Software Update.
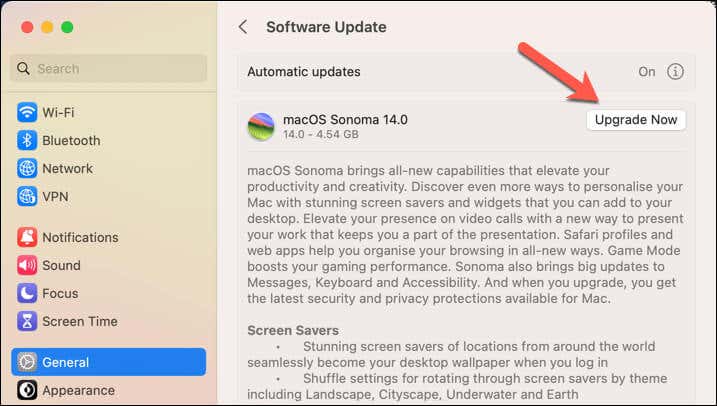
- If updates are available for you to install, press Update Now or Upgrade Now to begin the installation.
- Wait for the process to complete—this may involve your Mac restarting.
To check for new Microsoft Teams updates, follow these steps.
- Launch your Teams app via the Launchpad, Dock, or Applications folder in the Finder app.
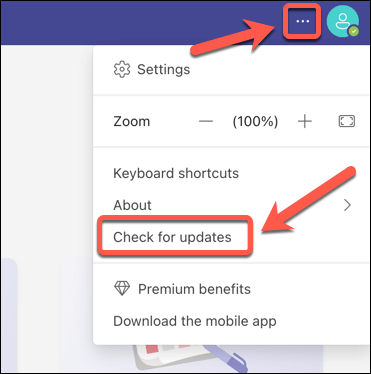
- Select the three-dots menu icon next to your profile picture in the Teams window in the top-right.
- Select Check for updates from the drop-down menu. If there are any updates available, they will be installed automatically in the background.
- If updates are installed, restart the Teams app to see if the changes resolve your camera issues.
4. Check if Microsoft Teams Has Permission to Access Your Mac Camera
Without the necessary permissions, Microsoft Teams can’t access the camera on your Mac. To resolve the problem, you must manually provide access to your Mac camera in the System Settings menu.
To do this, follow these steps.
- First, make sure to exit the Microsoft Teams app.
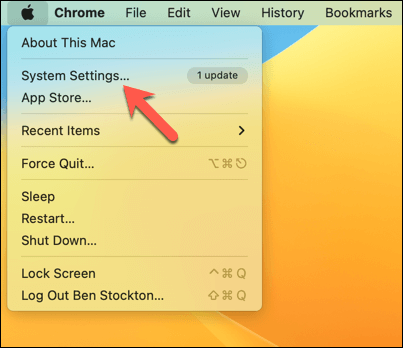
- Next, press the Apple icon on the menu bar and select System Settings.
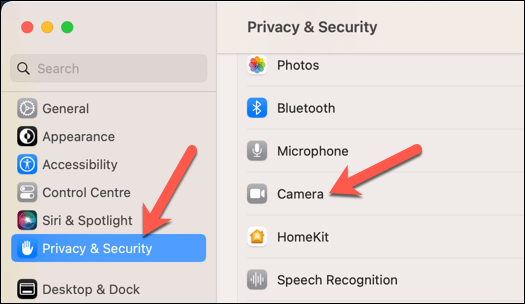
- In the System Settings window, press Privacy & Security > Camera.
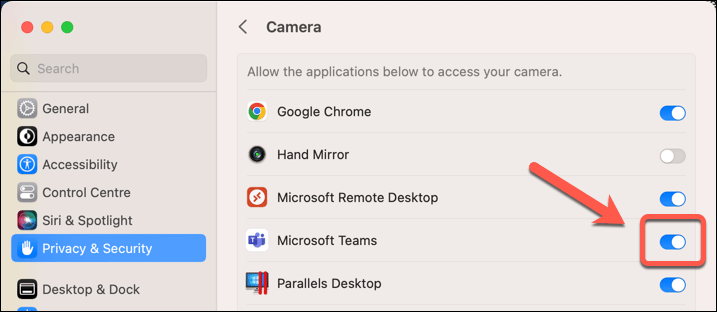
- Tap the slide next to the Microsoft Teams option, making sure the slider is active and in the on position.
- Exit System Settings and relaunch the Teams app to check that your camera has the necessary access.
5. Disable Screen Time Camera Restrictions
If you share your Mac with your family, you might have Screen Time restrictions restricting access to your camera. Screen Time is a helpful Mac feature designed to allow you to monitor and limit access to your Mac (or certain features or apps) at certain times.
This includes access to your camera. If your Mac camera is being blocked in Teams by Screen Time, you must turn off the restrictions using these steps.
- From the menu bar, press the Apple menu icon > System Settings.
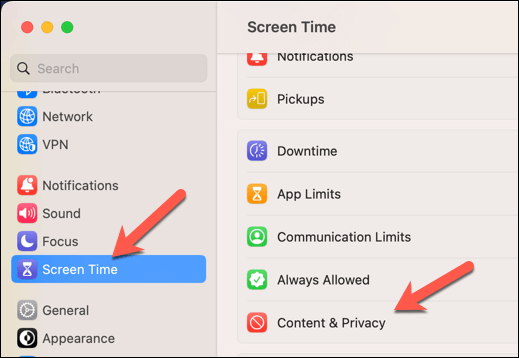
- In System Settings, select Screen Time.
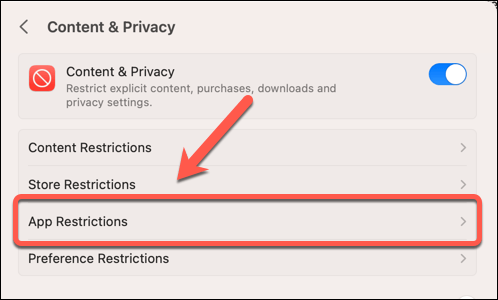
- Select Content & Privacy from the options. You may be prompted to enter your Screen Time passcode (if you’ve enabled one previously).
- In the Content & Privacy menu, select App Restrictions.
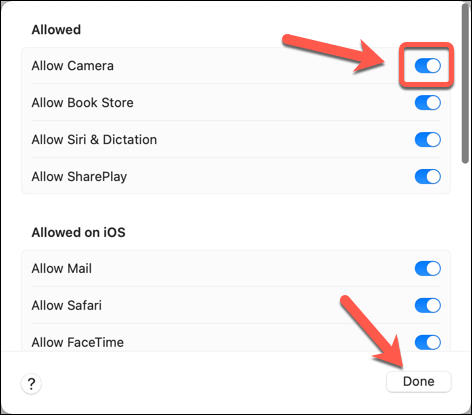
- In the Allowed section in the pop-up menu, make sure that the slider next to Camera is active and in the on position. If it isn’t, click it to enable it.
- Press Done to save the changes, then exit the System Settings menu.
- Relaunch Teams to see if the camera is working.
6. Check the Camera Works in Another Application
There’s a possibility that it isn’t Teams itself that’s at fault. You’ll need to rule out a potential OS or hardware issue by checking if your Mac camera is working in another application.
The easiest way to do this is to launch FaceTime on your Mac. This app is preinstalled and, assuming no permissions issues should allow you to see if your camera is working or not as soon as the app is launched.
Ensure that any other application with camera support (including Microsoft Teams) is closed before launching FaceTime. You can rule out a hardware fault if your camera works in the FaceTime app.
However, if it doesn’t work and has the correct permissions, you may need to consider whether your camera is faulty. This may require you to switch to a third-party webcam or to seek a repair from Apple itself for your device.
7. Force macOS to Restart Camera Services Using the Terminal App
While it’s more technical, you can try restarting the underlying macOS services responsible for accessing your camera via the Terminal app. The Terminal app allows you to run commands for system maintenance, including those that allow you to restart your Mac camera services.
This can fix any unusual problems with your camera more quickly than a restart. To do this, follow these steps.
- Make sure to quit Teams and any other applications using your camera.
- Next, open your Mac Launchpad, search for Terminal, and select it from the results list.
- In the Terminal window, type sudo killall VDCAssistant and press Enter. You may need to enter your administrator password for the command to run successfully.
- Next, type sudo killall AppleCameraAssistant and press Enter. If the command returns No matching processes were found, then your macOS version may not support this command. However, the first command should still force the camera service to stop and restart.
- If one or both of the commands run successfully, exit the Terminal window and re-launch the Teams app to ensure your camera is working again.
8. Reinstall Microsoft Teams on Your Mac
It might be time for a fresh start if you’re still having trouble with the Microsoft Teams camera not working on your Mac. Removing and reinstalling the Teams app could fix any corrupted settings or files preventing you from using your camera during a Teams meeting.
To reinstall Microsoft Teams on your Mac, follow these steps.
- Make sure that Microsoft Teams isn’t running. If it is, and it won’t close, press the Apple menu icon > Force Quit and ensure that the app is closed before you proceed.
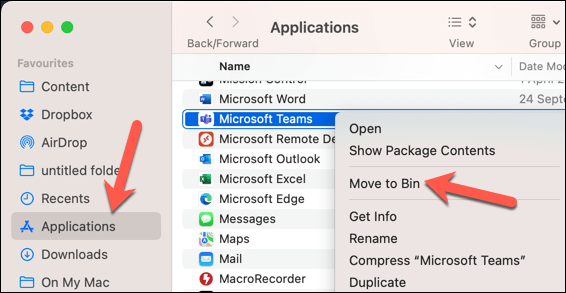
- Next, open the Finder app and select the Applications folder.
- Locate the Microsoft Teams app in the folder list.
- Right-click the Teams app and select Send to Trash (or Send to Bin in some locales).
- Next, right-click the Trash folder and select Empty Trash (or Empty Bin).
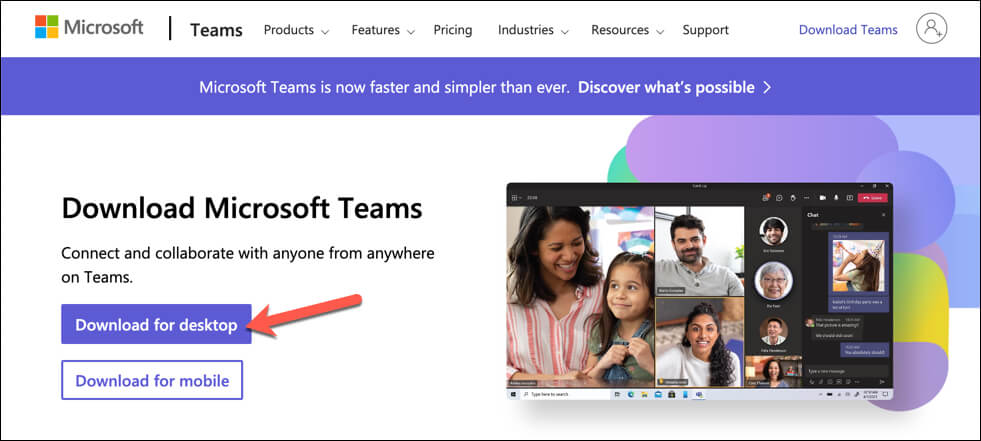
- Next, open the download page for Microsoft Teams and download the latest version for your Mac. Once the file finishes downloading, open it and follow the on-screen instructions to complete the installation.
- After installing Teams, launch the app via the Launchpad or the Applications folder in Finder and sign in, then check that your camera is working.

Troubleshooting Your Microsoft Teams Camera on Your Mac
Following the steps above, you should have a working Teams camera on your Mac. If you don’t, however, it could point to a hardware fault with your Mac camera. In this case, you should check your warranty and contact Apple for support and possible repair options.
Need a quick alternative? If you have an iPhone, you can use your iPhone as a webcam on your Mac.
[related_posts_by_tax posts_per_page="5"]
