Manage your files across multiple devices
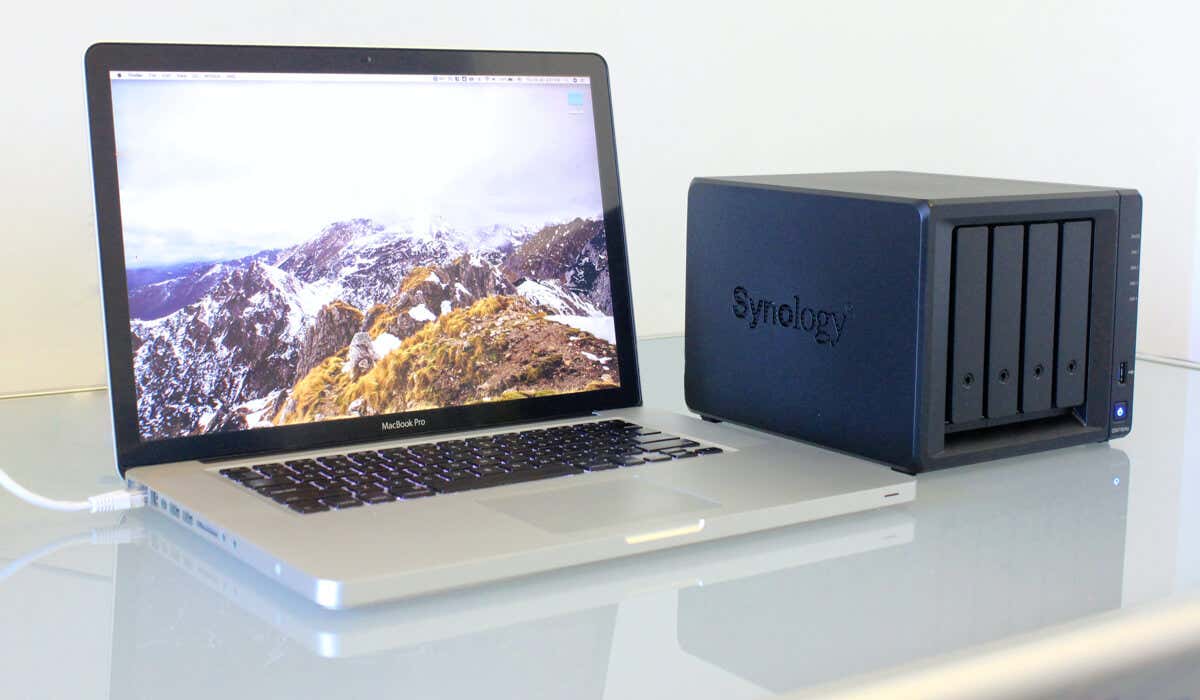
If you have a network drive or a Network Attached Storage (NAS) device, you can access it from your Mac.
Mapping a network drive in macOS lets you create a quick and easy shortcut to any shared folders and files on your network. This way, you don’t have to enter the network address whenever you want to access them.
If you want to know how to map a network drive in macOS, follow the steps below.
How to Map a Network Drive in macOS Using Finder
You can map a network drive in macOS using the built-in Finder app using the SMB network protocol.
This common protocol is supported on macOS, most Linux devices, and on Windows PCs. Mapping the drive will allow you to access it as if it was connected to your Mac directly.
- To map a network drive in macOS, first open Finder via your Dock icons or from the Launchpad.
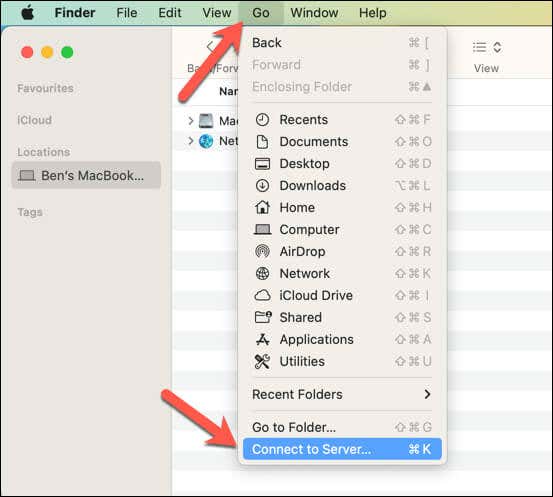
- In Finder, select Go on the menu bar and choose Connect to Server.
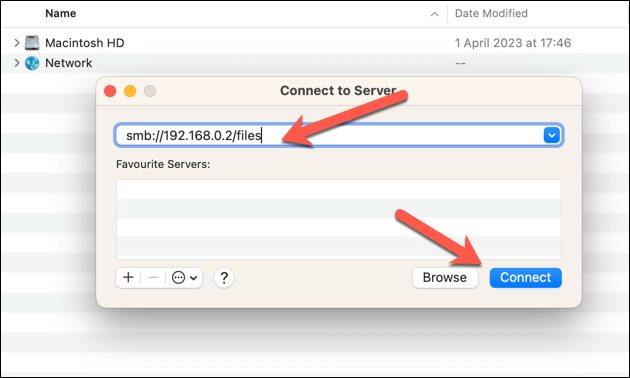
- Enter the network address of your drive in the Server Address field. It should start with smb:// followed by your drive’s IP address or hostname and the folder name (for example, smb://192.168.0.2/files or smb://nas-drive.local/files).
- Click Connect. If you’re prompted for a username and password, enter them and click Connect again. You may also need to enter the network area or workgroup of your drive if it’s required.
Once connected, you’ll see a new icon on your desktop and in the Locations section of the Finder sidebar. That’s your mapped network drive—double-click the icon to open and use the drive.
The drive will remain connected until your PC restarts, but you’ll need to repeat these steps to connect to it again afterward. Alternatively, follow the steps below to automatically map your drive after each restart.
How to Disconnect from a Mapped Network Drive in macOS Using Finder
If you no longer need to access your mapped network drive, you can disconnect from it using the Finder app quickly. Make sure to close and save any open files from the drive before proceeding, or you may risk data loss.
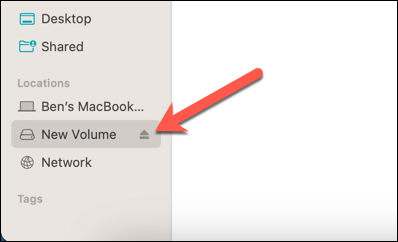
To disconnect from a mapped network drive in macOS, locate the drive in the Locations section in the sidebar, then press the Eject icon. Alternatively, right-click the icon of your mapped network drive on your desktop or in the Finder sidebar and choose Eject instead.
How to Automatically Map a Network Drive in macOS
If you want your mapped network drive to remain after you restart your Mac, you need to enable automounting. Then, your Mac will automatically connect to the drive when you log in.
Follow these steps to map a network drive in macOS Ventura and later.
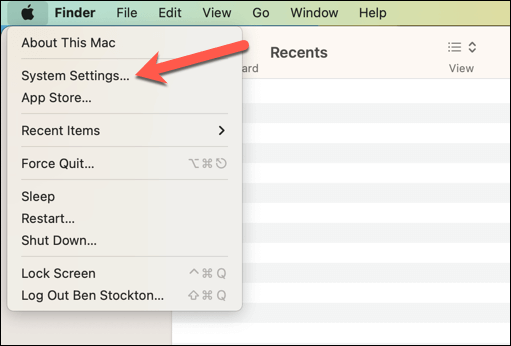
- Press the Apple menu icon and select System Settings.
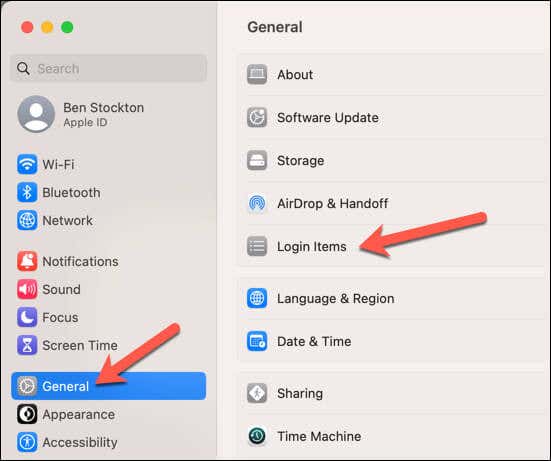
- In Settings, press General > Login Items.
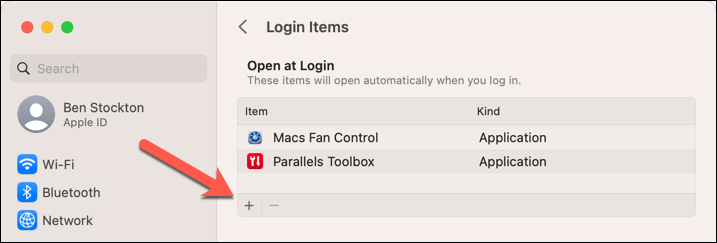
- Click the plus (+) button at the bottom and navigate to your mapped network drive.
- Select the drive and click Add or Open.
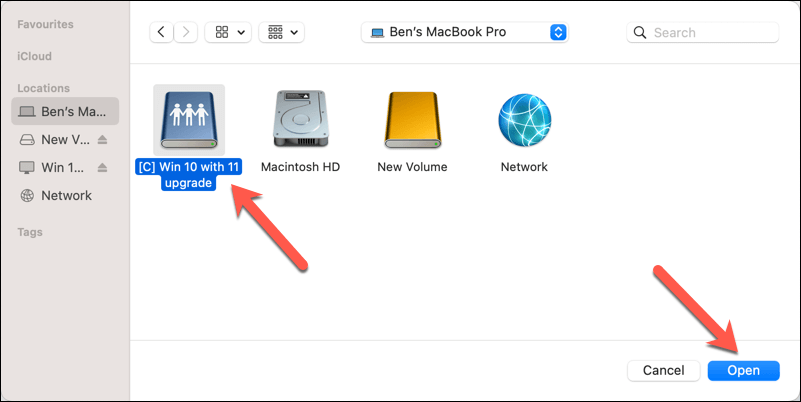
Your mapped network drive will now remain available and connected every time you log in to your Mac.
How to Map a Network Drive in macOS via the Terminal
You can also map a network drive in macOS using the Terminal app. This method allows you to use commands to connect and disconnect from your network drive quickly.
- Open Terminal from the Utilities folder in the Launchpad.
- Type sudo mount_smbfs //username:password@networkaddress/foldername /Volumes/foldername into the Terminal window and press Enter. Replace username, password, networkaddress, and foldername with your own values. For example, mount_smbfs //user:password@192.168.0.10/nas /Volumes/nas. This command will create a nas folder under /Volumes with the same name as your network drive and mount it there.
- To disconnect from your network drive, type umount /Volumes/foldername into the terminal and press Enter. Replace foldername with the name of your network drive.
How to Disconnect from a Mapped Network Drive via the Terminal
To disconnect from a mapped drive using the terminal, you can use the umount command. This command unmounts the folder corresponding to your network drive from the /Volumes directory.
To disconnect from a mapped drive using umount, follow these steps.
- Open the Terminal app via the Utilities folder in the Launchpad.
- In the Terminal window, type ls /Volumes and press Enter to list all the mounted drives on your Mac.
- Find the name of your network drive in the list. It should be the same as the last part of your network address (for example, nas).
- Type umount /Volumes/nas to disconnect from your network drive, where nas is the name of your network drive. If this doesn’t work, use sudo to force the command to run with the necessary privileges (eg. sudo umount /Volumes/nas).
- Press Enter and enter your password (if prompted to do so).
- If this doesn’t work, type diskutil unmount /Volumes/nas into the Terminal window and press Enter. You may also need to use the sudo command here (eg. sudo diskutil umount /Volumes/nas).
Troubleshooting Tips for Mapping a Network Drive in macOS
Struggling to connect to your networked drives on a Mac? If you encounter issues trying to map a network drive in macOS, here are some tips to help you fix them:
- Ensure your Mac and your network drive are on the same network and have internet access.
- Check if your network drive supports the SMB protocol, which macOS uses to connect to shared folders and files. Most modern NAS devices support SMB, as do most operating systems.
- Verify that you have entered the correct network address, username, and password to access files on your network drive.
- If you can’t find your network drive in Finder, try using its IP address instead of its hostname (for example, smb://192.168.0.2 instead of smb://nas-drive.local).
- If you have a firewall or antivirus software on your Mac or your network drive, ensure they are not blocking SMB connections.
Managing Files on a Network Using Your Mac
If you want to manage your files across multiple devices, you can use a network drive. Mapping a network drive in macOS using the steps above is a convenient way to access these shared folders and files across your network.
Once you’ve set up your network drive, you can move your files to or from it. You can also use Google Drive on your Mac as an alternative to local or network storage to save your essential files.

