If one of these doesn't work, call Apple
You’ll find the Touch Bar—a mini OLED display— sitting above the keyboard on new-generation MacBook Pros. We have published a detailed guide explaining everything you need to know about the Touch Bar and how you can customize it according to your preference. This time, we’ll walk you through what to do when the Touch Bar malfunctions or stops working.
When a MacBook’s Touch Bar fails to display controls and quick-access shortcuts, or it just won’t respond to touches, the problem is almost always due to temporary software issues. Thankfully, these issues are easily fixable and will only take minutes to resolve.
In this article, we’ve put together seven (7) troubleshooting solutions that’ll help restore your Touch Bar back to normalcy when it’s not working.
1. Force Stop App
Does your MacBook fail to respond or display dynamic controls when you use a particular app? Force stop the application and launch it again.
There are two ways to force stop an app on Mac: using the Force Quit tool or the Activity Monitor.
Force Stop App on Mac Using the Force Quit Tool
Click the Apple logo on the menu bar and select Force Quit.
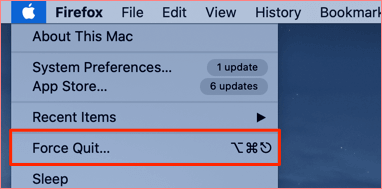
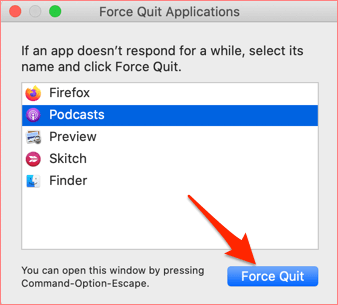
A faster way to launch the Force Quit window is using this keyboard shortcut: Command + Option + Escape.
Select the app that’s causing the Touch Bar failure and click the Force Quit button.
Force Stop App on Mac using Activity Monitor
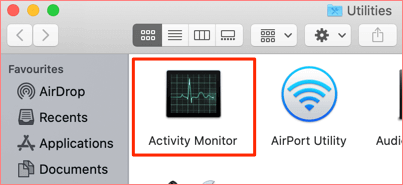
- Use the Command + Shift + U shortcut to launch the macOS Utilities folder and double-click on Activity Monitor.
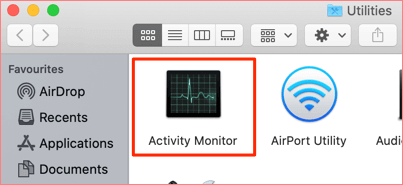
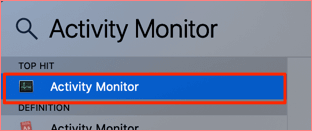
Alternatively, launch Spotlight Search using Command + Space bar and type activity monitor in the search box. Double-click on Activity Monitor in the search results.
- Select the causal app and click the x icon at the top-left corner of the Activity Monitor window.
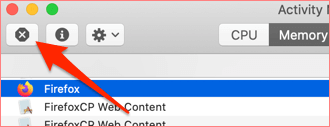
- Click Force Quit to close the app.

Should the Touch Bar remain unresponsive when you relaunch the application, it’s possible that the app has some bugs. Go to the app’s settings menu or visit the App Store to check if there’s an update available for the app.
You should contact the app developers if the app continues to crash your Mac’s Touch Bar.
2. Refresh Control Strip
The Control Strip is the expandable region on the right side of your MacBook’s Touch Bar. It houses the controls for system-level tasks — the Siri button, volume control button, mute button, brightness control, etc.

If the controls in the Control Strip are unresponsive or not displayed on the Touch Bar, try refreshing the Control Strip.
Refresh the Control Strip via Activity Monitor
You can refresh the Control Strip by force-closing the process in the Activity Monitor. Doing that will prompt macOS to clear the Control Strip from your Mac’s memory and fix issues causing it to malfunction.
1. Use the Command + Shift + U shortcut to launch the macOS Utilities folder and double-click on Activity Monitor.
2. Type control strip into the search bar.
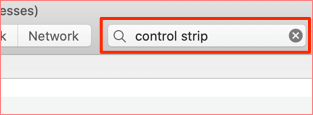
3. Select Control Strip in the results and click the x icon at the top-left corner.
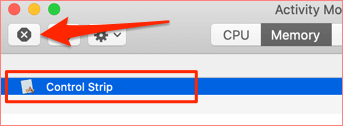
4. Click Force Quit to close the process.
Refresh the Control Strip via Terminal
1. Launch the macOS Utilities folder using Command + Shift + U and double-click on Terminal.
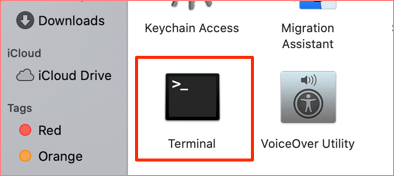
2. Paste the command below into the Terminal console and press Return.
killall ControlStrip
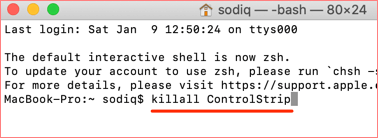
The Control Strip section of the Touch Bar will go blank and immediately come back on. If the Control Strip still doesn’t work, proceed to the next section to refresh the entire Touch Bar.
3. Refresh Touch Bar
If the Touch Bar is blank, unresponsive, or, not working for all applications, refreshing it should fix the problem. When you refresh your MacBook’s Touch Bar, you’re simply clearing the memory used by the Touch Bar. This is similar to deleting an app’s temporary files on your smartphone.
There are two ways to refresh the Touch Bar on MacBooks. You can either do that using the Activity Monitor or Terminal. Both methods involve shutting down and restarting the Touch Bar. We’ll show you how to do it both ways in the next section.
Refresh Touch Bar Using the Activity Monitor
1. Use the Command + Shift + U shortcut to launch the macOS Utilities folder and double-click on Activity Monitor.
2. Type touchbar (without space) into the search bar.
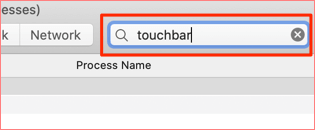
3. Click on TouchBarServer in the results and click the x icon at the top-left corner.
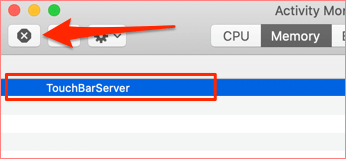
Note: This process is labeled “Touch Bar agent” on MacBooks running macOS Sierra (version 10.12) or older.
3. Click Force Quit to close the TouchBarServer process.

macOS will close the Touch Bar, assign new resources to the TouchServer, and restart the process. The Touch Bar will go blank for a second and come back on.
Refresh Touch Bar Using Terminal
1. Use the Command + Shift + U shortcut to launch the macOS Utilities folder and double-click Terminal.
2. Paste the command below into the Terminal console and press Return.
sudo pkill TouchBarServer
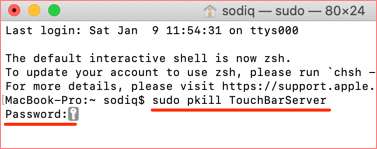
You may be required to provide your MacBook’s password. Type the password and press Return to proceed.
Note: For MacBooks running Mac OS Sierra (version 10.12) or older, paste the command pkill Touch Bar agent into the Terminal console.
4. Check Touch Bar Display Settings
macOS lets you customize the controls, buttons, and shortcuts on the Touch Bar. If you don’t find some buttons or controls on your Touch Bar, make sure you have the correct display configurations set for your Touch Bar.
Go to System Preferences > Keyboard and tap the Touch Bar shows drop-down button.
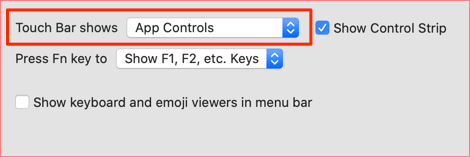
By default, the Touch Bar will display the App Controls but you can change that to Quick Actions, Spaces, Function Keys, or Expanded Control Strips.
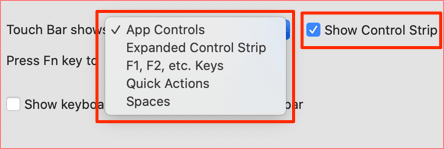
Make sure you also check the Show Control Strip box.
5. Restart Your MacBook
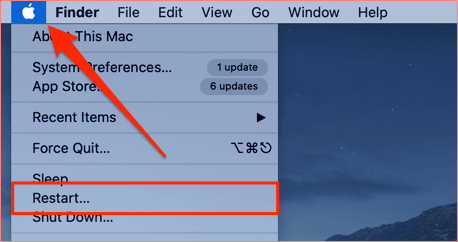
If the Touch Bar isn’t working after trying all the solutions above, restart your MacBook a reboot. Tap the Apple icon on the menu bar and click Restart.
6. Repair Your Mac’s Drive
The Touch Bar may malfunction if there’s an issue with your Mac’s drive. Follow the steps below to use the macOS Disk Utility tool to scan your drive for potential errors and corrupted files.
You’ll find the Disk Utility tool in the Utilities folder (Finder > Application > Utilities or use the Command + Shift + U shortcut).
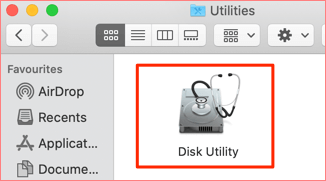
Launch the tool and click the First Aid icon.
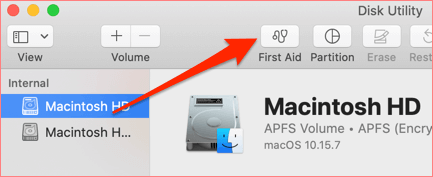
Click Run to proceed.

This will start a verification process that may last for several minutes or hours. If Disk Utility detects any error, click the First Aid button in Disk Utility again to repair the disk.
7. Update macOS
Initial macOS releases are often bug-ridden and sometimes cause certain MacBook components to malfunction. Make sure your Mac is up-to-date and running a stable public release. Head over to System Preferences > Software Update and install any update available for your PC.
Contact Apple Support
If your MacBook’s Touch Bar isn’t working due to a software issue, we’re confident that at least one of these troubleshooting tips will resolve the problem. However, if the Touch Bar continues to malfunction, the problem could be hardware-related. Contact Apple Support or visit an authorized Apple Service Provider near you to get your device checked for hardware damage.


