Almost every Mac on the market comes with a built-in camera, allowing you to take quick pictures, stage video calls over FaceTime or Zoom, or show your quirky side using the filters and effects in the Photo Booth app. You just need to turn your Mac camera on and get started—no extra software or additional setup is necessary.
A broken camera on your Mac means losing your window to the outside world. Rather than lose the ability to make video calls or take selfies, you may be able to fix your Mac camera using a few tricks and tips that aren’t so well known. If your Mac camera is not working, then here are some solutions you can try to fix the problem.
Check the Camera Lens
The obvious answer is sometimes the best. Putting a sticker over your Mac’s camera might be a sensible move if you prefer to avoid snoopers, but a blocked camera is a useless camera and could be why your Mac camera is not working, displaying a black feed instead.
Before you try any other fix, make sure to check that there isn’t anything in the way of your camera lens. You won’t be alerted if stickers or other objects are in the way—the camera feed will simply show black.
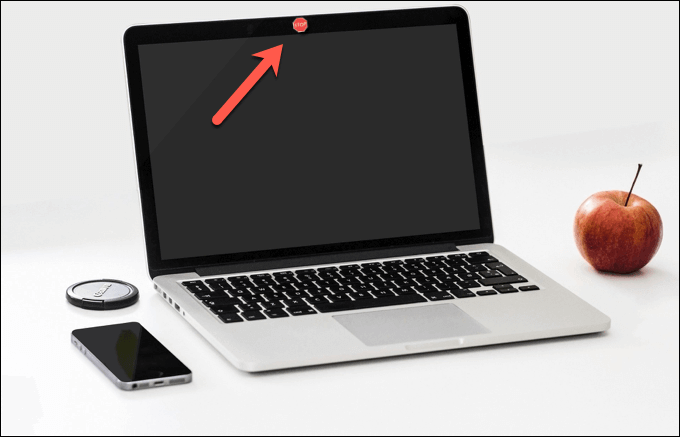
If there is something in the way of your camera feed, be sure to remove it before you try to use your camera. However, if your camera feed stays black, and there’s nothing in the way, you’ll need to try one of the following fixes instead.
Use Another App
Mac users don’t need another app to use their webcam, as the built-in Photo Booth app should allow you to take pictures and record videos. However, if this app (or another app, like Facetime) isn’t working, then check that the problem is specific to your camera by trying another app.
This could be another Apple app (Facetime over Photo Booth, for instance) or a third-party app. Apps like Hand Mirror give you quick access to your camera feed from the menu bar, while other apps like Skype use your camera and microphone feed to offer video calls, assuming your microphone is set up correctly.
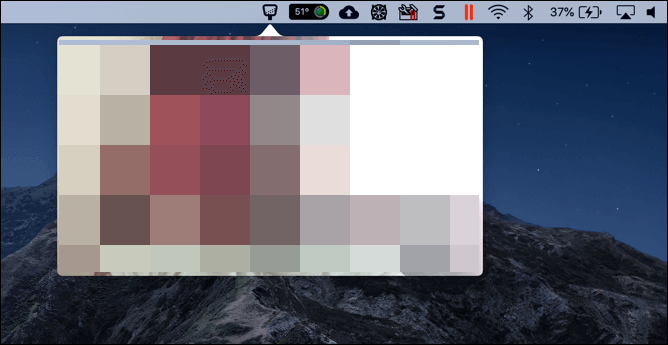
Trying different camera apps will help you determine if your camera has trouble with a certain app, or if it points to a wider software or hardware issue. Trying another app can also help to force priority over which app has access to your camera, as only one app should be able to access your Mac camera feed at once.
Confirm App Permissions in System Preferences
Newer versions of macOS limit access to your camera feed automatically. This prevents snoopers, badly-designed apps, and rogue websites from accessing your camera without your explicit permission.
While apps like Photo Booth and Facetime will typically be granted camera access automatically, third-party apps like Skype or Zoom won’t. You can check your camera permissions in the System Preferences app.
- To open System Preferences, select the Apple menu icon in the top-left corner. From the menu, select the System Preferences option.
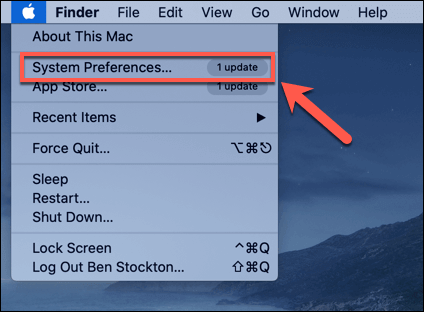
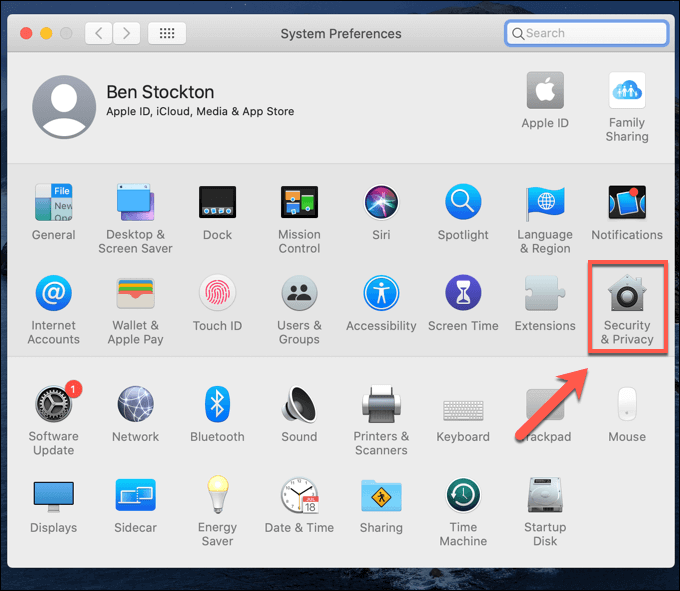
- In the System Preferences window, select the Security & Privacy option.
- In the Privacy tab of the Security & Privacy menu, select the Camera option on the left. On the right, a list of apps with possible camera access will be listed. Apps with permission to use your camera will have the checkbox next to their names enabled, so make sure to enable the checkbox next to any camera apps you wish to use here. You may need to select the lock icon at the bottom of the menu to authenticate first.
Once you’ve enabled the permissions for your third-party camera app in the System Preferences menu, close and reopen the app to ensure that camera access has been granted successfully.
Check Parental Controls in Screen Time
Screen Time is a set of parental controls in macOS that allows you to limit the features, apps, and services that can be used by its users. This is perfect for parents who might want to limit camera access, but it works both ways. If you’ve blocked the camera and forgotten about it, then you won’t be able to use your camera either.
- To check whether camera access is blocked by Screen Time, you’ll need to open System Preferences. From the Apple menu on your menu bar, select the System Preferences option.

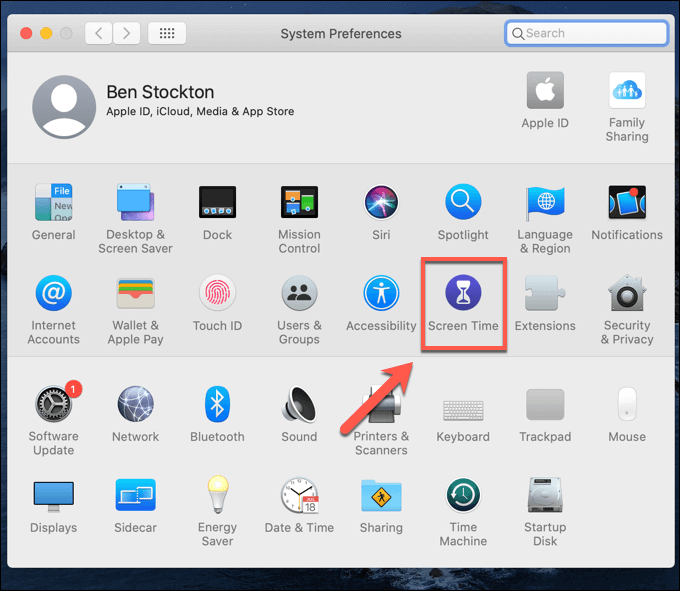
- In System Preferences, select the Screen Time option.
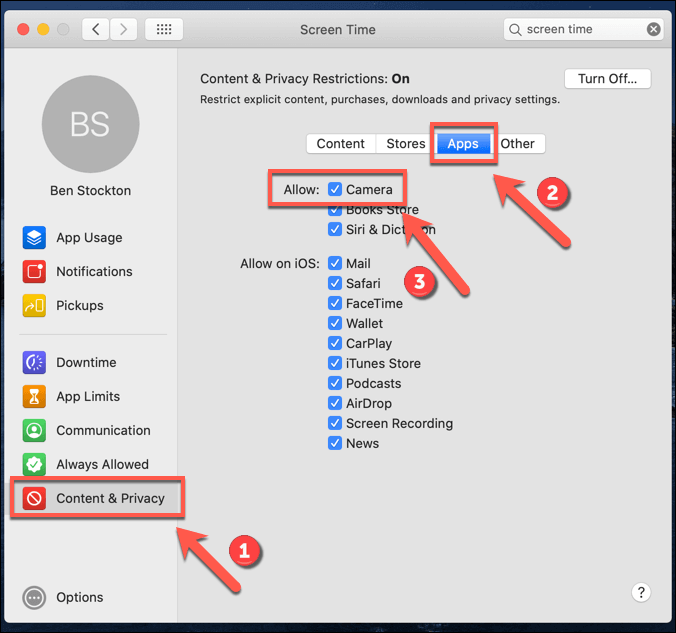
- Select Content & Privacy from the left-hand menu in the Screen Time menu. Under the Apps tab, make sure that the checkbox next to the Camera option is enabled. If it isn’t, you won’t be able to use your camera at all (even with system apps).
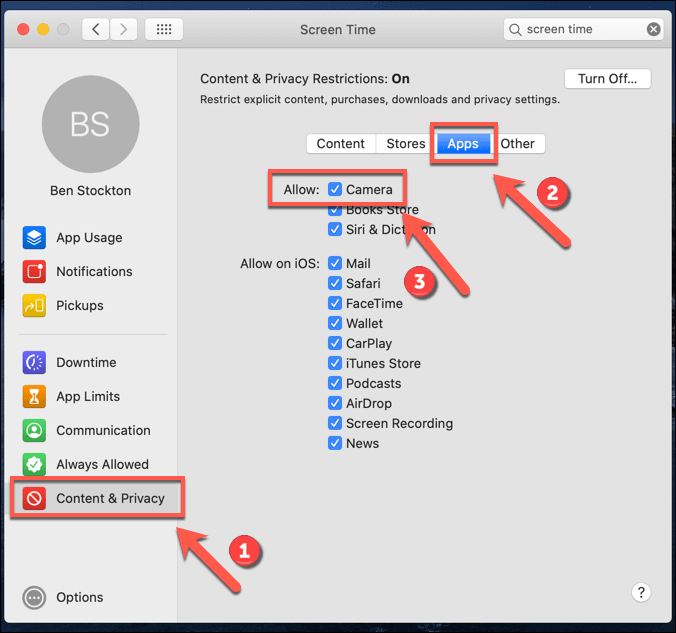
Once access to your camera has been restored in Screen Time, you may need to close and reopen the camera app for it to work correctly.
Restart Essential Camera System Processes
The internal Mac camera is controlled by system processes that run in the background of macOS. Restarting these processes can sometimes fix software conflicts or issues that can cause the Mac camera to stop working.
- To do this, you’ll need to open the Terminal app from the Launchpad. In the terminal window, type sudo killall VDCAssistant. If you’re running an older version of macOS, you may need to type sudo killall AppleCameraAssistant too. If you’re asked for your system password, type this in to ensure the commands successfully run.

Once these processes have stopped, you can restart them manually by opening one of the built-in Mac camera apps like Photo Booth.
Check Your Camera Is Detected Properly
With most of the potential software fixes exhausted, you may need to look at whether your internal camera itself is working. If your Mac can’t detect it, then this could point to a hardware issue, and you may need to seek a repair.
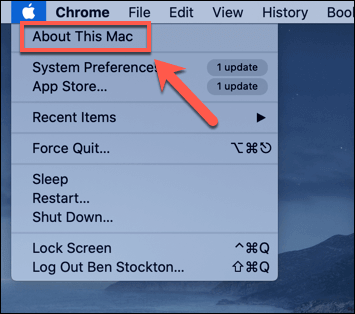
- To check whether your internal Mac camera is being detected, select the Apple menu icon in the top-left. From the menu, select the About This Mac option.
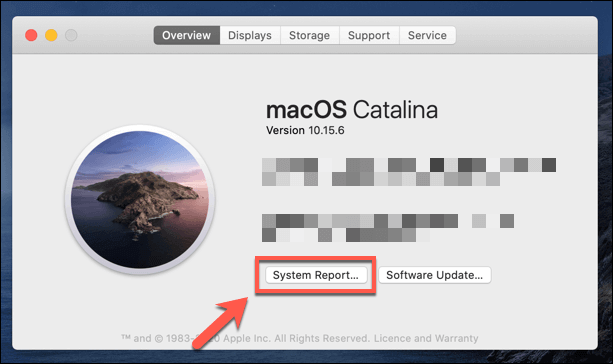
- In the Overview tab, select the System Report button.
- In the System Information menu, select Camera, listed under the Hardware tab. On the right, you should see information about your internal camera listed, including the type of camera and the model ID number.
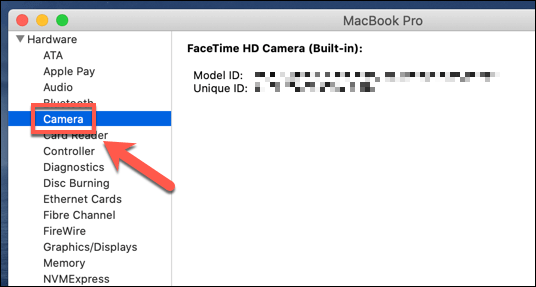
If the information isn’t listed, then your camera hasn’t been detected, and you’ll need to contact Apple for repair.
Troubleshooting Mac Camera Issues Further
The steps above should help get your Mac camera working properly again. Most of the time, issues with a Macbook camera are down to permissions, with major web browsers blocking camera access by default. If you’ve enabled these permissions in the System Preferences menu, then you’ll need to troubleshoot your issues further.
If nothing else works, it could point to a deeper software problem, or even a hardware fault, so try resetting your PRAM and SMC first. If that fails, try resetting your Mac to restore it to factory settings and remove any conflicting apps or services, but don’t forget to try using a USB webcam to see if your hardware is faulty first.
[related_posts_by_tax posts_per_page="5"]