Struggling with your iPhone’s email functionality can be a real headache, especially when you’re trying to send an important message and it just won’t go through. If you’re facing issues with your iPhone not sending emails, you’re not alone. This common problem can stem from a variety of issues, ranging from incorrect settings to network-related troubles.
In this article, we’ll explore 10 practical fixes that can help resolve this frustrating issue. Whether it’s adjusting your settings or simply restarting your device, we have you covered with straightforward solutions to get your email back on track.
1. Check Your Internet Connection
Sometimes the solution to your Mail app not sending emails is as simple as a faulty or lagging internet connection. So, before moving to advanced troubleshooting, check the active network connection on your device.
Make sure your internet is working by trying to open any website. You can also switch from Wifi to mobile data, or vice versa. If your internet connection is slow, and you’re trying to send a large file via email, the Mail app might display an error.
2. Enable Mobile Data for Mail App
Did you know iOS allows you to set up a mobile data connection for each app on your iPhone? Perhaps you disabled mobile data for the Mail app. If this is the case, just enable it back. Here’s how:
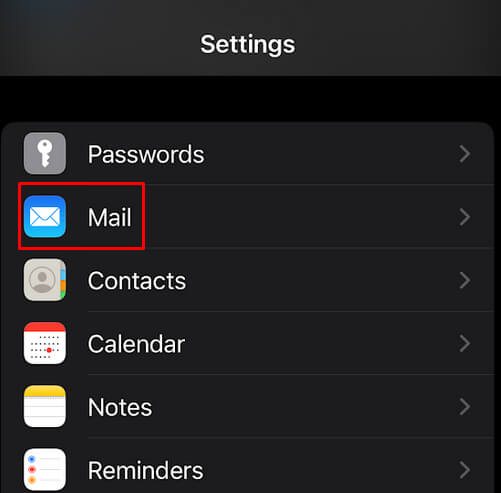
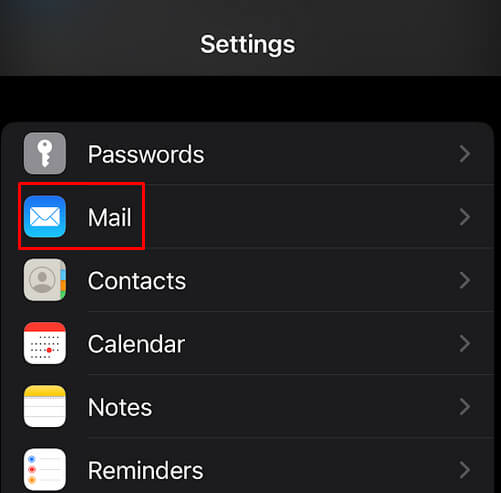
- Launch the Settings app and scroll down until you find Mail.
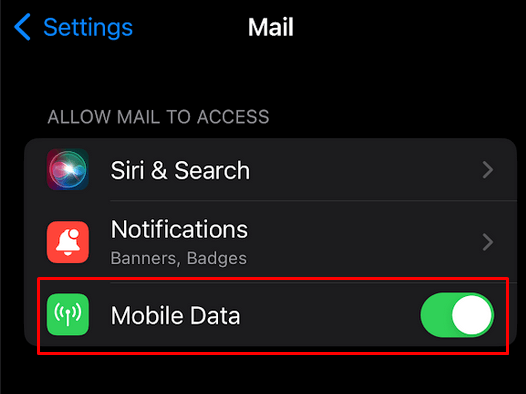
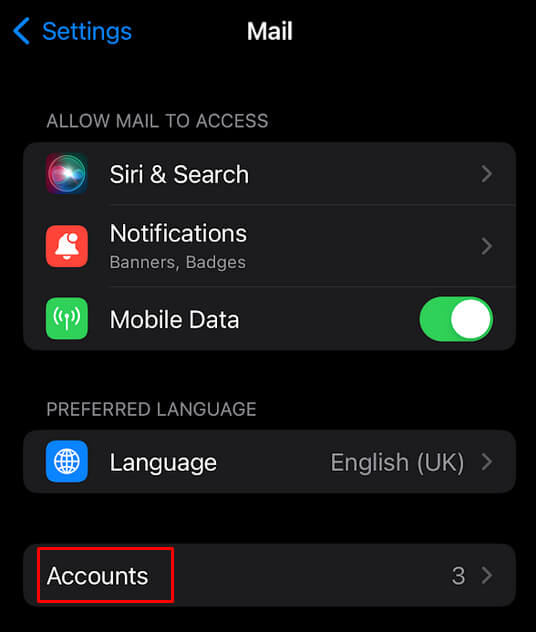
- Tap the switch next to the Mobile Data option to enable it.
- Exit Settings and see if you can send emails now.
3. Change the Default Email Provider
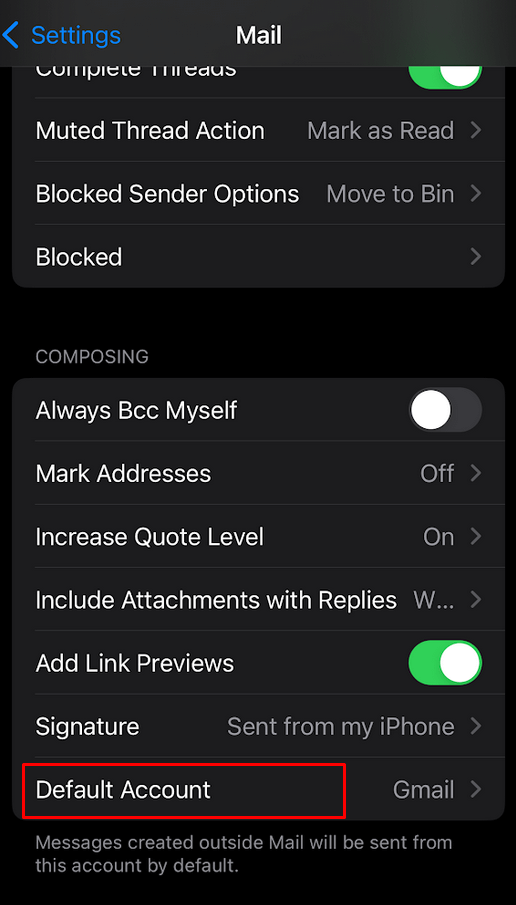
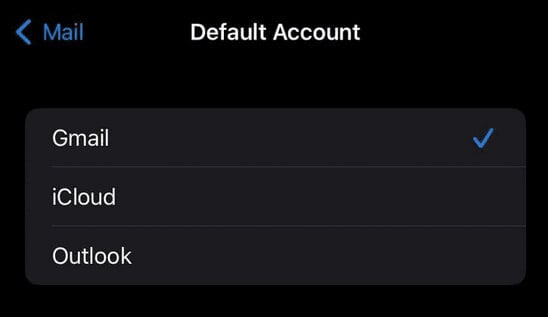
iPhone’s Mail app is compatible with all the major mailing services such as Gmail, Outlook, and Yahoo. If you’re experiencing trouble when sending emails from Gmail, try switching to Yahoo, or Outlook and see if this solves the issue. It could be that the fault is with the service provider, and not your device. Once you find which email provider works the best, you can set it as default on your iPhone.
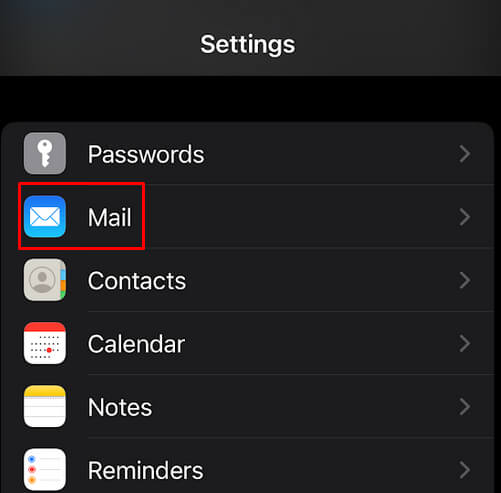
- Go to Settings and scroll down until you find Mail.
- Scroll down to find the Default Account option and tap it.
- Select your chosen email provider from the next menu.
4. Delete and Add Email Account Again
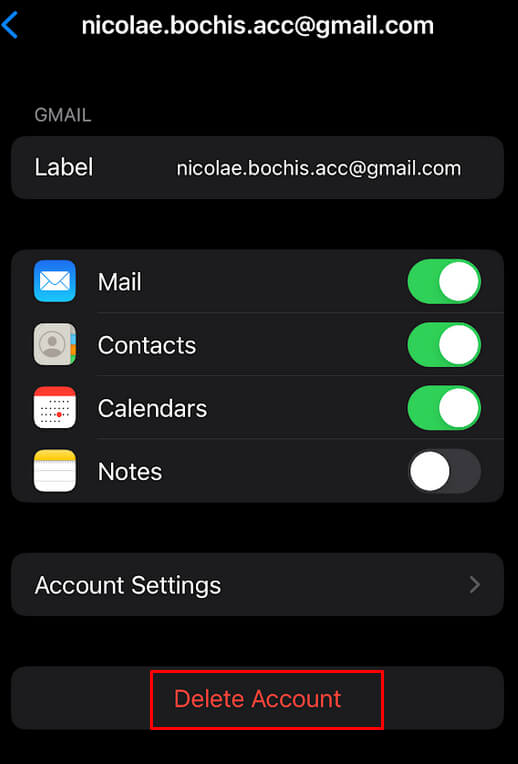
If you notice you’re having trouble sending emails from a specific account on the Mail app, you should try removing that account and adding it again. This might include changing your Gmail, Yahoo, or Outlook password too. To enable the email function again, the Mail app will ask you to authorize your account. Here’s what you need to do:
- Go to the Settings on your iPhone.
- Tap Mail to enter the Mail app menu.
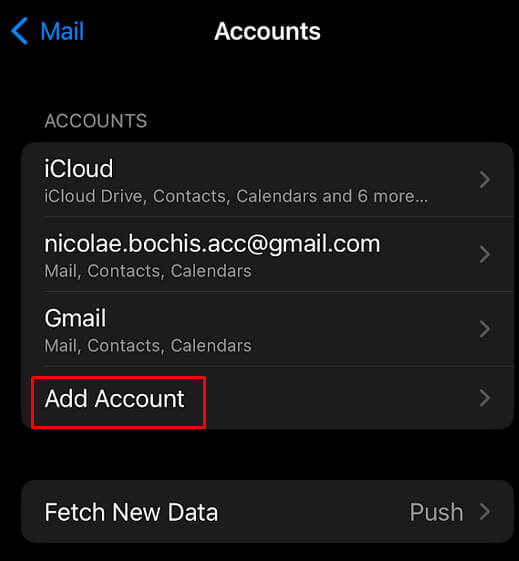
- Select Accounts and then tap the email account that’s not sending emails.
- Select Delete Account and confirm it.
- Go back to the Accounts and select Add Account.
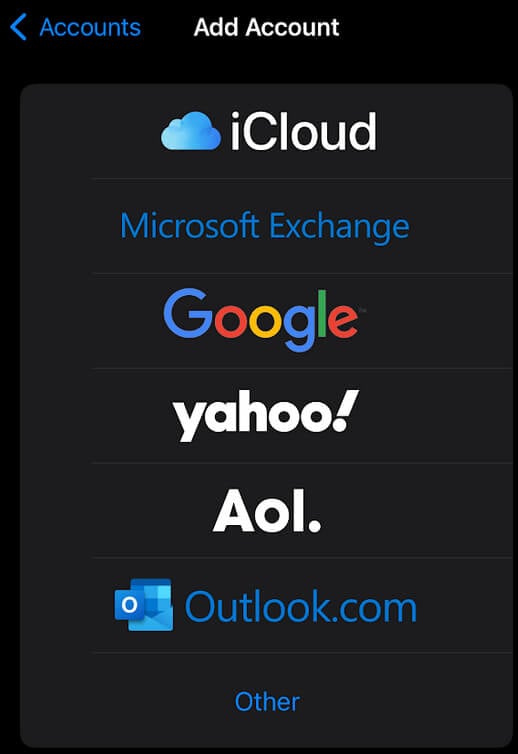
- Select your email provider and provide your login details.
Now that you added the account again, try sending an email and see if this solved the issue for you.
5. Reset iPhone Network Settings
One of the reasons why your Mail app won’t send any emails is the incorrect network settings on your iPhone. If this is the case you’ll have to reset network settings. Don’t worry, by doing this you won’t lose any data stored on your Mail app or your device.
Follow these steps to reset the iPhone’s network settings:
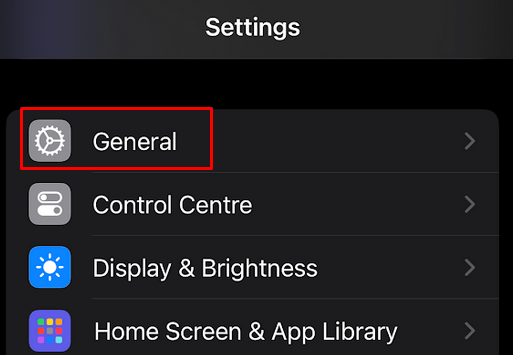
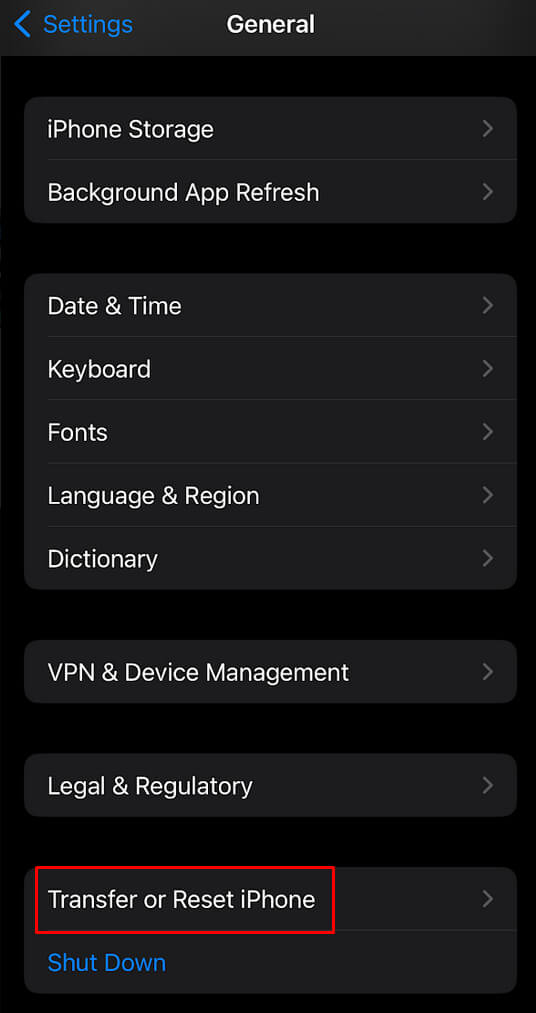
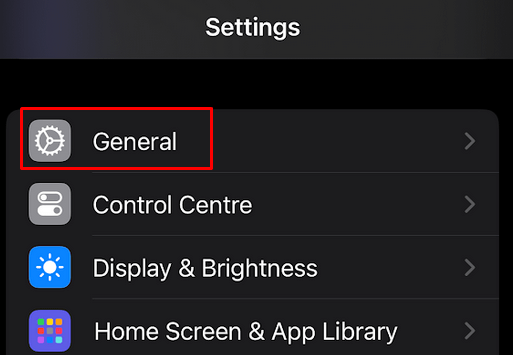
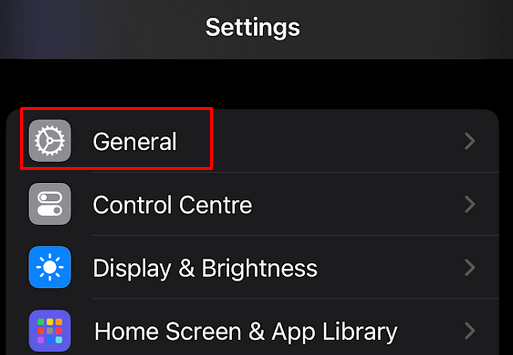
- Launch Settings and tap General.
- Scroll down and select Transfer or Reset iPhone.
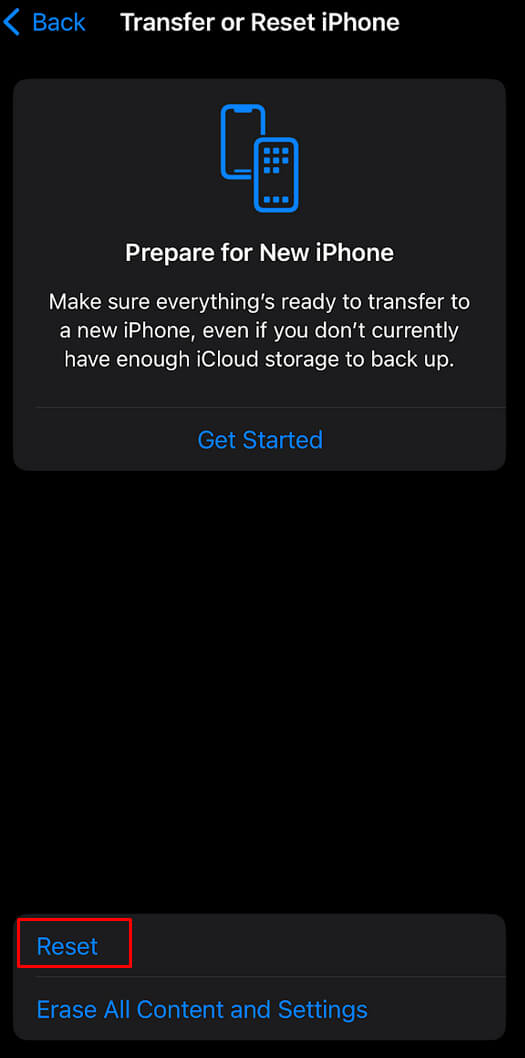
- Tap Reset.
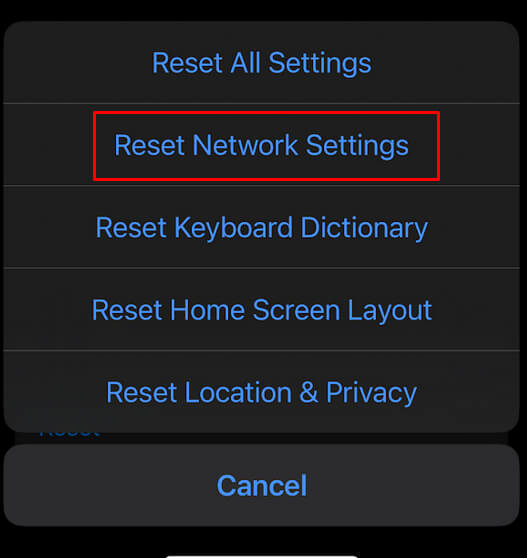
- Select Reset Network Settings and confirm you want to perform this action.
And that’s it. You can go back to the Mail app and try sending an email.
6. Check Your Mail’s Storage
No matter what email provider you’re using, they never offer unlimited storage. Google, for example, offers 15GB of Gmail storage for free, and Gmail shares this storage with Google Drive and Photos. Outlook offers only 5GB of storage for free, and if you want, you can purchase more.
It’s possible that you can’t send or receive emails via iPhone because you run out of email storage. If you suspect this is the case, check Gmail or Outlook storage space with the steps described below:
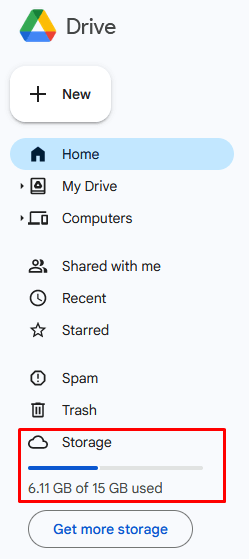
If you’re a Gmail user go to Google Drive on the web and look at the side menu to find available storage space.
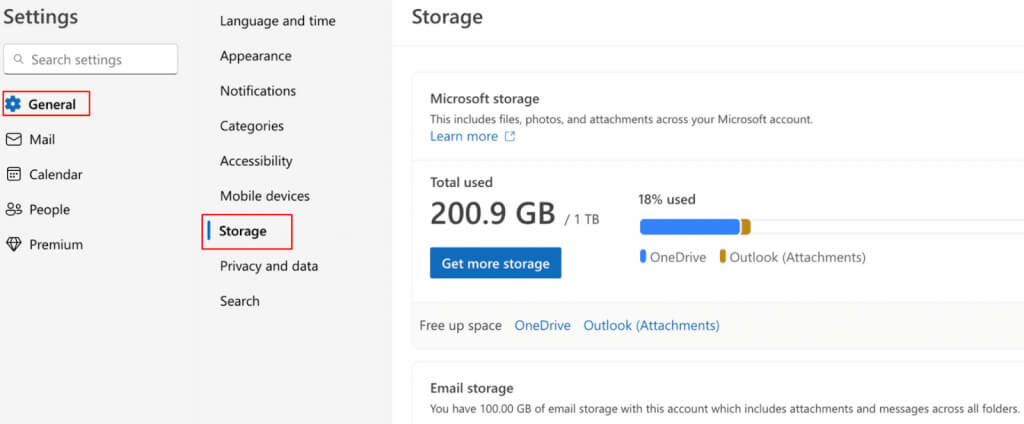
If you use Outlook:
- visit the service from the web browser and go to Settings in the top right corner.
- Select General and then click the Storage menu.
- On the next page, you can check the storage space for your Outlook inbox.
7. Disable Mail Privacy Protection
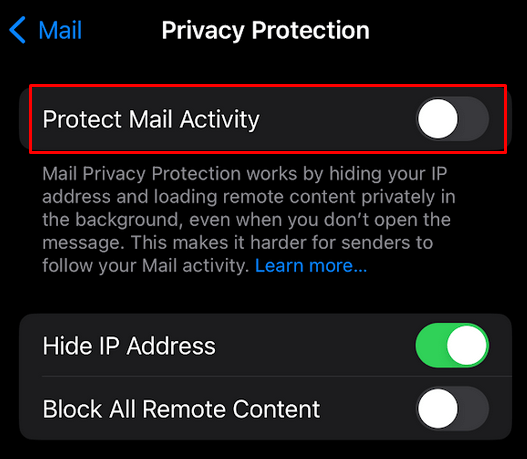
Privacy protection is part of your iCloud+ and Apple One subscription. It was designed to hide your IP address so you can load remote content privately, far away from the curious eyes. This means your email activity is also protected. But it’s possible that this feature interferes with how the Mail app works and it’s preventing it from sending any emails. Disabling privacy protection should fix the issue. Here’s how you can do it:
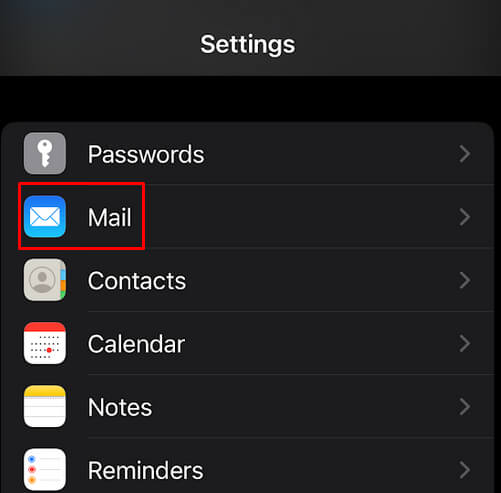
- Go to Settings on your iPhone and tap Mail.
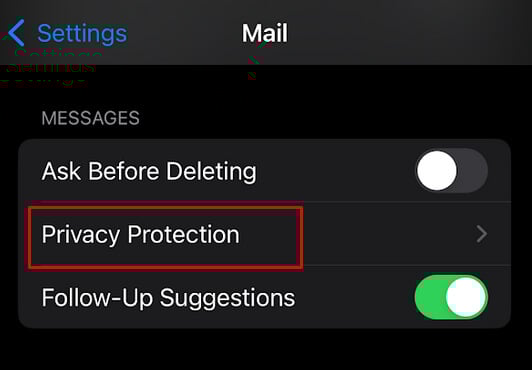
- Find and tap Privacy Protection.
- Disable the Protect Mail Activity toggle.
Go ahead and try sending an email to see if this fixed the issue.
8. Reinstall the Mail App
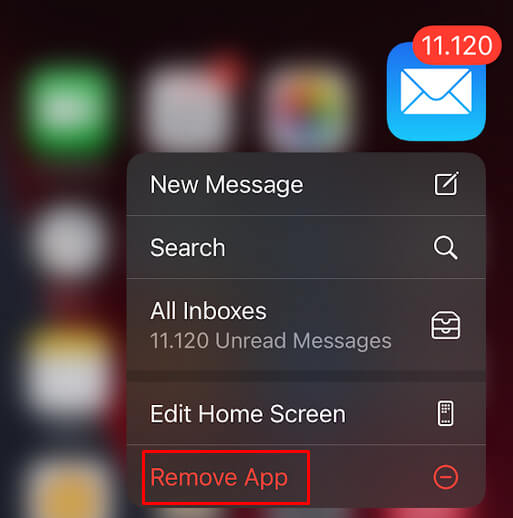
If you think your Mail app is bugged perhaps you should try reinstalling it. Fortunately, Apple allows its users to delete the built-in apps. Delete the Mail app and then install it again from the App Store. If you don’t know how to delete an iPhone app:
- Long-press and hold the Mail app icon.
- Select Remove App.
- Tap Delete App to remove it from your iPhone.
- Go to the App Store, find the Mail app, and install it.
9. Update iOS
Mail app is Apple’s product which means it’s perfectly compatible with iOS builds. However, to keep it bug-free, you should regularly update iOS. This action will automatically update the Mail app too.
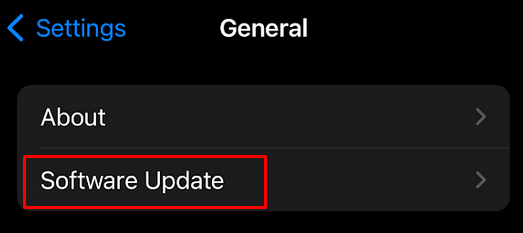
- Go to Settings and tap General.
- Go to Software Update and select the newest iOS version to install.
10. Restore iPhone
If none of the described fixes helped you, and you still can’t send emails with your iPhone’s Mail app, restoring your device should fix the issues. However, this means you’ll lose any personal settings on your iPhone and you’ll have to set it up again from scratch. If you’re willing to do it here’s what you need to do:
- Launch Settings and tap General.
- Scroll down and select Transfer or Reset iPhone.
- Tap Erase All Content and Settings.
- Follow the on-screen instructions to reset your iPhone.
Important note: Remember that this will delete all personalized content from your iPhone’s storage. It might be wise to transfer important files and documents from your iPhone to another device before you proceed with resetting it.
Now that we’ve walked through these 10 fixes for when your iPhone isn’t sending emails, you should be well-equipped to tackle the issue head-on. Remember, most email-sending problems are often resolved by checking your settings, updating your software, or rebooting your device. If you’ve tried all these steps and are still facing difficulties, it might be time to contact your email provider or visit an Apple Store for further assistance.
[related_posts_by_tax posts_per_page="5"]