Use it in the play that is your life
With the release of macOS 13 Ventura, Apple introduced a new way to organize open apps. The feature is called Stage Manager and its intent is to help you focus better with a less cluttered workspace.
If you’ve just updated your Mac or purchased a new one with this latest version of the operating system, we’ll show you how to enable, use, and customize Stage Manager on macOS Ventura.

Turn Stage Manager On and Off
You have two easy ways to turn on Stage Manager as well as turn it off when you finish using it.
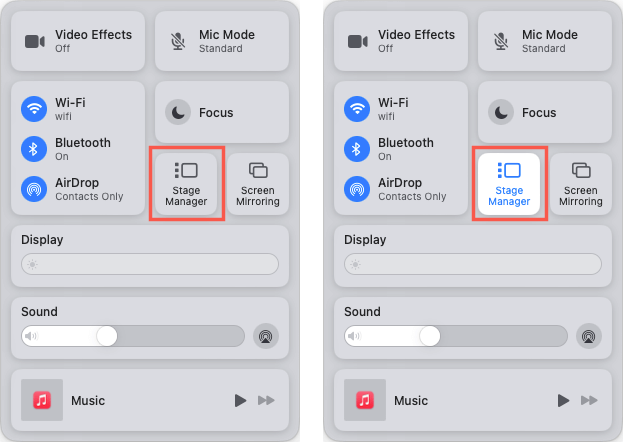
Method one: Open the Control Center and select the Stage Manager button. When Stage Manager is active, you’ll see the button highlighted.
Tip: If you plan to use Stage Manager often, you can drag the button from Control Center to the menu bar for even faster access.
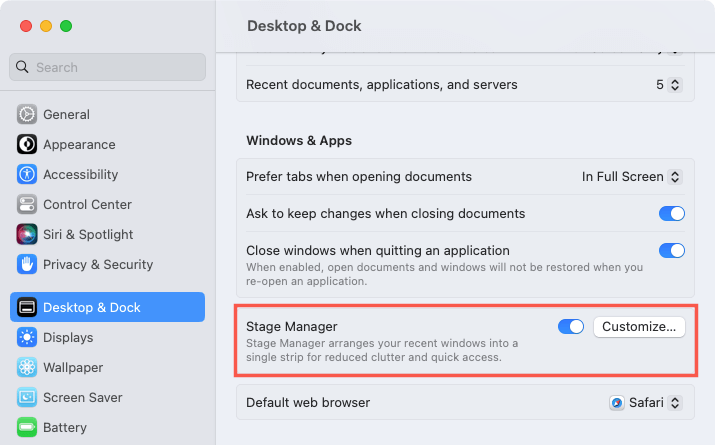
Method two: Open System Preferences, select Desktop & Dock on the left, and turn on the Stage Manager toggle on the right.
To turn off Stage Manager, either select the button in the Control Center or disable the toggle in the Desktop & Dock settings.
Use Stage Manager on Mac
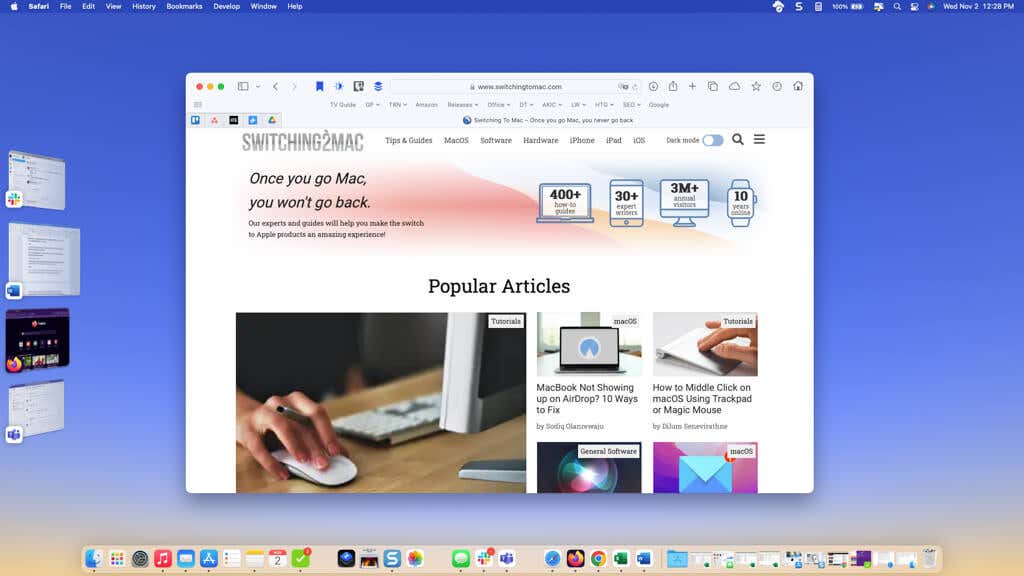
The basic layout of Stage Manager places the active app window in the center of your screen with inactive but open apps as thumbnails on the left-hand side.
You can have up to six thumbnails on the side at one time, depending on the size of your screen. The thumbnails display in order of the most recently used apps.
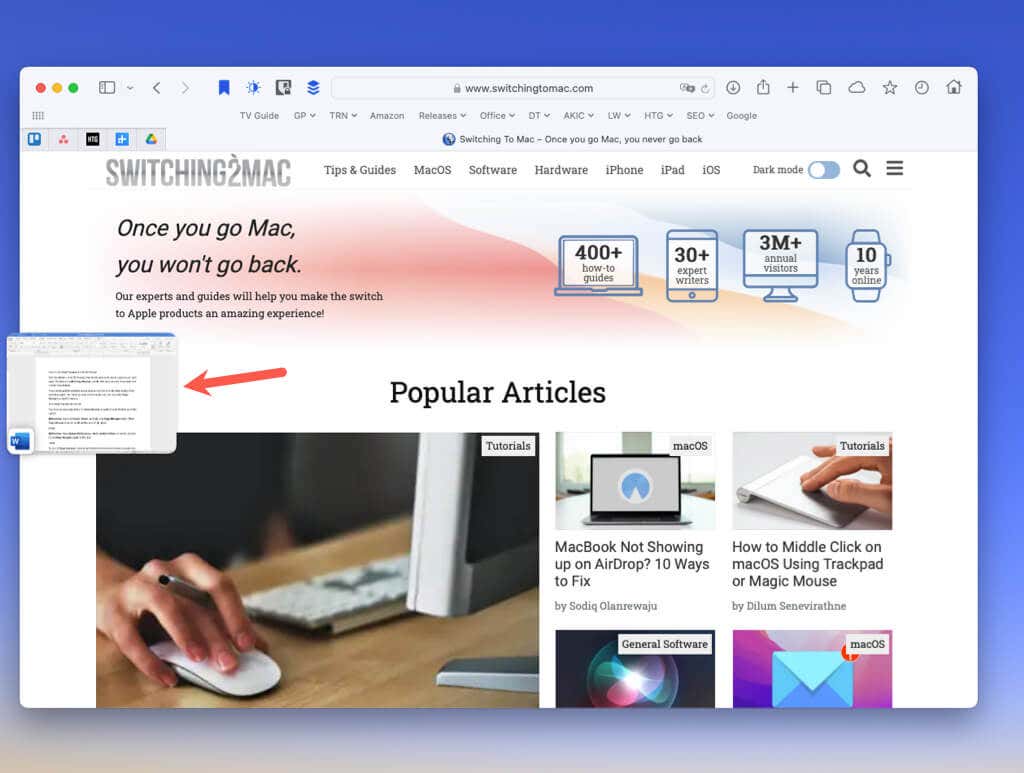
If you want to resize a center window, simply drag the title bar or an edge as you normally would. If the size of the window covers the thumbnails, those will hide out of the way. You can then resize or move the center app to see them again or move your cursor to the left side of the screen to display the thumbnails.
When you put a window in full screen mode, it moves away from Stage Manager to its own spot. To see the thumbnails, remove the app from full screen view.
To view your desktop items, select any blank spot on your desktop. To return to Stage Manager, select a blank spot again. This setting is customizable which we’ll describe later.
Control the Apps
You can switch to an app on the side by choosing its thumbnail. That app then takes center screen while the other one you were using minimizes to a thumbnail.
- To add an app to Stage Manager, simply open it like you normally would. That app will display in the center of the screen and the current app will minimize to a thumbnail.
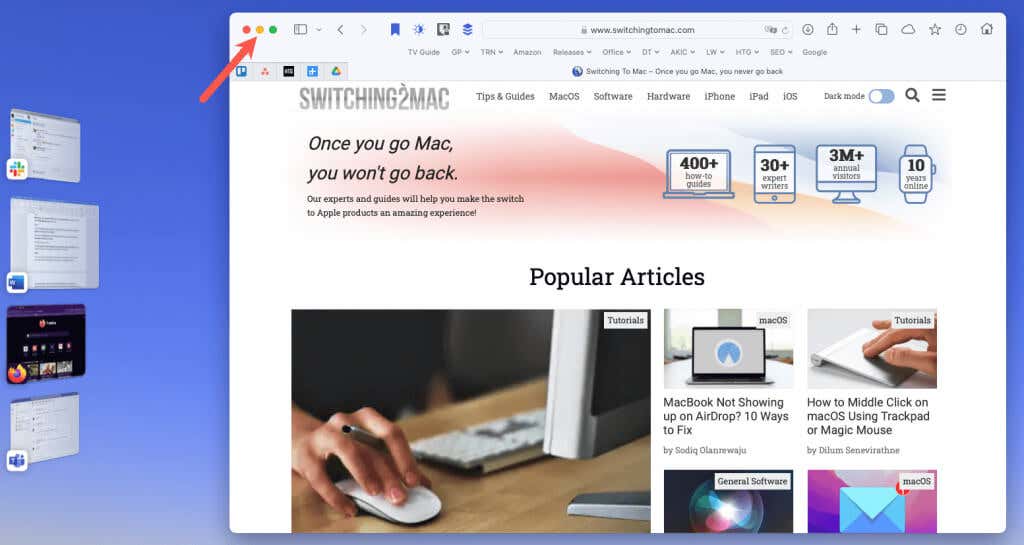
- To close an app without converting it to a thumbnail, select the close button (X) on the top left of the window like normal.
- To minimize an app to its thumbnail without switching to another app, either select the minimize button (minus sign) on the top left of the window or use the keyboard shortcut Command + M.
Create Groups of Apps
You may have certain apps that you like to use side-by-side such as communications apps like Slack and Teams. You can create a group in Stage Manager that allows you to display more than one app in the center of the screen.
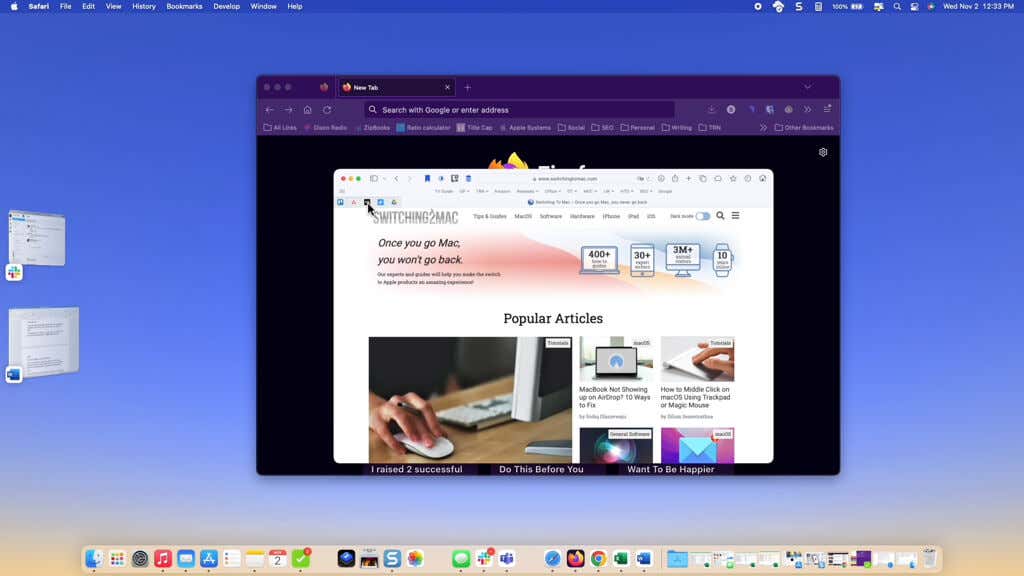
With the first app you want in the group in the center, either drag the thumbnail for the second app to the center with the first or hold Shift and select its thumbnail.
Do the same for additional apps you want in the group.
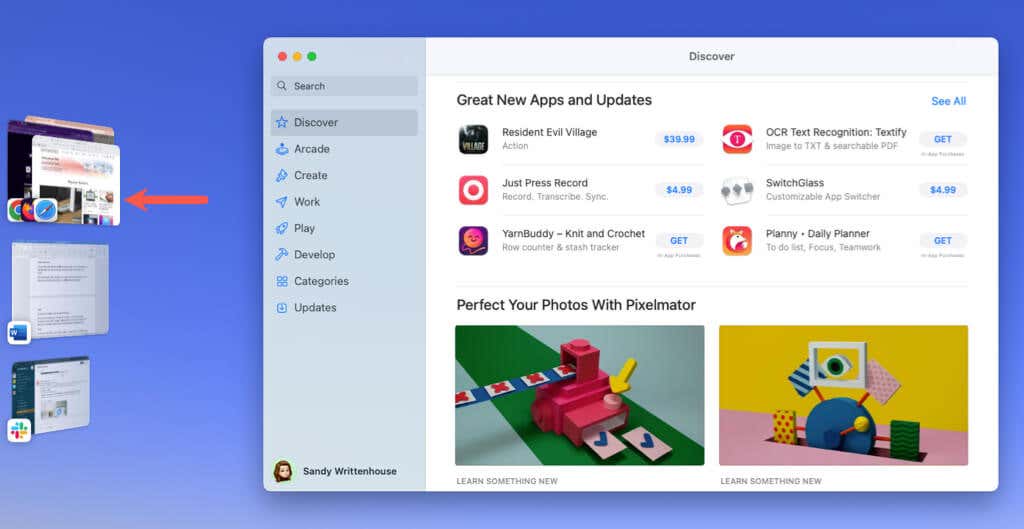
When you minimize each app in the group to a thumbnail, you’ll see that group on the side with its app icons. Select the group to display all of its open windows in the center at the same time. This is also a customization you can change, which we’ll explain later.
To remove an app from a group, display the group in center screen. Then, drag the app you want to remove to the thumbnail area and release when you see its thumbnail.
Customize Stage Manager
You do have a few settings that you can adjust to make Stage Manager work its best for you.
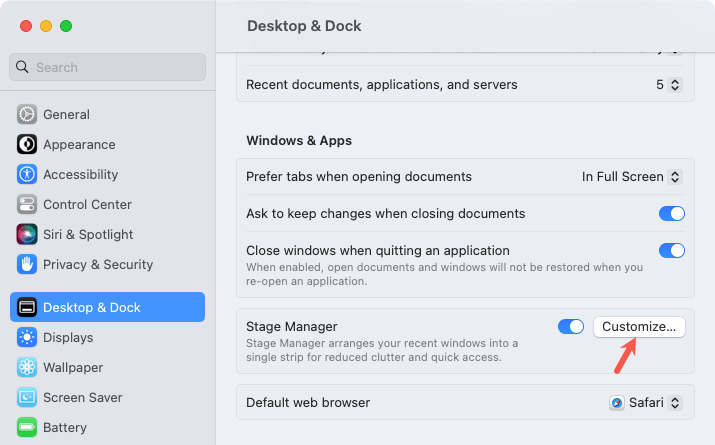
- Open System Preferences and select Desktop & Dock on the left.
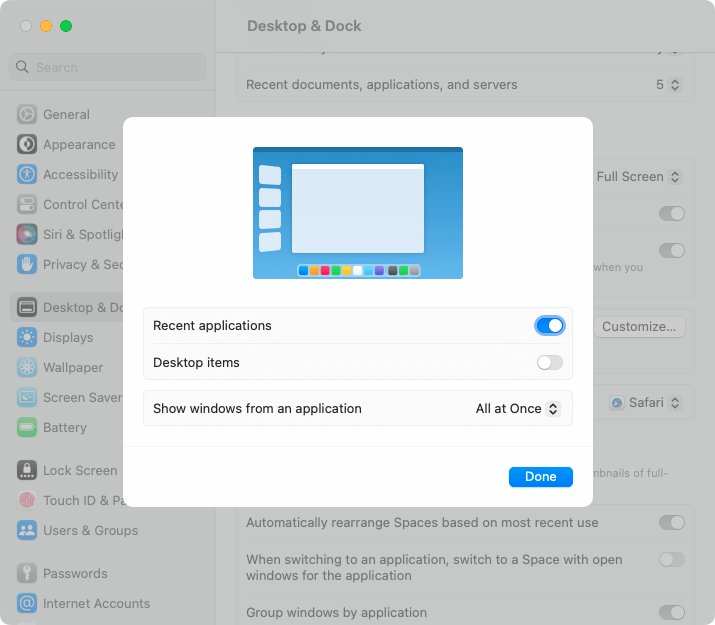
- Next to the Stage Manager toggle on the right, pick Customize.
- Use the Recent applications toggle to keep the thumbnails on the screen. If you turn off the toggle, the thumbnails remain hidden until you move your cursor to the left side of the screen.
- Turn the Desktop items toggle on to show apps, files, or folders on your desktop while using Stage Manager. If you turn the toggle off, just select a blank spot on your desktop to view those items as mentioned earlier.
- Use the Show windows from an application drop-down box to pick All at Once or One at a Time. With All at Once, you’ll see all windows at the same time for the center app. With One at a Time, you’ll only see one of the app windows with the rest minimized to thumbnails.
- Select Done when you finish customizing the Stage Manager and close the system settings.
Will You Use Stage Manager?
Stage Manager on macOS Ventura gives you a convenient way to work with several apps at the same time. Maybe you’ll create a group for web browsers like Safari, Chrome, and Firefox that you work with side-by-side. Or maybe you’ll simply switch between different apps one at a time with a single click. Either way, Stage Manager is a useful feature for multitasking on Mac, will you use it?
For more, look at how to split the screen on your Mac.

