Did you know you can run multiple macOS versions on the same Mac? This is incredibly useful if you’re a software developer, tester, or a power user who wants to use different versions of applications, test compatibility, or troubleshoot problems.
You can install another copy of macOS as a virtual machine through VMware Fusion or VirtualBox. However, a virtualized operating system can’t take full advantage of your Mac’s hardware, which translates to sluggish performance.
Instead, this tutorial focuses on setting up a different version of macOS on a separate APFS volume on your MacBook Pro/Air, iMac, or Mac mini, allowing you to enjoy the full benefits of running it as a dedicated operating system.
Back Up Your Mac
Before you begin, it’s a good idea to back up your Mac. That helps you restore data if something goes wrong later. We recommend you take a Time Machine backup.
Assuming you’ve already set up Time Machine on your Mac, here’s how to create a fresh backup.
- Connect your Time Machine drive to your Mac.
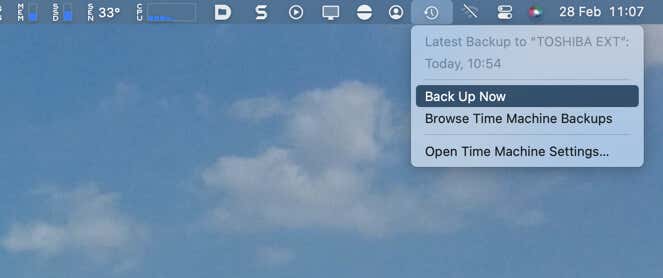
- Select the Time Machine icon on the menu bar and choose Back Up Now.
- Wait until Time Machine finishes backing up your Mac.
Alternatively, you can manually copy your documents and files to an external hard drive or upload the data to iCloud, Google Drive, or OneDrive.
Free Up Disk Space
Installing an additional copy of macOS consumes around 15-20GB of disk space. However, it’s best to have at least 50GB of storage to account for the system cache, applications you plan to install, and the miscellaneous files you accumulate.
To check your Mac’s storage and free up disk space on macOS Ventura or later:
- Open the Apple menu and select System Settings.
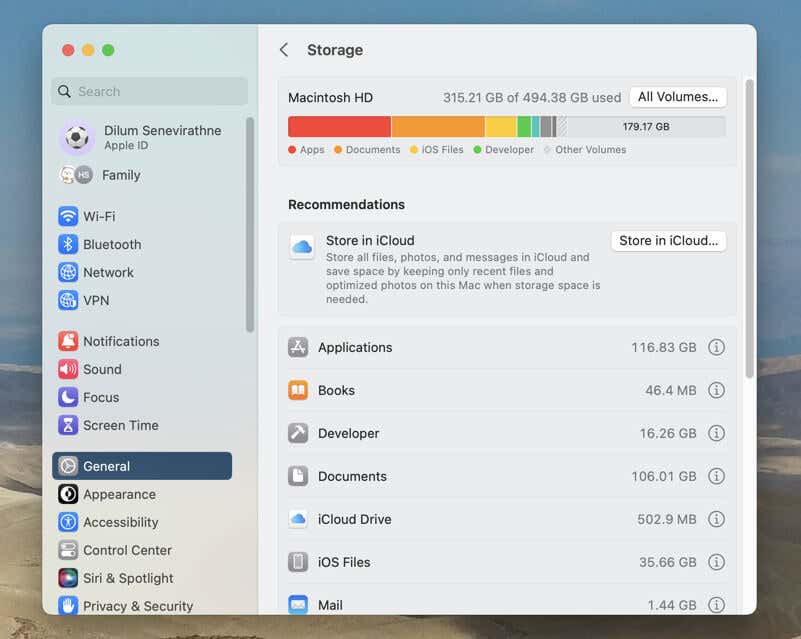
- Go to General > Storage.
- Use the indicator at the top of the screen to check for available storage space.
Use the recommendations that follow to free up disk space. E.g., you can delete unwanted TV shows, upload photos to iCloud Drive, and delete unused apps.
In macOS Monterey and older versions, open the Apple menu, select About This Mac, and switch to the Storage tab to manage your Mac’s storage.
Add New APFS Volume
To install another version of macOS on your Mac, you must create an additional APFS (Apple File System) volume on the internal SSD or hard drive. Disk Utility makes that quick and straightforward.
- Open the Launchpad and select Other > Disk Utility.
- Select Macintosh HD on the sidebar.
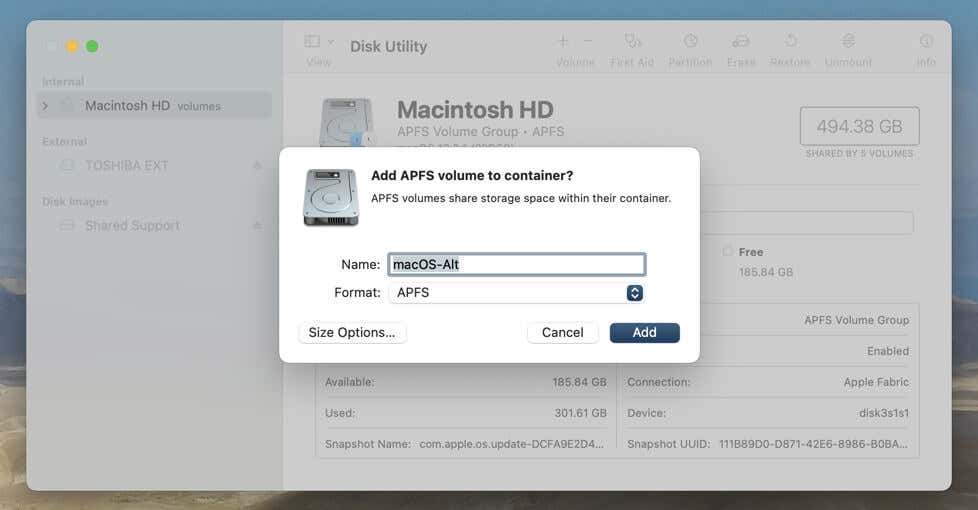
- Choose Edit > Add APFS Volume on the menu bar.
- Enter an identifiable name, set the Format to APFS, and choose Add.
- Wait until Disk Utility creates the APFS volume and select Done.
- Exit Disk Utility.
Note: You don’t need to allocate storage space to the APFS volume because the file system dynamically adjusts its size as you keep using it. However, you can reserve a specific amount of storage for the volume—in step 4, select Options and specify the Reserve Size in gigabytes. Learn about how the APFS format works in detail.
Download the macOS Installer
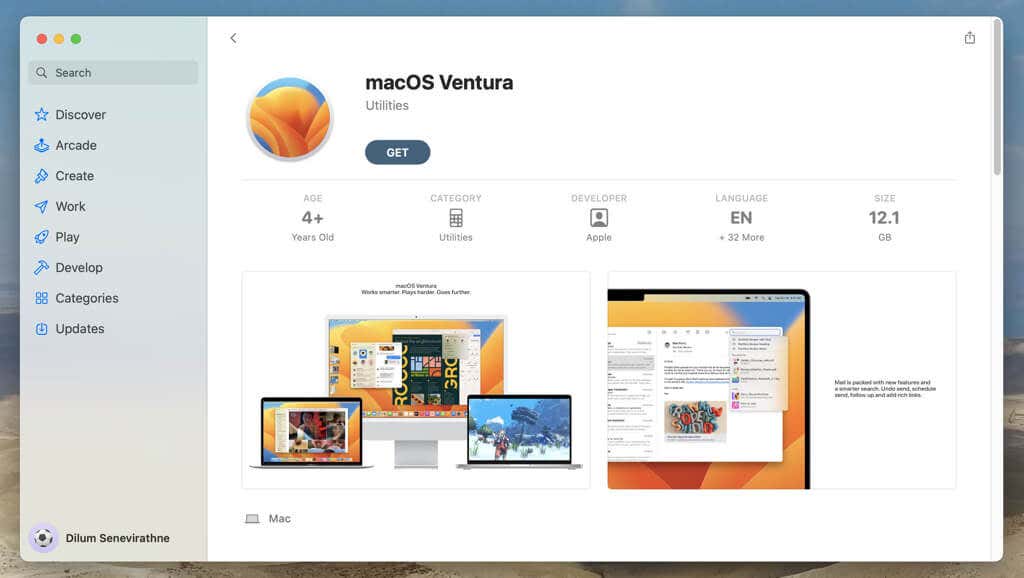
With the APFS volume set up, you must next download the installer for the macOS version you want to install. If it’s the same version of the system software that you’re currently running on your Mac, you can:
- Open the Mac App Store and search for the macOS version—e.g., macOS Ventura.
- Select Get.
- Select Download.
If you’re looking to install an older version of macOS or Mac OS X, then searching for the macOS version on the Mac App Store will not work. Instead, follow these download links, select Open App Store, and choose Get.
- Download macOS Ventura
- Download macOS Monterey
- Download macOS Big Sur
- Download macOS Catalina
- Download macOS Mojave
- Download macOS High Sierra
Note: If you attempt to install a version of macOS older than the version shipped with your Mac, you may encounter compatibility issues. Also, Macs with Apple silicon chipsets cannot run macOS Catalina and older.
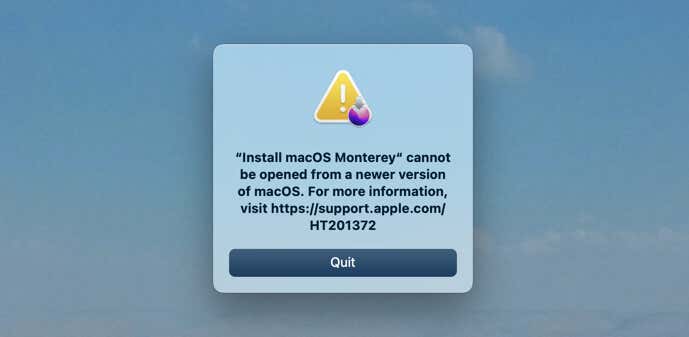
Wait until the Software Update tool downloads the copy of macOS onto your Mac. It’s a 10-15GB download that can take several hours if you’re on a slower internet connection. If you’re downloading an older version of macOS, you’ll encounter the following error message at the end—select Quit.
Note: It’s also possible to install a beta version of macOS on a separate volume on your Mac. Enroll in the Apple Beta Software Program to download the latest macOS Beta installer.
Install the Same Version of macOS
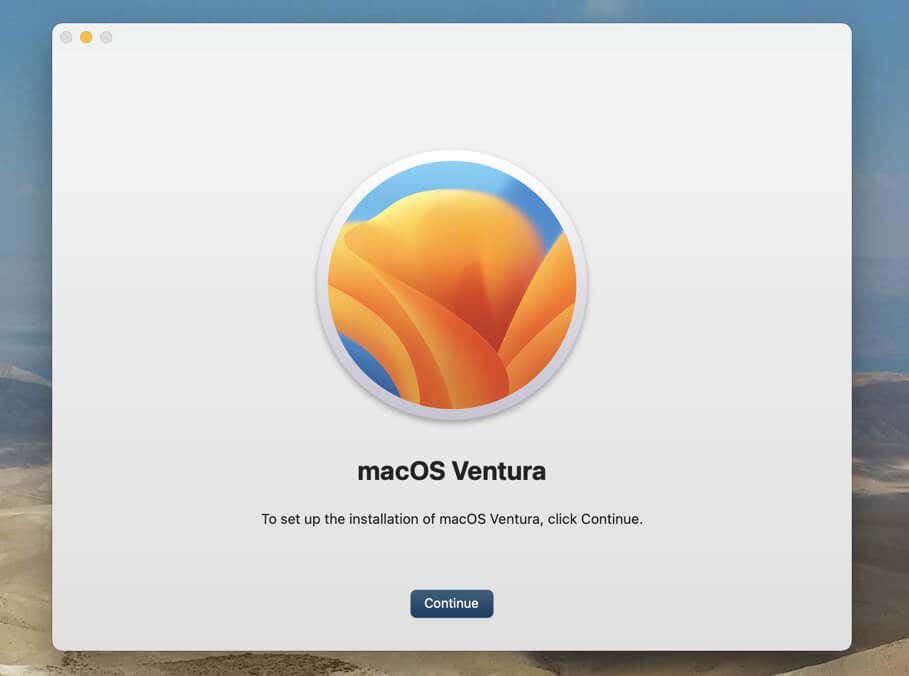
The process is exceptionally straightforward if you want to install the same version of macOS—or a system software beta—on the other APFS volume. The macOS installer should automatically run after you finish downloading it. If not, open the Applications folder and double-click the installation file—e.g., Install macOS Ventura. Then:
- Select Continue on the macOS installer’s welcome screen and agree to Apple’s software license agreement.
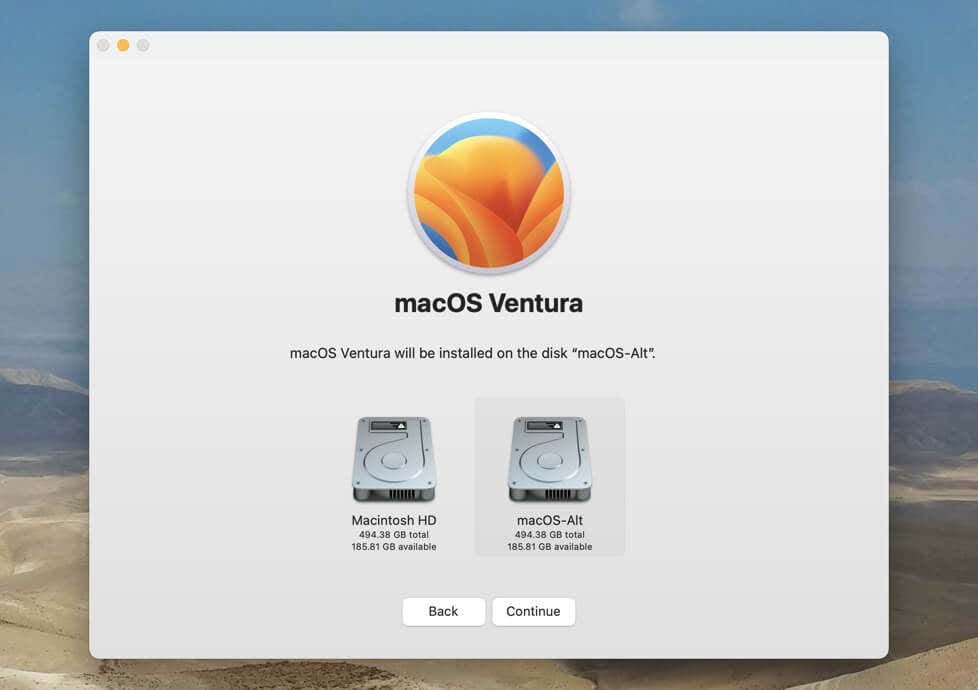
- Select Show All Disks, pick the new APFS volume, and select Continue.
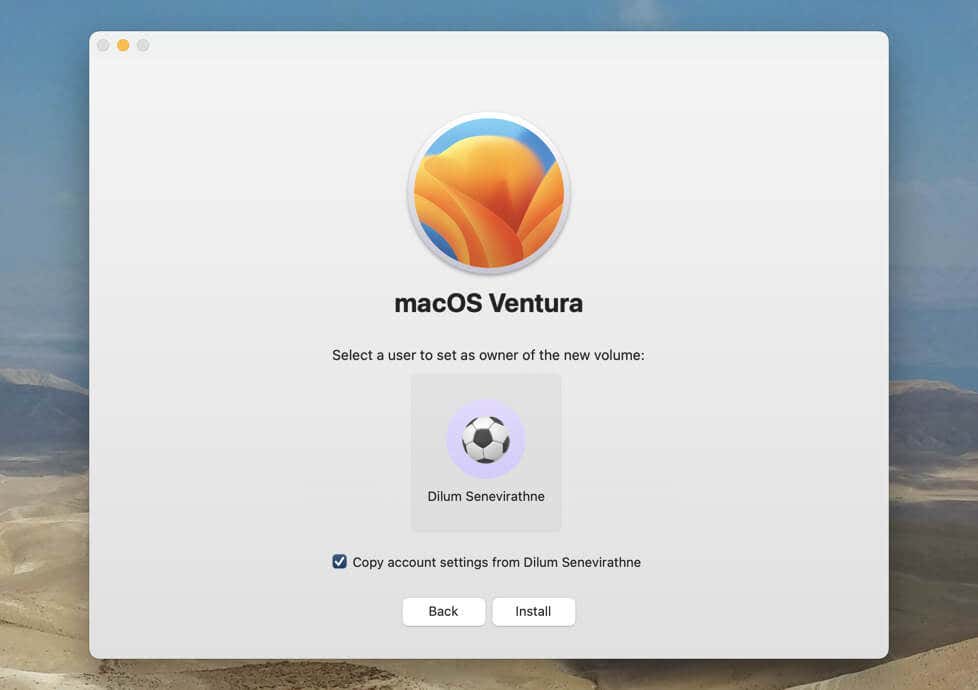
- Select the Mac administrator account you want to set as the new owner of the APFS volume. Optionally, check the box next to Copy account settings from [User Account Name] to copy your account settings to the new macOS installation.
- Select Install. Your Mac should immediately begin installing macOS on the APFS volume.
Install an Older Version of macOS
You must create a bootable USB flash drive to install an older version of the system software on the Mac. Here are the specific instructions you need to follow.
Create USB Installer
A bootable macOS USB stick requires at least 16GB of free storage. The procedure erases all existing data on the drive, so make sure you copy anything important elsewhere. Then:
- Plug in the USB stick to your Mac.
- Open the Launchpad and select Other > Terminal.
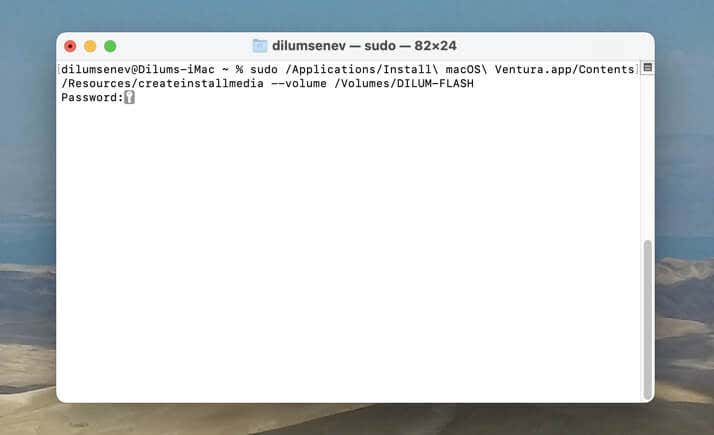
- Depending on the macOS version, execute the appropriate command below, replacing MyUSB at the end with the name of the USB drive.
- Ventura: sudo /Applications/Install macOS Ventura.app/Contents/Resources/createinstallmedia –volume /Volumes/MyUSB
- Monterey: sudo /Applications/Install macOS Monterey.app/Contents/Resources/createinstallmedia –volume /Volumes/MyUSB
- Big Sur: sudo /Applications/Install macOS Big Sur.app/Contents/Resources/createinstallmedia –volume /Volumes/MyUSB
- Catalina: sudo /Applications/Install macOS Catalina.app/Contents/Resources/createinstallmedia –volume /Volumes/MyUSB
- Mojave: sudo /Applications/Install macOS Mojave.app/Contents/Resources/createinstallmedia –volume /Volumes/MyUSB
- High Sierra: sudo /Applications/Install macOS High Sierra.app/Contents/Resources/createinstallmedia –volume /Volumes/MyUSB
- Enter your Mac administrator password and press Return to authorize the command.
- Enter Y and press Return to confirm you want to execute the command.
- Wait until Terminal finishes creating the bootable USB stick.
- Quit Terminal.
Boot via USB and Install macOS
Next, you must boot your Mac through the USB stick. The procedure differs depending on the chipset your Mac runs on.
Intel Macs: Restart your Mac, hold down the Option key (or Alt) during startup, and select the bootable USB stick on the startup disk menu selection screen.
Apple Silicon Macs: Shut down your Mac, turn on the macOS device while holding down the Power button, and select the bootable USB stick on the Startup Options screen.
Install macOS on the APFS Volume
Once your Mac boots via USB, you enter macOS Recovery for the system software version you’re about to install. Enter your Mac’s administrator password, and then:
- Select Continue on the macOS installer’s welcome screen.
- Agree to Apple’s software license terms.
- Select the new APFS volume.
- Select the administrator account you want to set as the owner of the new volume.
- Select Install.
Switch Between macOS Versions
After copying the system software files to the new APFS volume, your Mac should automatically boot into the new macOS installation. You must then work through the on-screen prompts to set up a new Mac user account, configure your keyboard languages, specify privacy and security settings, etc.
You can also sign in with an Apple ID if you prefer having your data sync between both macOS versions on your Mac, including other Apple devices like your iPhone and iPad.
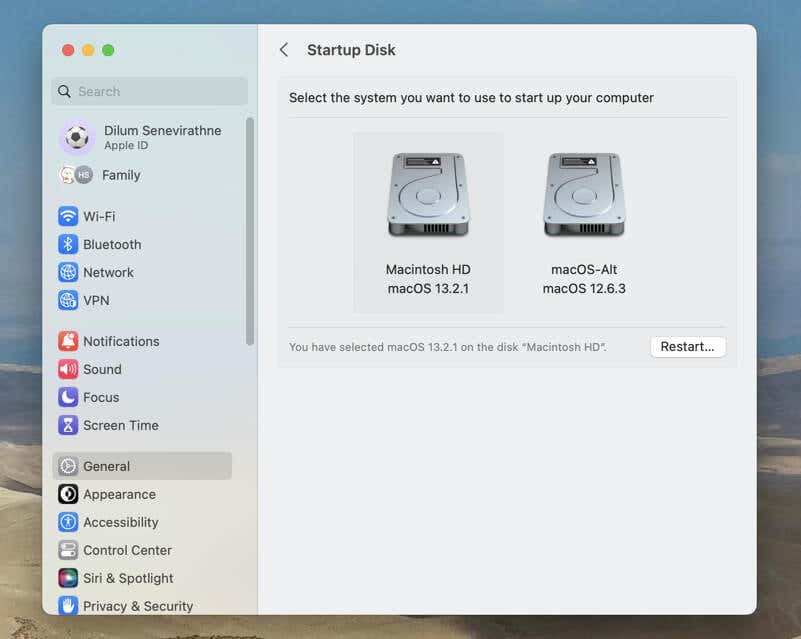
To switch between system software versions, visit the startup disk menu selection screen (Intel Macs) or Startup Options screen (Apple Silicon Macs) and pick the macOS version you want to boot into. Alternatively:
- Open the Apple menu and select System Settings or System Preferences.
- Go to General > Startup Disk or select Startup Disk.
- Pick the startup disk you want to boot from and choose Restart.
Enjoy Your Multi-macOS Setup
By running different copies of macOS on the same Mac, you can enjoy the benefits of each version without having to switch between physical machines. Whether you need to test apps, access legacy software, or simply explore different versions of macOS, this guide should help you get started on the path to a more versatile Mac experience.
Finally, remember to keep both Mac operating systems up-to-date. If you use an old version of the system software alongside a newer version, you can still install minor feature and security updates while skipping major version updates. Regularly doing that translates to fewer bugs and issues, improved security, and better performance.
[related_posts_by_tax posts_per_page="5"]