Apple has a reputation for making products that attract a price premium, but they’ve also got some pretty generous policies and services to ensure you only have to pay for software or services once and then share them with your whole family.
iCloud is the key to all this and encompasses both iCloud storage sharing and the various other family Group goodies that use iCloud as a backbone. So let’s look at how to set up iCloud Family Sharing, and get your nearest and dearest to join and share all the good stuff Apple has to offer with them.
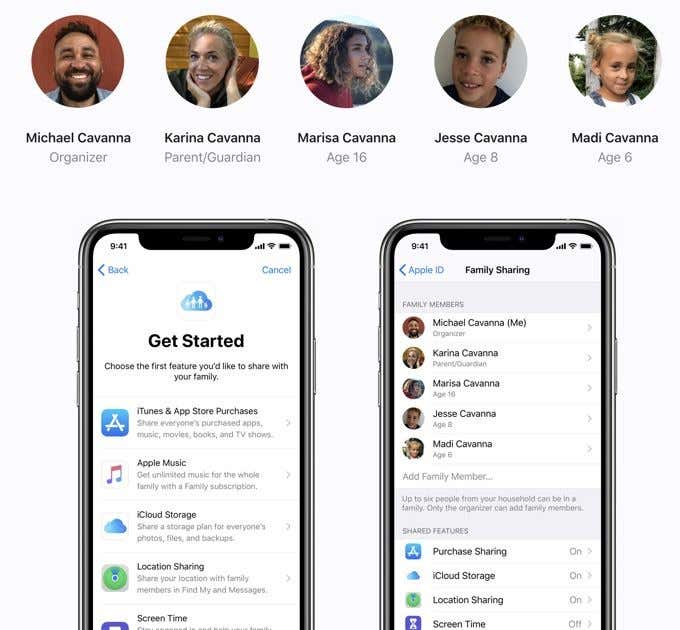
The Apple Family Group and iCloud Family Sharing
Apple lets up to six people (including you) share services, apps, and other perks without having to pay for them multiple times. You’ll start a family group and enable family sharing for everyone in it. Each person in the family group will of course require their own Apple ID. It’s these IDs that you’ll add to the group.
Once your group is set up, you can share Apple TV+, Music, Books, and much more. However, you may have to pay for a special iCloud family sharing plan in many cases. For example, you’ll need a distinct Apple Music sharing plan. The good news is that these sharing plans are only slightly more expensive than an individual plan and much less expensive than six individual plans for a family!
How To Create a Family Group
To create a family group you need to, first of all, have one person who will manage that group. This person has to be an adult and will act as the organizer. It’s probably best for this to be the person whose credit card is going to pay for everything.
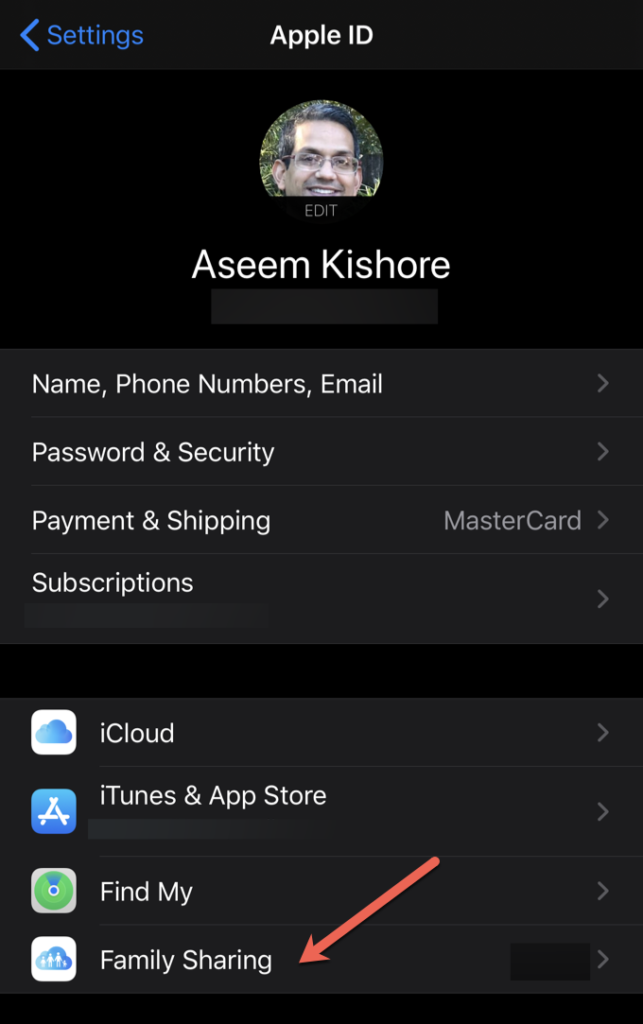
Now, to add people to your Family Group, simply go to Settings > [your name] and then tap Set Up Family Sharing. This will work on all iOS devices running the latest version of the OS.
On a Mac, go to Apple Menu > System Preferences and then Family Sharing. This works for macOS Catalina. On Mojave, the setting is under iCloud under System Preferences instead.
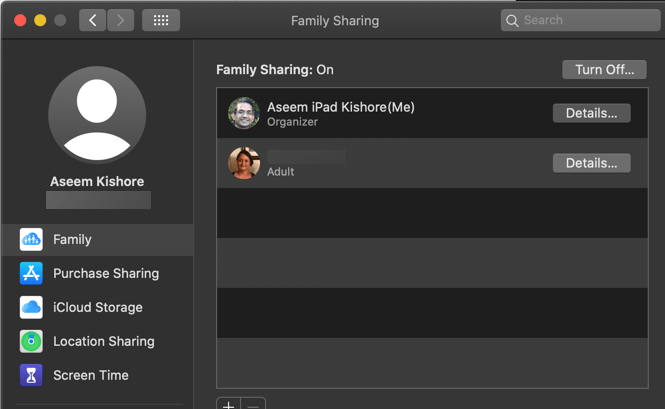
Add the Apple IDs of every person you want to share with, up to the limit of six. If you have children, you can create Apple IDs for them and add those as child accounts. This allows you to control their spending via parental approval.
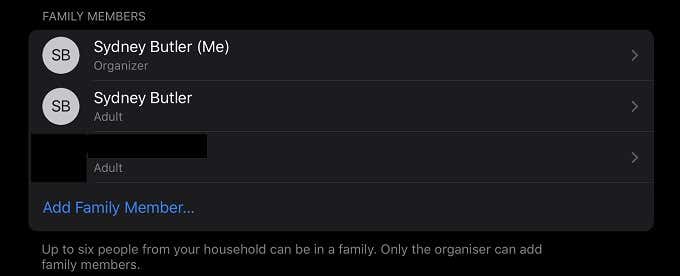
When you use the “Add a Family Member” function, an invitation will be sent to the person in question. They will only become a member of your Family Group once they accept.
What is iCloud?
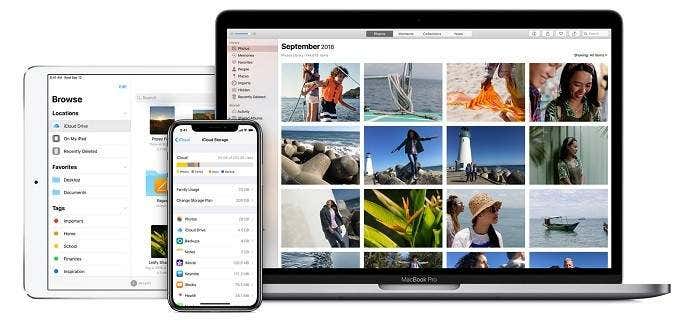
Now that you have a family group, you can share your iCloud account with everyone. iCloud is Apple’s own cloud storage service. You can use it with all your Apple devices to back up files, photos, and more. Everyone gets a small amount of space for free, but to be truly useful you’ll need to fork out for one of the paid plans.
The bigger the plan you buy, the less you’ll be paying for each gigabyte of space. At the time of writing Apple only offers four tiers of storage:
- 5GB – Free!
- 50GB – $0.99
- 200GB – $2.99
- 2TB – $9.99
This is incredible value for the money. When you consider that it can be shared, it’s even more attractive.
With iCloud, you can automatically back up your data, offload full-quality photos from your devices and share and collaborate on documents. Apps, iTunes purchases, and other media that can be retrieved from Apple’s servers don’t count towards your storage limit. It’s only your personal data that will take up space.
How iCloud Family Storage Sharing Works
Just as with services like Google One, iCloud sharing doesn’t give the other members of the iCloud family group access to your data. Instead, everyone has access to a single shared pool of storage, but their files and information are kept separate.
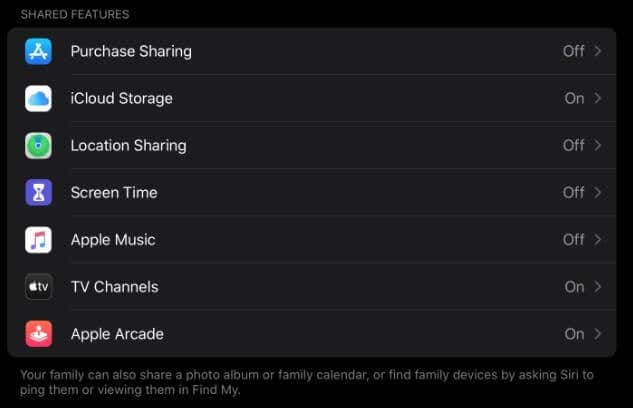
This is great on the one hand because it means no space is wasted when some members need more room than others. On the other hand, it means one member can still hog all the space. That’s a problem you’ll have to solve the old-fashioned way. To activate storage sharing, here’s what to do.
On an iOS device:
1. Go to Settings
2. Tap your name
3. Tap Family Sharing
4. Tap iCloud Storage
5. Upgrade to at least the 200GB plan, if needed
6. Initiate family sharing
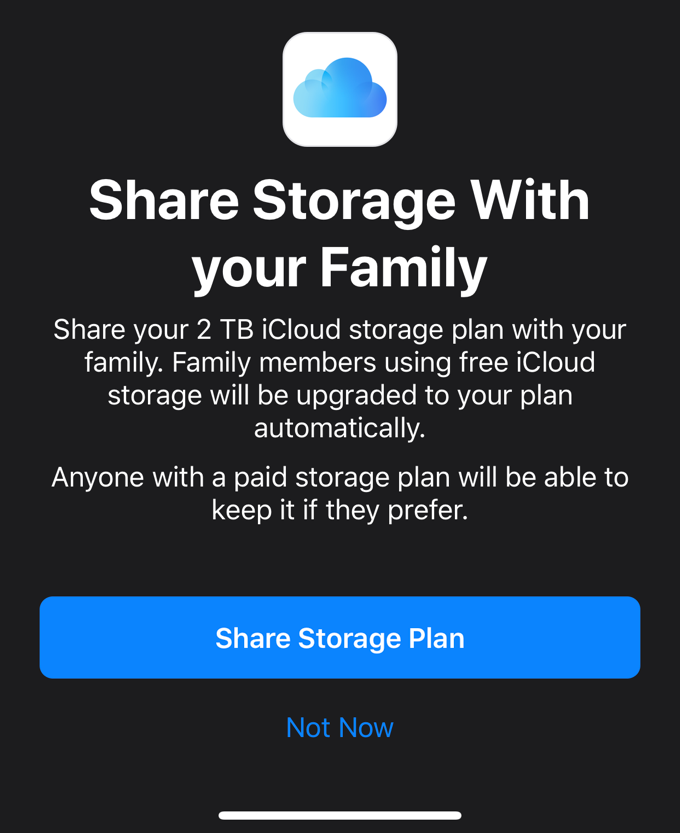
7. Let your family group members know they can switch to the shared storage under iCloud Storage settings.
On a macOS device using Catalina:
1. Click the Apple Menu and then System Preferences
2. Click Family Sharing
3. Click iCloud Storage
4. Click Share
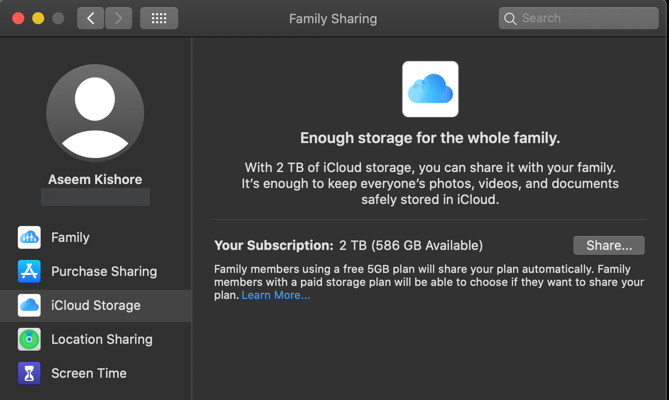
4. Just follow the wizard’s instructions
Once you’ve started the share, you can go back to iCloud Storage at any time to see how much each member is using from the shared pool.
Sharing Apps and Services
Through iCloud Family Sharing, you only need to buy content like apps, books, movies, and certain types of subscriptions once and then share them with your family group members. When a member of the group goes to the app store, they can tap on their account icon and then browse the purchases of anyone else in the group, downloading what they like.
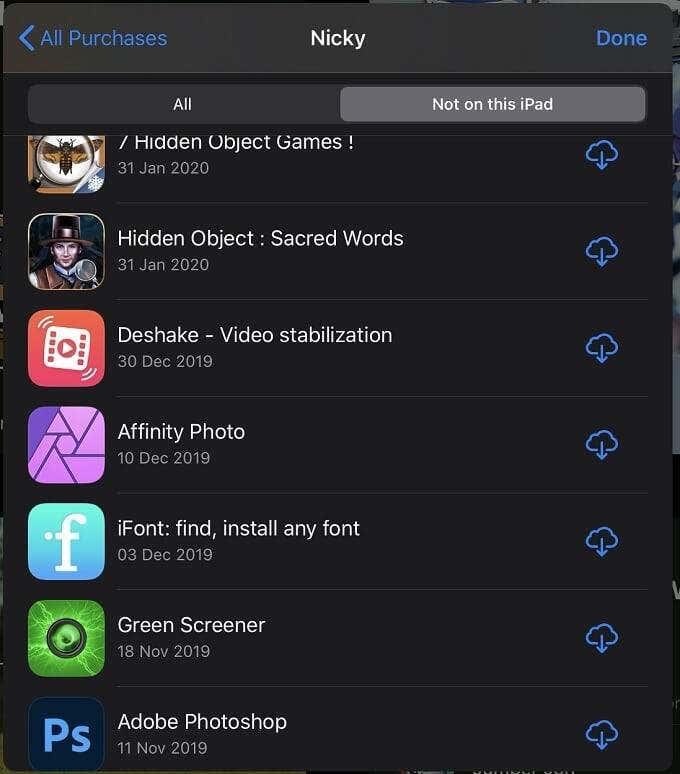
In the case of something like Apple Music, you need to choose the family plan tier of the service, but once that’s done everyone in the group gets the individual service as if they had a separate plan.
The only exception, as far as we can tell, comes from premium features unlocked via in-app purchases. There’s no way to share these within the family group.
Shared Payment Methods
In your family groups, all purchases are billed to the credit card of the family organizer. This is why you shouldn’t add people to the group who aren’t a part of your family. The only way to prevent adult members of the group from making purchases is to switch off purchase sharing for the group entirely.

Members who are under 13 automatically have the “Ask to Buy” feature switched on. This means the family organizer will have to approve or decline each purchase. For members under 18, but not under 13, you have the option of enabling Ask to Buy.
Sharing is Caring
With so many great services and apps, it’s a brilliant gesture from Apple to let people in the same household save money by sharing. If only other aspects of family life were this easy to manage! Of course, there’s always the issue of certain members hogging all the space, but if we’re being honest the 2TB plan is very affordable!
[related_posts_by_tax posts_per_page="5"]