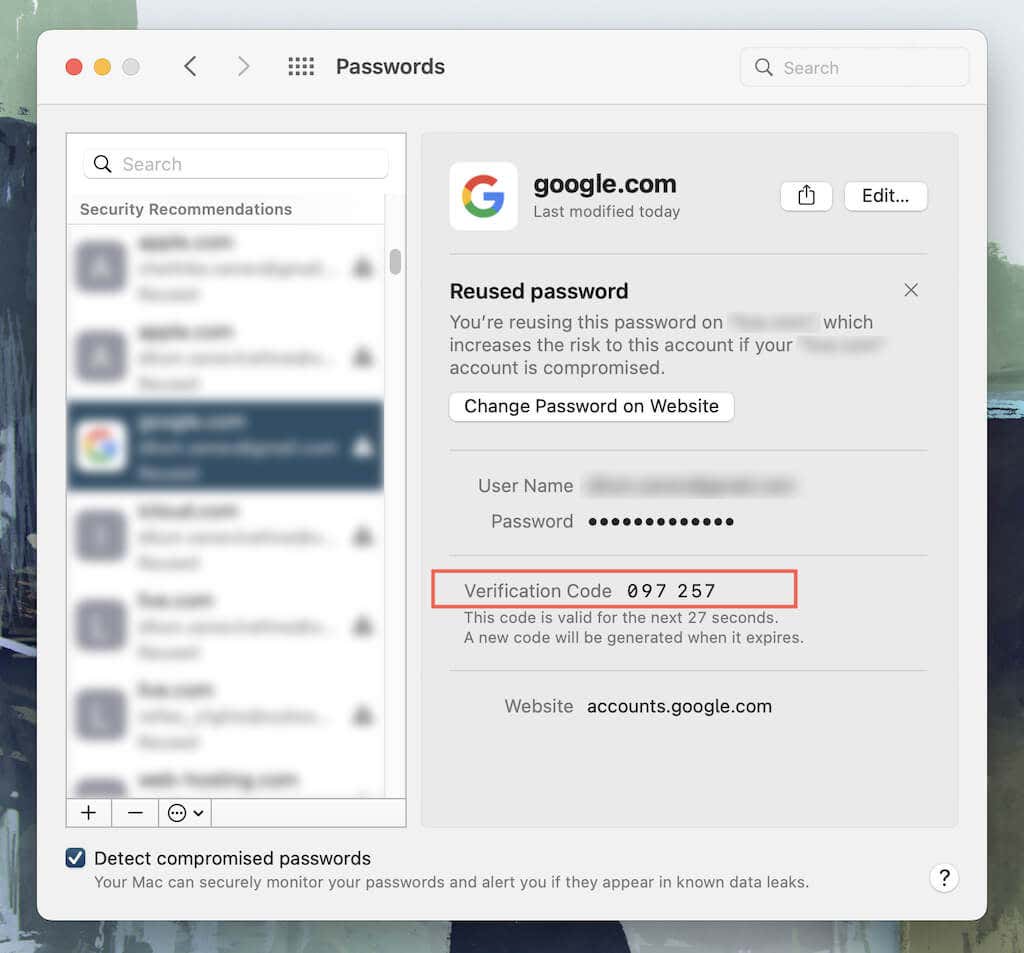
macOS 12 Monterey brings several updates to Safari’s built-in password manager. It sports a streamlined user interface and provides new features like exporting and importing passwords, creating secure notes, and auto-generating two-factor authentication codes.
It’s also accessible outside of Safari, making it perfect if you want to look up a password without opening the browser. If you upgraded to macOS Monterey or later, read on to learn everything you need to know about using the new password manager on your Mac.
Open the New Password Manager
In macOS Monterey, you can access Safari’s password manager as you did before via the browser preferences. Just select Safari > Preferences on the menu bar and switch to the Passwords tab. and enter your Mac user account password or use Touch ID.
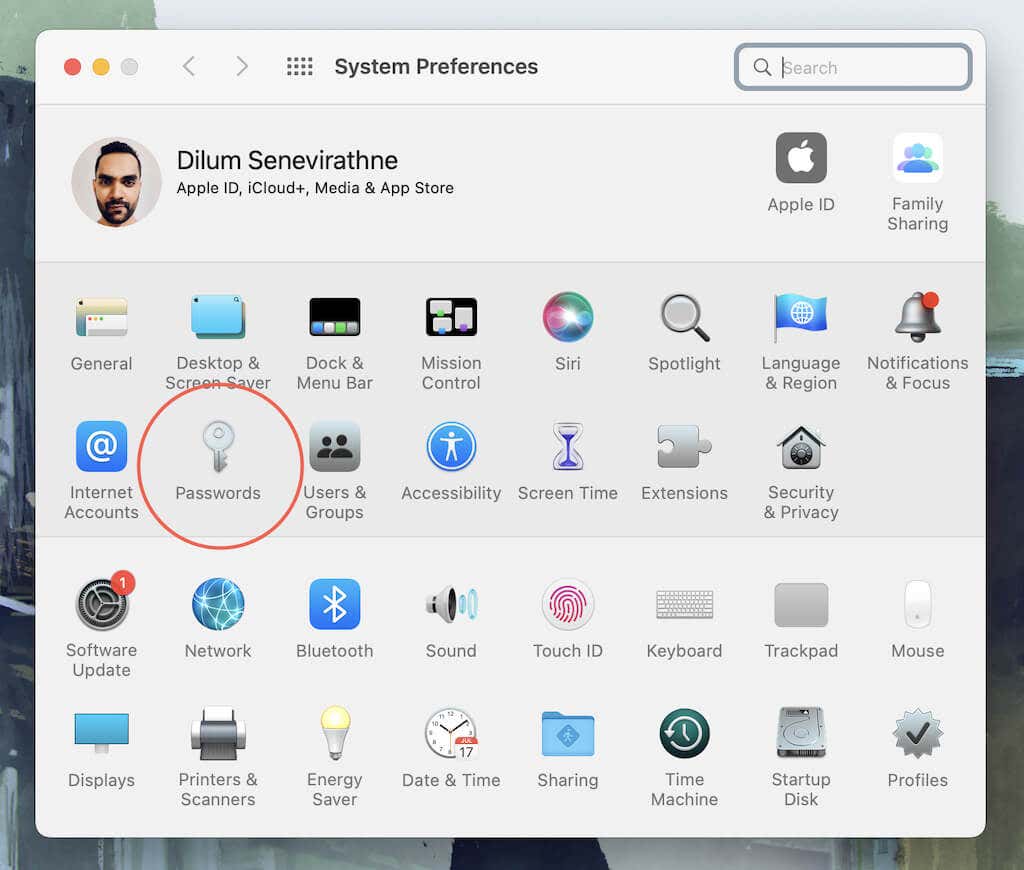
Alternatively, you can open it without launching Safari. To do that, open the Apple menu and choose System Preferences. Then, select the category labeled Passwords.
An even faster way to get to the new password manager is to Control-click the System Preferences icon on the Mac’s Dock and select Passwords.
View and Copy Passwords
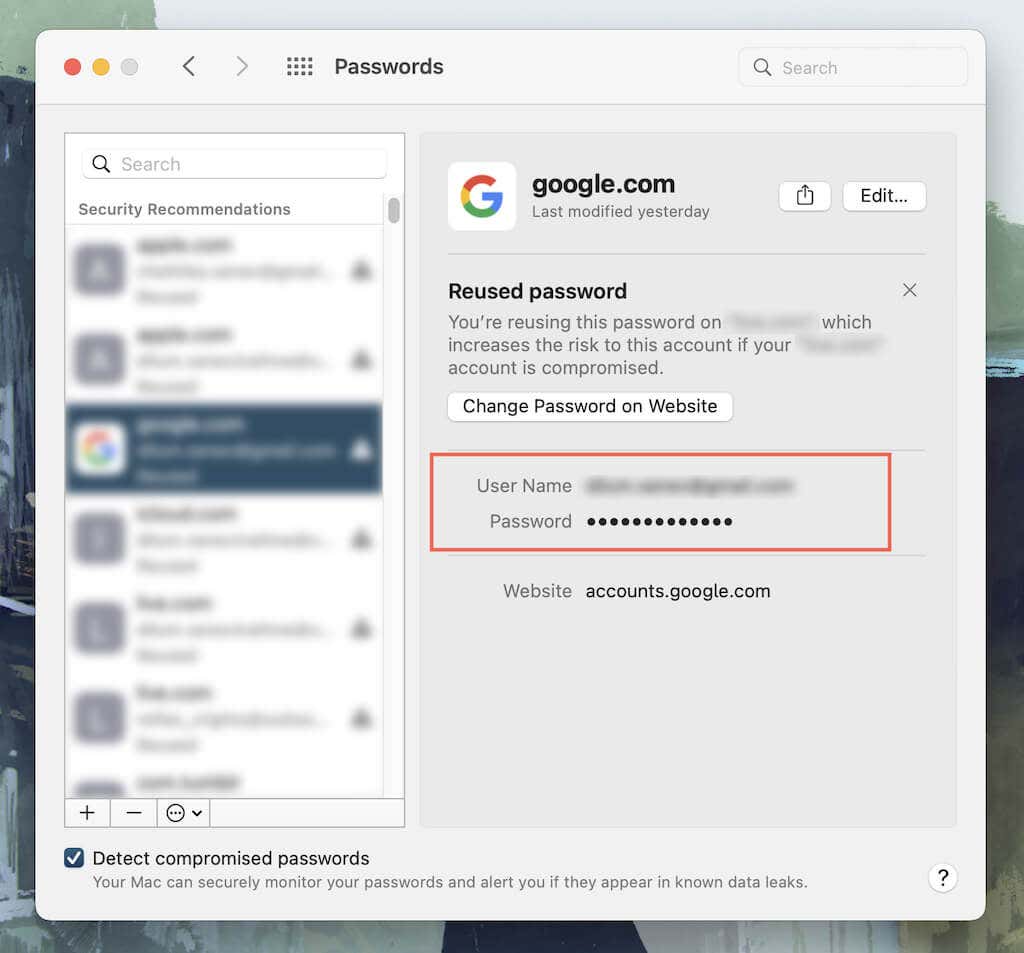
The new password manager appears the same regardless of whether you open it via Safari or the System Preferences. The left pane lists all saved login credentials in alphabetical order, with a Search box at the top to help you locate specific entries faster.
Select an entry to view relevant details such as the username, password (hover the cursor over the Password field to unhide it), and notes. Control-clicking the entry will also reveal contextual actions you can use to copy the data to your Mac’s clipboard. However, when you use Safari, you can always have it fill them in for you automatically.
If you have easy-to-guess, reused, or compromised passwords (Apple regularly cross-checks them against known data breaches), you will see them at the top of the list. It’s best to update them as soon as possible.
Add and Remove Passwords
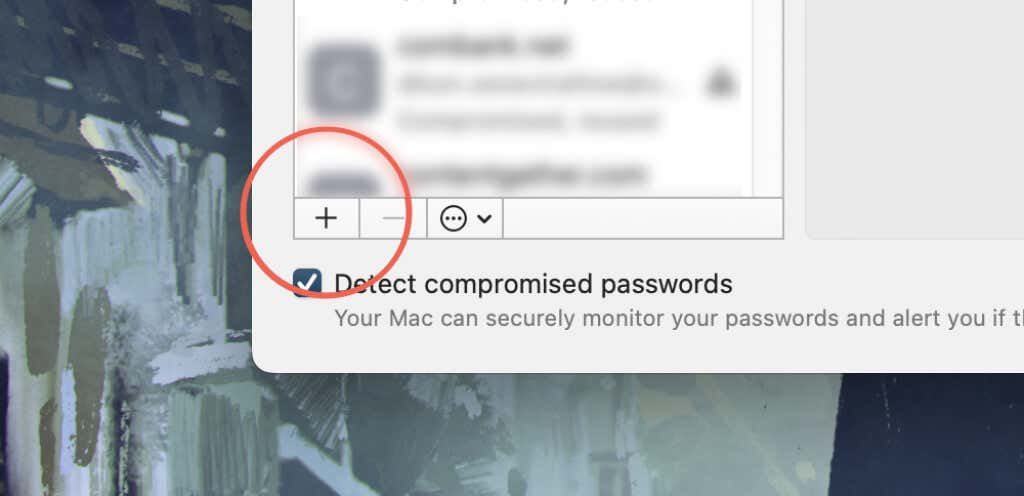
Although Safari lets you save passwords whenever you create or fill them in the first time, you can always use the password manager to add passwords directly to Apple Keychain. To do that, select the Plus button at the bottom right of the windows, fill in the Website, User Name, and Password fields, and select Add Password.
Likewise, you may also come across obsolete passwords or “Never Saved” entries in Safari that you may want to remove. To do that, just highlight the entry on the left pane and select the Minus button. If you use iCloud Keychain, any passwords you remove will also disappear from other Apple devices you own.
Edit Passwords and Add Notes
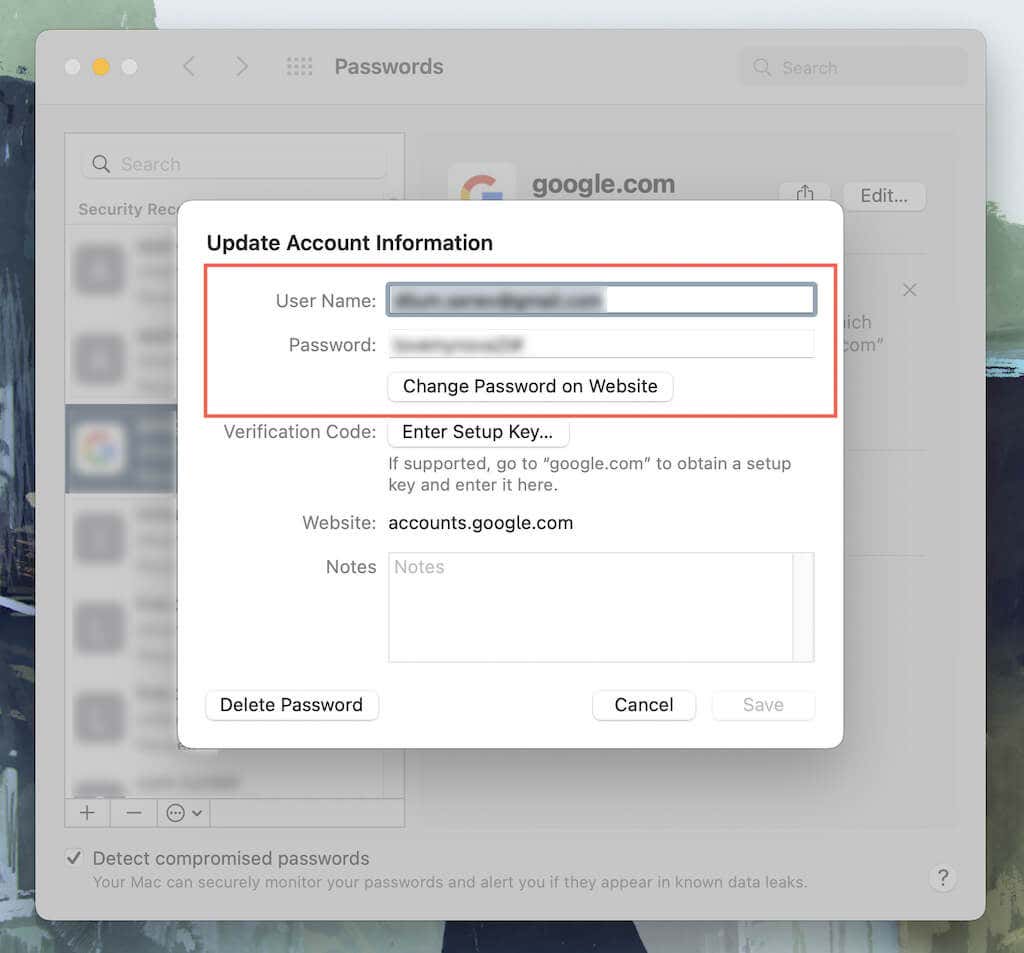
Editing passwords with the new password manager in macOS Monterey is quick and straightforward. After picking an entry, select the Edit button at the top-right of the window to bring up the Update Account Information pane. Then, make your changes and select Save. Or, visit the site and log in with the new password, and request Safari to update it for you.
When editing passwords, you also have the opportunity to add secure text-based notes into the Notes field. For example, you can type in answers to security questions, a list of backup codes, the purpose for creating an account with the website (in case you forget that later), etc.
Additionally, the Enter Setup Key button allows you to add the two-factor setup key for a site. You will learn more about that further below.
Import and Export Passwords
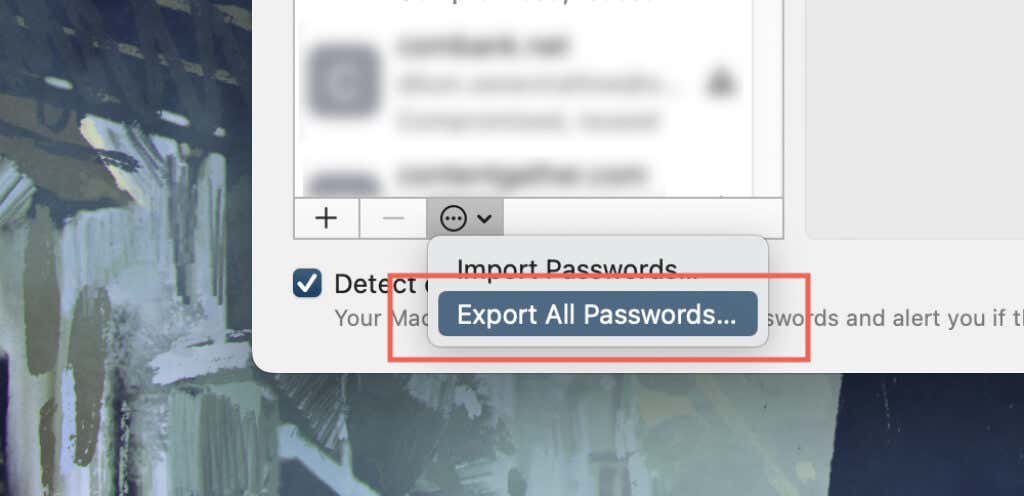
If you want to back up your passwords or transfer them to a different password manager, you have the option of exporting them to the CSV (comma-separated values) file format. To do that, select the More icon (three dots) at the bottom left corner of the password manager window, select Export All Passwords, and specify a storage location.
Conversely, you can choose to import passwords from CSV files into Apple Keychain. Again, select the More icon, but pick the option labeled Import Passwords instead.
Generate Two-Factor Authentication Codes
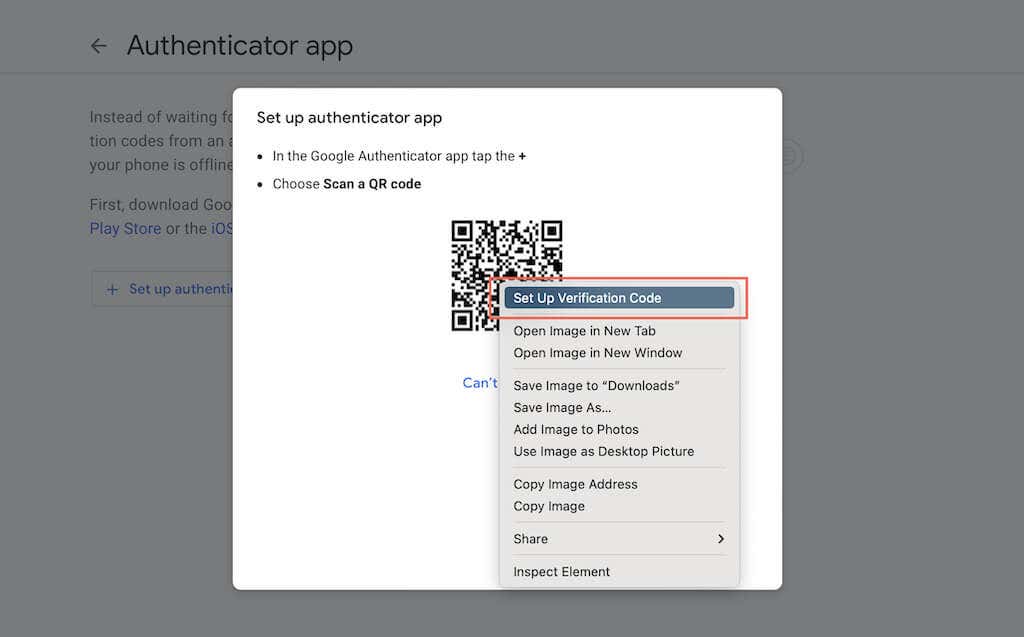
The new password manager in macOS Monterey can work as a two-factor authenticator, generating and auto-filling verification codes in Safari. Whenever you attempt to set up 2FA authentication for a website or service in Safari, Control-click or right-click the QR code on the screen and select Set Up Verification Code.
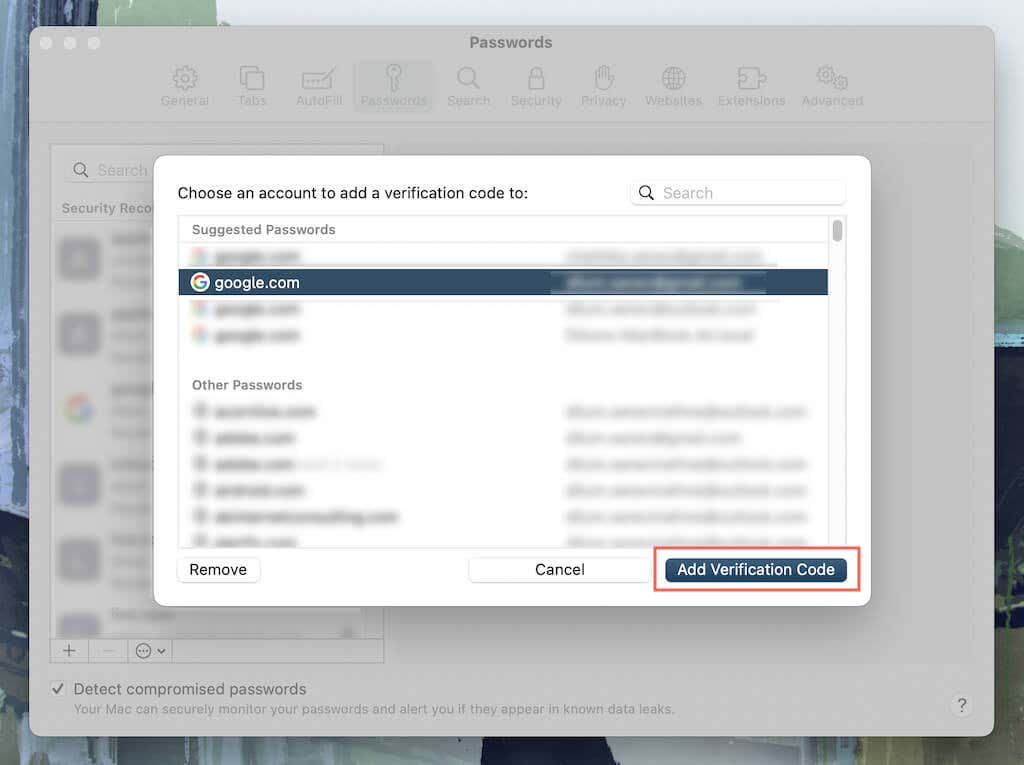
That will prompt Safari’s password manager to automatically show up via the browser preferences. Just choose the relevant login entry for the site and select Add Verification Code.
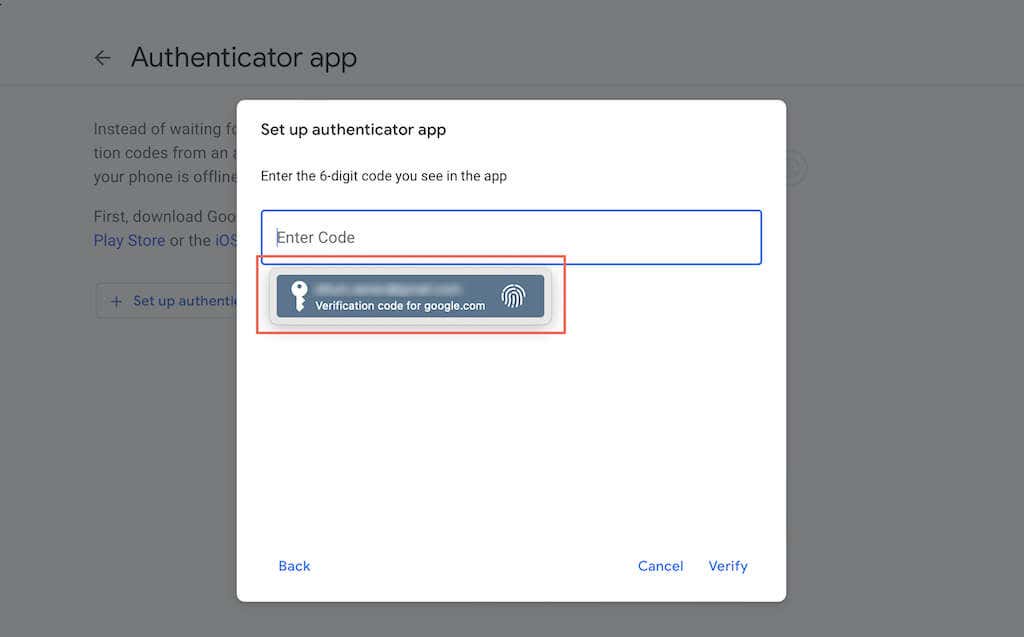
You can then proceed with the verification process on the site by auto-filling the 2FA verification code that the password manager generates for you. It will continue to auto-fill verification codes while attempting to log into the site going forward.
You can also set up two-factor authentication for a site even when using a different browser or app. While viewing the QR code, just look for an option like Can’t scan code? to reveal a 2FA setup key—copy it to your clipboard. Then, open the password manager via System Preferences, select the password for the site (manually add it if it isn’t present), select Enter Security Key, and paste the setup key.
The password manager will immediately start displaying a verification code you can copy and paste to complete the verification process. Revisit the password manager and select the password entry to obtain 2FA codes for the site in future sign-in attempts.
Wrapping Up
Safari’s new password manager in macOS Monterey is a significant improvement, but it still falls short of dedicated third-party password management apps. If you want more, consider switching to 1Password, LastPass, and Dashlane, or get to grips with Keychain Access.
[related_posts_by_tax posts_per_page="5"]
