Running Microsoft Windows alongside macOS on a Mac is ridiculously easy, thanks to tools like Boot Camp, VirtualBox, and Parallels. However, given the often-limited storage of Mac devices, maintaining a multi-OS setup is not exactly sustainable in the long run.
If you’re looking to free up space, declutter your system, or transition away from Windows, this guide walks you through the steps to safely uninstall Windows from any MacBook, iMac, or Mac mini.
Uninstall Windows in a Boot Camp Installation
Boot Camp is Apple’s native solution to get Windows on Intel-based Macs. It handles everything, from creating a separate partition on the hard drive or SSD, downloading the required hardware drivers, to setting up the Windows installation.
If you have Windows on your Mac courtesy of Boot Camp, you can uninstall the operating system and reintegrate the Windows partition with the main macOS volume through Boot Camp itself.
Back-Up Your Windows Data
Time Machine does not back up data related to Windows, so before you begin, create a copy of your data to avoid permanently losing access to important files and folders.
To do that, hold the Option key as you turn on your Mac and choose Boot Camp to boot into Windows. Then, open File Explorer, go to BOOTCAMP (C:) > Users, and move your user account folder to an external drive or cloud storage service.
Uninstall Boot Camp Partition via BCA
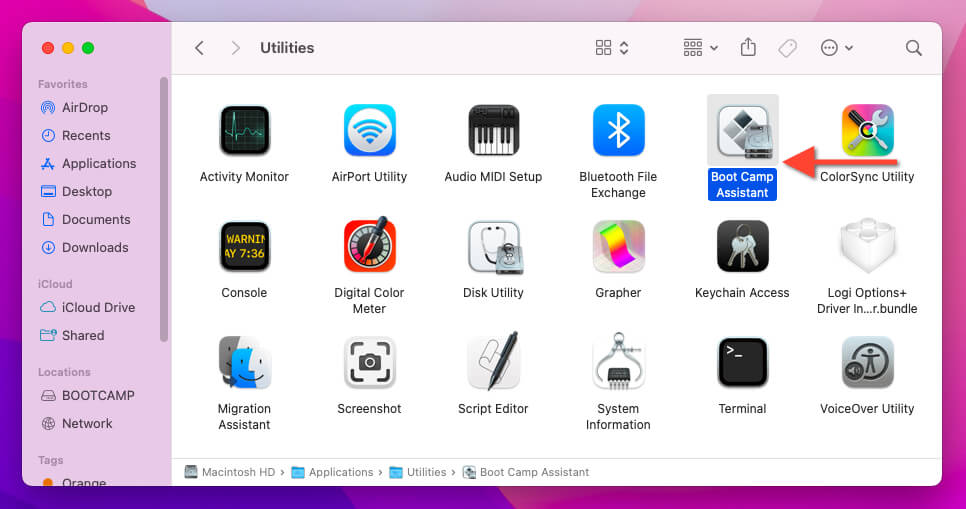
After backing up your data, it’s time to use the Boot Camp Assistant (BCA) utility in macOS to remove Windows. Enter the boot selection screen at startup, select Macintosh HD to boot into macOS, and then:
- Open Finder, navigate to Applications > Utilities, and open Boot Camp Assistant.
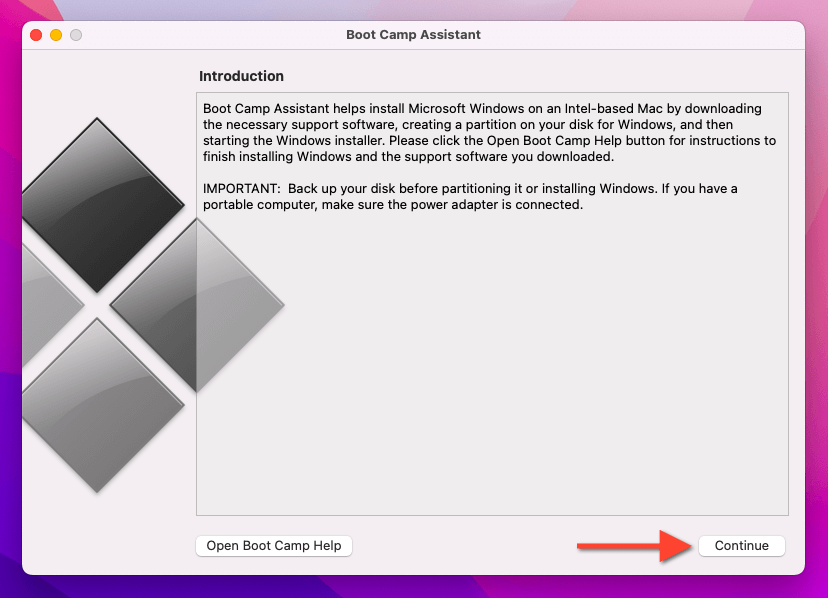
- Select Continue on the Boot Camp Assistant welcome screen.
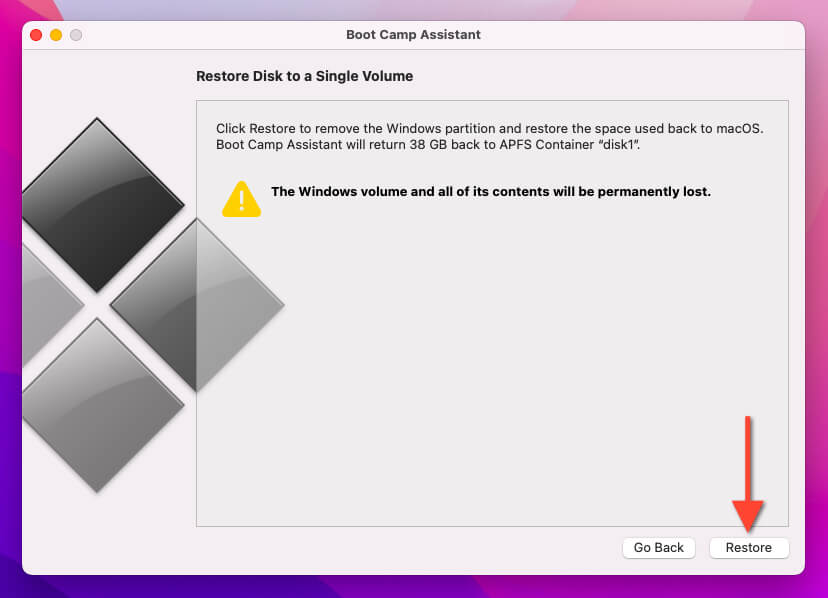
- Select the button labeled Restore.
Note: In Boot Camp Assistant for macOS Catalina and older, you’ll be presented with an additional screen where you must choose Remove Windows 7 or later version or Remove Windows 10 or later version to proceed.
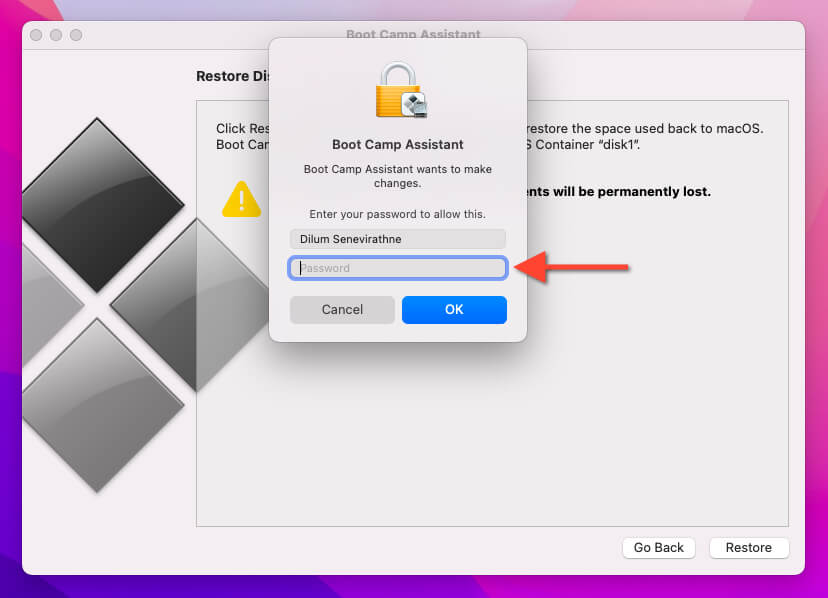
- Enter your Mac administrator password into the authentication pop-up and select OK.
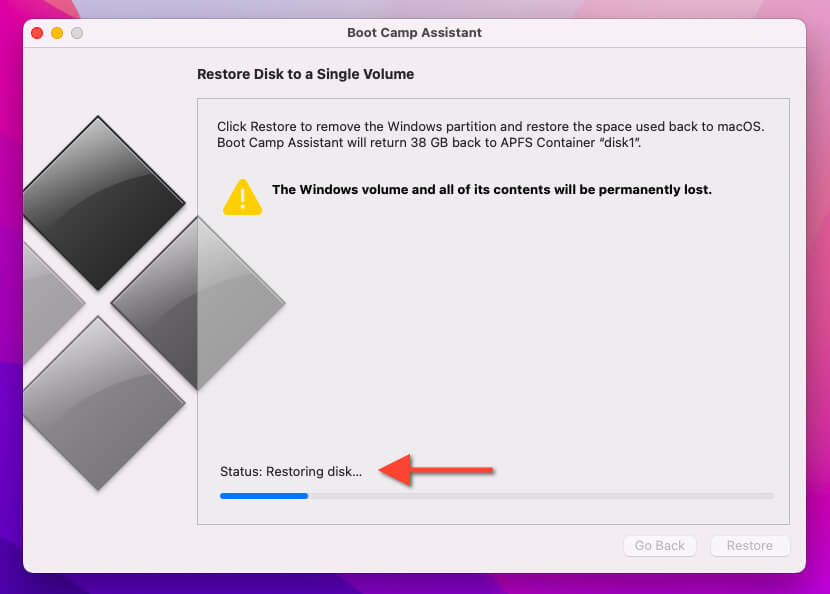
- Wait until Boot Camp Assistant erases Windows and restores the internal disk as a single macOS partition. The procedure can take a while, so be patient.
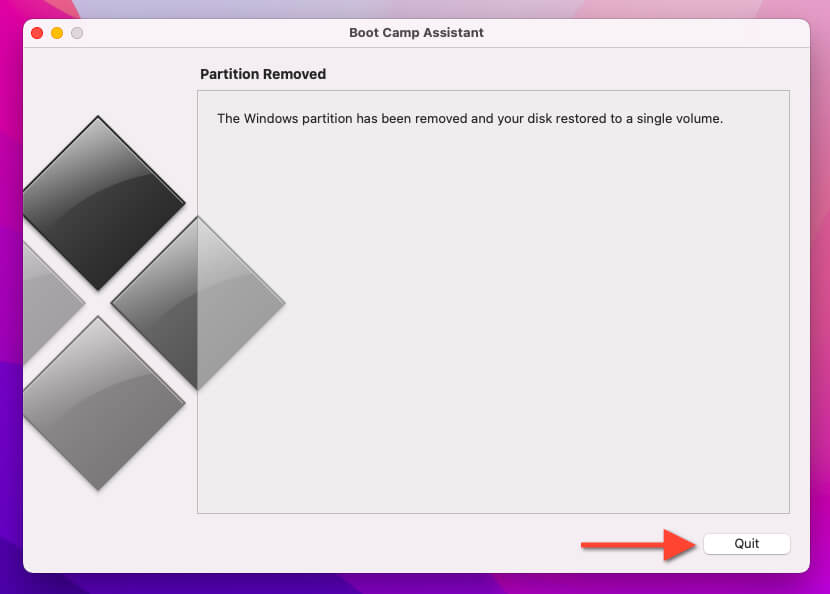
- Select Quit to exit the Boot Camp Assistant.
- Reboot macOS—open the Apple menu and select Restart—to finalize the Windows removal process.
Remove Boot Camp Partition via Disk Utility
If you encounter a “Your disk could not be restored to a single partition” error message while attempting to remove the Windows OS via Boot Camp Assistant, you can rely on the Disk Utility-based approach below. Just:
- Invoke Spotlight Search (press Command + Spacebar) and launch Disk Utility.
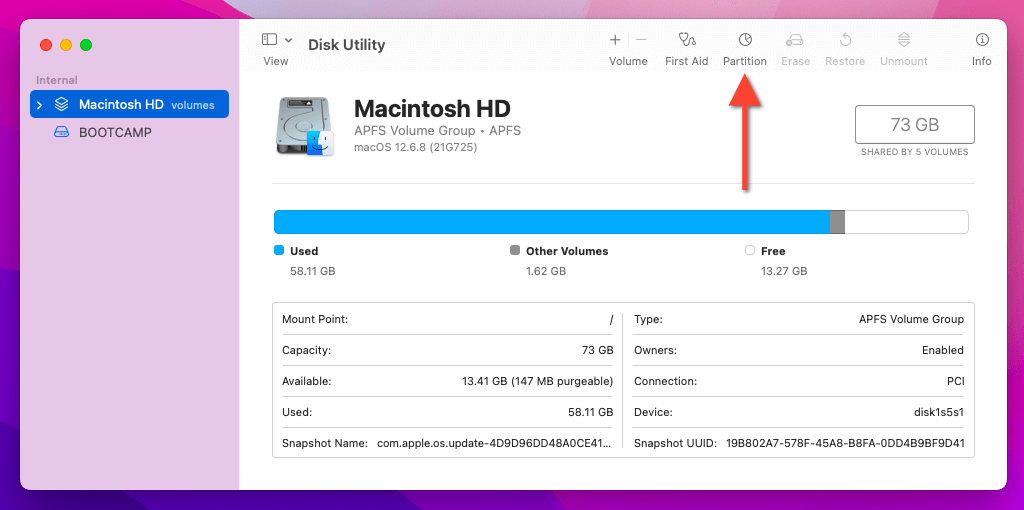
- Select the Partition button on the top of the Disk Utility window.
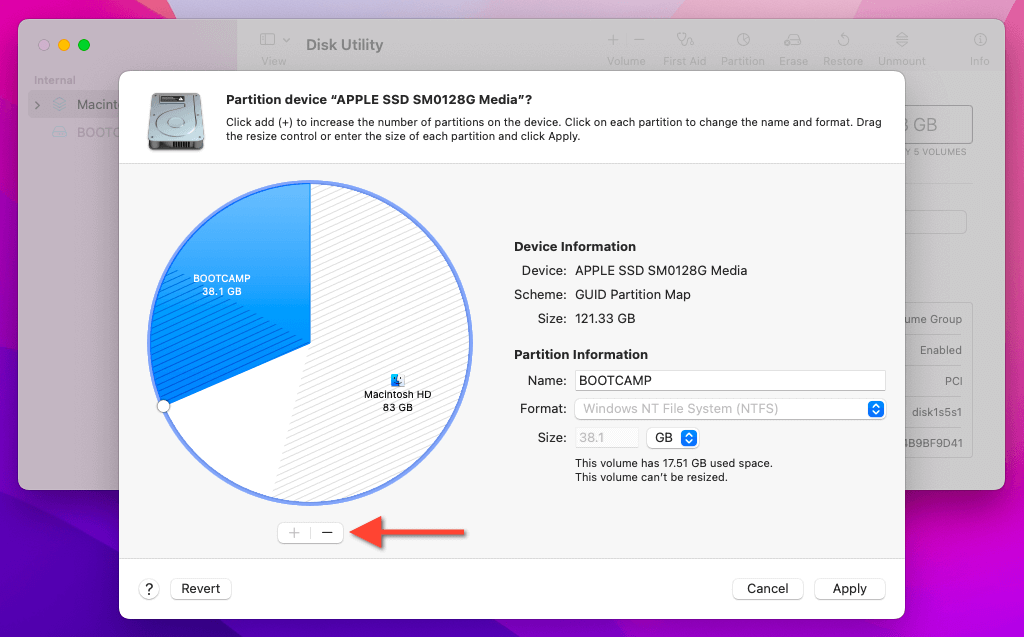
- Highlight BOOTCAMP within the pie chart view and select the Minus button.
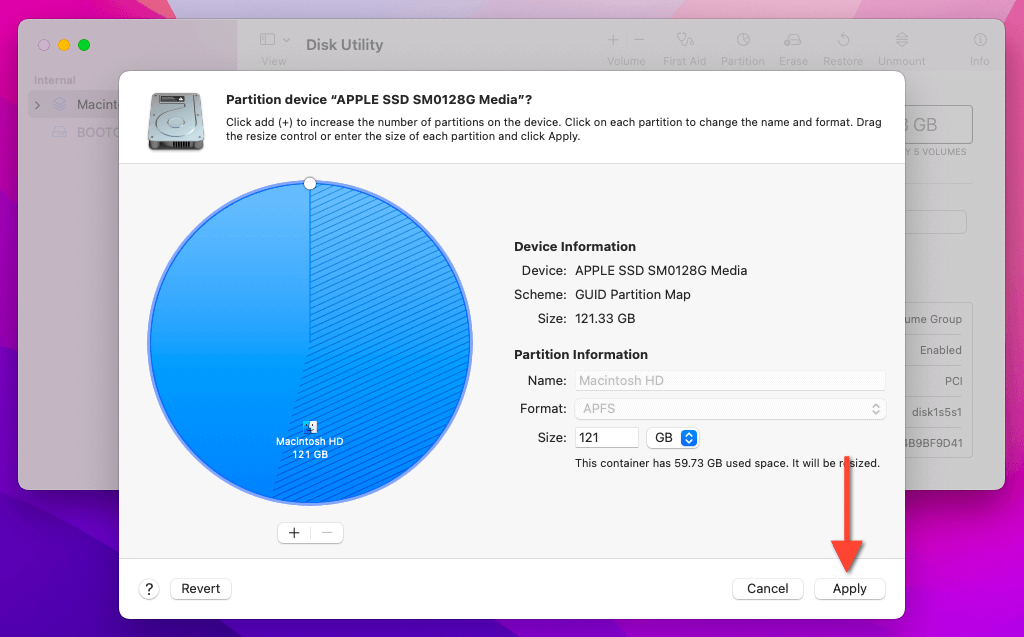
- Select Apply.
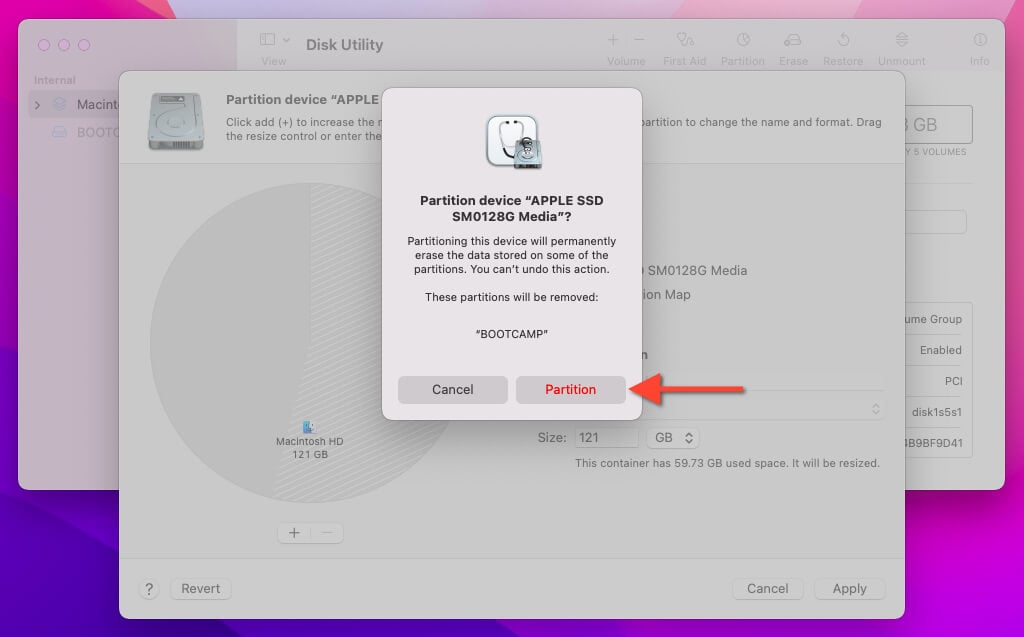
- Select Partition.
- Stay put as Disk Utility wipes and merges the Windows disk with the primary macOS volume.
Note: If you continue to run into issues removing Windows, repeat the steps above using Disk Utility in Mac Recovery Mode.
Remove Windows From Virtualization Apps
Compared to Boot Camp, virtualization software like VirtualBox makes using Windows on a Mac more convenient since you can interact with the operating system without having to boot out of macOS. Paid tools—such as Parallels Desktop—even support running ARM versions of Windows on Apple Silicon Macs.
Removing a Windows virtual machine (VM) is just as convenient. There are no separate partitions to deal with; all you have to do is instruct the virtualization program to delete the virtual disk files associated with the VM. As examples, here’s how uninstalling a Windows VM works in VirtualBox and Parallels.
Backup Important Files: Before you delete anything, copy any essential data from the Windows virtual machine to your Mac or an external storage device.
Remove Windows Installation From VirtualBox
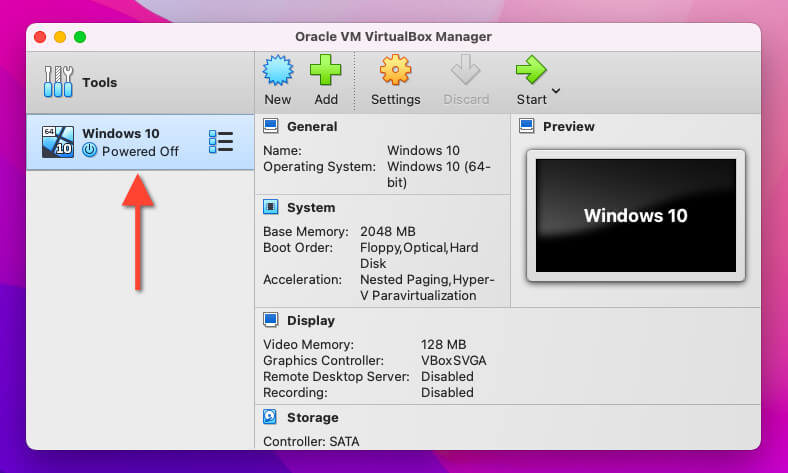
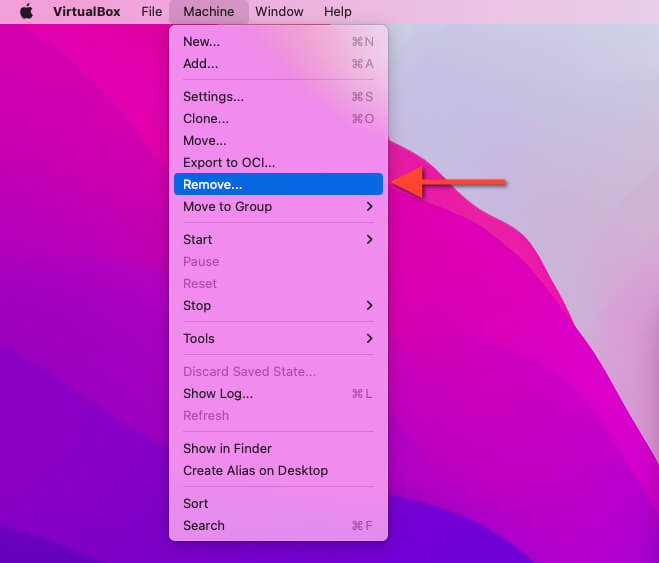
- Open the Oracle VM VirtualBox Manager and highlight the Windows installation you want to delete on the sidebar. If the virtual machine is active, power it down first.
- Select Machine on the top menu and choose Remove.
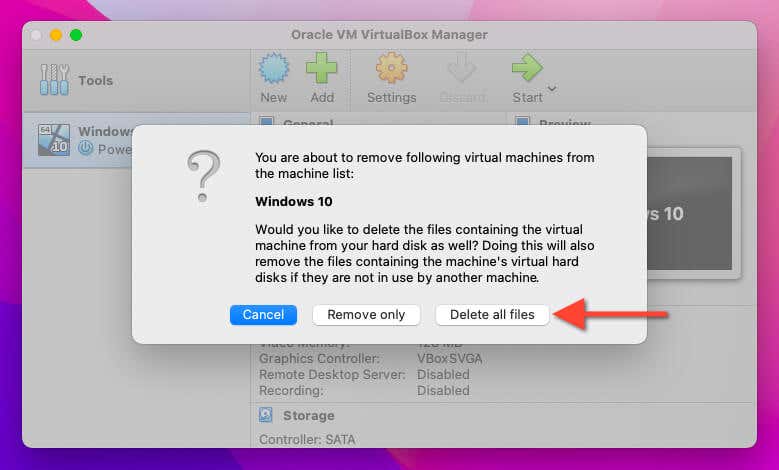
- Select the Delete all files button.
- Go to your Mac’s Trash and empty it to completely remove the virtual machine and free up space on the internal disk.
If you want to remove the VirtualBox installation from your Mac, use the VirtualBox Uninstall Tool bundled with the VirtualBox installer. Check our VirtualBox for Mac removal guide for detailed instructions.
Remove Windows Installation From Parallels Desktop
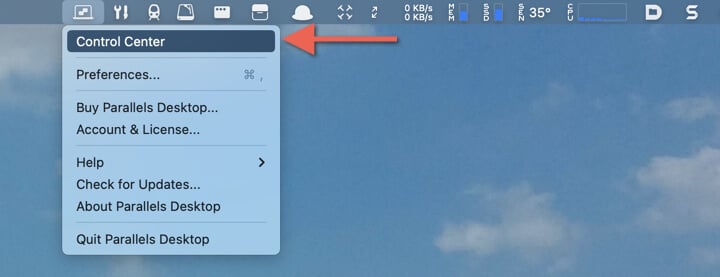
- Open Parallels Desktop, select the Parallels Desktop status icon, and choose Control Center.
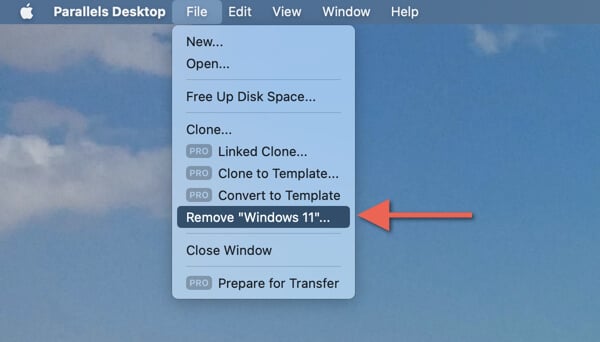
- Shut down the Windows virtual machine if active and choose File > Remove [virtual machine name] on the menu bar.
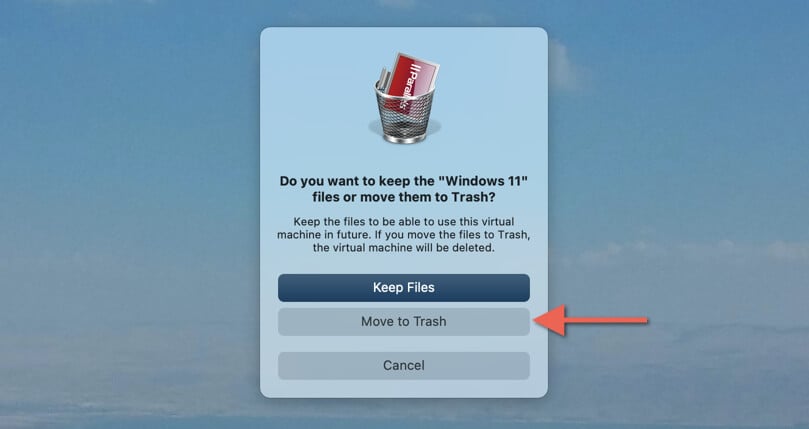
- Select Move to Trash.
To uninstall Parallels on your Mac, quit all running virtual machines, visit the Applications folder, and drag and drop Parallels into the Trash. You can manage your Parallels subscription by signing into your Parallels account via Safari or any other web browser.
You’re Now a Full-Time Mac User
You now know what it takes to uninstall a full-fledged Windows installation or virtual machine from a Mac computer. While the steps are straightforward, always prioritize backing up your data. If you’re just troubleshooting Windows for issues, feel free to reinstall the OS when you’re ready.
By the way, did you know you can also use Windows apps on the Mac without installing Windows?
