Do Not Disturb—a.k.a. DND—is a built-in Mac feature that eliminates distractions when you need to concentrate on an activity. It blocks all app notifications, text alerts, and phone calls while giving you the option to allow specific apps and people to reach you.
Additionally, you can use custom DND modes (Apple calls them “Focus” profiles) to set boundaries for the multitude of tasks you engage in on your Mac, such as working, studying, and gaming.
This tutorial will walk you through everything you need to know about setting up, enabling, and using Do Not Disturb and Focus profiles on a Mac computer.
Note: The instructions below apply to a Mac running macOS Ventura or later. If you’re on an older system software version, open System Preferences and select Software Update to update your Mac.
Enable the Do Not Disturb Mode on Mac
By default, Do Not Disturb blocks all application and system notifications, banners, and alerts on your Mac. It also blocks FaceTime calls, including regular phone calls forwarded by your iPhone. To activate DND:
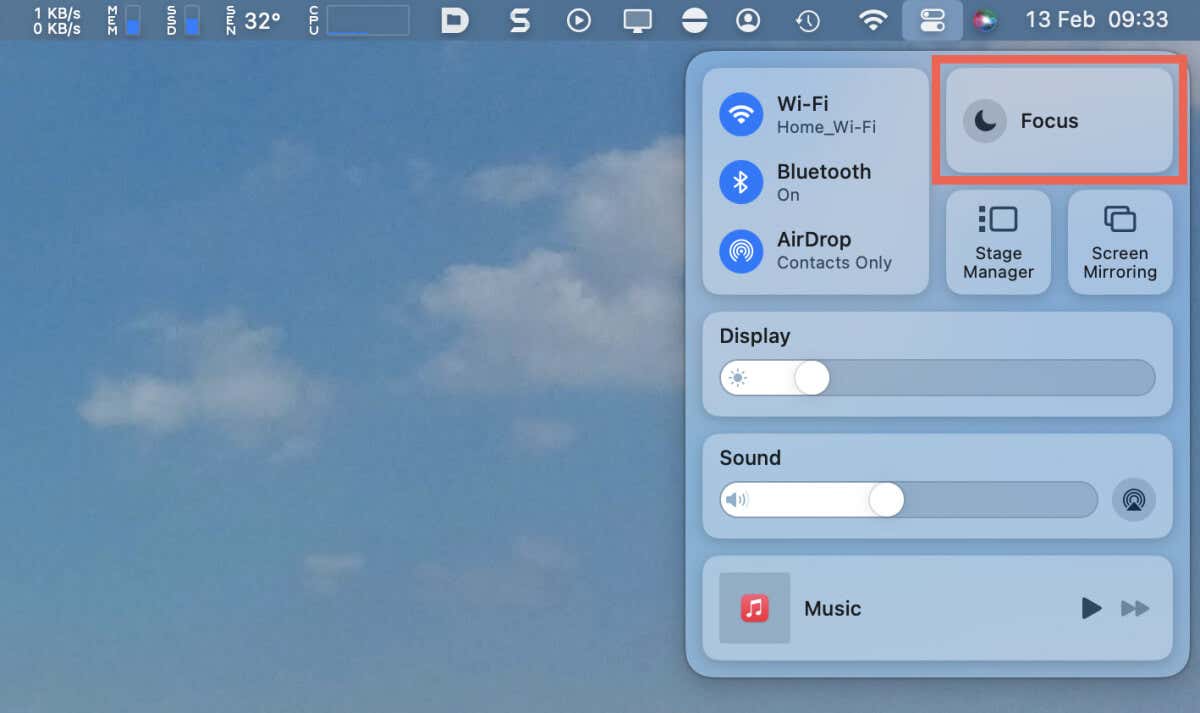
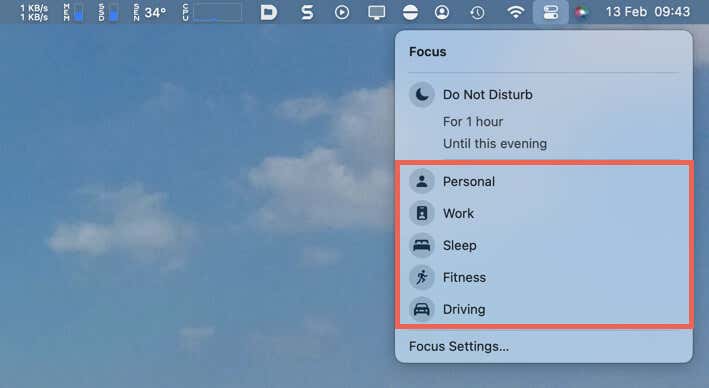
- Select the Control Center icon on the upper-right corner of the Mac’s menu bar and choose Focus.
- Select Do Not Disturb. Or, pick the For 1 hour or Until this evening options if you want your Mac to disable DND automatically after the defined period.
Tip: A faster way to activate Do Not Disturb is to select the Notification Center icon—which displays the date and time—while holding down the Option key.
When it’s time to disable Do Not Disturb, use any of the following methods:
- Re-open the Control Center and select Do Not Disturb twice.
- Select the Moon icon on the Mac’s menu bar and choose Do Not Disturb twice.
- Hold down the Option key and select the Notification Center icon.
Customize the Do Not Disturb Mode on Mac
Your Mac provides several Do Not Disturb options to customize how the feature works. To configure DND:
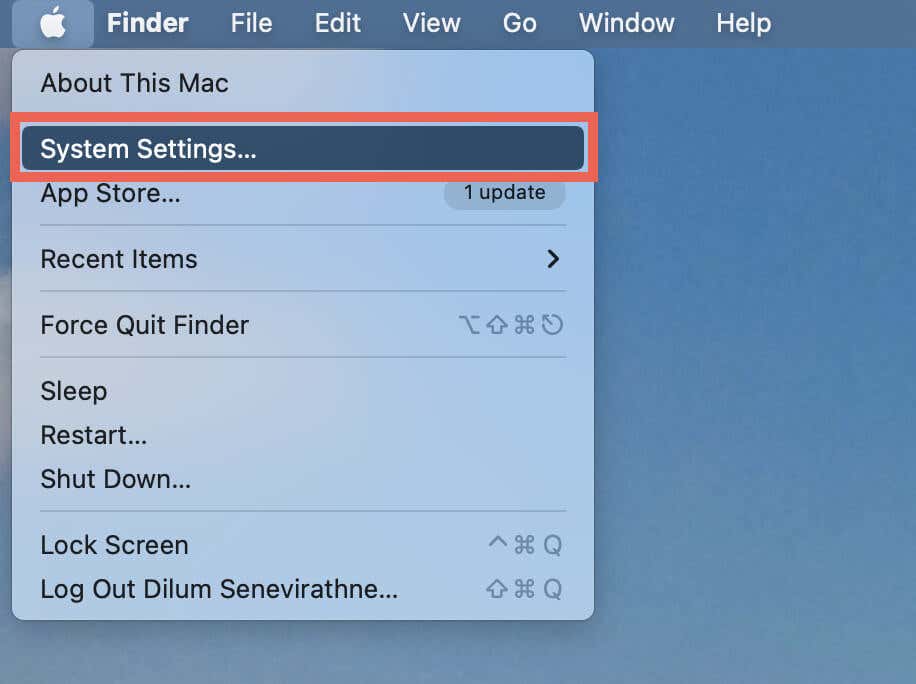
- Open the Apple menu and select System Settings.
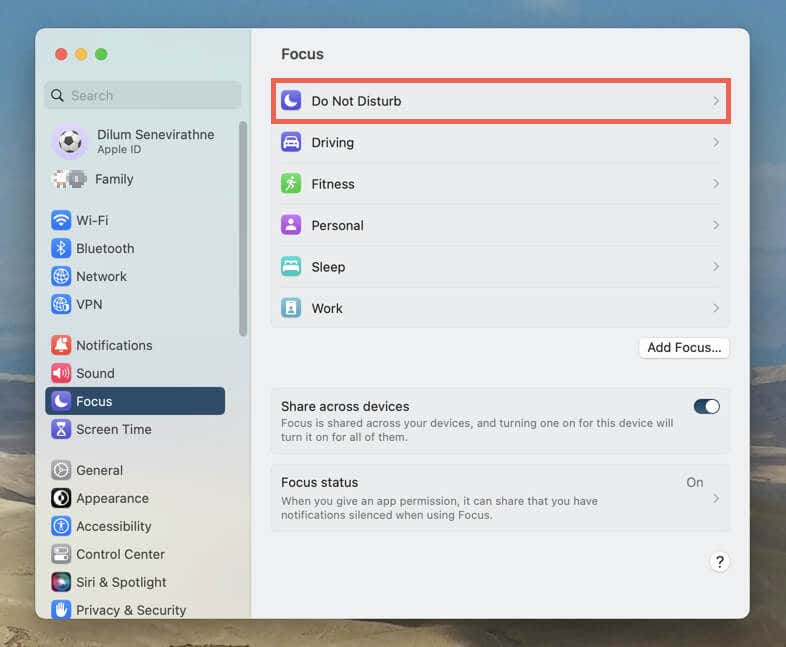
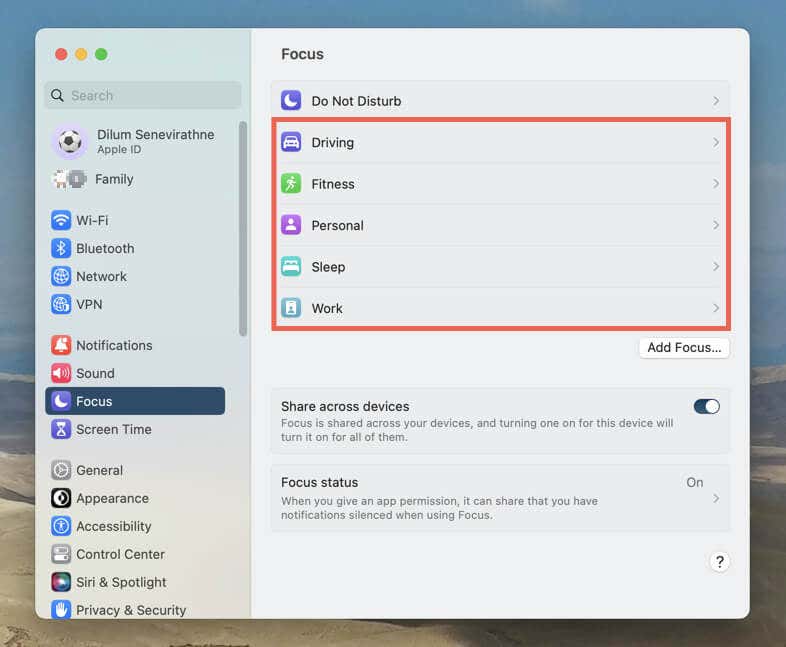
- Select the Focus tab on the sidebar and choose Do Not Disturb.
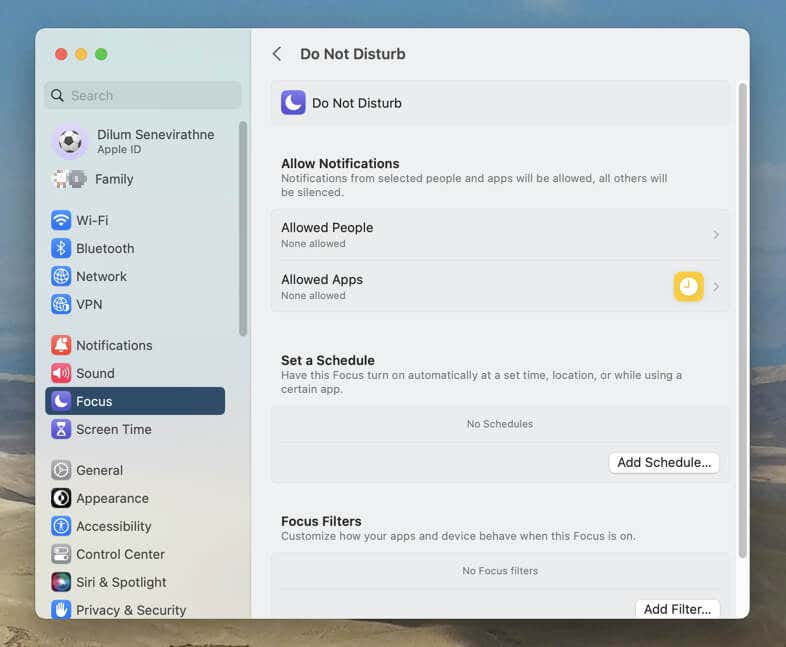
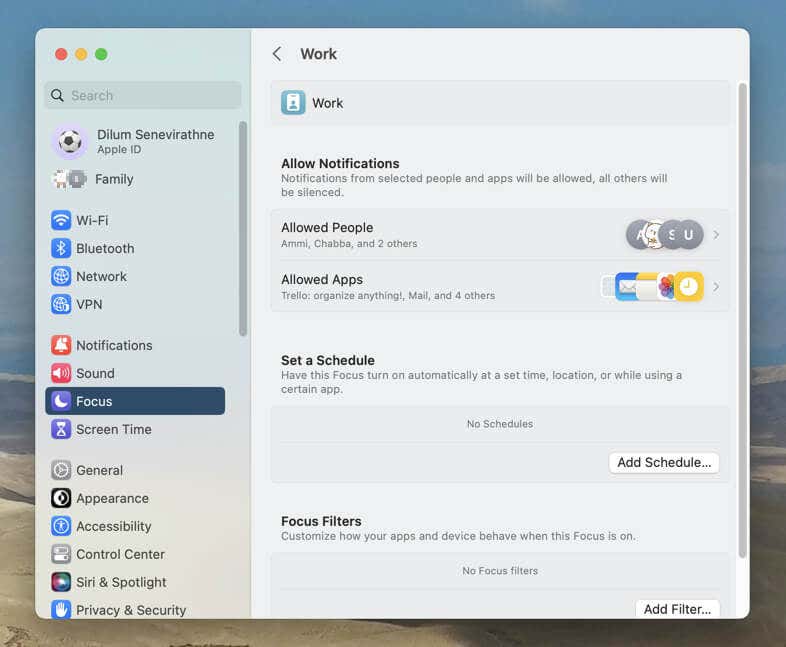
- Available Do Not Disturb customization settings are as follows—Allow Notifications, Set a Schedule, and Focus Filters. Here’s how you can use them:
Allowed Notifications — Allowed People
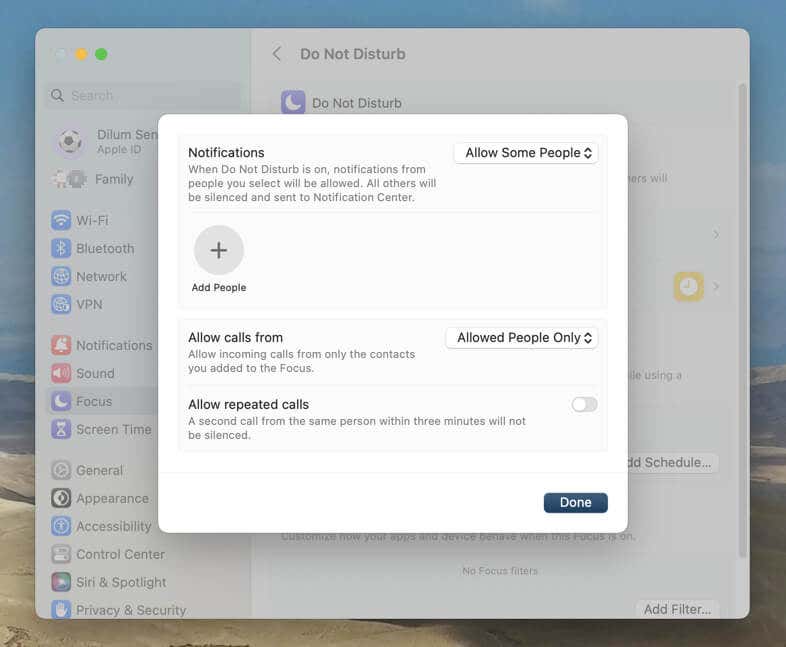
Use the Add People button to specify who can reach you over the Messages app when Do Not Disturb is active. If you only want to block the people you add, change the Notifications mode from Allow Some People to Silence Some People.
Next, use the menu next to Allow calls from to let through calls from all or specific people. For example, choose Everybody to allow all calls or Allowed People Only to let in calls from the contacts you’ve added to the list above.
If you pick anything other than Everybody, turn on the switch next to Allow repeated calls to allow a person through if they call for a second time within three minutes.
Allowed Notifications — Allowed Apps
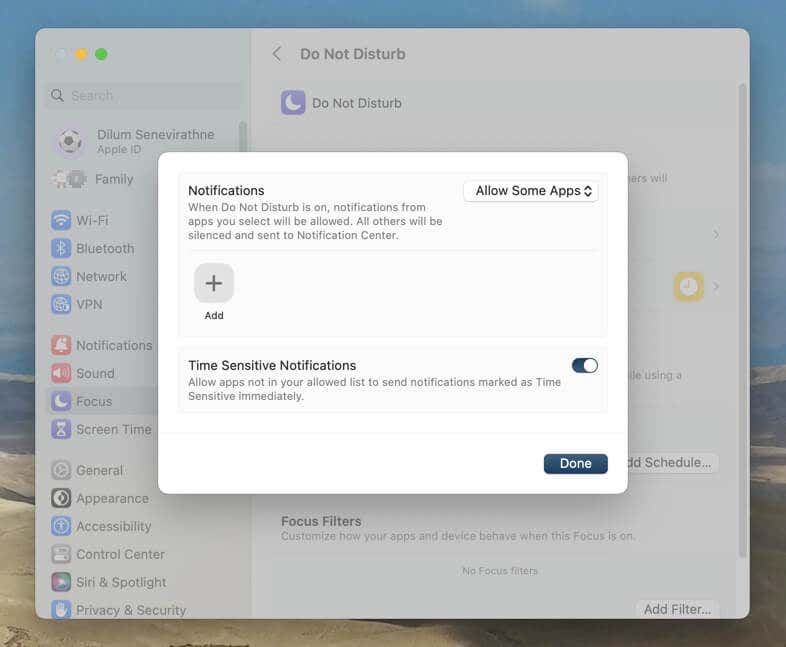
Use the Add button to select programs that send alerts to you during Do Not Disturb. If you want to block notifications from the apps you add, switch the Notifications mode from Allow Some Apps to Silence Some Apps.
Turning on the switch next Time Sensitive Notifications lets through notifications that require immediate attention, such as upcoming calendar events. Learn more about Time Sensitive notifications in macOS.
Set a Schedule
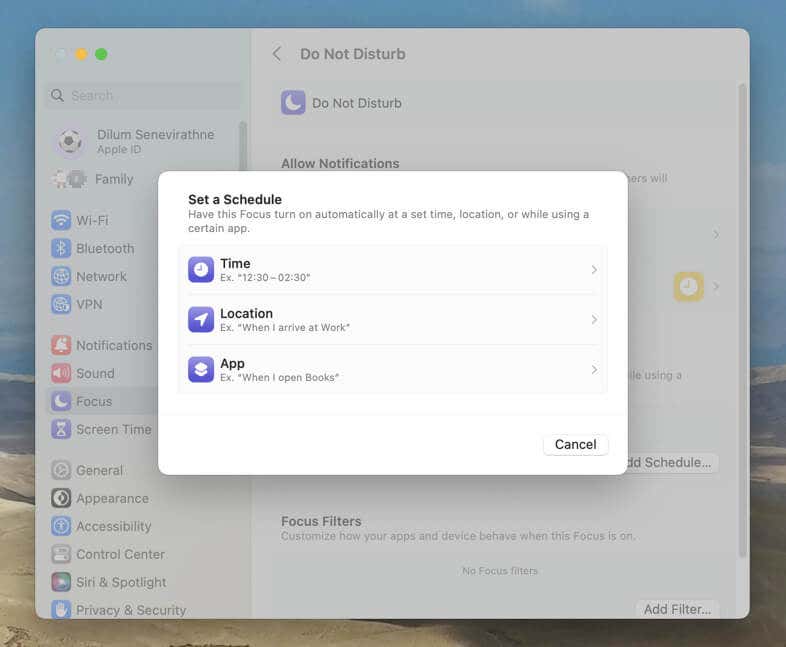
Set up multiple Do Not Disturb schedules with Time, Location, and App automations. For example, you can set DND to activate and deactivate within a specific time, when you arrive at a location, or when you open a particular app.
Focus Filters
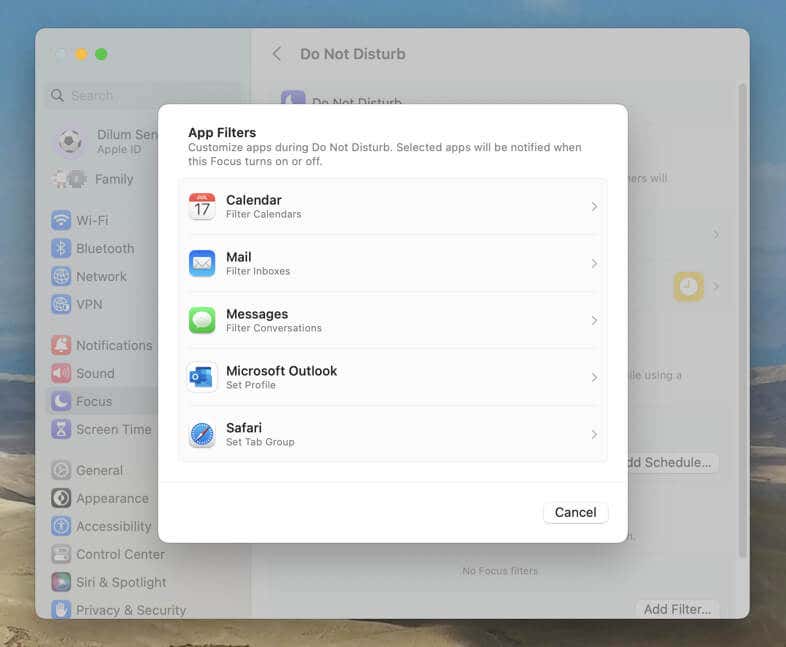
Decide how apps work in Do Not Disturb. For example, if you have multiple mailboxes in the Mail app, you can choose which can notify you about incoming email messages.
Note: At the time of writing, only a limited number of macOS apps support Focus Filters.
Enable and Customize Focus Profiles on Mac
Although it’s possible to customize Do Not Disturb repeatedly to match the activities you perform on your Mac, the process can get tedious. That’s where Focus comes into the picture. It’s a feature you can use to create and save multiple DND profiles, each with its own customizations and automation triggers.
By default, macOS provides access to five Focus profiles—Driving, Fitness, Personal, Sleep, and Work. For example, the Work profile automatically allows notifications from apps geared toward productivity.
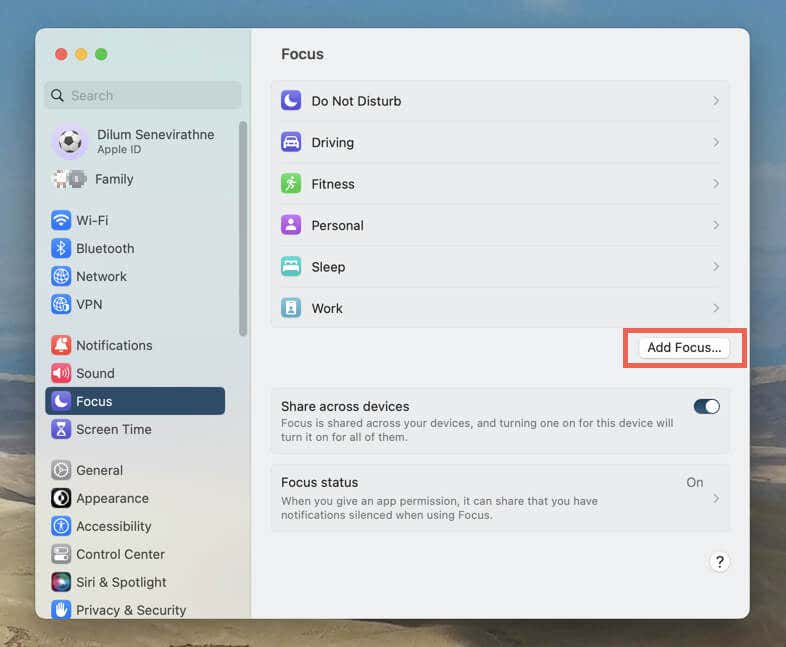
You can also create custom profiles through your Focus settings and add three additional presets—Gaming, Mindfulness, and Reading—if you want (more on that later).
Enabling a Focus profile is similar to activating Do Not Disturb—just open the Control Center, select Focus, and pick the profile you want.
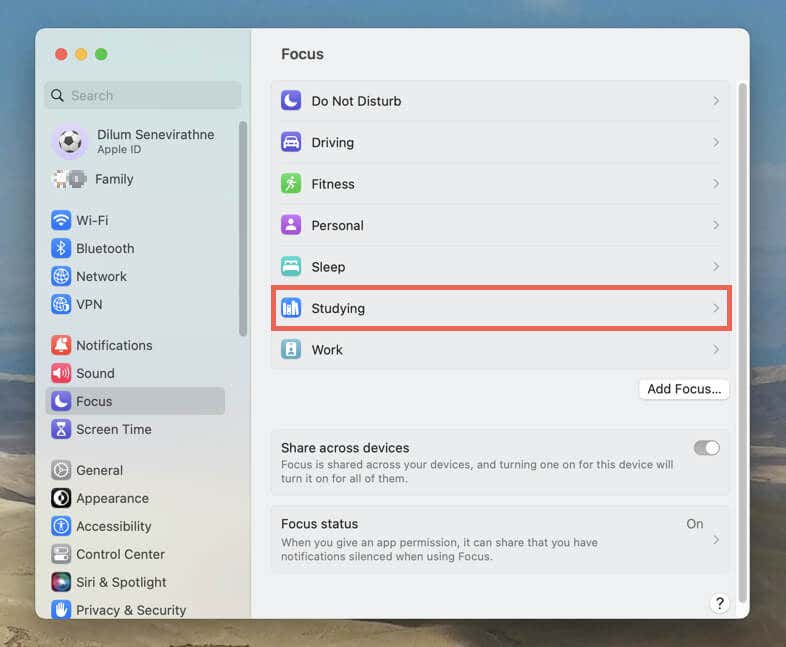
You can customize the default Focus profiles if you want. Go to System Settings > Focus, and pick the Focus you want—e.g., Work.
Then, like with the regular DND mode, you can include and exclude people and apps, add or modify schedules, and set up Focus Filters.
Note: You must use your iPhone to fully customize the Driving and Sleep profiles.
Create Custom Focus Profiles on Mac
The pre-set Focus profiles aside, you can create as many custom profiles on your Mac as you want. To do that:
- Open the System Settings app, select Focus, and choose the Add Focus button.
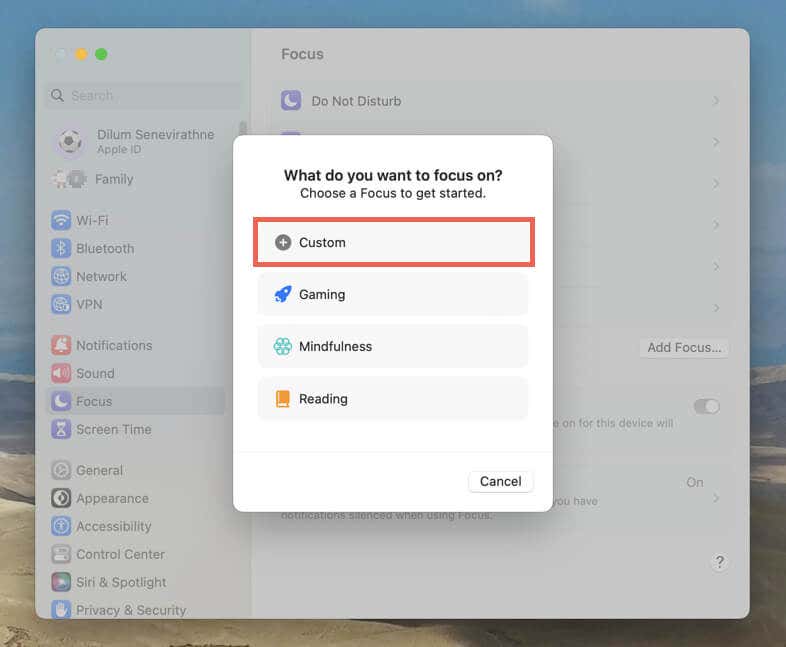
- Select the Custom category. If you want to add an additional pre-set Focus profile, choose Gaming, Mindfulness, or Reading.
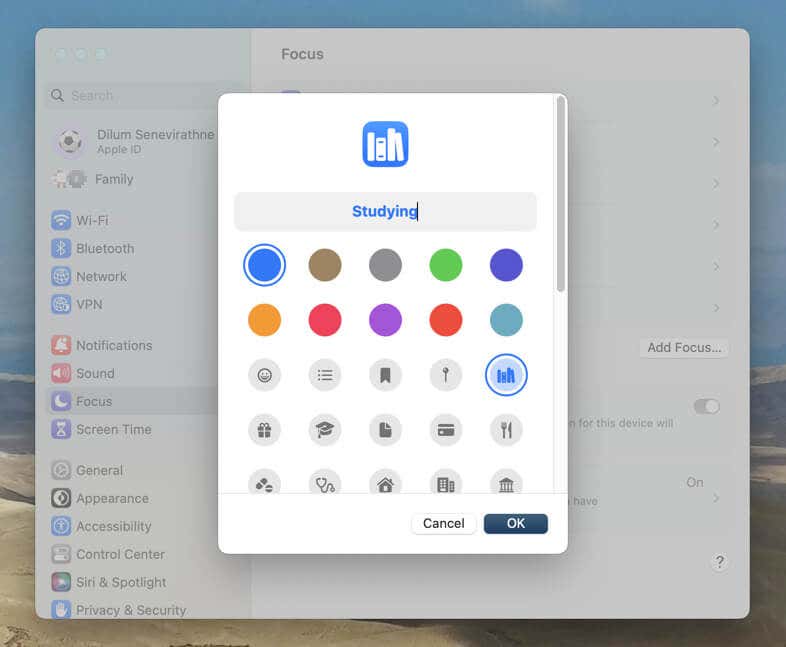
- Name the Focus profile—e.g., Studying—and pick a suitable icon.
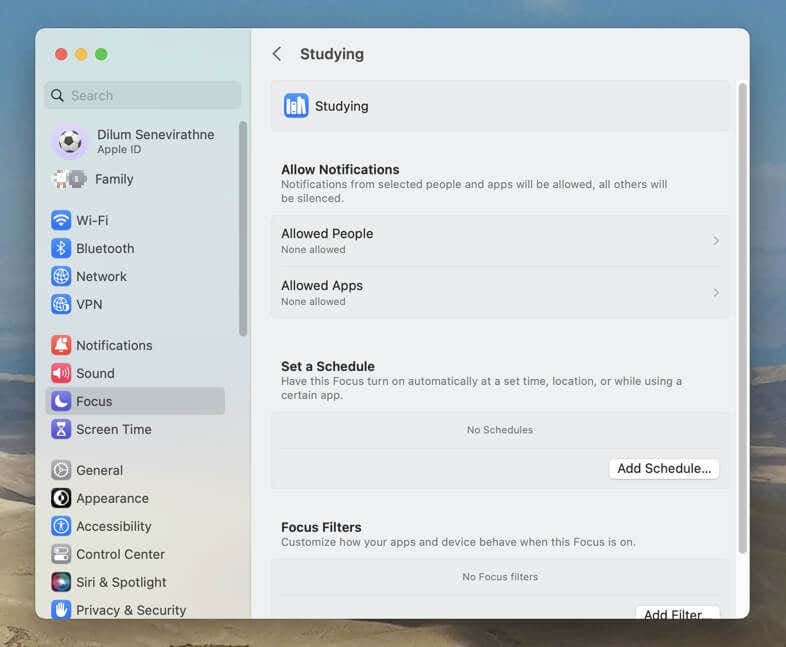
- Work through the customization options to allow notifications from selected people and apps, set a schedule, and activate Focus Filters.
- Activate the Focus profile through your Mac’s Control Center.
Delete a Focus Profile on Mac
You can delete a preset or custom Focus profile on the Mac anytime. To do that:
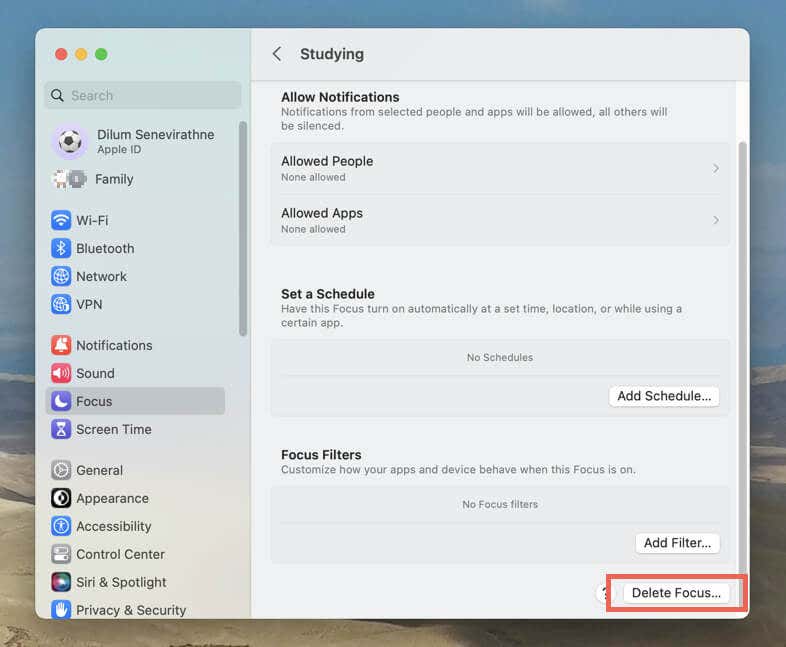
- Go to System Settings > Focus and select the Focus you want to delete.
- Select the Delete Focus button.
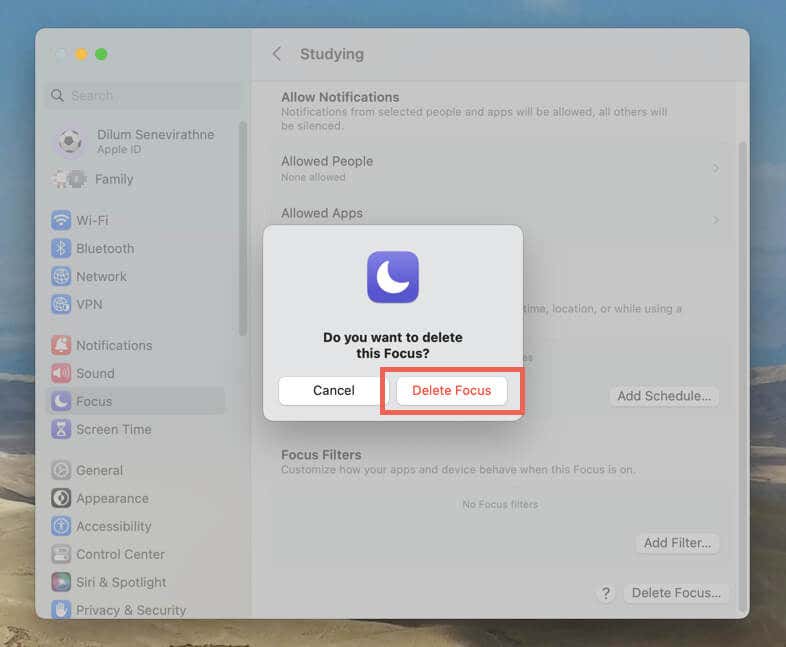
- Select Delete Focus on the confirmation pop-up.
If you delete a preset profile, you can easily add it back through the Add Focus wizard.
Other Ways to Customize DND and Focus
You can tweak several settings in macOS to customize how Do Not Disturb and Focus work on your Mac even further.
Stop Syncing DND and Focus Between Apple Devices
By default, when you enable Do Not Disturb or a Focus profile on your Mac, it also automatically syncs the Focus status with other Apple devices you own, such as the iPhone, iPad, and Apple Watch.
If you want to stop that, go to System Settings > Focus and disable the switch next to Share across devices.
Disable Focus Status Sharing With Other Apple Users
Your Mac transmits your Do Not Disturb and Focus status with other Apple users on apps like Messages to let them know you aren’t receiving any notifications.
If that sounds like a possible breach of privacy, go to System Settings > Focus > Focus Status and disable the checkbox next to Share Focus status.
Activate an Always-On DND/Focus Status Indicator
You can add a permanent Do Not Disturb or Focus status indicator to the Mac’s menu bar for faster access to your DND options and Focus profiles.
Go to System Settings > Control Center, open the menu next to Focus, and pick the Always Show in Menu Bar option.
Don’t Let the Distractions Get to You
Do Not Disturb and Focus profiles are excellent features that help you avoid getting sidetracked, beat procrastination, and focus on the stuff that matters. Keep experimenting with the various DND customization settings, try out the default Focus profiles, create your own custom Focus modes, and you should be able to figure out the best way to get the most out of both features.
[related_posts_by_tax posts_per_page="5"]
