One of the benefits of owning an iPhone is using a live photo as your home and lock screen background.
Live Photos is part of the features that came with the iPhone 6s series in 2015. You can use the feature to record what happens 1.5 seconds before and after taking a photo. What you get is a picture with sound that moves a bit when you activate it.
You probably use Live Photos with images from your phone’s gallery. But if you have a video you shot a while back, you can also use it as a live background. The good news is that you can convert a video into a Live Photo, but you’ll need a special third-party app for that.
In this guide, we’ll show you how to turn a video into a Live Photo on your iPhone in a few simple steps.
How to Turn a Video into a Live Photo on an iPhone or iPad
There’s no built-in app or way to turn a video into a Live Photo on your iPhone or iPad.
Some of the best third-party apps you can use include intoLive, Video to Live Photo, TurnLive, and VideoToLive.
Note: Live Photos is available on iPhone 6s or later, iPad Air (3rd generation), iPad (5th generation), iPad Pro (2016 or later), and iPad mini (5th generation).
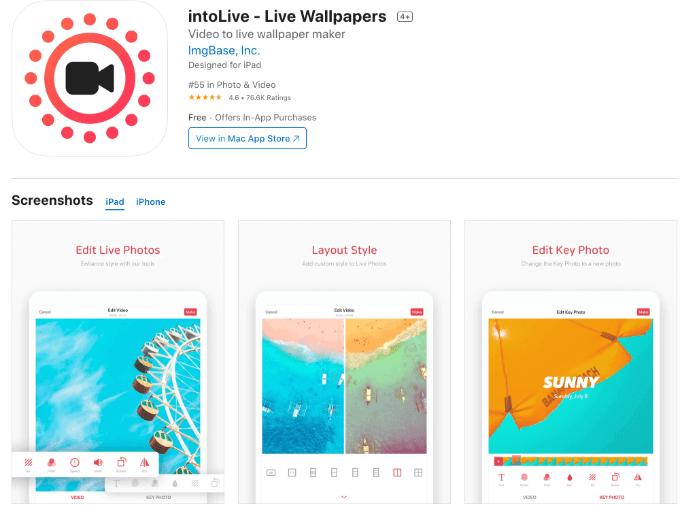
We’ll use the intoLive app for this guide. The app’s free version comes with basic features, but you can get the Pro version to unlock advanced features and editing tools.
- Download and install intoLive app from the App Store.
- Launch the intoLive app and allow the required access permissions to your photo library. You’ll see all the files in your gallery or camera roll organized by type. From here, you can select the video you want to convert into a Live Photo.
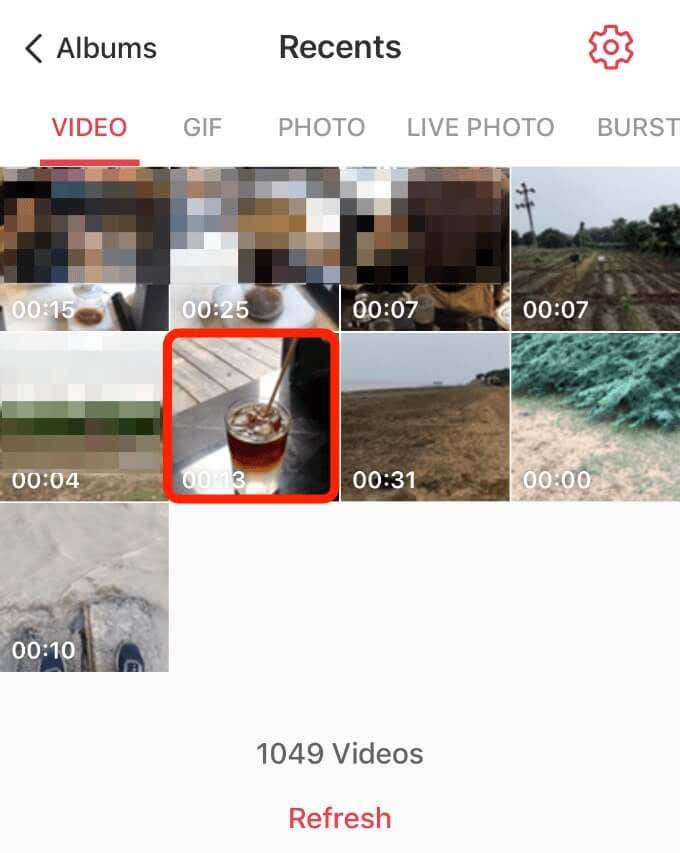
Note: If you’re using the free version of the app, you can only make Live Photos of up to five seconds long. If you want a longer video, the Pro version allows you to make up to 30 seconds long videos.
- In the video editing page, use the slider to trim the video to the part you want to turn into a Live Photo.
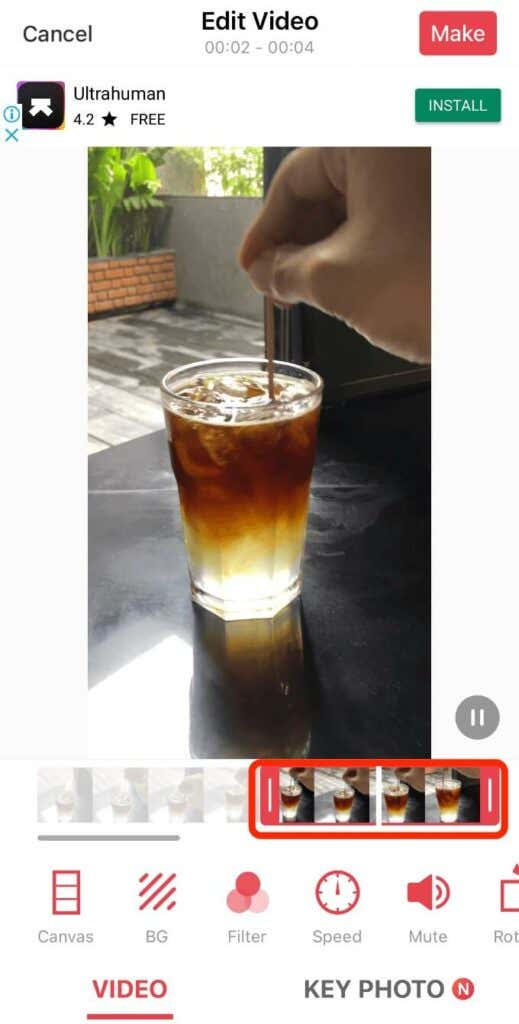
- You can also change the video’s speed, apply filters and repeated loops. However, some options are locked behind the Pro version’s paywall.
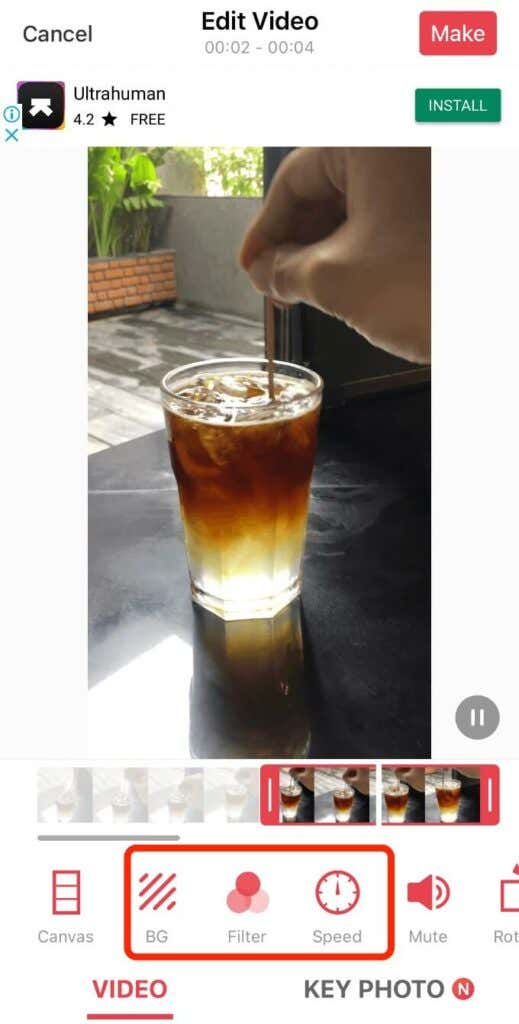
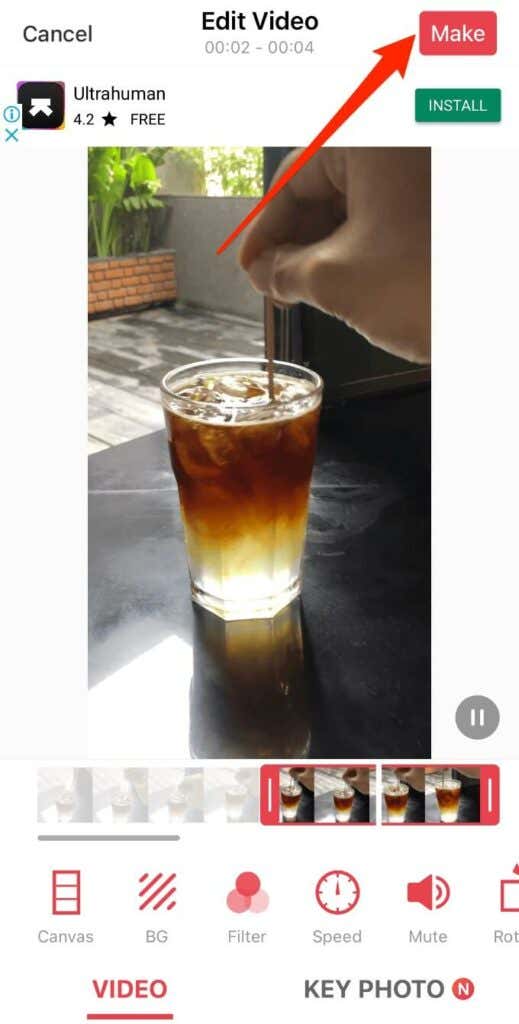
- Once you finish editing the video, tap Make on the upper right side.
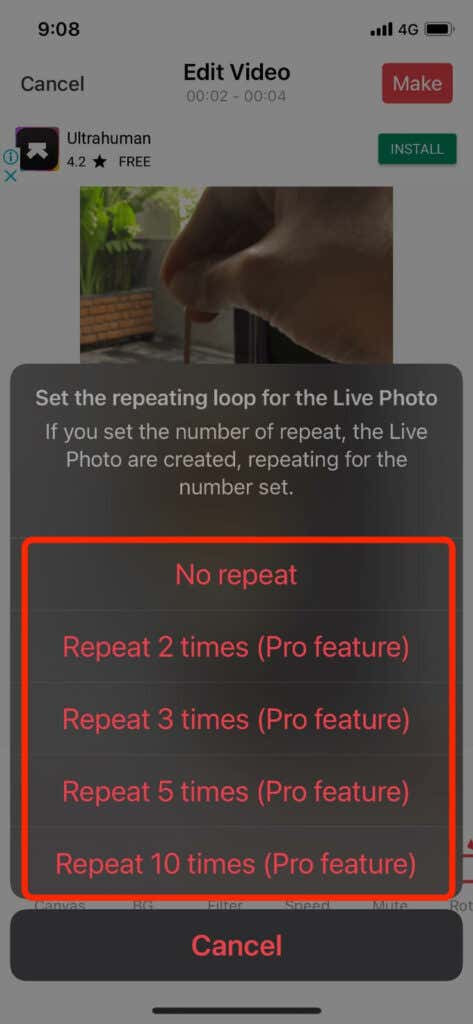
- Choose the number of times you want the Live Photo to repeat.
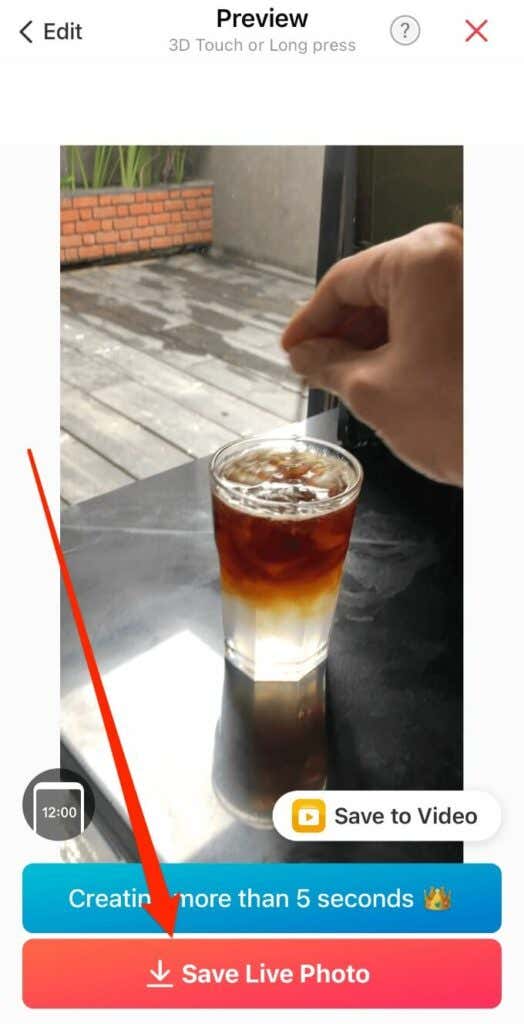
- Give the app a few seconds to create your Live Photo, and then tap Save Live Photo to your iPhone or iPad’s camera roll.
- From here, you can open the Photos app, tap on the new Live Photo, and tap Share.
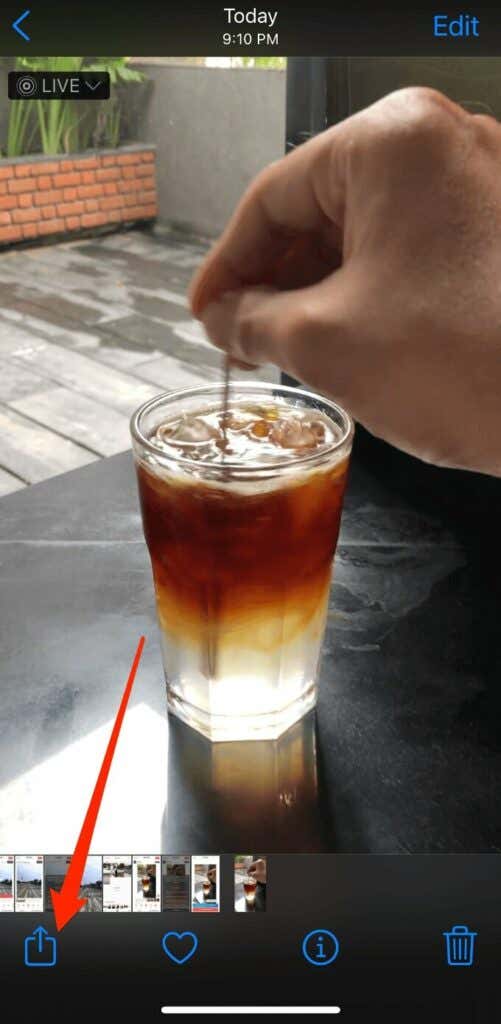
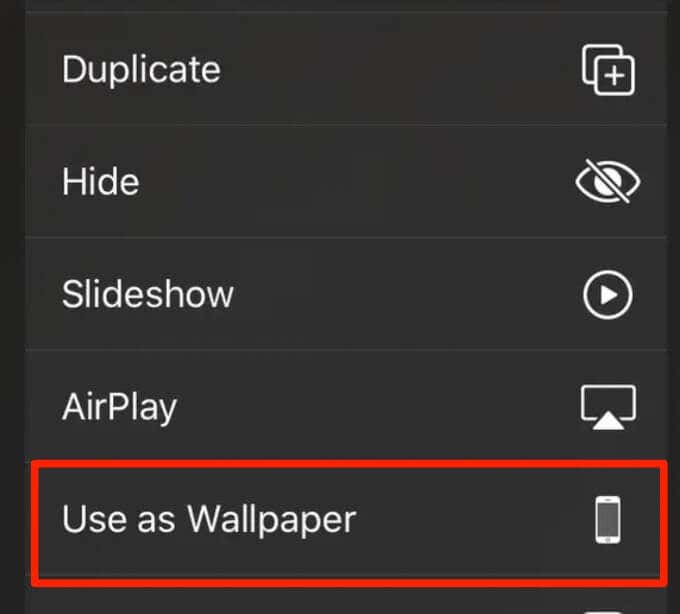
- Tap Use as Wallpaper to set the new Live Photo as your home or lock screen background.
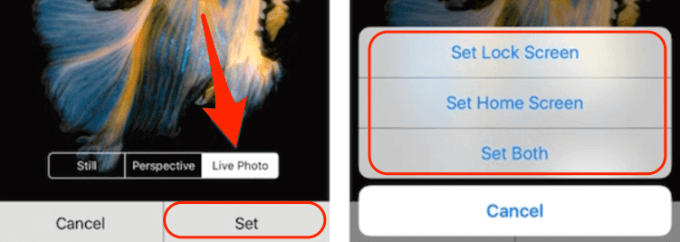
- Next, tap Set and then select whether you want the Live Photo on your home screen, lock screen, or both screens.
How to Turn a GIF into a Live Photo on iPhone or iPad
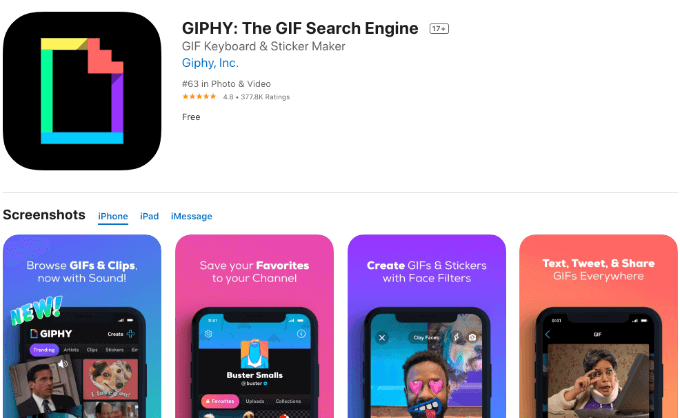
You can also turn your favorite GIF into a Live Photo, but you’ll need a third-party app. For this guide, we’ll use GIPHY, which is free and has the most extensive library of GIFs, stickers, and clips.
- Download and install GIPHY on your iPhone or iPad and launch the app.
- Select the GIF that you want to turn into a Live Photo, tap the three vertical dots on the right side of your screen.
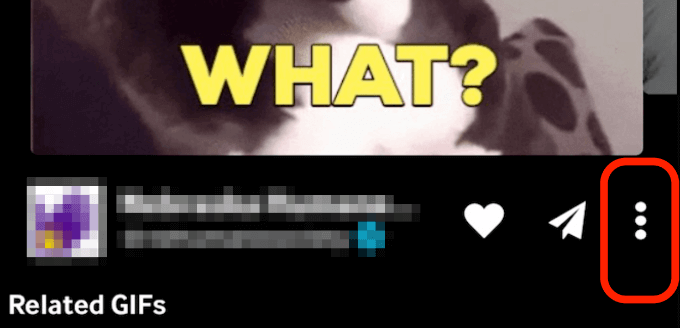
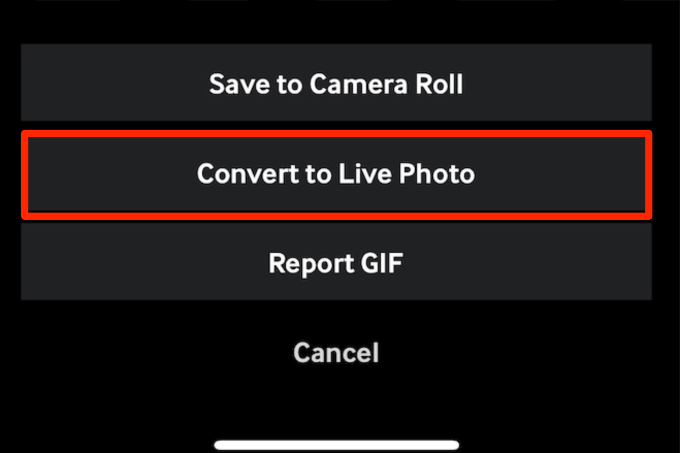
- Tap Convert to Live Photo.
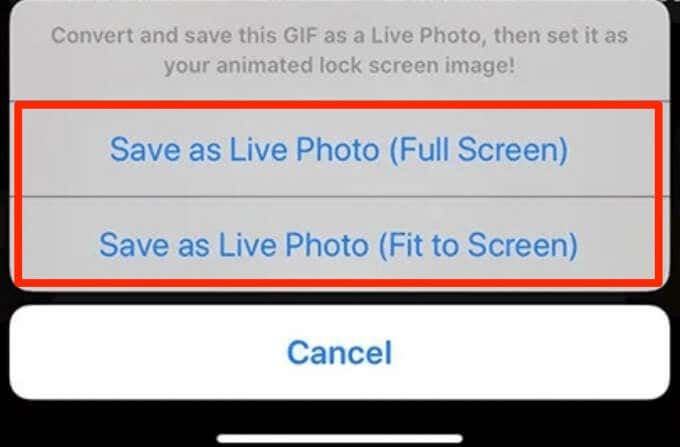
- Select full-screen or fit-to-screen.
- Your new Live Photo will be available in your Camera Roll. From here, you can set it as live wallpaper or background on your device’s home or lock screen.
Never Have Boring Backgrounds Again
Live Photos can spice up your iPhone or iPad beyond the standard, static wallpapers.
If you don’t want the pre-installed options, you can make your Live Photos from videos or GIFs and customize your device in a fun, unique way.
Leave a comment and let us know if this guide was helpful.
[related_posts_by_tax posts_per_page="5"]