Live Photos are loads of fun. However, they don’t work on non-Apple devices. So if you want to share a Live Photo, the safest option is to convert it to the universally compatible GIF format. Sure—it won’t end up as cool-looking. But it’s still better than a static JPEG.
The methods that follow should show what you need to do to turn a Live Photo into a GIF on the iPhone and Mac. We’ll explore each in detail.
Turn Live Photo to GIF Using Shortcuts App on iPhone
The most convenient way to convert a Live Photo into a GIF on the iPhone involves using a shortcut. The Shortcuts app, which comes built into iOS, lets you do that.
You just need to download the relevant pre-built shortcut from the Shortcut app’s Gallery. You can then start turning Live Photos into GIFs immediately.
Install the Make GIF Shortcut
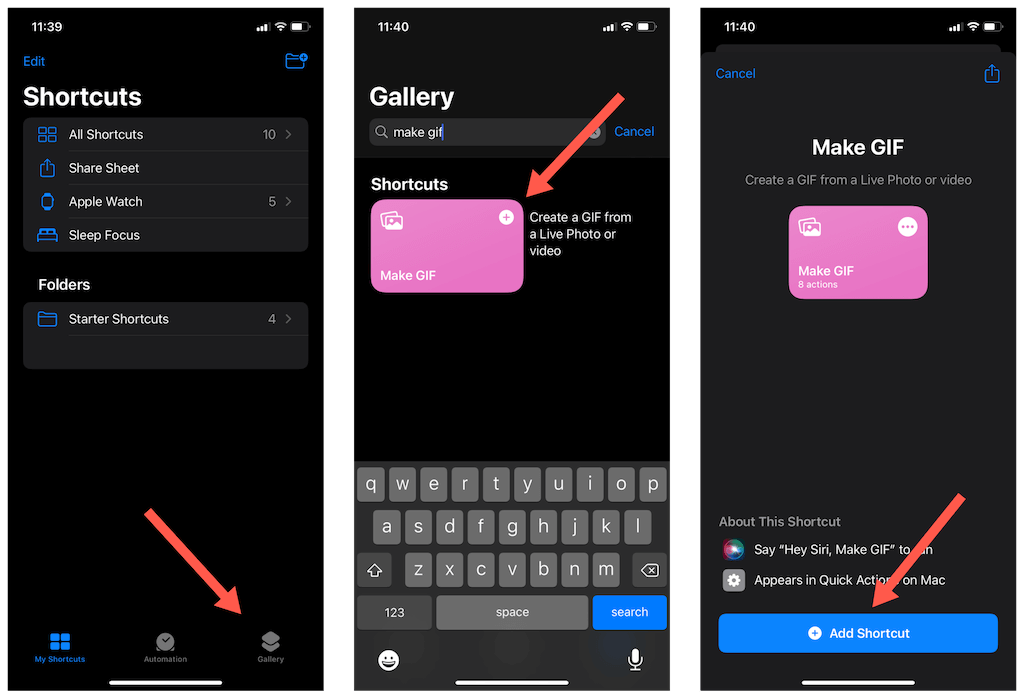
1. Open the Shortcuts app and switch to the Gallery tab.
Note: If you can’t locate the Shortcuts app on your iPhone, you must download it from the App Store.
2. Type make gif into the search field at the top of the screen.
3. Tap the Make GIF shortcut within the search results.
4. Tap Add Shortcut.
Run Make GIF Shortcut
1. Locate and tap the Make GIF shortcut. You should find it listed underneath the My Shortcuts tab of the Shortcuts app.
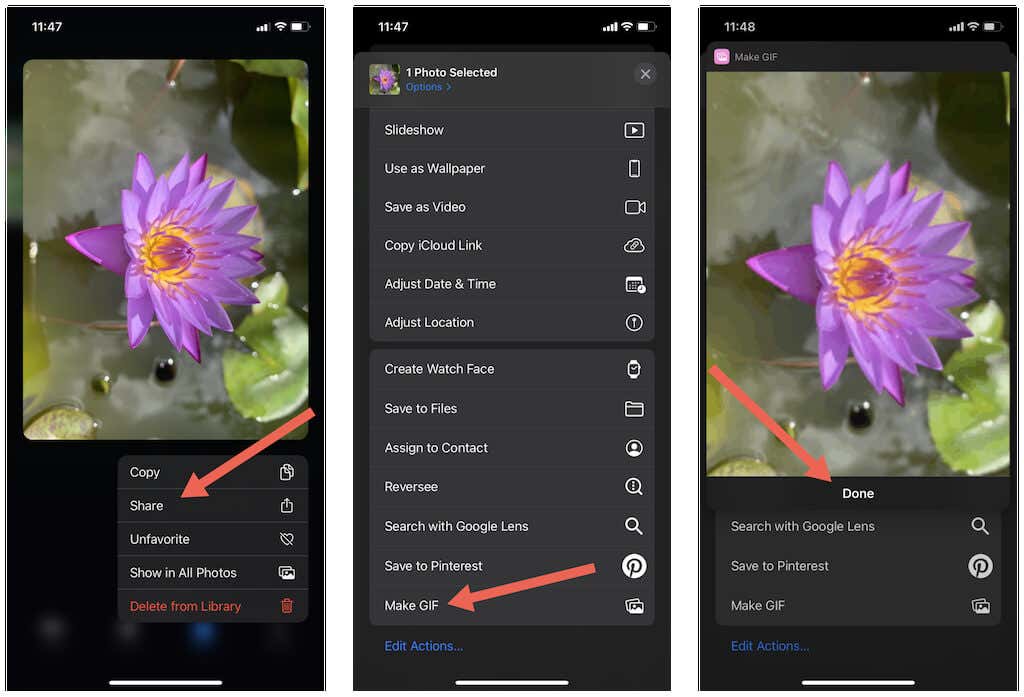
2. Pick the Live Photo you want to convert. You should see a preview of the converted image within the span of a few seconds.
3. Tap Done.
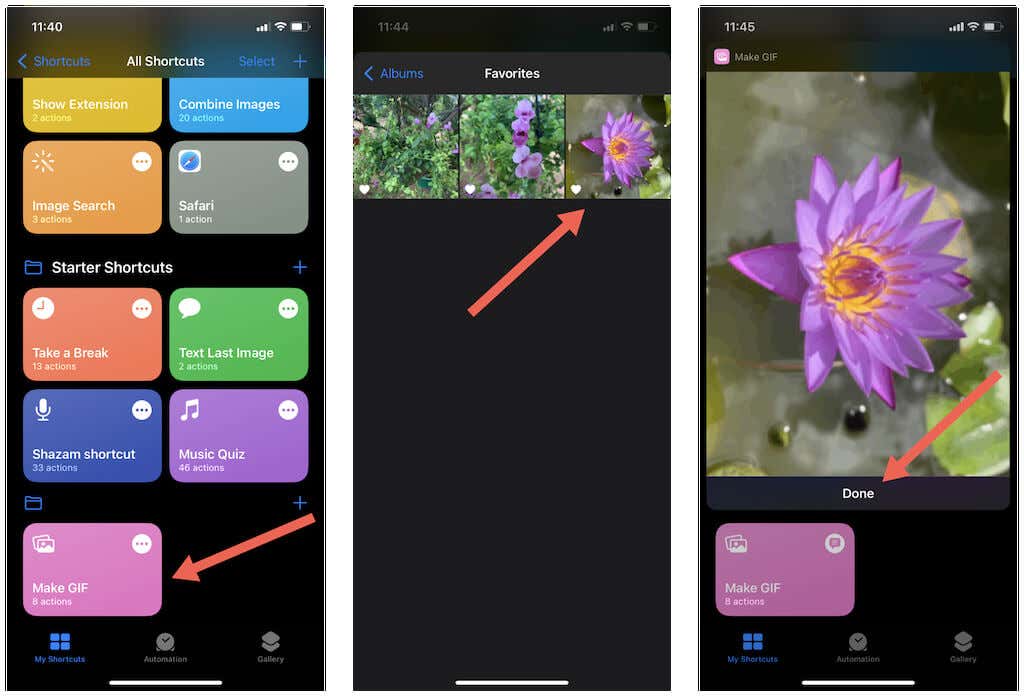
You will find the GIF listed under the Recents album within the Photos app. The original Live Photo should also be intact. You can share or copy the converted image and it should show up as a GIF in any app.
Run Make GIF via Share Sheet
If you want to convert a Live Photo to the GIF format directly via the Photos app, you must first configure the Make GIF shortcut to show up within an image’s Share Sheet.
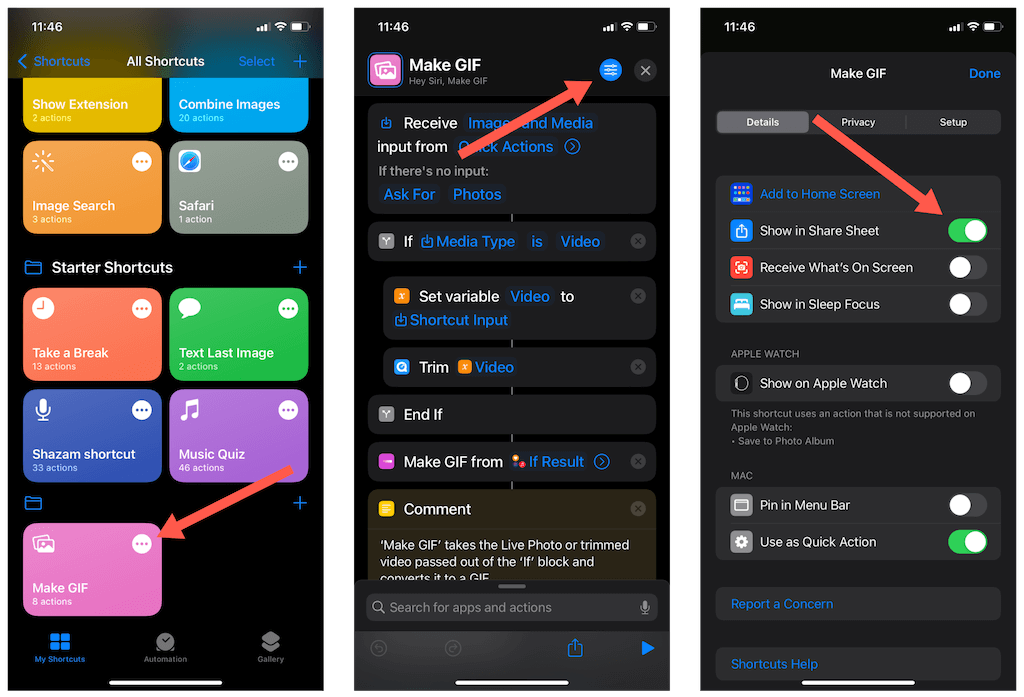
1. Tap the More icon (three dots) on the Make GIF shortcut.
2. Tap the icon with three sliders to the top-right of the screen.
3. Turn on the switch next to Show in Share Sheet. Then, tap Done.
4. Open the Photos app and long-tap the GIF you want to convert and tap Share.
5. Tap Make GIF.
6. Tap Done. The converted image should appear within the Photos app’s Recents album.
Turn Live Photos to GIFs Using GIPHY
Shortcuts aside, you can also make use of the free GIPHY app to convert a Live Photo to the GIF format on iPhone. It’s fast, easy, and even lets you spice up your images using visual effects and stickers. You can also adjust the duration of your GIFs.
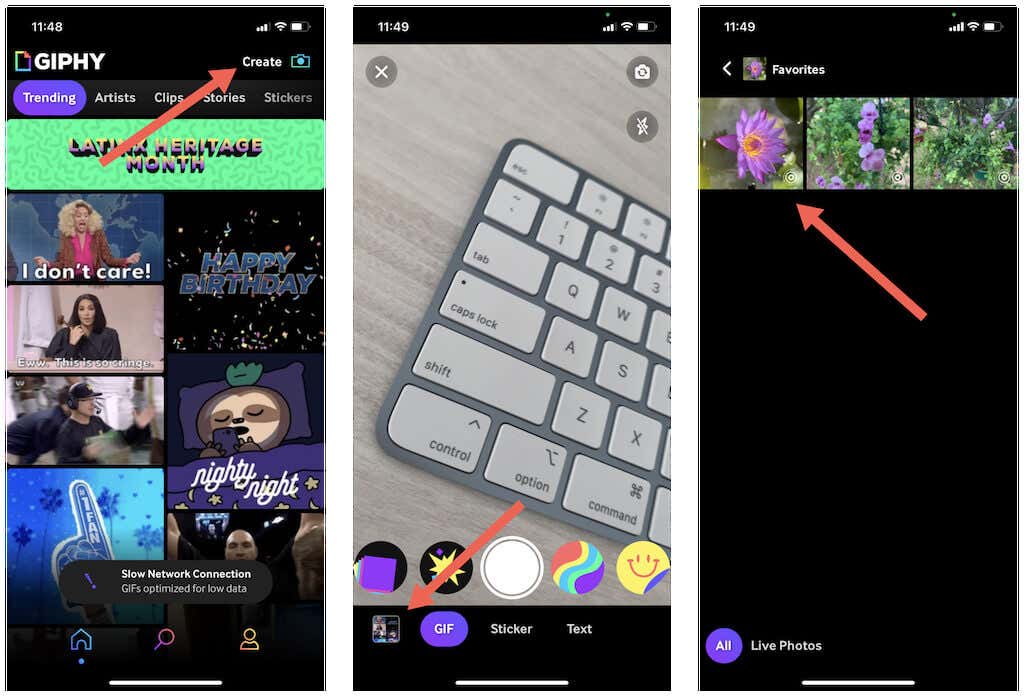
1. Download and install GIPHY off the App Store.
2. Open the GIPHY app. You have the option to continue with or without a free GIPHY account.
3. Switch to the Home tab and tap the Create option in the top right corner of the screen.
4. Select GIF and tap the Recents album’s thumbnail to the lower-left of the screen.
5. Pick the Live Photo you want to convert.
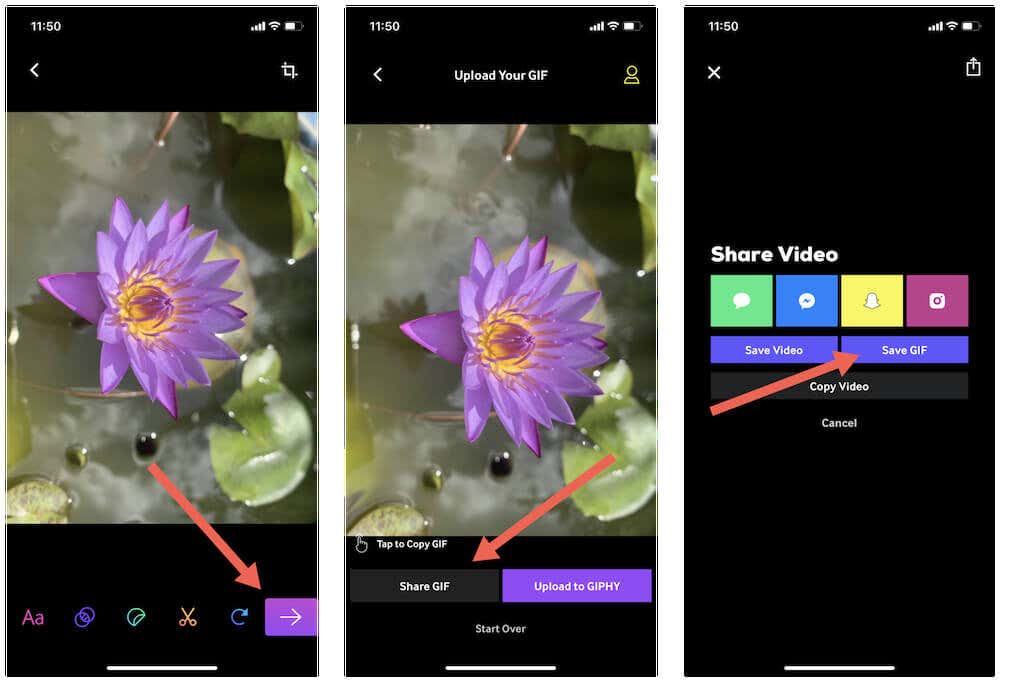
6. Make any edits using the tools to the bottom of the screen and tap the Go icon. You can then choose to share the GIF to social media, copy it to your clipboard, or upload it to GIPHY (if you have a GIPHY account). If you want to save the GIF, tap Share GIF and pick the Save GIF option.
You’ll also find additional third-party apps within the App Store that let you convert Live Photos to GIFs. Feel free to look around.
Turn Live Photos into GIFs Using Photos App
The iPhone’s Photos app also lets you modify the default effect of a Live Photo to mimic the properties of a GIF. Sharing it with apps such as Mail will prompt iOS to convert the image to a GIF. However, the method isn’t fully reliable since some apps may receive the image as a JPEG or MOV file.
1. Open the Photos app and select a Live Photo.
2. Tap the Live option to the top left of the screen.
3. Pick between the following effects::
- Loop: Loops the image.
- Bounce: Bounces the image forward and backward.
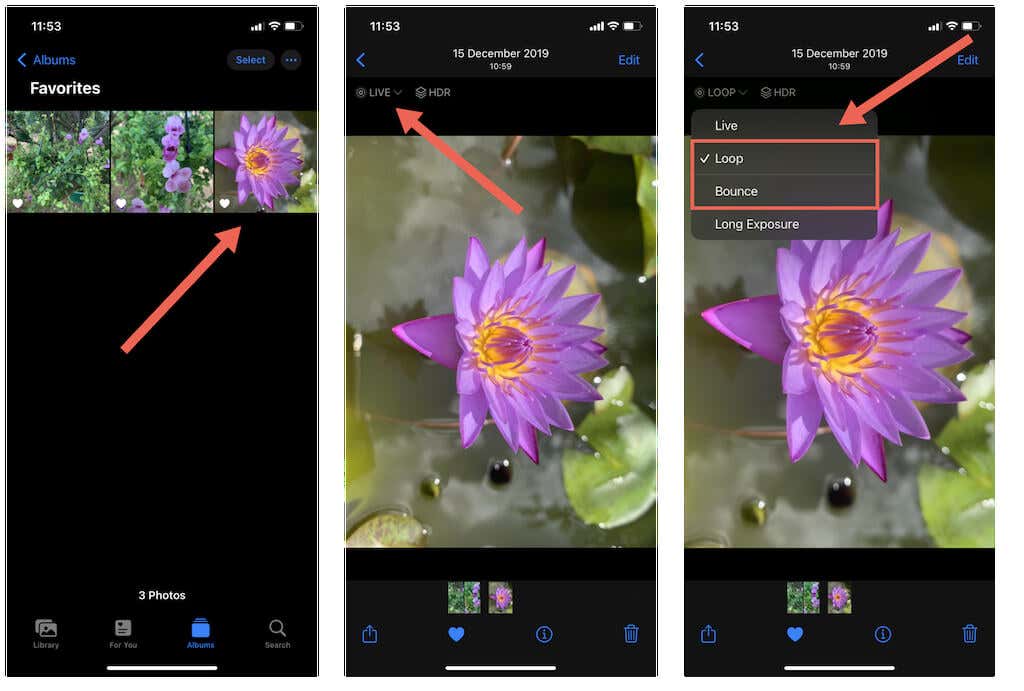
You can now share the image, and it should likely transfer over as a GIF. If not, use an alternative method to convert the image. You can always change the image’s default effect to Live whenever you want.
Turn Live Photos into a GIF Using Shortcut on Mac
If you use a Mac running macOS 12.0 Monterey or later, you can turn a Live Photo into a GIF using the Shortcuts app. The process is basically the same as on the iPhone. Just download the Make GIF shortcut and use it to perform the conversion.
Install the Make GIF Shortcut
1. Open the Shortcuts app on the Mac.
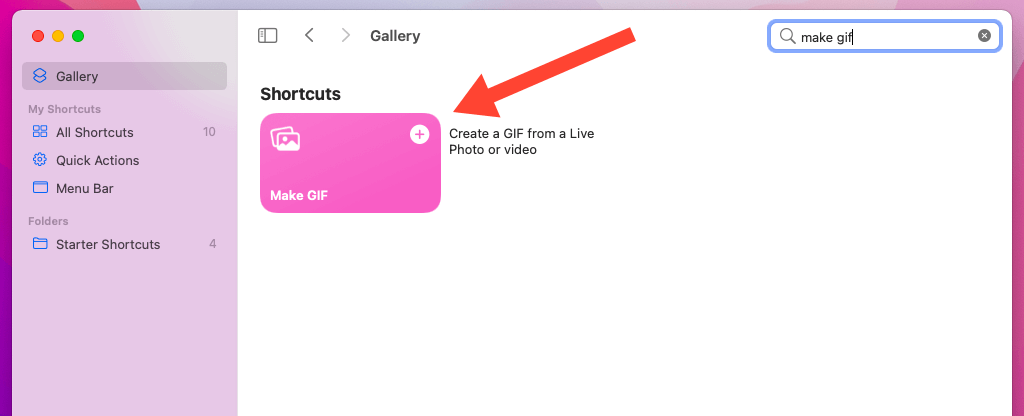
2. Select Gallery on the sidebar and type make gif into the Search bar at the top-right of the window.
3. Select the Make GIF shortcut and add it to the Shortcuts app.
Run Make GIF Shortcut
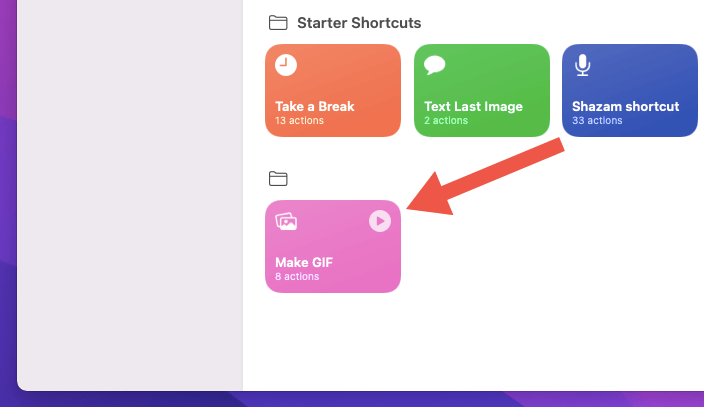
1. Open the Shortcuts app and run the Make GIF shortcut. You should find it under All Shortcuts.
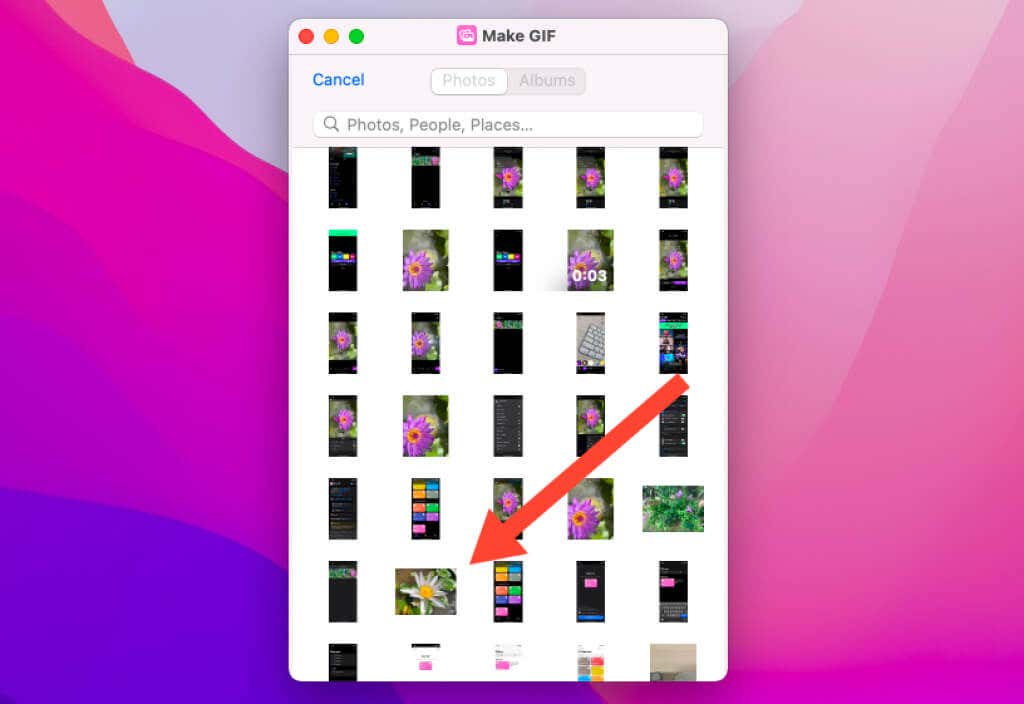
2. Select the Live Photo you want to convert. You’ll see a preview of the GIF immediately.
3. Select Done.
You’ll find the converted Live Photo under the Recents album of the Photos app.
Turn Live Photos to GIF Using Photos App on Mac
Another way to convert a Live Photo to a GIF on the Mac is to use the Photos app’s export functionality. It’s similar to the method on the iPhone that involves messing around with image effects, except that the Mac also provides a dedicated option to save the photo as a GIF.
1. Open the Photos app.
2. Select the Live Photo you want to convert.
3. Select the Edit button to the top-right of the screen.
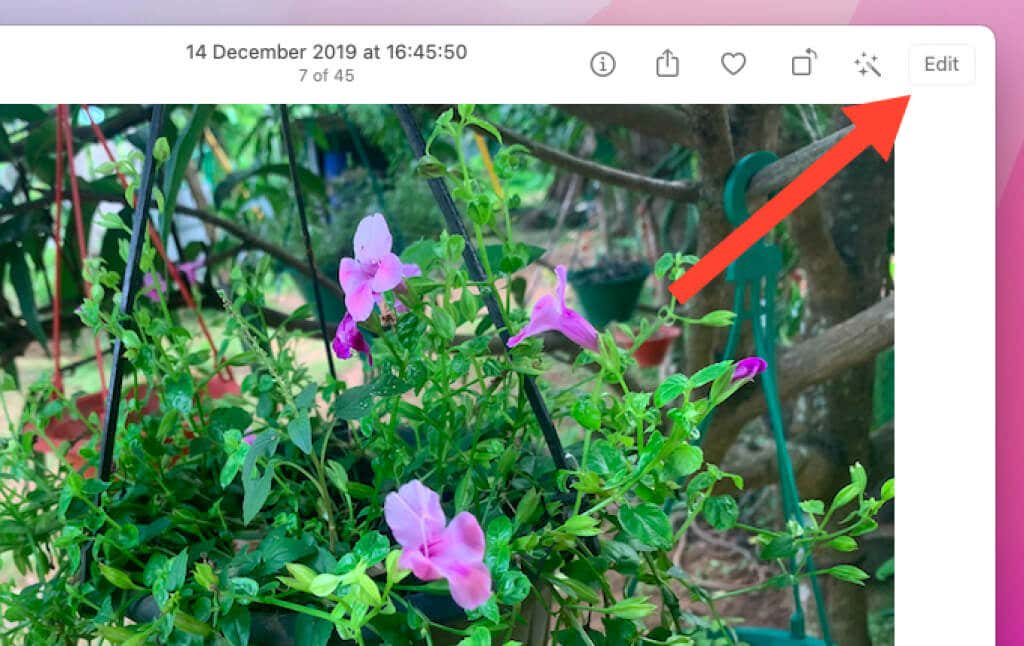
4. Open the pull-down menu labeled Live and pick between the following options:
- Loop: Loops the image.
- Bounce: Bounces the image forward and backward.
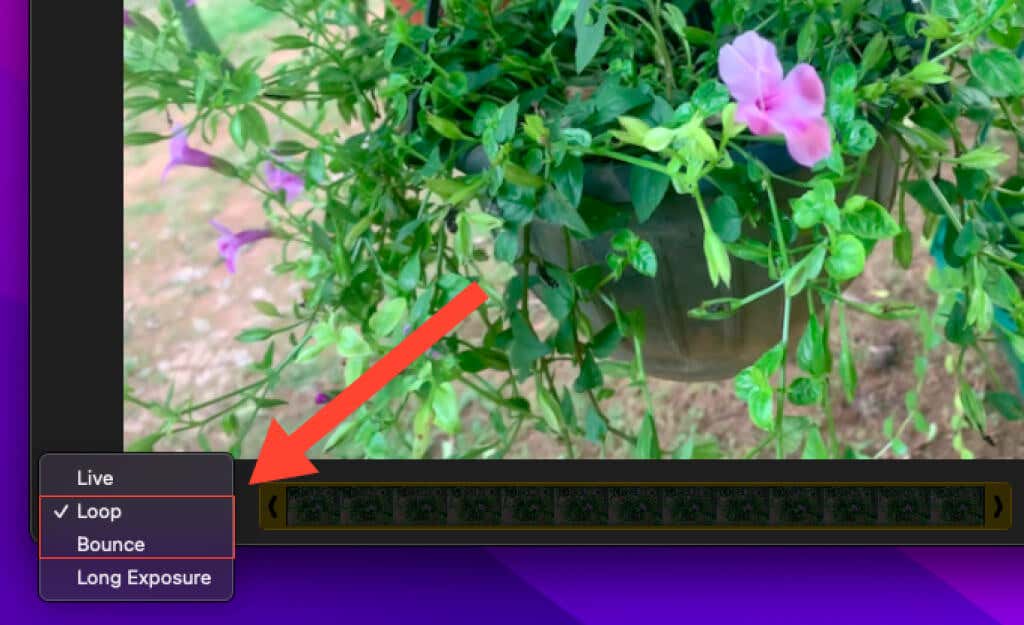
5. Select Done.

6. Open the File menu and select Export > Export GIF.
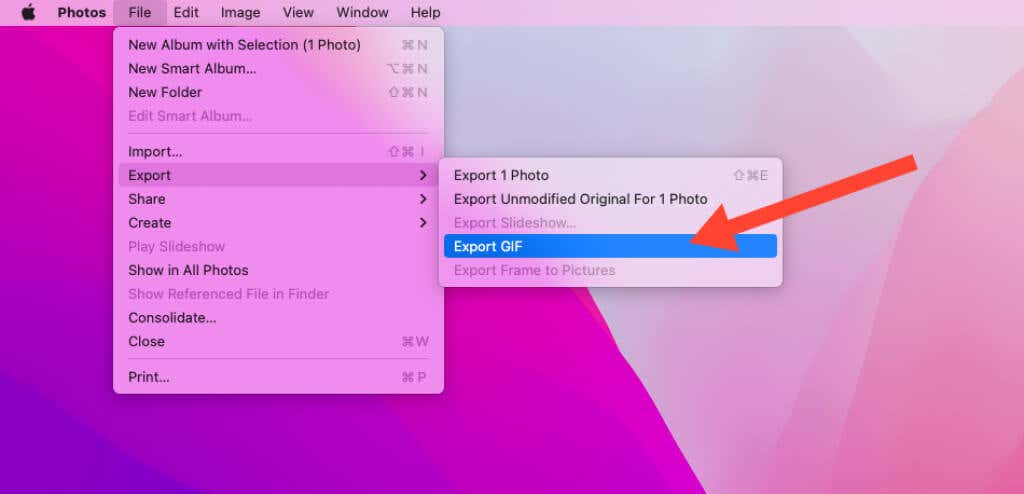
7. Pick a destination (e.g., Desktop) and select Export.
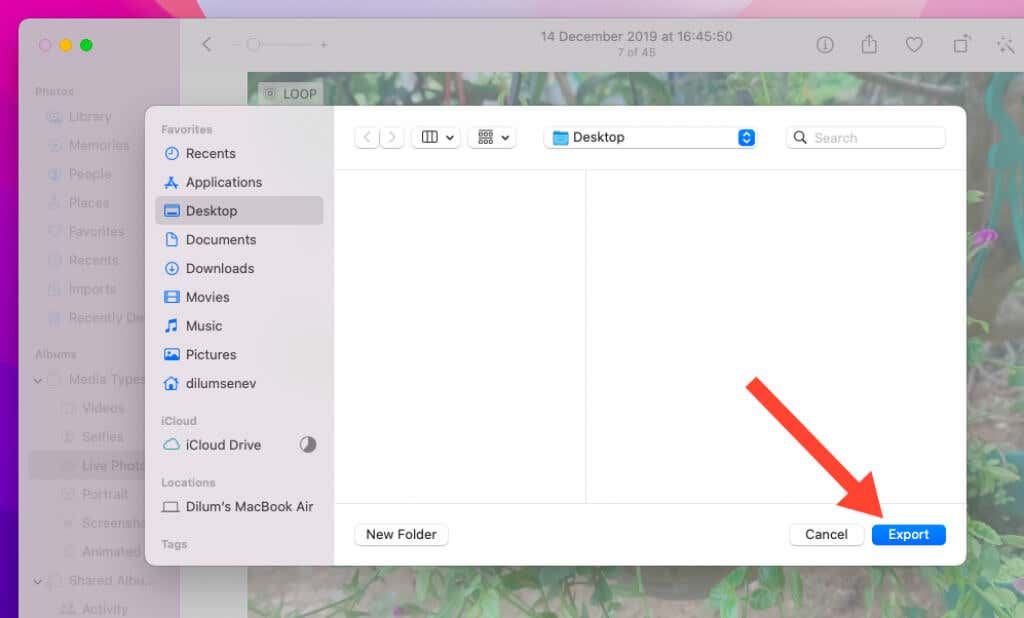
You can always revert changes to the original by entering Edit mode in Photos and setting the default effect to Live.
Live Photo to GIF Made Easy
The instructions above should’ve helped you easily turn Live Photos into GIFs on the iPhone and Mac. Pick the method that fits you the best and you should be fine. However, if any of the resulting GIFs appear too large in terms of file size, don’t forget to check out these GIF compressor and optimizer tools to tone them down.
Related Posts
- How to Change Your Game Center Nickname (iPhone, iPad, and Mac)
- What Happens When You Reset End-to-End Encrypted Data on Apple Devices
- How to Update Apps on Your Apple Devices
- How to Enable and Turn Off Incognito Mode (Private Browsing) On iPhone and Mac
- How to Import Photos From iPhone to Mac (and Vice Versa)