You can do it mid-conversation
Do you want to transfer live calls from an iPhone to a Mac? Not only does that allow you to use the vastly better-sounding speakers on your MacBook or iMac, but you also get to conserve battery life and stay focused on a single device at a time.
But if you have trouble figuring out how to move an iPhone conversation mid-call to your Mac, you’ll learn everything you need to know about the procedure below.

How to Set Up Call Transferring Between iPhone and Mac
The Apple ecosystem consists of a set of features called Continuity that enables you to carry on tasks from an iPhone to a Mac and vice versa. Among them is iPhone Cellular Calls, which lets you initiate and answer calls directly using a Mac. Additionally, it also makes transferring live phone conversations between devices possible.
But as its name implies, iPhone Cellular Calls only works with calls from your iPhone’s cellular account. So that prevents you from, say, transferring FaceTime or third-party VOIP calls (e.g., Whatsapp and Skype) among devices.
iPhone Cellular Calls also requires your iPhone and Mac to meet the following criteria before you can start using it. Going through them should ensure that you won’t run into any hitches.
iPhone and Mac Should Be Signed Into iCloud With the Same Apple ID
Both your iPhone and Mac must be signed in to iCloud with the same Apple ID. You can quickly confirm that by opening the iPhone’s Settings app and Mac’s System Preferences app. Both apps list your Apple ID at the top of the screen or window.
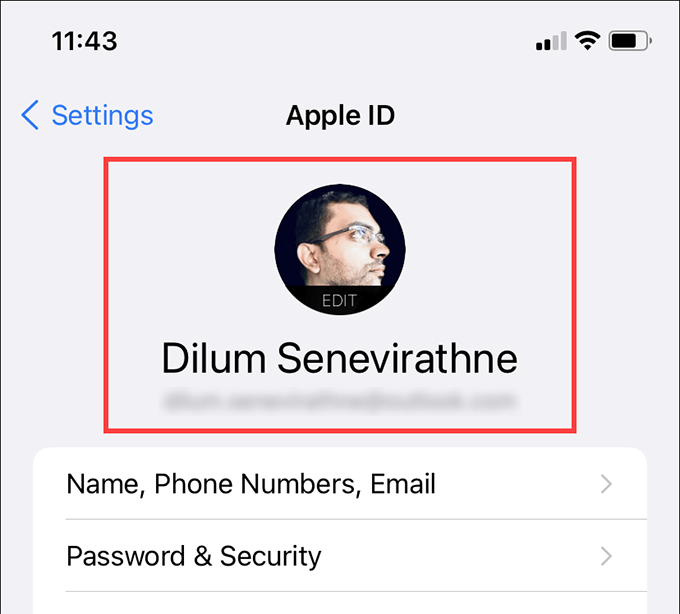
If you need to sign in with a matching user account, then tap or select the current Apple ID and use the Sign Out option on the subsequent screen to log out first.
iPhone and Mac Should Be Signed Into FaceTime With the Same Apple ID
Both the iPhone and Mac must also be logged in to FaceTime with the same Apple ID.
To check that, go to Settings > FaceTime on the iPhone. You should then see your Apple ID listed under the Called ID section. If you want to change it, tap it and select Sign Out. You can then sign back in using the correct Apple ID.
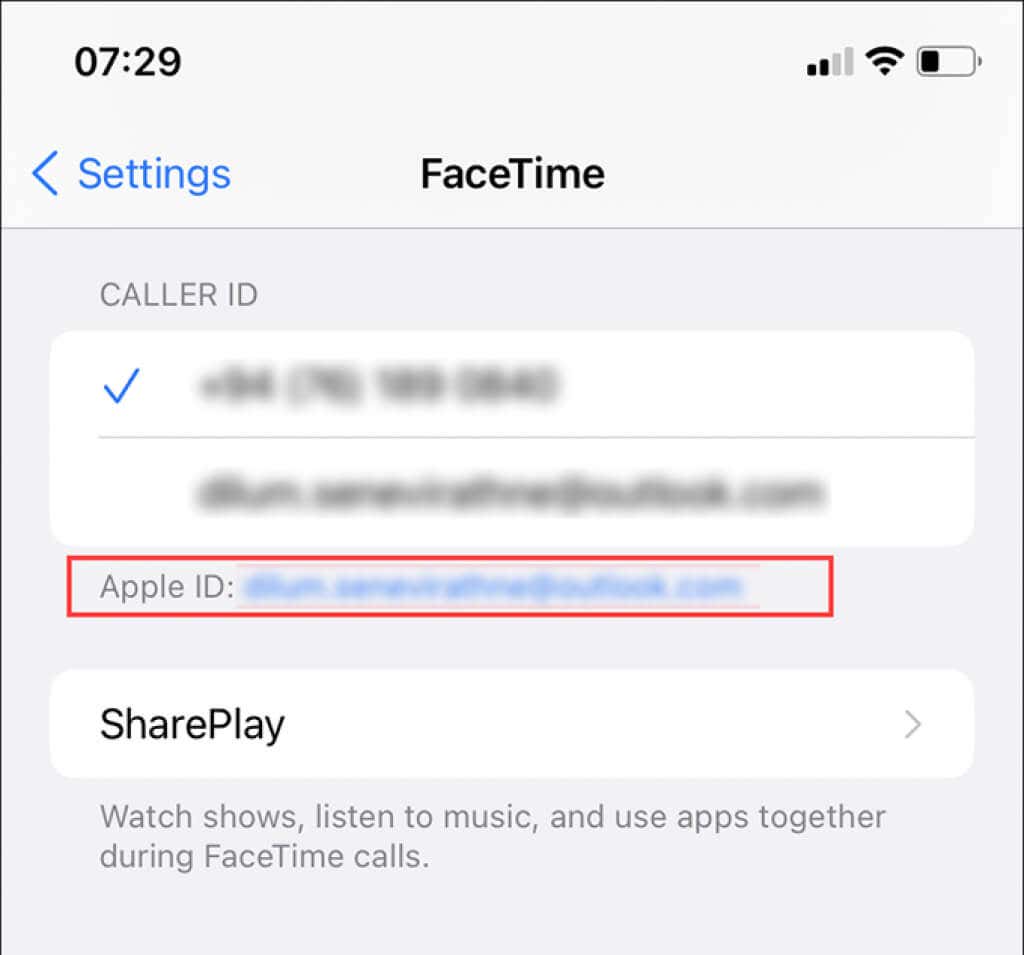
On the Mac, open FaceTime and select FaceTime > Preferences. You should see your Apple ID listed under the Settings tab. You can then select Sign Out and sign back in using a matching Apple ID should you want.
iPhone and Mac Should Be Nearby and Connected to the Same Wi-Fi Network
You must connect both your iPhone and your Mac to the same Wi-Fi network. The devices should also be closer, preferably in the same room.
iPhone Should Be Configured to Allow Calls on Mac
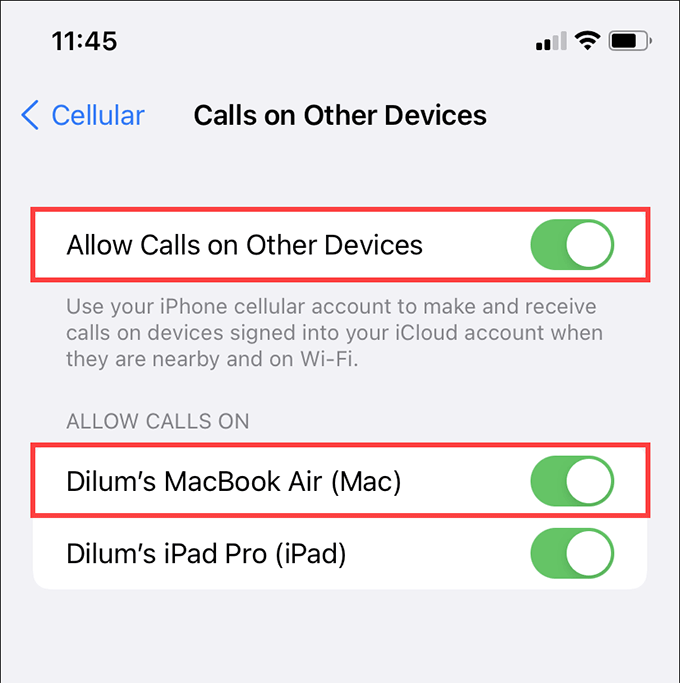
You must configure your iPhone to permit other devices to make cellular calls. To do that, open the iPhone’s Settings app and go to Phone > Calls on Other Devices. Follow that by turning on the switch next to Allow Calls to Other Devices. Then, turn on the switch next to your Mac.
Mac’s FaceTime Preferences Should Be Configured to Make and Receive Calls
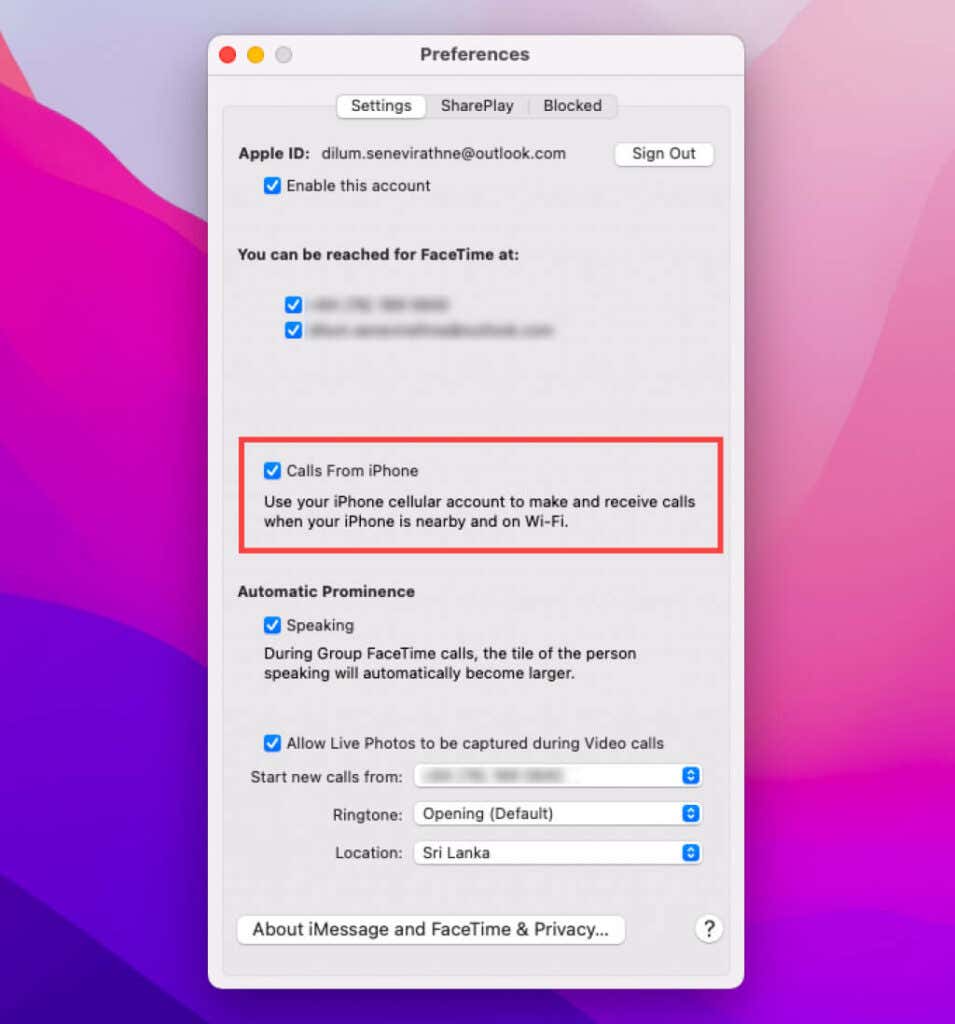
You must also allow calls from your iPhone on the Mac. To do that, open the Mac’s FaceTime app and select FaceTime > Preferences. Then under the Settings tab, check the box next to Calls From iPhone.
How to Transfer a Call from iPhone to Mac
After making or receiving a call on your iPhone, you can transfer it to your Mac amid a conversation whenever you want.
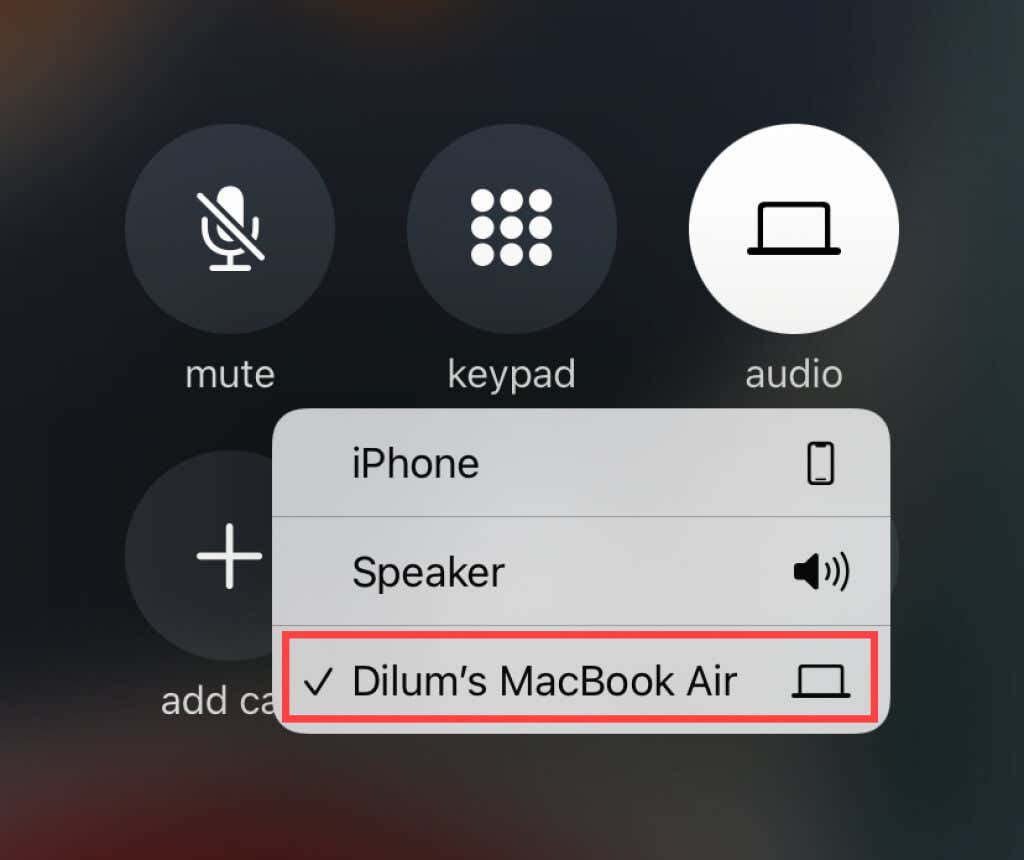
Just tap the Audio icon on the iPhone’s call interface. Then, on the list of devices that show up, select your Mac. The default speaker icon should change to resemble a Mac, and the call should transfer to your Mac instantly. Despite that, your iPhone shall continue to relay the call.
Note: Starting iOS 14, you may want to tap the compact incoming call notification at the top of the screen to activate the full-screen call interface.
How to Manage a Transferred Call on the Mac
After transferring a call from iPhone to Mac, you should see a notification labeled From your iPhone on the top-right of the Mac’s screen. You can use the controls inside it to manage the call. For example, tap the Mute button to mute the call or select End to end it. You can also bring up a dial-pad by tapping the button with nine dots.

How to Transfer a Call Back to the iPhone
You can also transfer a call back from your Mac to the iPhone. But you can only do that using your iPhone itself.
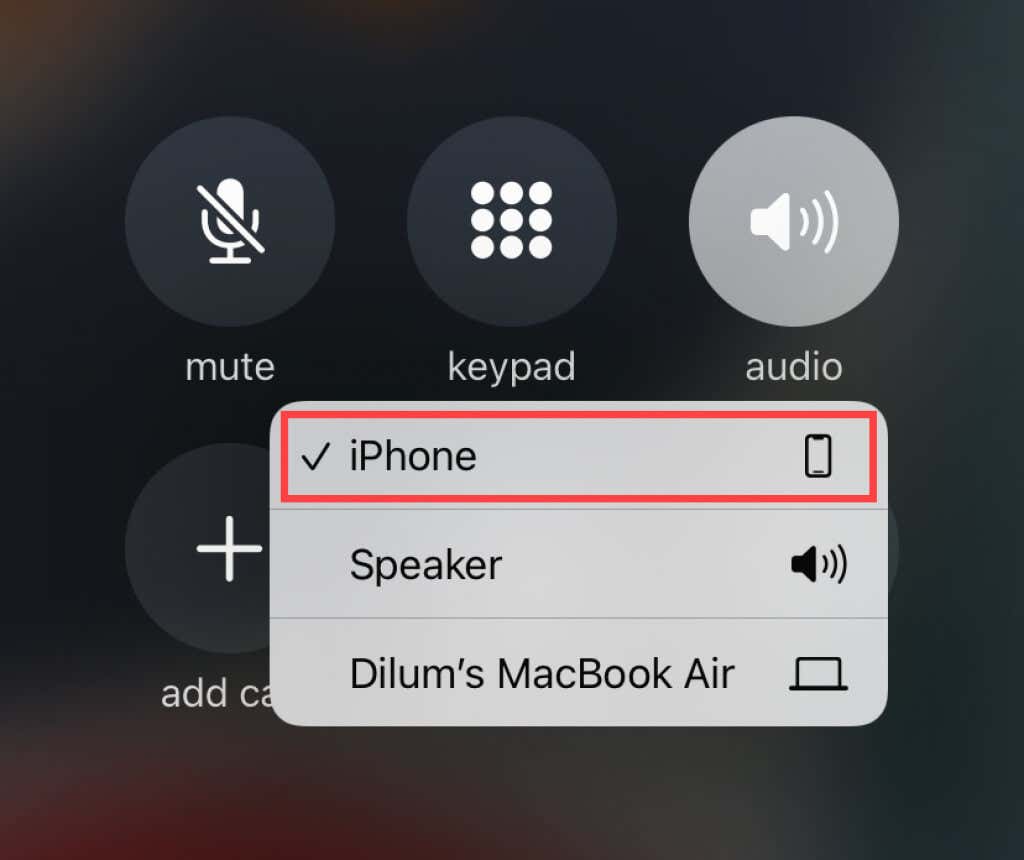
So start by accessing the iPhone’s call interface by tapping the green-colored icon on the top-left of the screen. Then, tap the Audio icon and select iPhone. The From your iPhone notification should disappear from your Mac, and the call should transfer to your iPhone momentarily.
How to Receive or Make a Call Directly on the Mac
Instead of transferring a call, you can also answer a call directly on the Mac. If your Mac is unlocked, you should see a notification whenever there’s an incoming call. Select the Accept button to accept the call. Of course, you can always transfer it back to your iPhone using the exact instructions in the section above.

Additionally, you can make calls via the FaceTime and Contacts apps on your Mac and relay them via your iPhone. In FaceTime, for example, type the contact’s phone number and select Call Using iPhone.
Note: If your carrier supports Wi-Fi calling, you can also use your Mac to make a call even when your iPhone isn’t nearby. To make that work, open the iPhone’s Settings and go to Wi-Fi > Wi-Fi Calling. Then, turn on the switch next to Allow Wi-Fi Calling for Other Devices.
Switch Freely
The pointers above should’ve helped you transfer calls from your iPhone to the Mac. However, if you run into any trouble, just make sure to double-check that both devices meet the criteria for iPhone Cellular Calls.
In addition to that, it’s also a good idea to rule out bugs and other issues by updating the system software on your iPhone and Mac. To do that, head over to Settings > General > Software Update on the iPhone and System Preferences > Software Update on the Mac.


