With most of Apple’s products having an extremely intuitive user interface and design, many functions are very easy to learn and execute. However, some things may not be immediately obvious, such as taking a screenshot on an iPad.
You can also do a screen recording on the iPad, but that’s a relatively new feature. You might be wondering how you can get started with a recording? Once you learn how you’ll find that it’s an incredibly easy process to remember.

You don’t need to download any special software to screenshot or record your iPad’s screen either. These features are built directly into the user interface. You can do both whenever you need to, no matter what you’re doing.
How To Screenshot On Your iPad
Follow these steps to easily take a screenshot:
- When you’re on the screen you would like to take a screenshot of, simultaneously press the power button and the home button. If you have an iPad with FaceID, you need to press the top button and the Volume Up button.
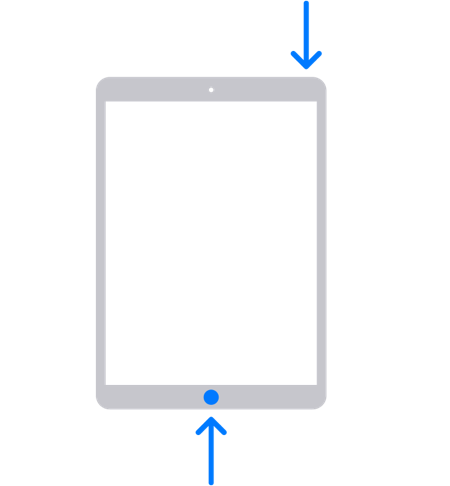

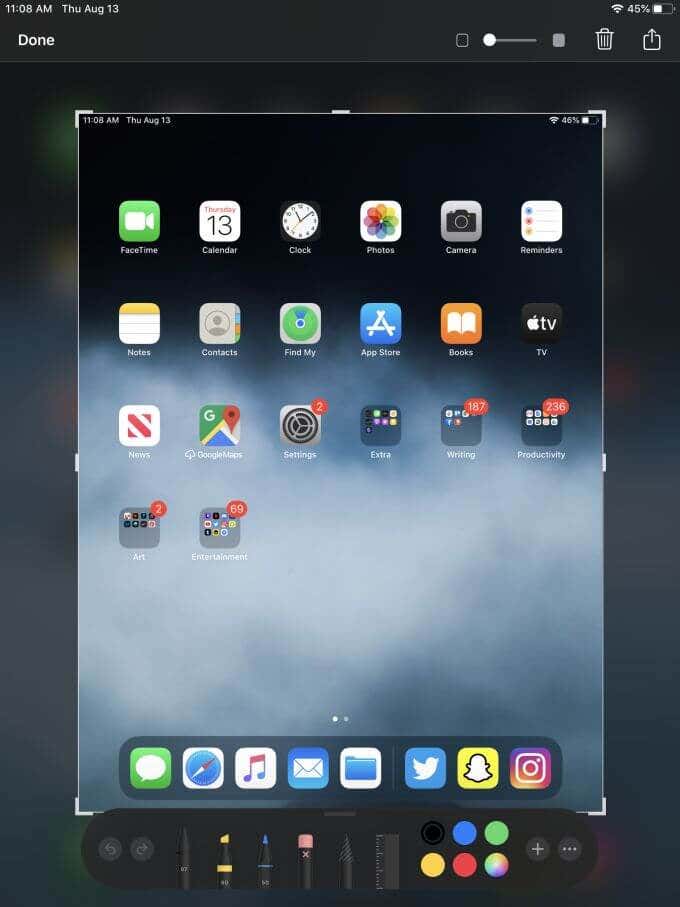
- The screen should flash white and your screenshot should show up in the lower left-hand corner of your screen.
- You can tap on the screenshot to edit it before it gets saved. This includes cropping or marking up your picture.
How To Screen Record On Your iPad
Screen recording on your iPad is simple now that Apple has added the feature so that it’s accessible directly in the Control Center. First, follow these steps to make sure you can access the screen recording capability.
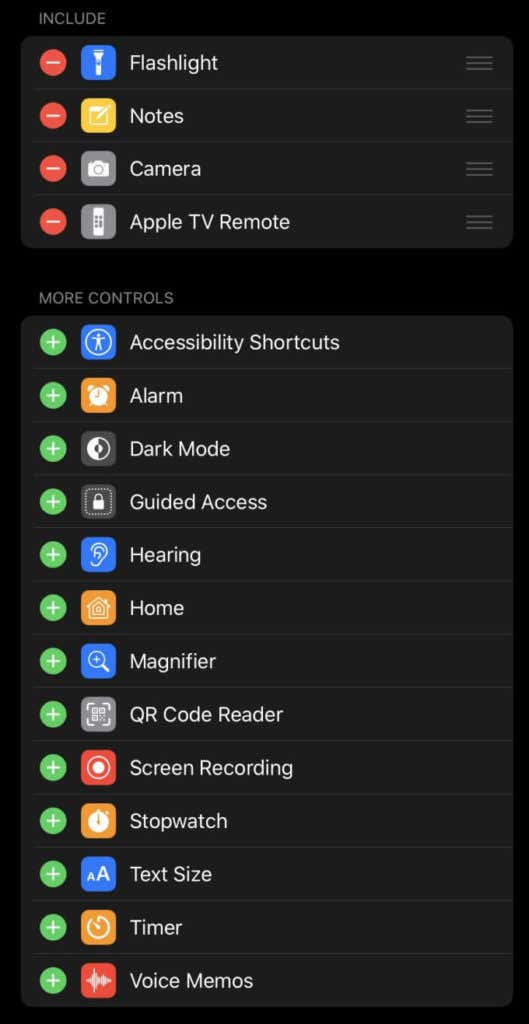
- Open Settings > Control Center
- If you don’t see Screen Recording under the Include section, look for it under the More Controls section.
- Tap the green plus next to Screen Recording to add it to the Include list. Screen recording will now be accessible in your Control Center.
Here is how to use the screen record function:
- Swipe down in the top right-hand corner of your iPad screen. The Control Center menu should appear.
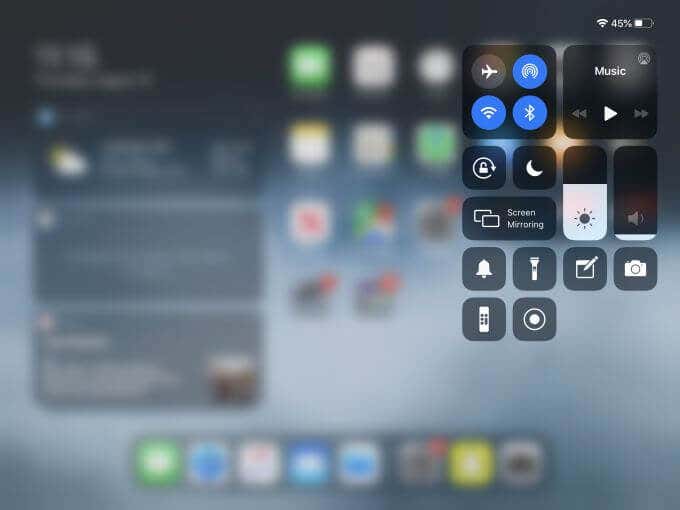
- Tap on the icon at the very bottom of this menu that pictures a solid circle in an outline of a circle. A countdown should start before it begins screen recording your iPad. When you tap away from the Control Center, you should see a red icon in the top right corner of your iPad, which means it’s recording.
- When you’ve finished recording, you can go back to the Control Center and tap on the same icon to end it. Your recording will then be saved to your Camera Roll.
Keep in mind that the iPad’s screen recording function works best for short recordings of a few minutes. You can still make longer recordings, but the recording may stop out of nowhere if there isn’t enough space on your iPad to record.
How To Find And Edit Your Screenshots And Recordings
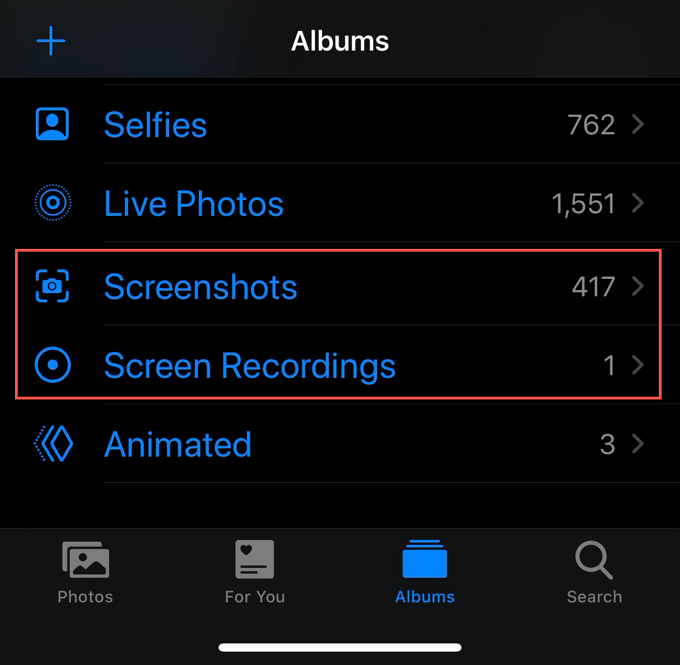
Your iPad will automatically save your screenshots and recordings to the Photos app. You can easily find your most recent images and videos in your Camera Roll by going to your Recents album. You can also scroll down, and you should see a list named Media Types. Under this y, you’ll find two albums specifically for screenshots and screen recordings.
If you’d like to edit either of these directly from your Photos app, all you have to do is tap on the picture or video and find the Edit button in the top right-hand corner. This edit function allows you to crop, rotate, or change settings such as brightness or contrast in your screenshot.
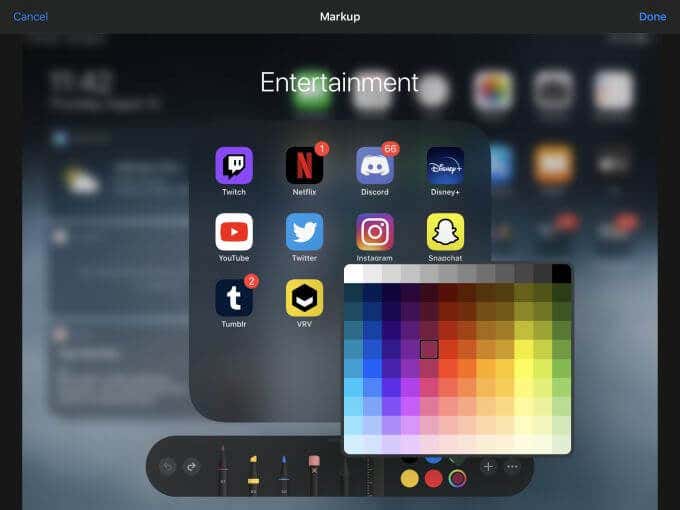
You can also markup pictures by tapping on the ellipsis icon in the top right. Then press Markup. You’ll be given multiple different options to write or draw on your screenshot. There is even a ruler option you can use to make straight lines. You also can select from a wide range of colors. When you’re happy with how you’ve edited your screenshot, just tap Done.
If you’re editing a screen recording, you can crop the video directly from this editing function. Just move the bracket on either side of the video footage at the very bottom of the screen. You can also tap the ellipsis icon here and import your video into iMovie or another app.
Other Apps For Editing Screenshots And Recordings
If you want some different options than just what the Photos app provides, there are multiple other avenues you can take for editing.
PicsArt is a great option for editing both photos and videos. It has lots of great editing tools and allows you to make much more in-depth changes. You can add text, edit multiple images together, and choose from tons of filters that are also editable. The app itself and nearly all of its editing features are free, but you can also buy add-ons such as text fonts or more filters.
If you’re looking for something strictly for editing video for your screen recordings, iMovie is Apple’s free editing software that’s super easy to use on the iPad. As mentioned before, you can import your screen recordings directly into iMovie, or you can go into the app and import them that way when starting a new project.
Sharing Your Screenshots Or Recordings
If you’d like to share your screenshots or recordings, you can do it the same way you would any other picture or video. You can upload them to social media usually from your Camera Roll, or you can share them right from the Photos app.
To do this, when you’re viewing a screenshot or recording in Photos, you can tap on the icon in the top right which shows a box and an arrow pointing up. From here, you can select multiple photos or videos to share, and you can choose an app to share. This includes iMessage, email, and whatever apps support sharing photos or videos.
[related_posts_by_tax posts_per_page="5"]