Spend enough time troubleshooting your Mac, and you’ll discover there are a lot of files that you can’t see. Apple deliberately hides specific files from users so they can’t access, edit, or delete these files. These files are usually critical macOS system files, so they’re hidden for a reason.
If you want to show hidden files in macOS to see what Apple has kept out of sight, you can use either the Finder or Terminal app to reveal them in the Finder.

Use Finder to Show Hidden Apps
Finder is the easiest way to show hidden files in macOS. You just need to open the folder and use a keyboard shortcut to reveal and hide the hidden files.
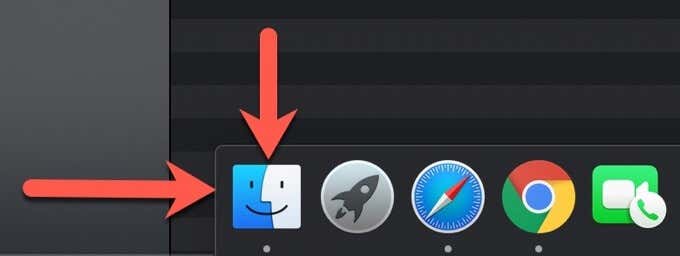
1. Select Finder in the toolbar, which is usually at the bottom of the screen.
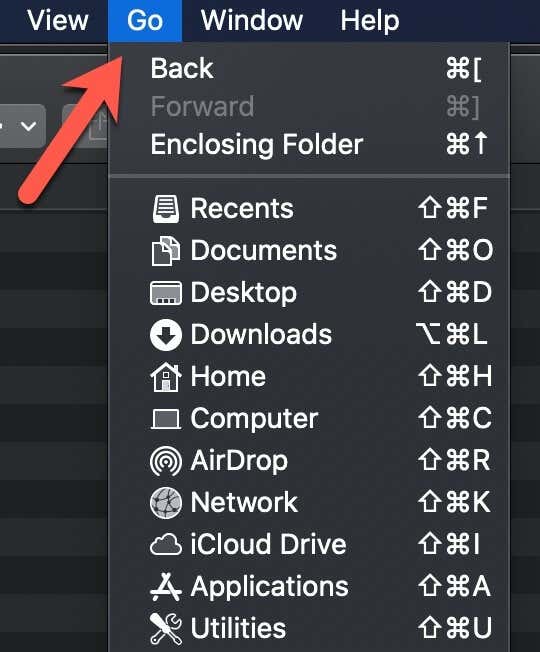
2. Select Go in the menu bar.
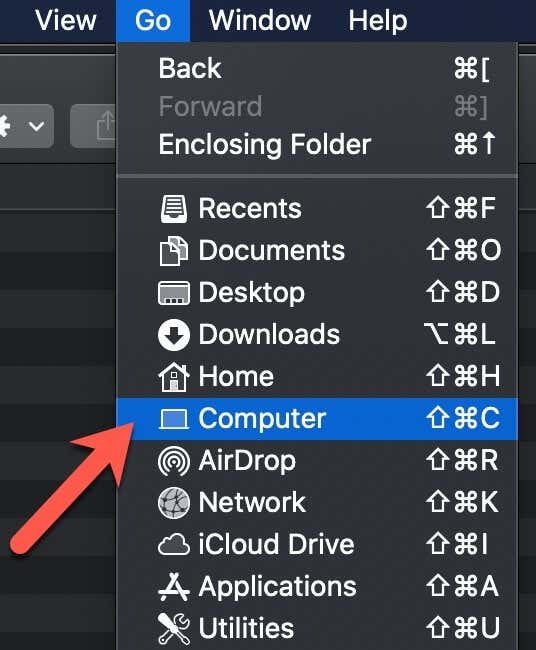
3. Select Computer to access the root folder on the hard drive.
4. Press Command-Shift-Period keys to reveal the hidden files, which will be greyed out on the screen.
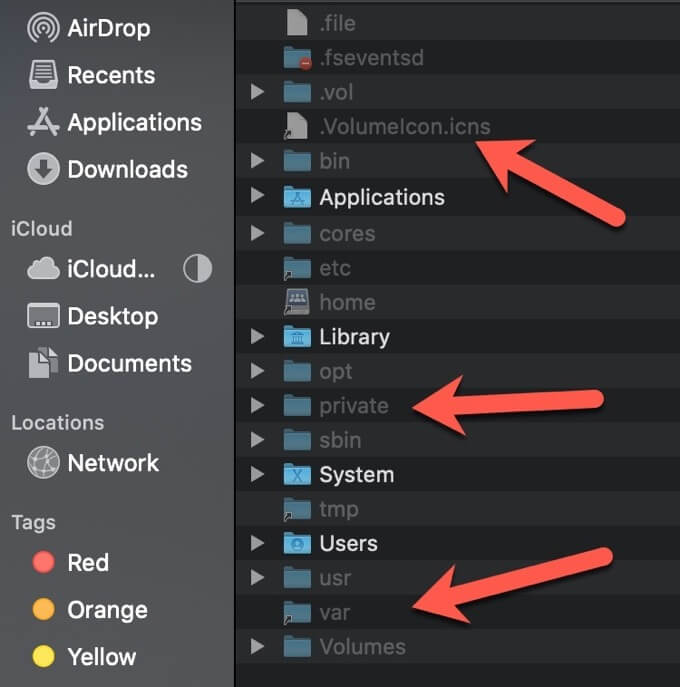
4. When you’re done, press Command-Shift-Period keys to re-hide the files.
Use Terminal to Show Hidden Files
The terminal app is another way to show and hide hidden files on macOS. Terminal is not as user-friendly as the Finder app. Still, these commands are useful if you work in the Terminal app and are familiar with its operation.
1. Select Launchpad in the toolbar, which is usually at the bottom of the screen.
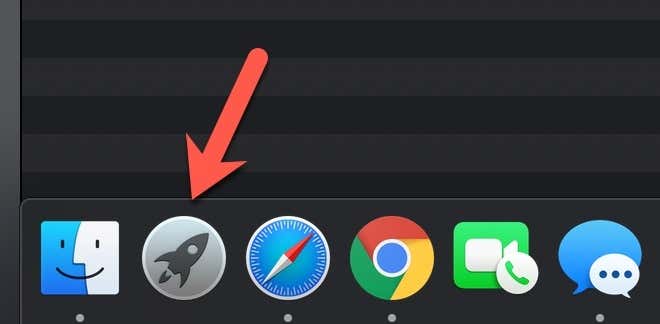
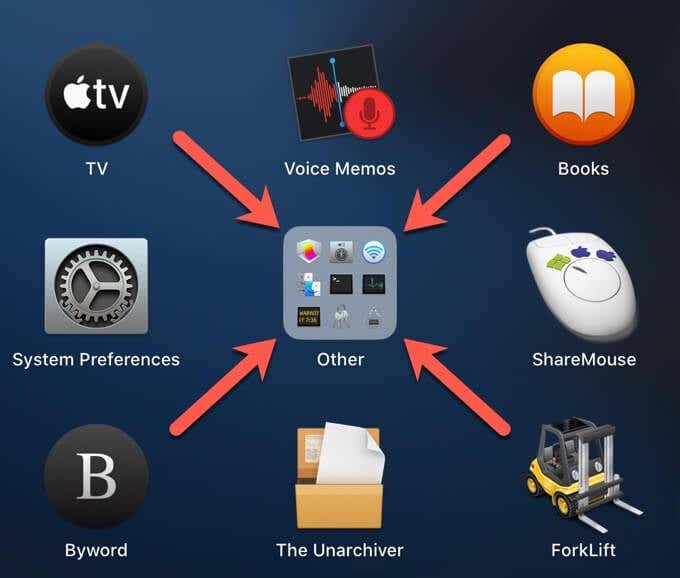
2. Select the folder named Other in Launchpad.
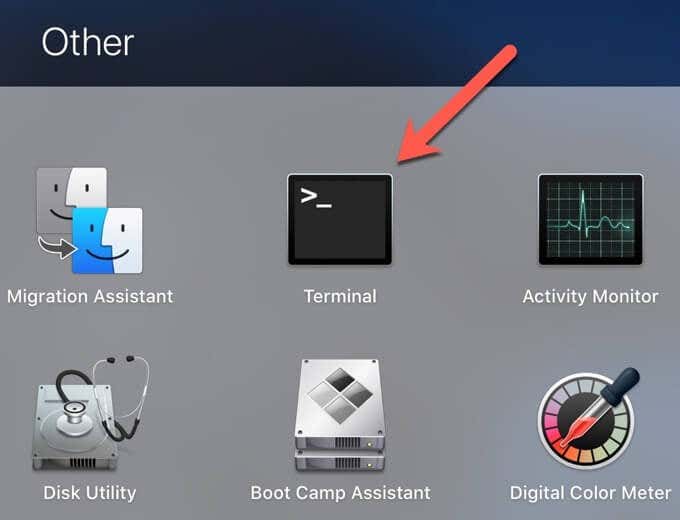
3. Select the Terminal app to open it.
4. Enter the following string into the terminal:
defaults write com.apple.finder AppleShowAllFiles true; killall Finder.

5. Press Return to execute the script.
This first half of the command changes the ShowAllFiles parameter to true which will show all files, including those that were previously hidden. The second half is a killall command that restarts the Finder and displays the hidden files.
Use Terminal to Hide All Files
When you’re done working with the hidden files, it’s a good idea to re-hide the files, so you don’t accidentally modify or delete them. Follow the same first four steps above to open Terminal or simply press Command + Spacebar to open Spotlight and type in Terminal.
1. Select Launchpad in the toolbar, which is usually at the bottom of the screen.
2. Select the folder named Other in Launchpad.
3. Select the Terminal app to open it.
4. Enter the following string into the terminal:
defaults write com.apple.finder AppleShowAllFiles false; killall Finder.

5. Press Return to execute the command.
This command sets the ShowAllFiles parameter to false, which will hide the hidden files. Once again, the second line is a “killall” command that restarts the Finder and removes the hidden files from view.
Why You Should Keep Files Hidden
Be careful when working with hidden files as they typically are hidden for a reason. Most of these files are critical system files that are used by macOS or the apps you have installed. If these hidden files are modified or deleted, your operating system and apps may not work as expected. You may even have to reinstall macOS to get everything functional again.