If you use an iPhone, iPad, iPod touch, or Mac, AirDrop is the fastest way to share documents, photos, and links with nearby Apple devices. It comes baked into iOS, iPadOS, and macOS, so you don’t need to install anything to get started.
If you’ve yet to use AirDrop, this tutorial will walk you through what you must do to set up Apple’s proprietary file transfer service on your iPhone, iPad, or Mac.

AirDrop-Compatible Devices
AirDrop is available on all recent iPhone, iPad, and Mac models. These include:
- iPhone 5 and iPad (3rd-generation) or later running iOS 7 or newer. To check your iOS or iPadOS version, open the Settings app and go to General > Software Update.
- Any MacBook Air, MacBook Pro, iMac, Mac mini, or Mac Pro from 2012 (excluding the 2012 Mac Pro) or later running OS X Yosemite or newer. To check your Mac’s make and model year, open the Apple menu and select About This Mac.
The sending and the receiving device must be AirDrop-compatible. For example, you can’t send a file from your iPhone to a Mac from 2011 or earlier. Additionally, both devices shouldn’t be more than 9 feet apart.
Activate Wi-Fi and Bluetooth
If you use an AirDrop-compatible iPhone, iPad, or Mac, you must start by making sure that both the Wi-Fi and Bluetooth radios are active. This also applies to the other device you want to share content with via AirDrop.
To check the Wi-Fi and Bluetooth status on iPhone or iPad, start by swiping down the top-right of the screen. If your iPhone uses Touch ID, Double-click the Home button instead. On the Control Center that shows up, make sure that both Wi-Fi and Bluetooth are active—if not, tap to activate them.
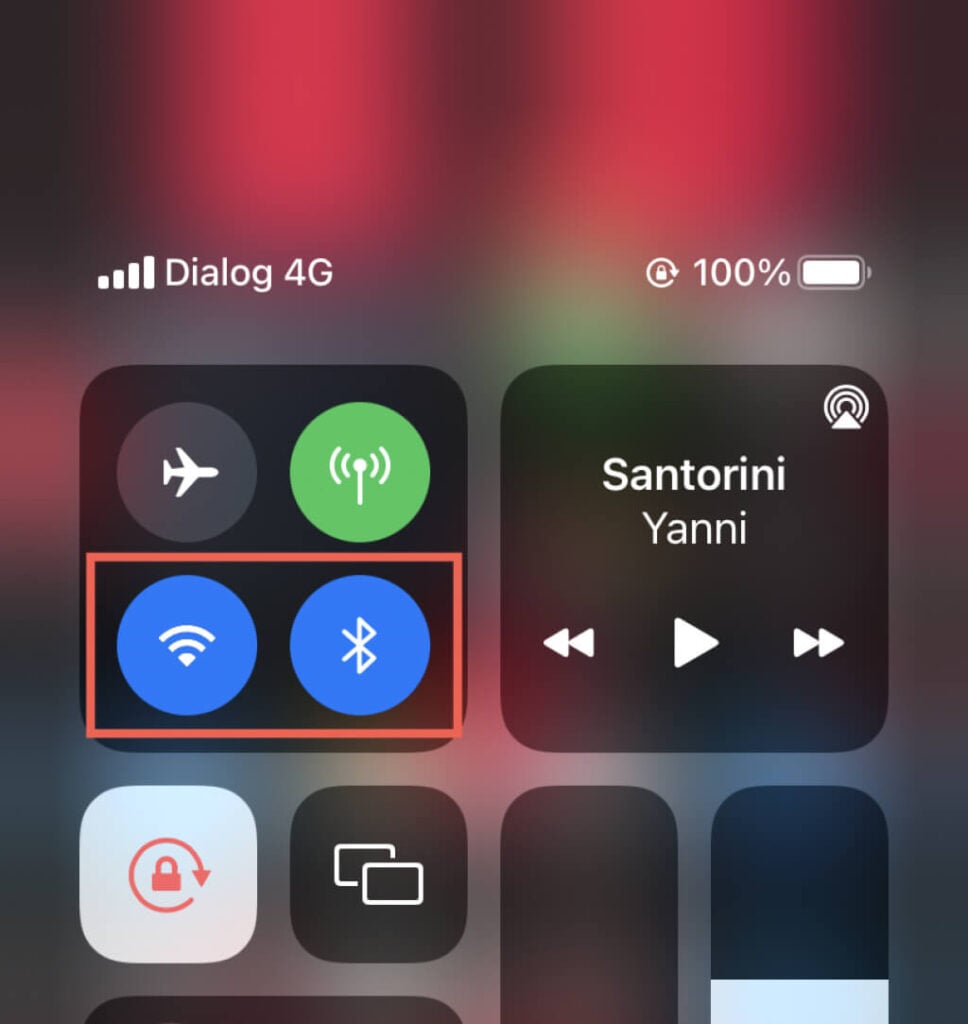
On a Mac, select the Wi-Fi and Bluetooth status icons and ensure that both radios are active. If you use a Mac with macOS Big Sur or later installed, open the Control Center to reveal the status icons.
Note: You don’t have to connect your iPhone, iPad, or Mac to a Wi-Fi network to enable AirDrop. Just activating the Wi-Fi radio should suffice.
Set AirDrop Preferences
With Wi-Fi and Bluetooth active, you can immediately send documents, photos, and links to other Apple devices wirelessly. However, if you plan on receiving items via AirDrop, you must configure your AirDrop preferences. They consist of the following:
- No One/Receiving Off: Stops your iPhone, iPad, or Mac from broadcasting itself as an AirDrop device. You can still send items over AirDrop to another device that has AirDrop set to Contacts Only or Everyone.
- Contacts Only: Restricts receiving by AirDrop to contacts only—you will only show up as an AirDrop device if you appear as a contact on the sender’s device. However, the contact card must contain an email address or phone number associated with your Apple ID.
- Everyone: Your device is publicly visible. Use this option if you want to receive an item over AirDrop without including the sender as a contact. You may receive unsolicited AirDrop requests, so it’s best to revert to the Contacts Only or No One/Receiving settings as soon as possible.
Manage Airdrop Settings – iPhone & iPad
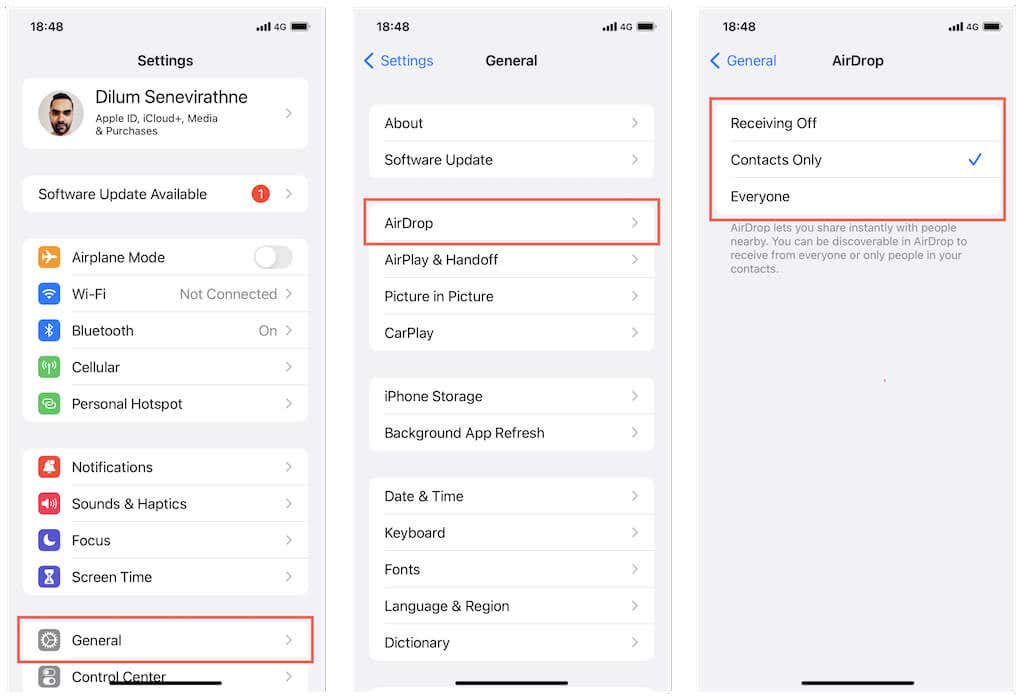
Method 1: Open the Settings app and go to General > AirDrop. Then, pick between the Receiving Off, Contacts Only, and Everyone options.
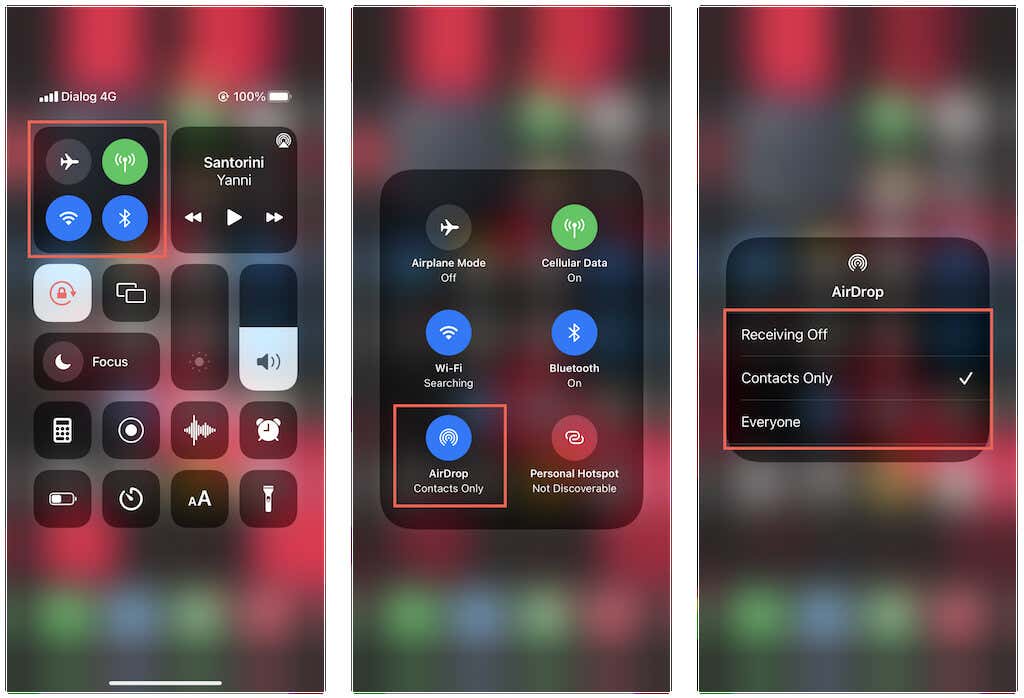
Method 2: Long-press any of the network icons on the Control Center to reveal the AirDrop icon. Then, long-press the AirDrop icon and select your AirDrop preferences. You can also quickly tap the AirDrop icon to turn AirDrop receiving on or off.
Manage Airdrop Settings – Mac
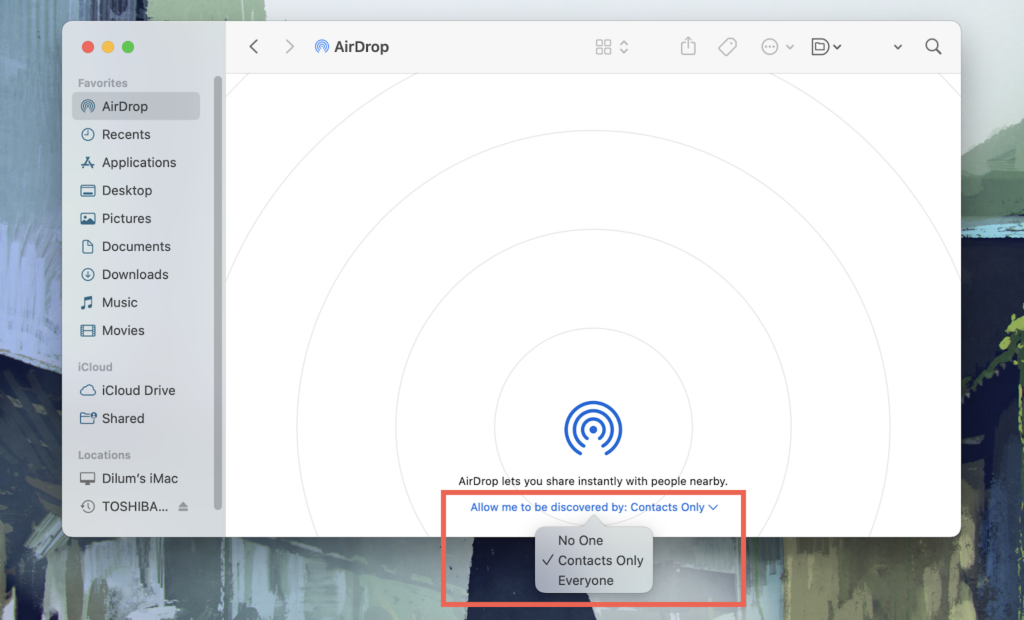
Method 1: Open a new Finder window and select AirDrop on the sidebar. Then, set Allow me to be discovered by to No One, Contacts Only, or Everyone.
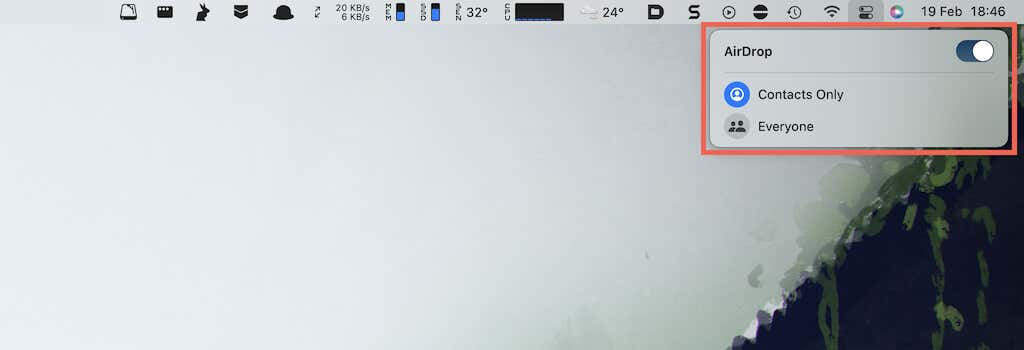
Method 2: On Macs running macOS Big Sur or later, you can open the Control Center on the menu bar and expand AirDrop. Then, use the AirDrop switch to turn AirDrop receiving on or off or pick between Contacts Only and Everyone.
Add or Edit Contacts
If your AirDrop preferences are set to Contacts Only, you must add the sender as a contact to the Contacts app to receive items. To add a contact, open Contacts on your iPhone, iPad, or Mac, tap the Add Contact icon, fill in the details (it must contain the person’s email address or phone number), and tap Done.
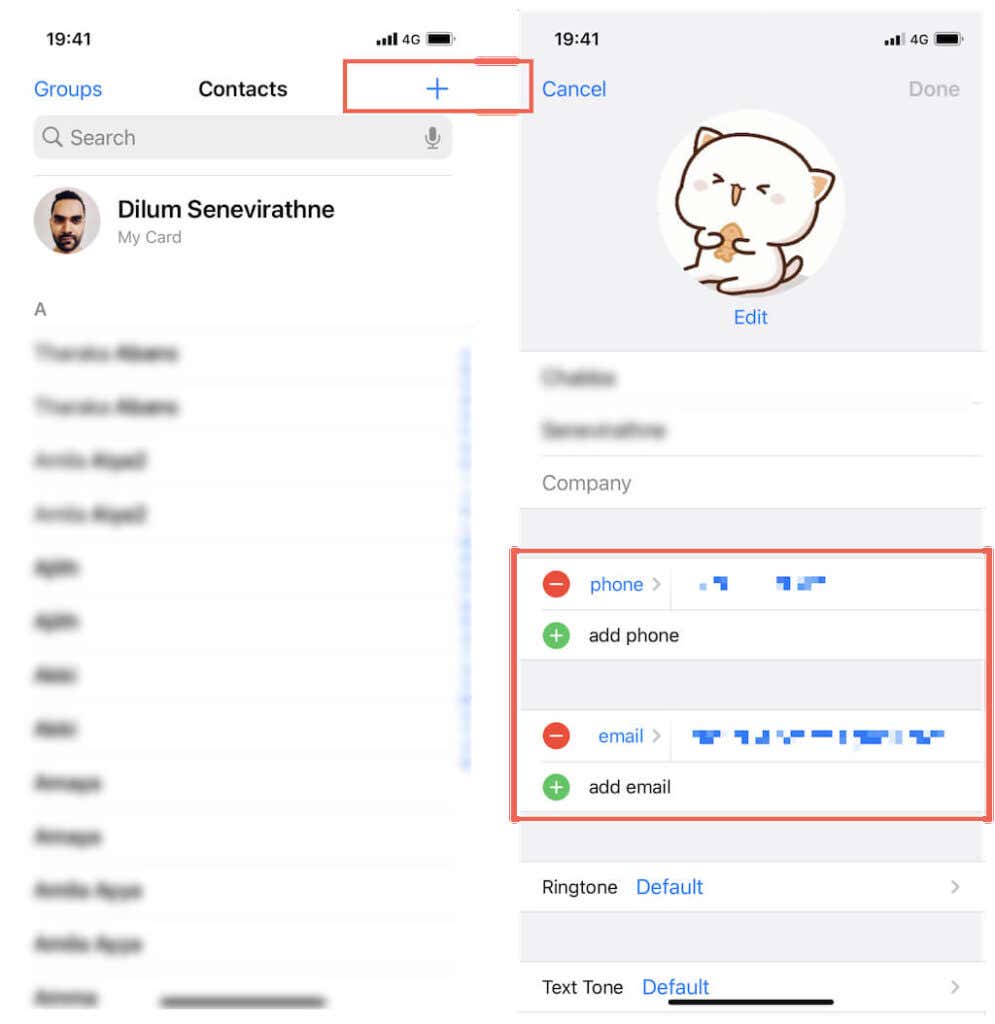
If the sender is already listed within the Contacts app, make sure that the card contains the email address or phone related to the iCloud account of the sender. It’s a good idea to sync contacts with your iPhone and Mac or vice versa afterward.
Send Files via AirDrop
AirDrop is accessible via the Share Sheet in most native and third-party apps on iPadOS and iOS devices. For example, in the Photos app, select the photo or photos (tap the Select button at the upper-right corner of the screen) you want to share and tap the Share icon (box with an arrow coming out of the top). Then, tap AirDrop and select the person or device you want to send the items to.
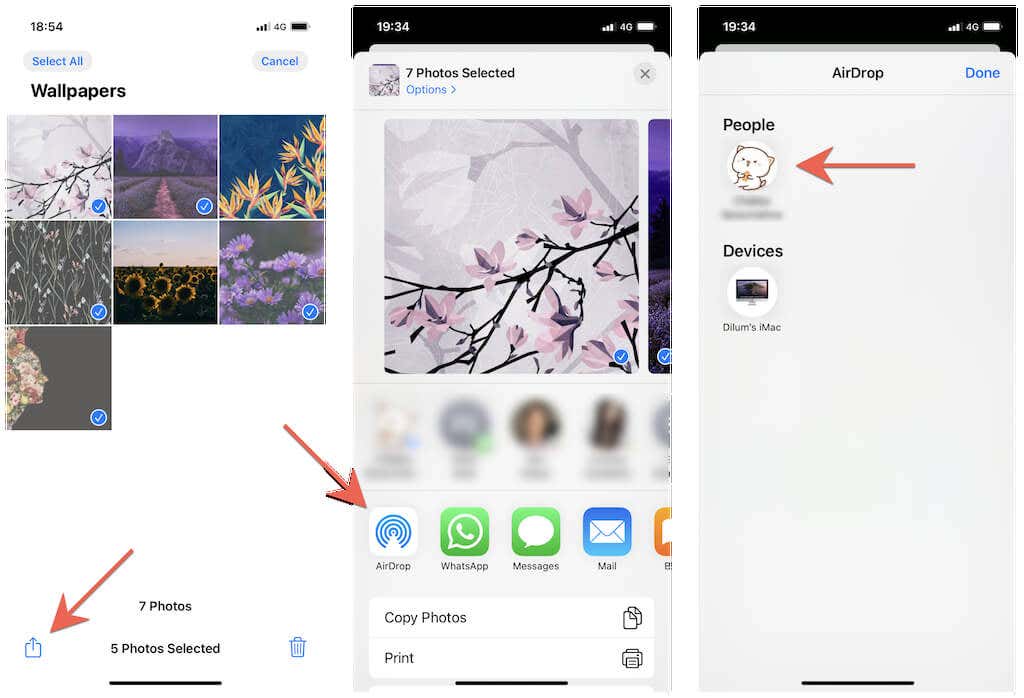
Note: While sharing a webpage via a browser, you don’t have to select anything. AirDrop will automatically grab the URL of the open tab.
The same applies to the Mac with stock apps such as Photos, Safari, and Notes—locate and select the Share button and then select AirDrop.
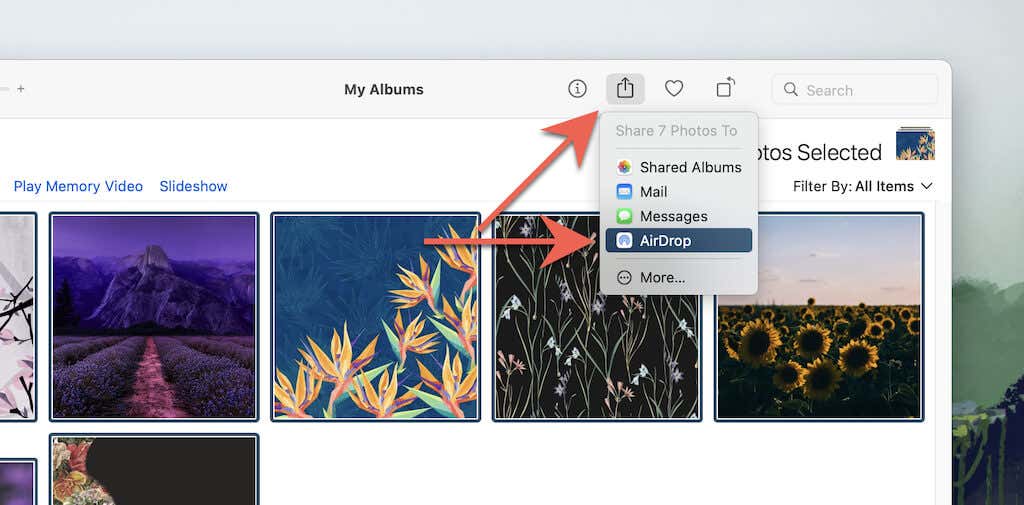
On the AirDrop pop-up that shows up, select the device you want to share files or links with.
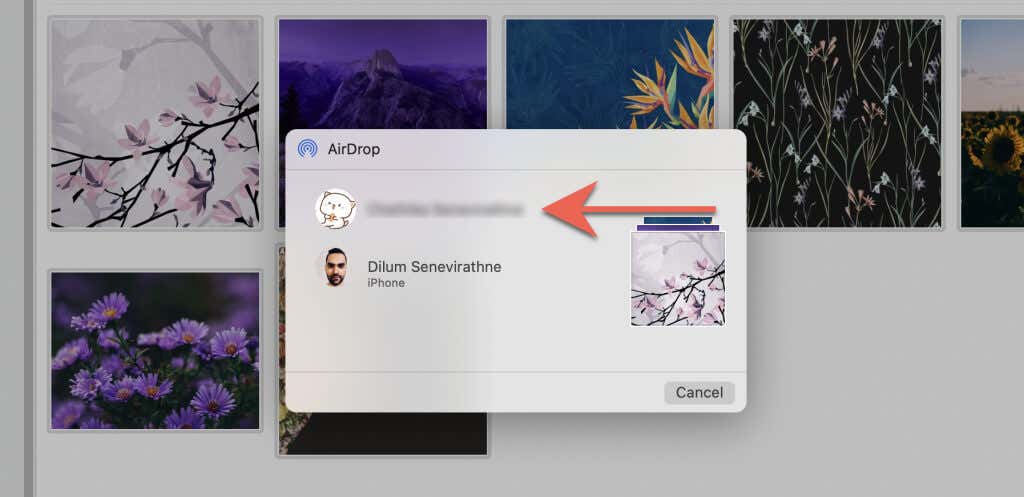
You can also transfer files and folders on macOS devices by dragging the items you want into the recipient’s portrait on the AirDrop window in Finder.
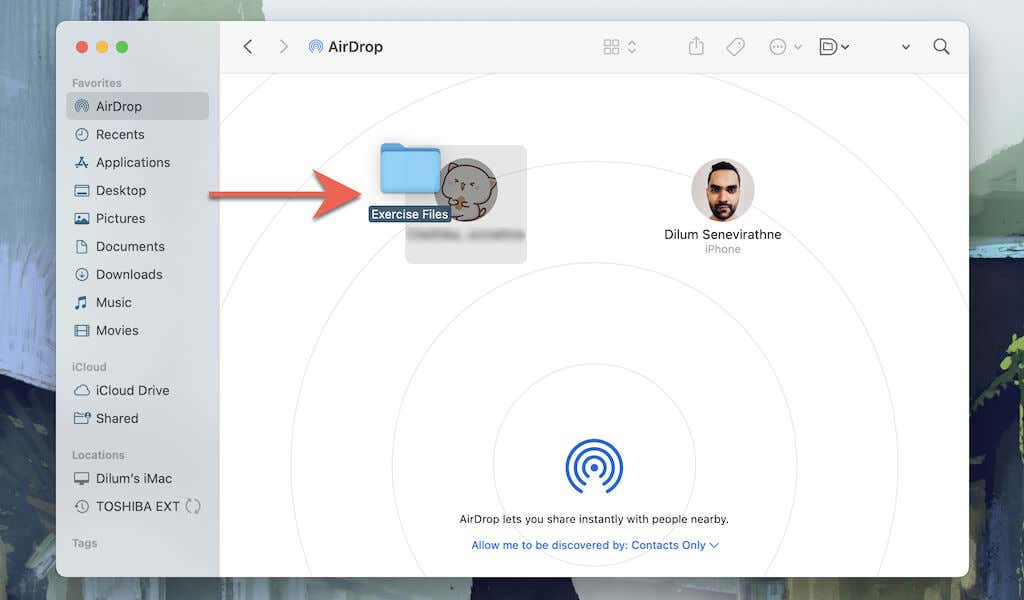
Again, the recipient must have their AirDrop preferences set to Contacts Only or Everyone. If it’s the former, your name or email must be present within their Contacts app. The recipient must also accept the transfer. If you AirDrop files to your own devices, you don’t have to accept anything.
Receive Files via AirDrop
If you want to receive files via AirDrop, you must have your AirDrop preferences set to Contacts Only or Everyone. When using the former, just make sure to include the sender’s email address or phone number in the Contacts app on your iPhone, iPad, or Mac.
When a person transfers documents, photos, and links via AirDrop, your Apple device will alert you with a prompt or notification—just tap Accept.
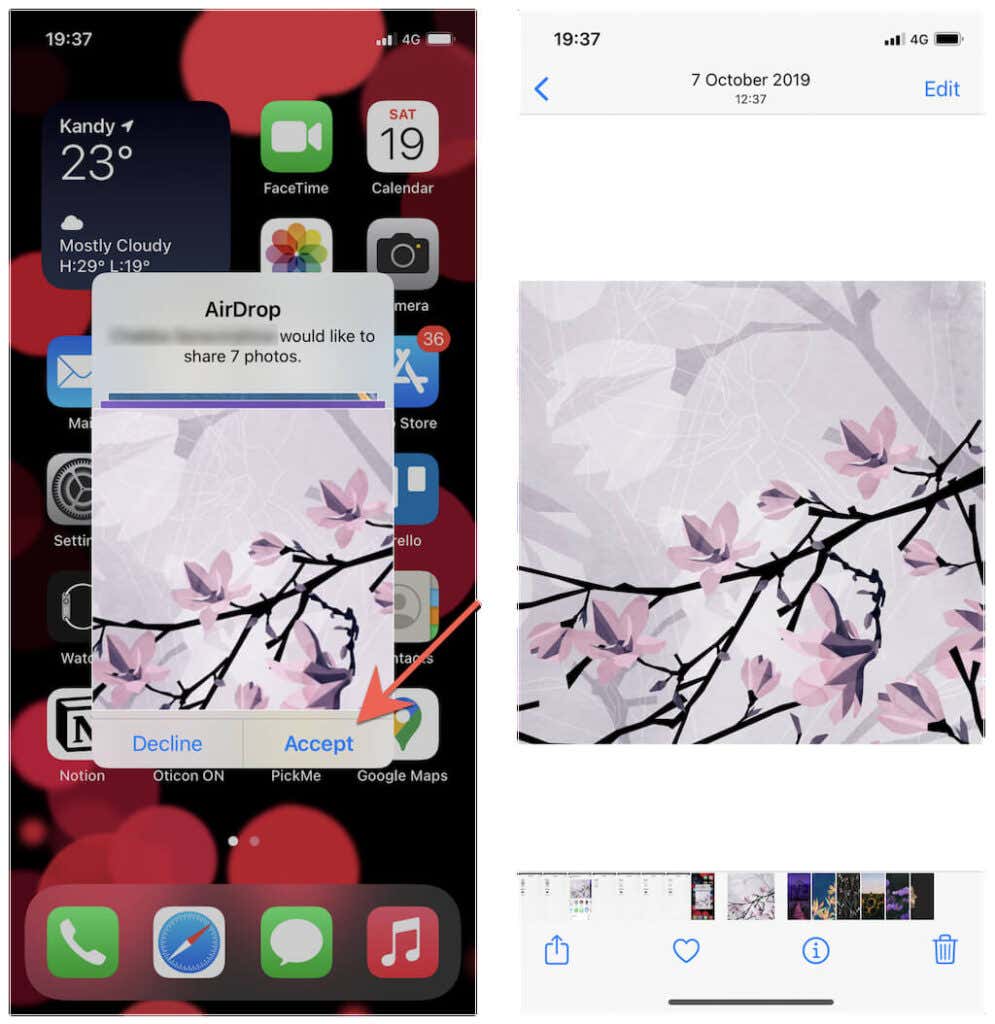
On the iPhone and iPad, incoming items will typically open in the relevant app (e.g., Photos, Notes, or Safari), or you’ll be asked to save them a location within the Files app. On a Mac, an AirDrop transfer will appear within the Downloads folder. Again, if you’re receiving an AirDrop from a device you own, you don’t have to accept the transfer.
AirDrop Setup Complete
As you just saw, AirDrop is ridiculously convenient to use with its own set of privacy restrictions. If you also have an Android device, you may want to learn about an equivalent service—Nearby Sharing.
However, if you encounter any issues with AirDrop, you must know how to troubleshoot the sending or receiving device. For example, having Personal Hotspot active on your iPhone or iPad can stop it from sending or receiving files. For the complete rundown of possible reasons and solutions, check out our troubleshooting guide to fixing AirDrop on iPhone, iPad, and Mac.
[related_posts_by_tax posts_per_page="5"]