Reliver your PS2 gamer glory days
The PlayStation 2 is still the best-selling console in history, although the Nintendo Switch might overtake it by the time you read this. Nonetheless, it has quite possibly the most iconic game library of all time, with many titles still locked to the PS2.
The good news is that PlayStation 2 emulation on Windows and Linux is nearly flawless, but on Mac, things aren’t quite as polished yet. If you own a Mac and want to relive the glory days of being a PS2 gamer, we’ll show you how to play PS2 games in no time.
Here’s What You Need
Before we get into the technical details, let’s lay out the list of things you’ll need to follow in this tutorial.
- A macOS X computer with (at minimum) 4GB of RAM, a dual-core CPU, and a DirectX 10 GPU with 2GB of VRAM.
- A copy of the macOS version of PCSX2 (the emulator we’re using).
- A copy of the PlayStation 2 BIOS.
- A PS2 Game
- An (optional) compatible gamepad. A PS4 or PS5 controller is highly-recommended
The above hardware requirements are taken from the Windows and Linux versions of PCSX2. At the time of writing, the macOS version of this software isn’t yet an official release. Although it may be by the time you read this guide.
These minimum hardware specifications may not be enough to run some titles at a playable performance or high resolution. So, we recommend a quad-core Mac with hyperthreading and a dedicated Nvidia or AMD GPU with 4GB of VRAM.
Macs like the Intel MacBook Pros that use Intel integrated graphics are unlikely to offer a great experience. However, the built-in GPU in Apple’s M1 (or newer) Apple Silicon Macs is powerful enough. We are using a base model M1 MacBook Air with the lowest-end GPU in the range for this guide.
Check for Malware
Getting the PS2 emulator up and running will require tracking several files from the internet. We can’t link you to those files directly, and there are many different sources for them. You must always check any files you download from the internet for malware.
Make sure your source is trusted. Run the files through a virus checker such as VirusTotal. Apart from the emulator itself, don’t run any executable files on your Mac bundled with these additional downloads. Just delete them.
Downloading the PCSX2 Emulator
Usually, Mac emulation is quite simple, thanks to software like OpenEMU, which includes emulation engines for popular consoles such as the GameCube, PSP, PSX, and Wii. However, you won’t find a Sony PlayStation 2 emulator wrapped up in such a neat package at the time of writing.
The best working example of a PS2 emulator for Mac is the PCSX2. However, the macOS version isn’t yet an official release. You should head to PCSX2.net to download the software when it does.
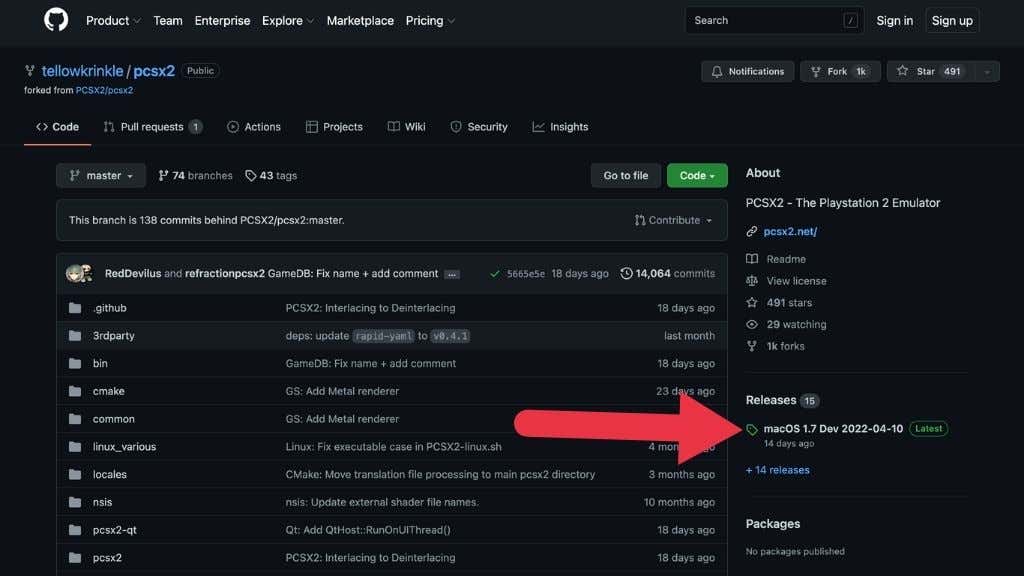
For now, you can get the macOS version at the Github page of Tellowkrinkle. Look for Releases on the right-hand side of the page and open the link.
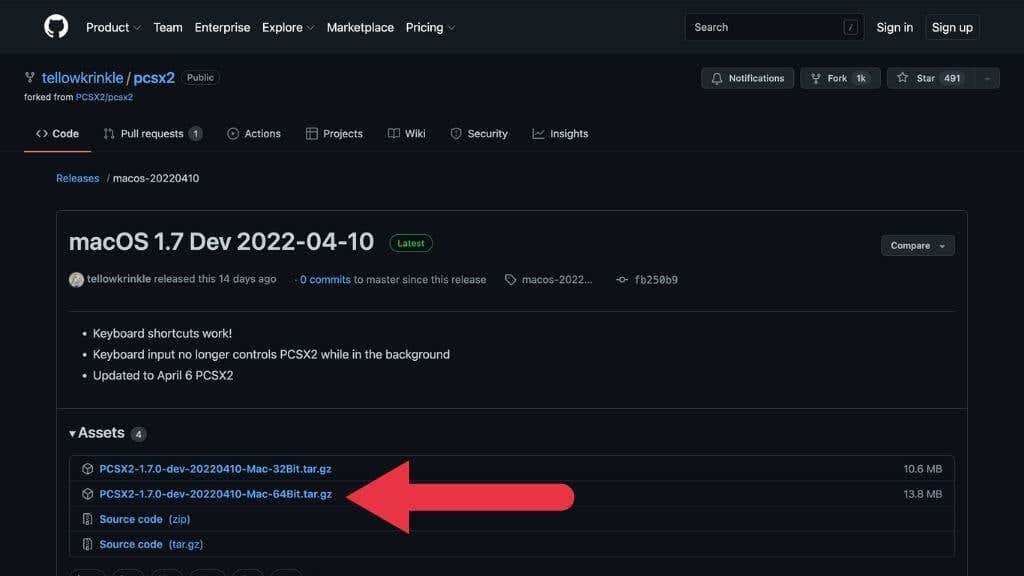
Now download the latest release as a tar.gz file. Most modern Mac users should download the 64-bit version of the application.
Just leave the downloaded file where it is. We’ll come back to it shortly.
Finding a PlayStation 2 BIOS
PCSX2 requires a PlayStation 2 BIOS to work. Unfortunately, since the BIOS is a copyrighted file, it’s not included with PCSX2, an open-source PlayStation emulator. This means you’ll have to find a BIOS file yourself.
If you own a PS2 console, you can look up a method to “dump” your BIOS, but most users will simply download these BIOS files from online sources.
We can’t link you directly to them, but you have to search for “PS2 BIOS Files” in a search engine, and you’ll find them readily enough. You’ll likely find a collection of BIOS files collected in a ZIP file or similar. Unzip the files and save them in a folder on your computer. In our case, we saved them in a folder called “PS2BIOS” in the Documents folder.
Finding PS2 Games
The final piece of the puzzle is the game itself. You can find PS2 games in used game stores or sites like Amazon. With a few exceptions, PS2 games aren’t expensive to buy, and there’s no shortage depending on where you live.
We visited a local used game store and picked up this copy of Charlie’s Angels for the PS2. It is, by all accounts, an awful game. But it was just $4, which is perfect to test our emulation software!
Many users opt to download pirated video games from torrent websites or other shady ROM websites when it comes to rare or hard-to-find games. The legality of this depends on the laws of your country or state, but in general, this is illegal, so we can’t condone it or link you to those sources.
Playing Directly From Disc
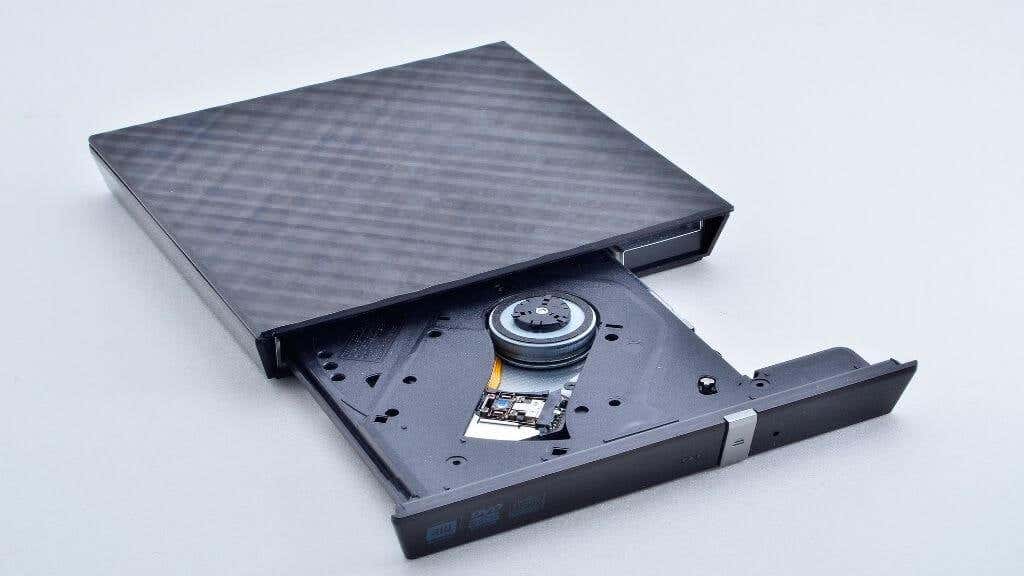
We’re using a USB DVD drive for this tutorial. PCSX2 supports playing the game directly from the disc, but we couldn’t get it to work with the particular unofficial release of PCSX2, and it appears the disc plugin isn’t yet implemented for it.
This feature may work properly with future releases, but even if this option were functional, we’d recommend making an ISO disc image from your game disc since it is much more convenient and performs better.
Creating a Disc Image With Disc Utility
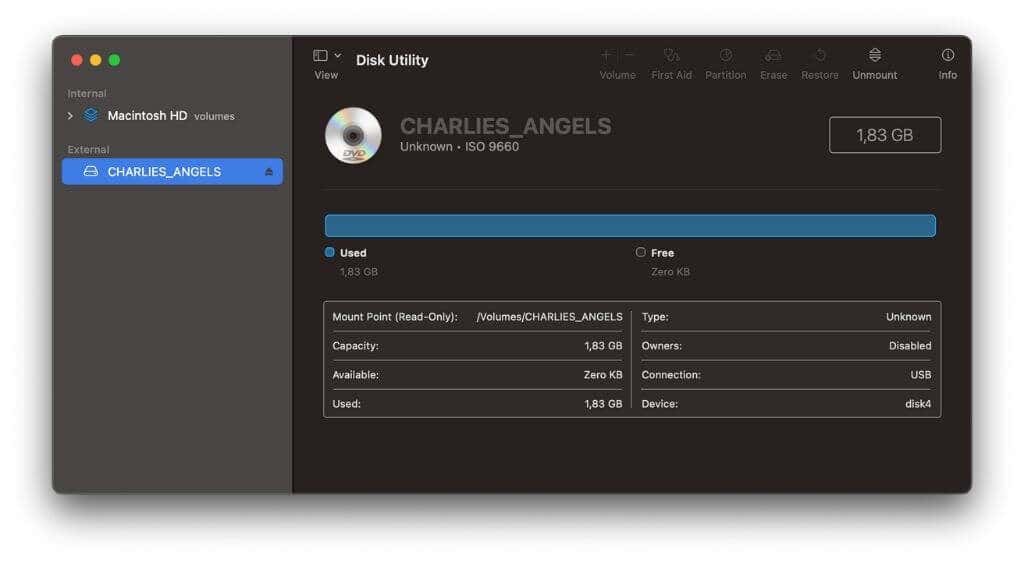
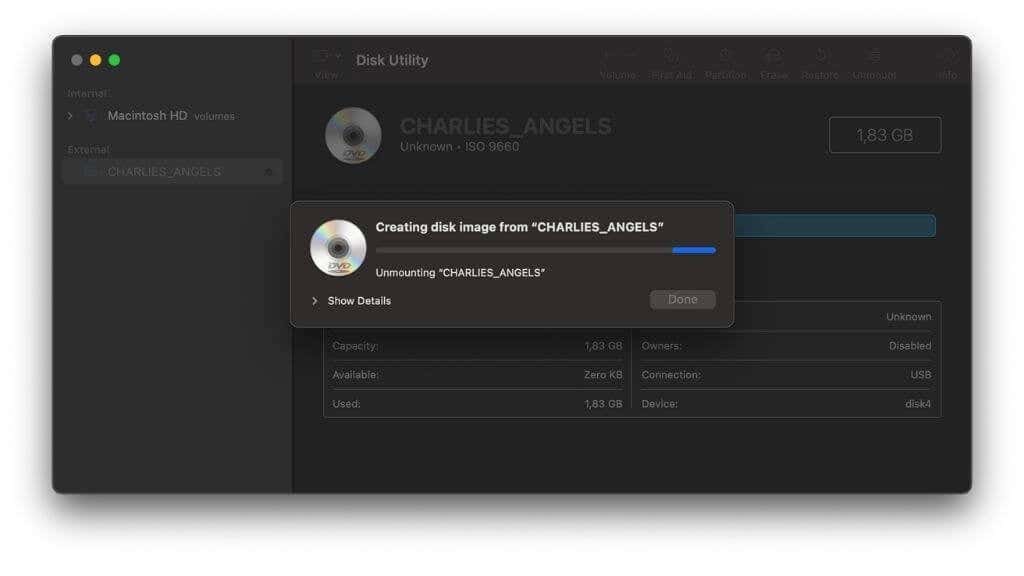
You don’t need special software to create a disc image with PCSX2. You can use your Mac’s built-in Disk Utility to create a disc image. First, open Disk Utility using Spotlight Search (Command + Space).
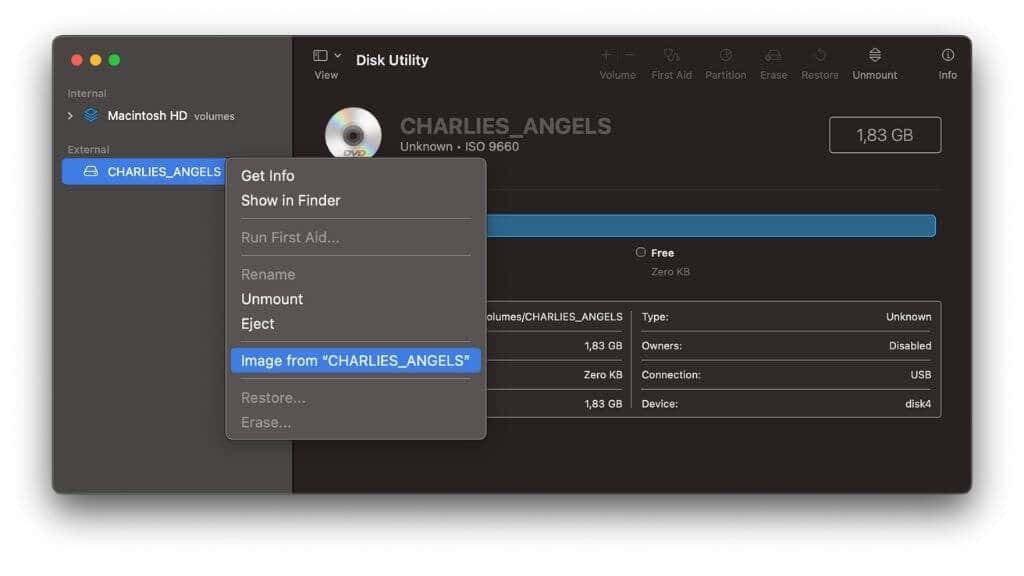
Next, alternate-click on the drive and select Image from.
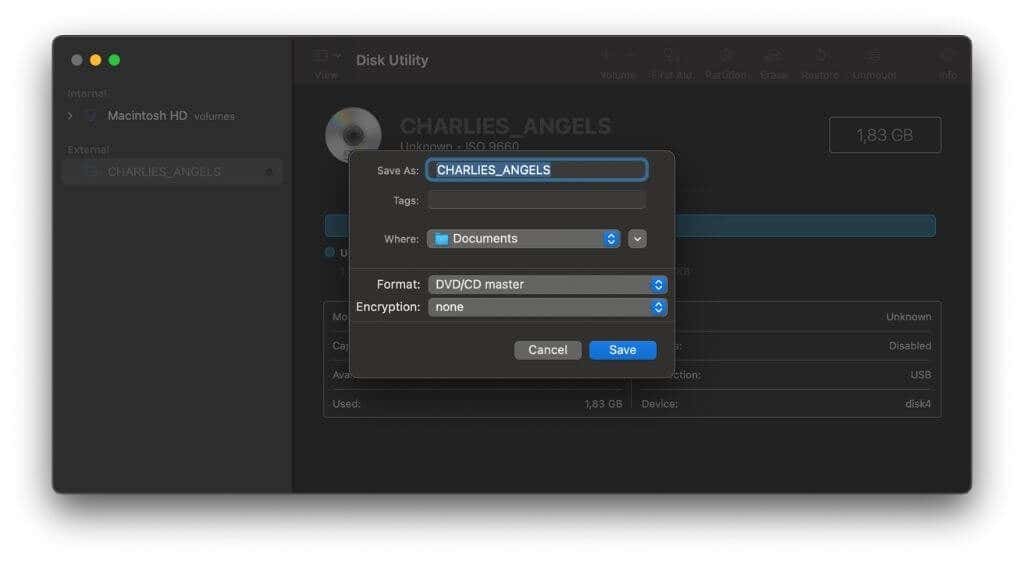
Give the image a name, choose a location to save it, and change the DVD/CD master format. Then select Save.
The resulting file will be a .cdr file, but in most cases, you can rename it to .iso.
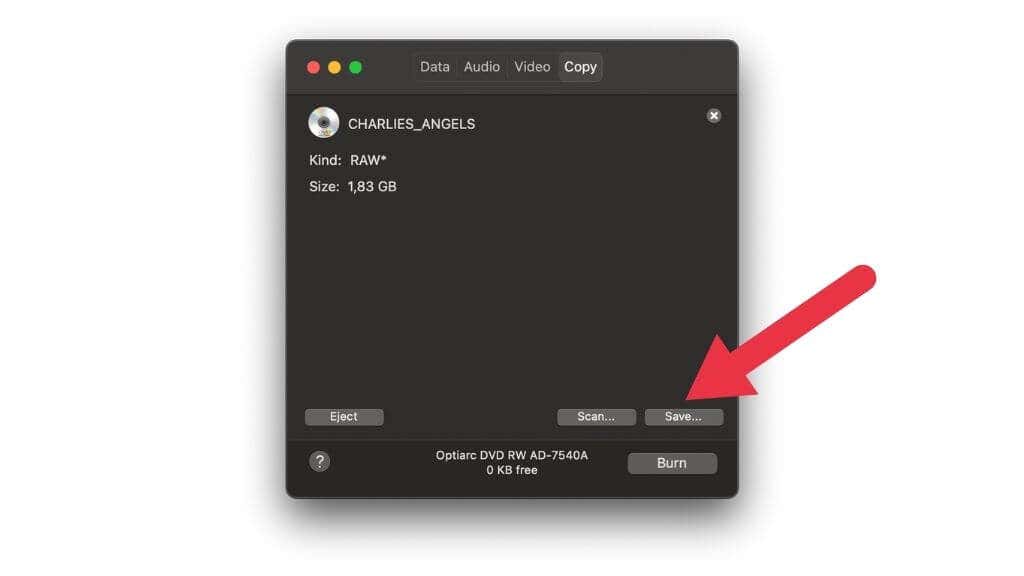
If Disk Utility doesn’t work for you, you can try out Burn, an excellent disc burning utility for macOS. Open the app, and choose the Copy tab. Then select Scan.
Once the disc is scanned, select Save and choose the location for your ISO file.
Checking Game Compatibility and Special Settings
The last thing you need to know before proceeding is the game compatibility and unique per-game settings. Many PS2 games require special fixes or settings within the emulator to run correctly. If you don’t check for these special settings, the game may run poorly, incorrectly, or not.
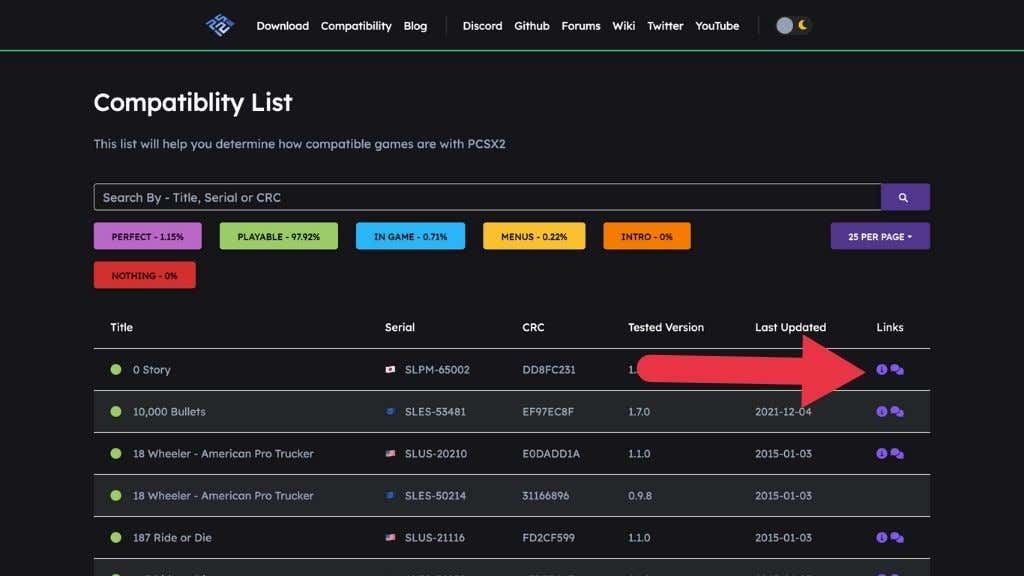
Go to the PCSX2 compatibility list for information about how well the game should run.
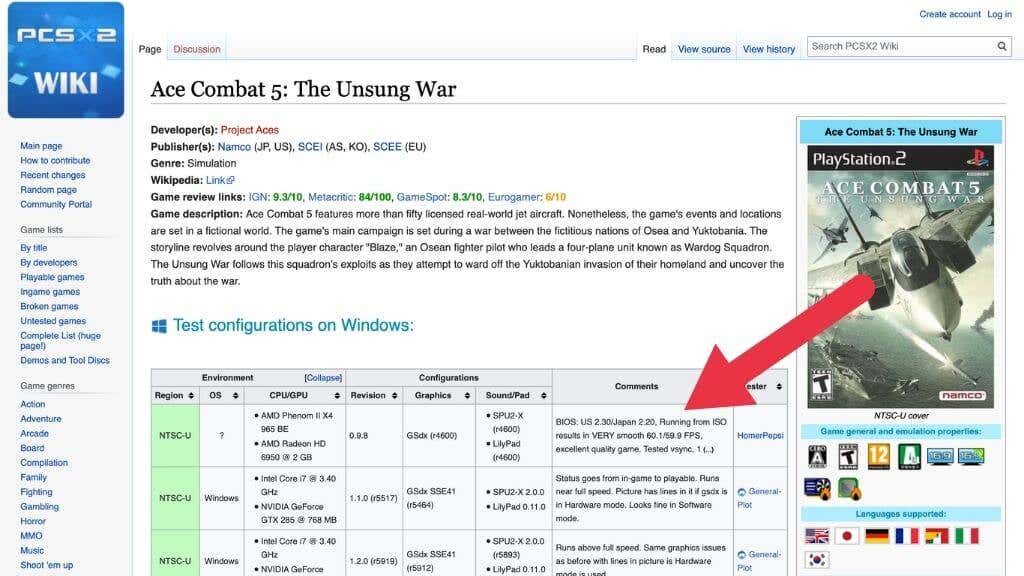
If a game’s entry has a little “i” icon, you can click on that to see if there are any unique settings you need to enable in the emulator to make that game work correctly.
Remember that you don’t want those fixes activated for every game since they might break other titles.
Setting Up and Playing Your Game
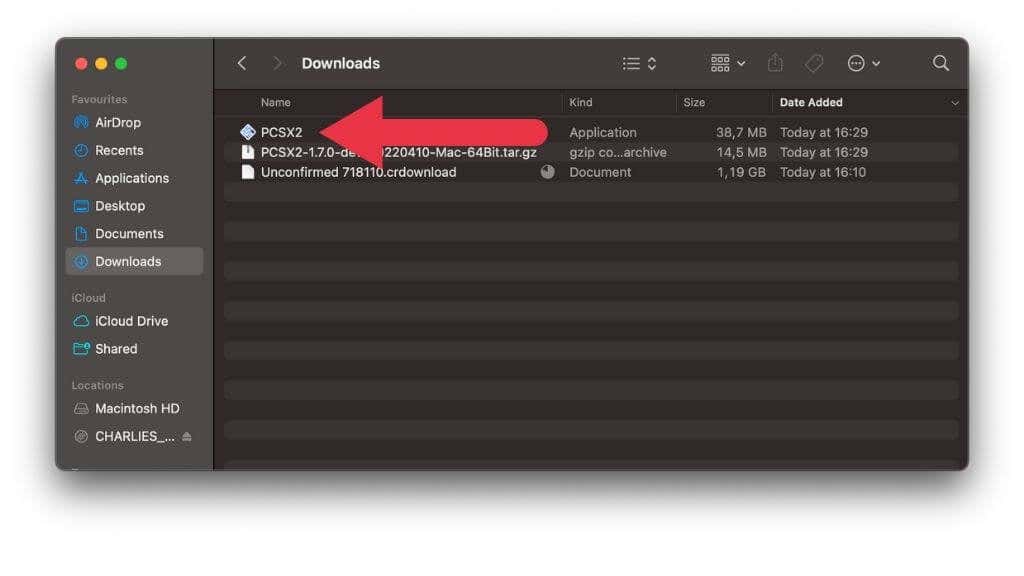
Now we have everything we need to start playing our game. First, we need to install PCSX2. Head over to the folder where you downloaded the tar.gz file and double-click it to uncompress it.
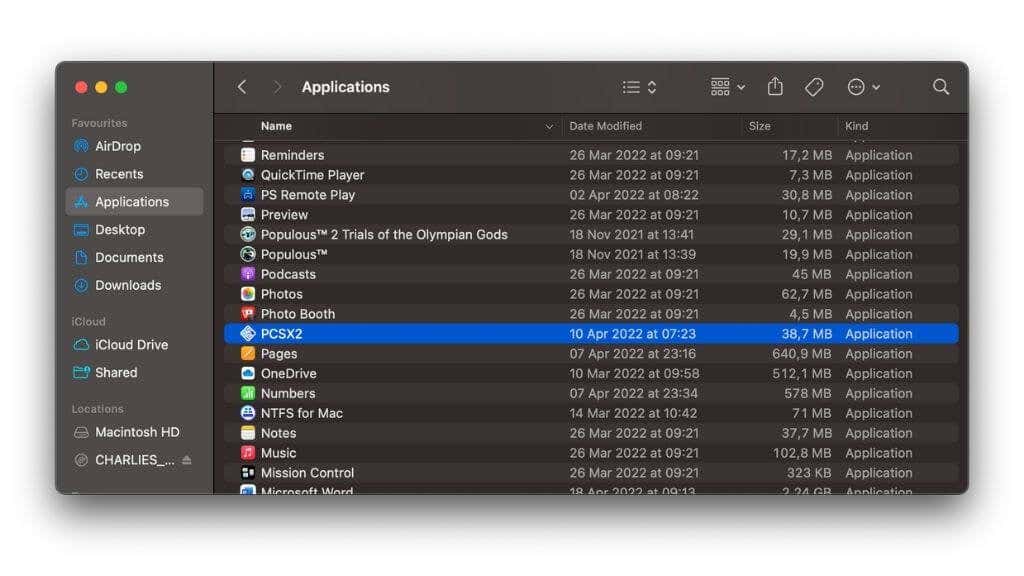
Next, drag the PCSX2 app to your applications folder.
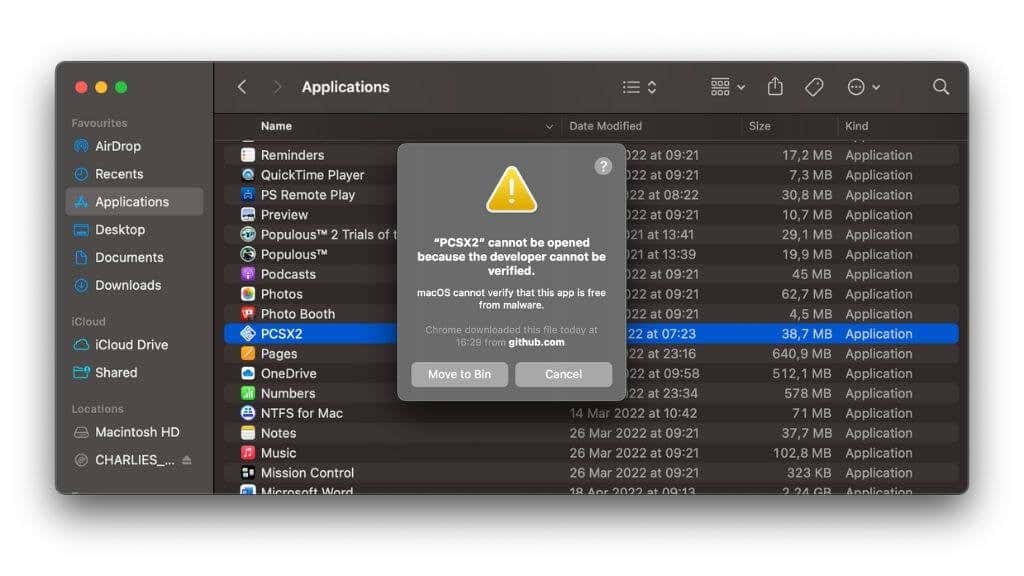
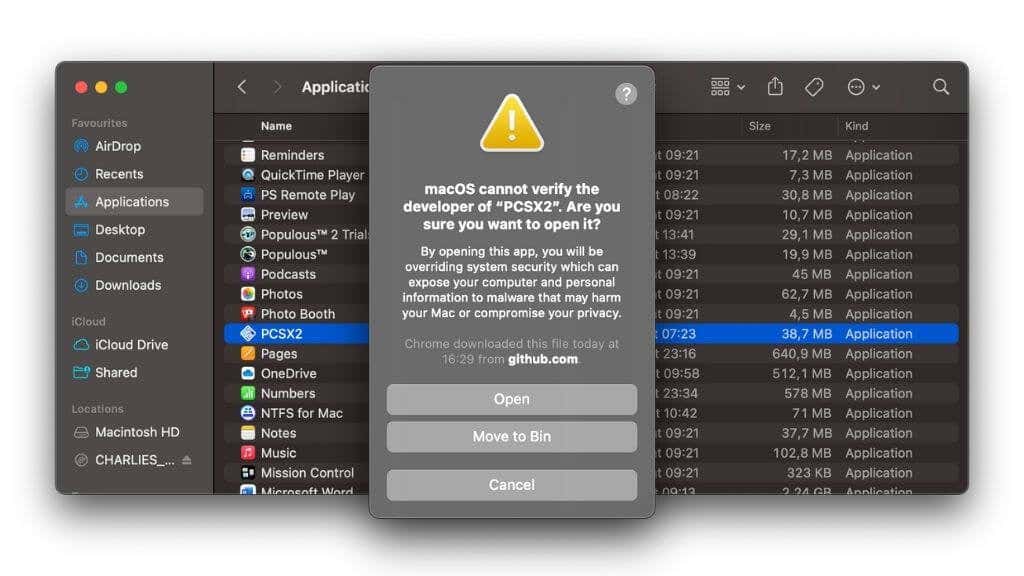
If you try to open the app the first time, you might see this error message.
Hold down the Control key and then click on the app once. Then, select Open from the menu and confirm if you’re sure.
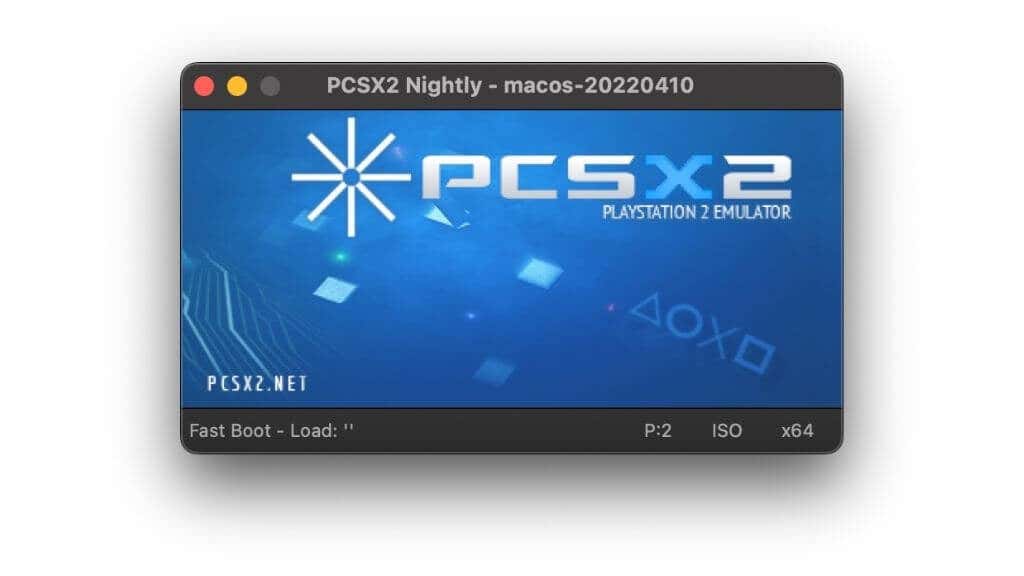
The emulator should now open.
Next, copy your BIOS files to Users/YOURNAME/Library/Application Support/PCSX2/bios where “YOURNAME” is replaced with your specific user name.
If you don’t want to copy the BIOS files there, save them to any folder you’d like, but you’ll have to manually specify the folder when we configure the software.
Configuring PCSX2 BIOS Settings
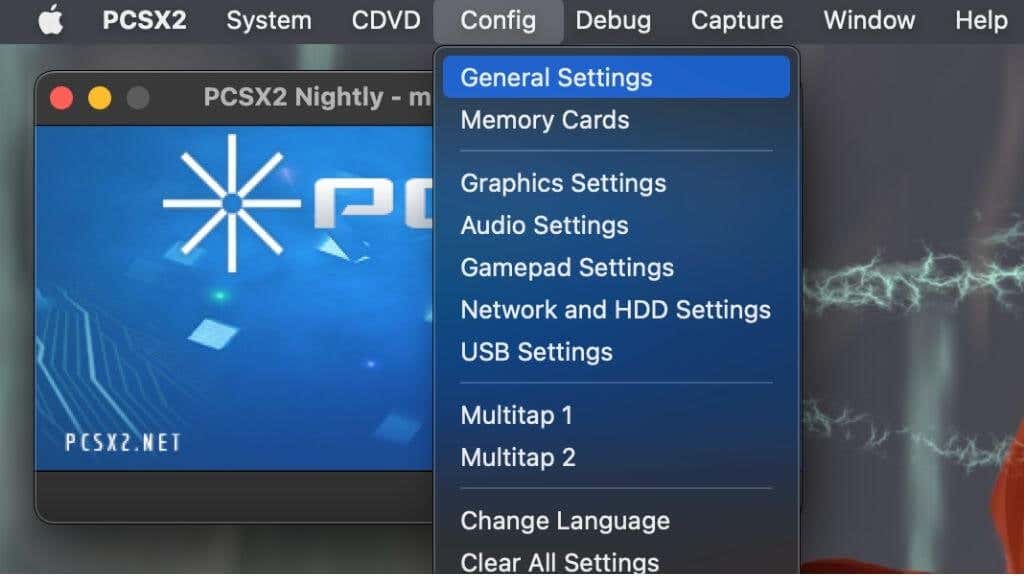
Now that PCSX2 is open, select Config > General Settings.
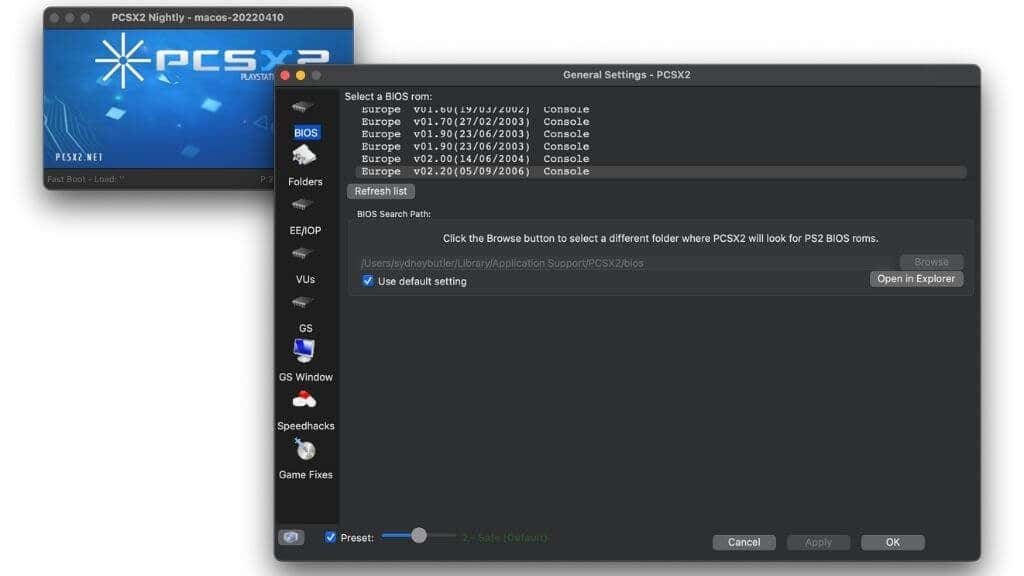
Under the BIOS section, you should see all of the BIOS files you copied into the folder under the BIOS section. For a custom folder, uncheck Use Default Settings and select Browse. Then, choose the folder where you saved the BIOS files and confirm.
From the list of BIOS files, choose the one that works for your game. For example, if you have a PAL game, you should use a European BIOS file. If the game is NTSC, then use a US BIOS, and so on. Some games work best with specific BIOS versions; you can find that information as part of their info page in the PCSX2 database.
Select Apply to lock in your selection and if PCSX2 asks you to create a configuration folder, say yes.
Configuring Graphics
Setting up the graphics is important.
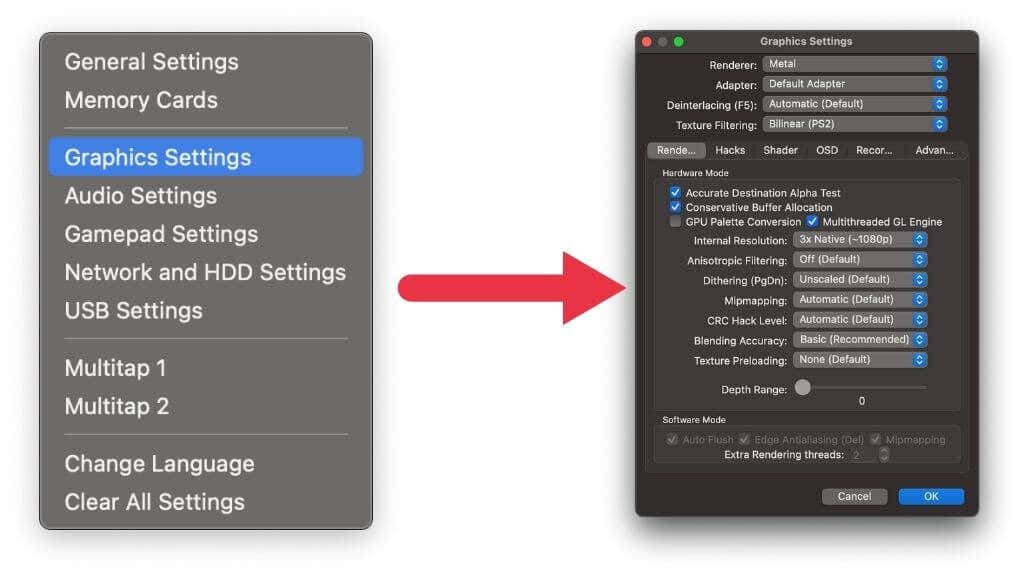
Open Config > Graphics, and you’ll see this options menu.
You don’t need to change much here, but make sure that the render is set to the Metal API, and not OpenGL. You may also want to change the internal resolution to something higher, but starting with PS2 Native is a good idea so that you can increase the internal resolution if you still have some performance to spare.
Leave everything else on default unless you know specific settings under the Hacks tab that need to be activated.
Configuring Your Gamepad
If you’re using a gamepad rather than keyboard controls, you’ll need to connect it to your Mac. You can use a direct USB connection, which is as simple as plugging the two ends of the cable into the controller and your Mac. The latest version of macOS has native support for the PS4 and PS5 controllers using Bluetooth.
Put the controllers into pairing mode and select them from the Bluetooth device menu just as you would any other Bluetooth device. You can activate pairing mode for both controllers by holding the Share and PS buttons while the controller is off. The light on the controller will flash rapidly, and this is when you can pick the controller from the list in macOS. If you mess this up, just hold the PS button until the controller switches off.
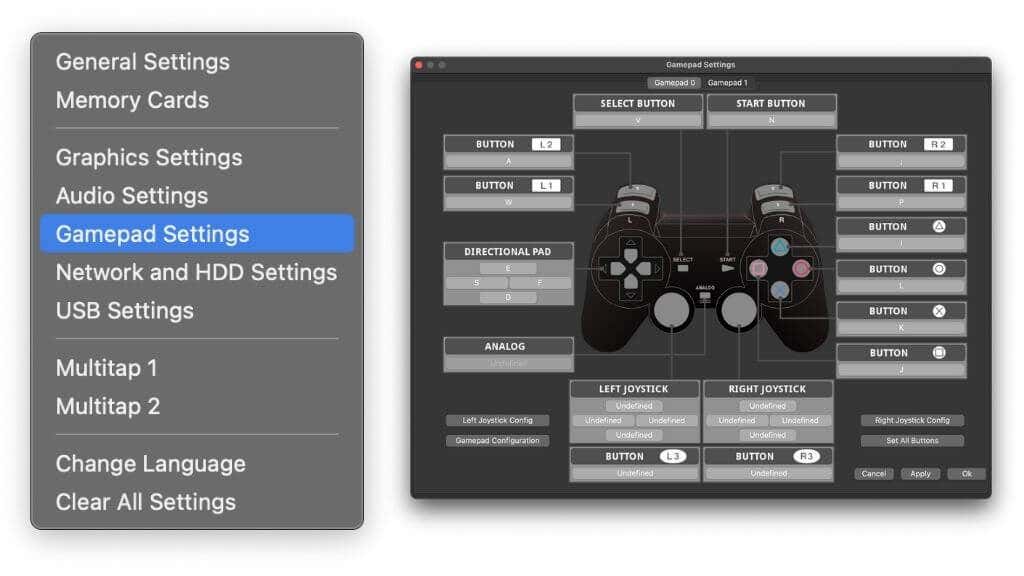
Now, in PCSX2, go to Config > Gamepad Settings.
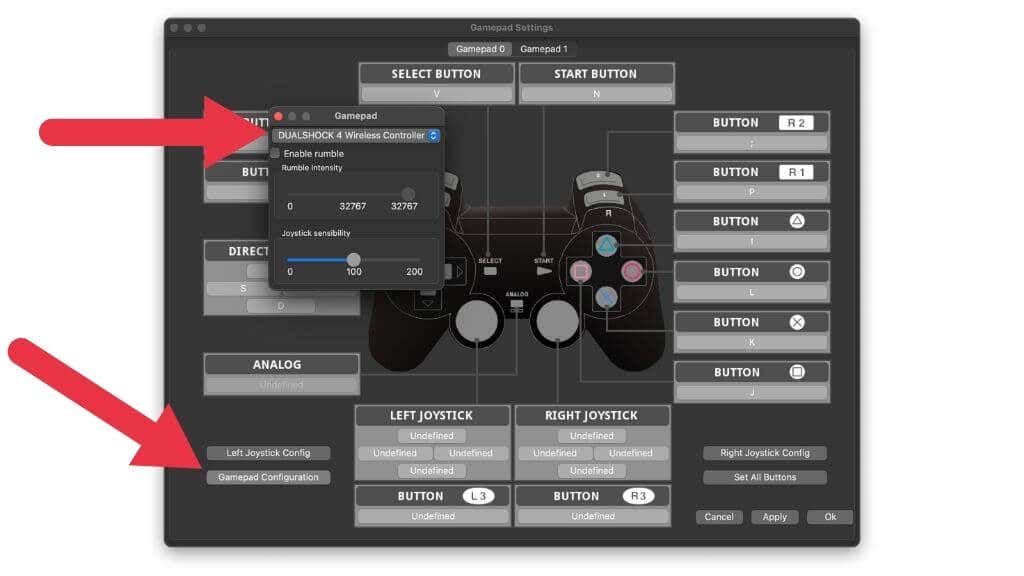
Select GamePad configuration.
Your controller should be automatically mapped. Select OK to confirm and close the window.
Launching Your Game
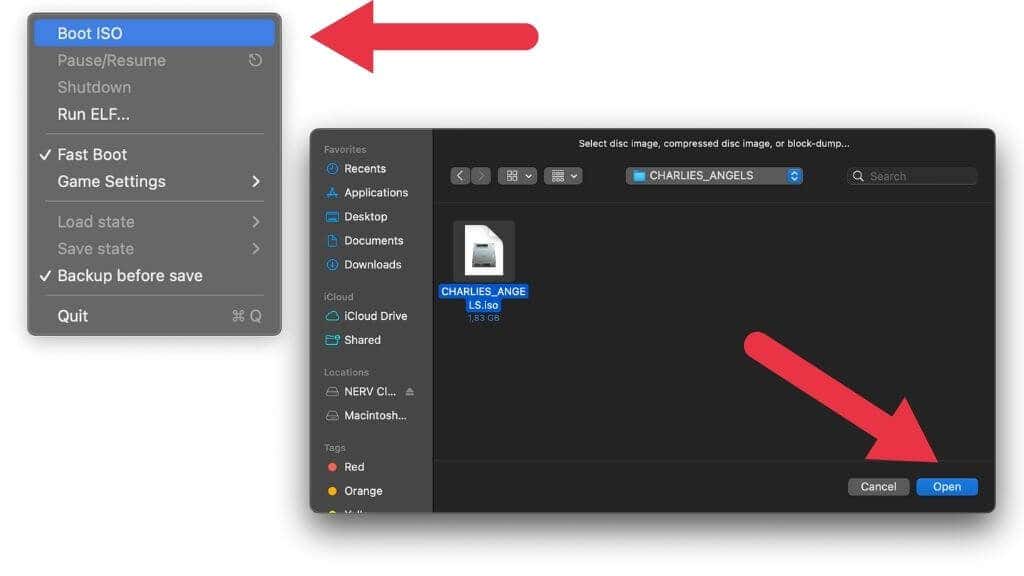
Now the moment of truth has arrived. Select System > Boot ISO and then navigate to your game’s ISO file.
Once you open the file, the game should launch.
You can begin playing using your controller.
Emulation Isn’t Perfect
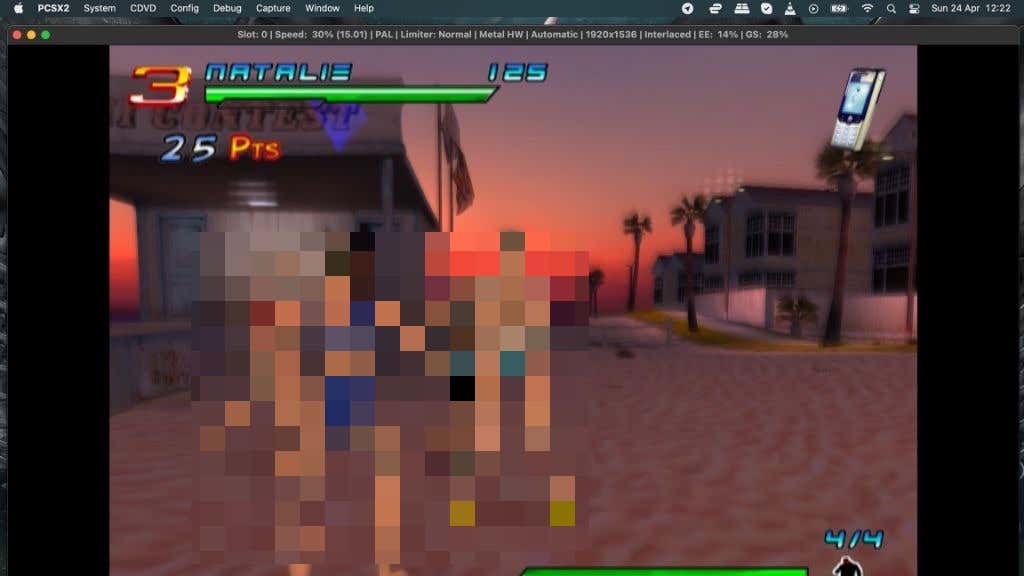
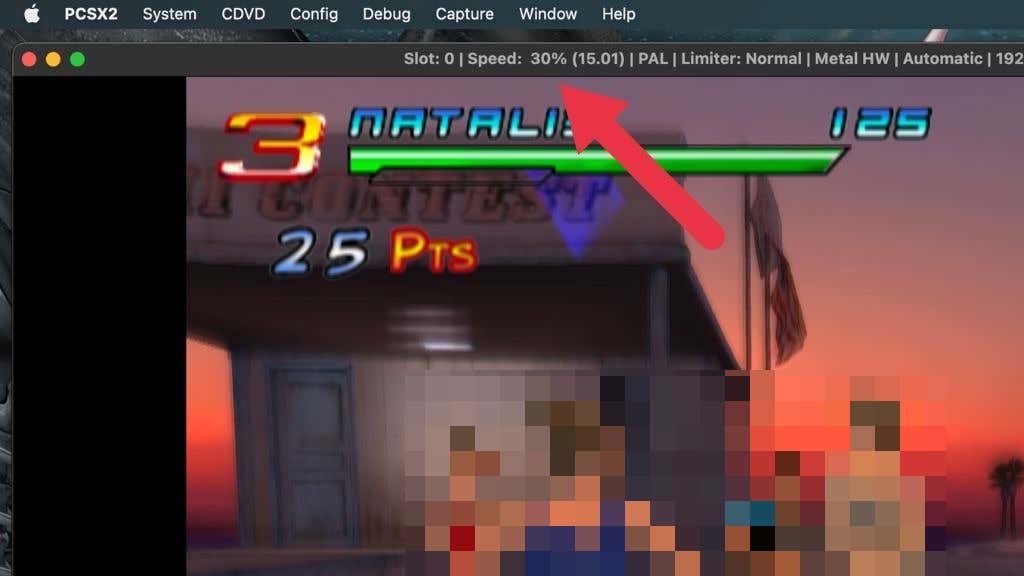
The first time you play your game using PCSX2 on your Mac, you may not be happy with how it looks and performs. Keep an eye on the title bar of the emulator window to see how well the game is running.
The percentage meter shows you the emulation speed (with the FPS in brackets), and you want that number to be as close to 100% as possible. Higher numbers mean the game is running too fast, and lower numbers suggest it’s running more slowly. If you’re constantly getting numbers below 100% with laggy gameplay, you probably need to apply performance patches or lower graphical settings such as resolution.
Also, watch for graphical glitches or other oddities in the game. In most emulated games marked as playable, these are minor annoyances, but in some titles, they can ruin the experience. If you see these glitches, there might be fixes you can apply that make them go away.


