Do you want to transfer voice memos from an iPhone to a Mac or PC? Whether it’s to listen to your recordings with higher-quality playback hardware or to create extra copies for backup purposes, you’ve got multiple ways to do that.
For instance, you can sync your voice memos via iCloud or iTunes, share individual recordings over AirDrop, upload and access them using iCloud Drive, and so on. We’ll walk you through each method in detail below.

Sync Over iCloud (Mac Only)
Apple introduced Voice Memos on the Mac with macOS 10.14 Mojave. So, if you use the same Apple ID on an iPhone and an up-to-date Mac, you can simply sync your voice recordings between the two devices over iCloud. Here’s how to set that up.
Sync Voice Memos on iPhone
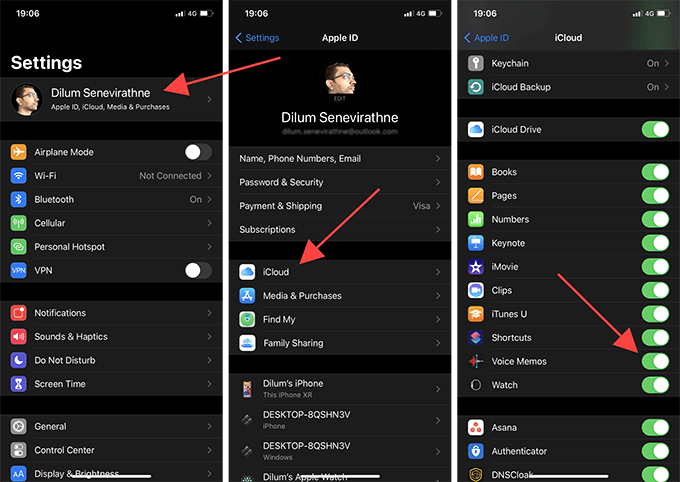
1. Open the Settings app on your iPhone and tap your Apple ID.
2. Tap iCloud.
3. Scroll down and turn on the switch next to Voice Memos.
Sync Voice Memos on Mac
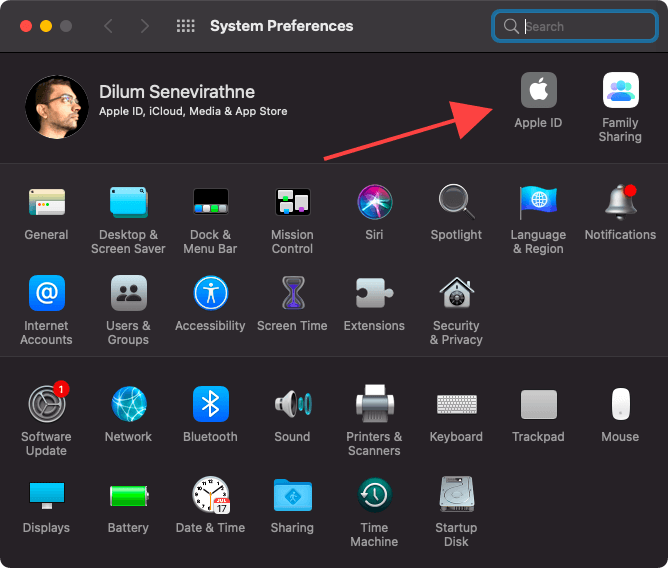
1. Open the Apple menu and select System Preferences.
2. Select Apple ID.
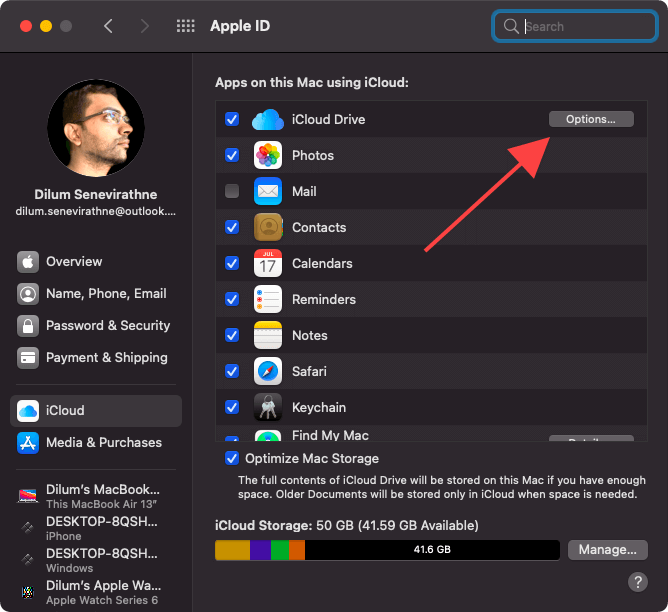
3. Select Options next to iCloud Drive.
4. Enable Voice Memos.
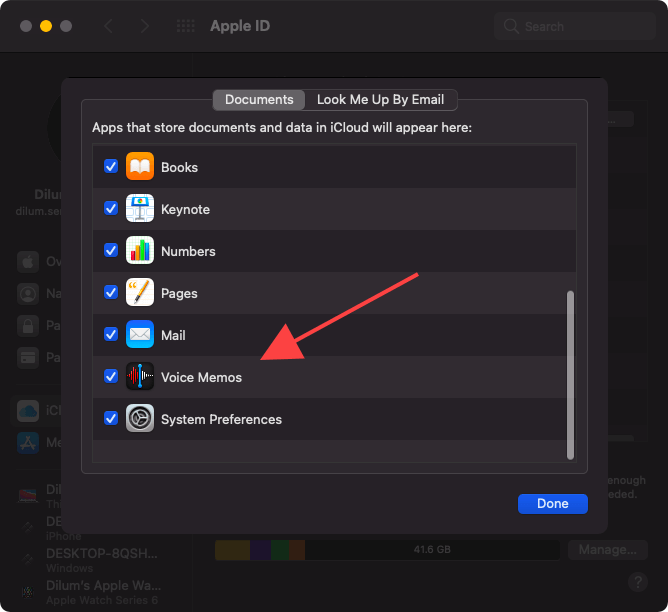
5. Select Done.
Once you’ve finished setting up Voice Memos to sync on both devices, go to Finder > Applications and open the Voice Memos app on your Mac.
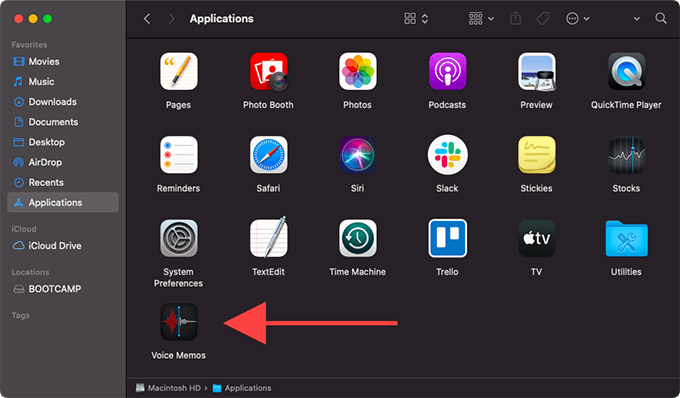
Your recordings should sync from your iPhone to the Mac in real-time. You can then play or edit them on the Mac. Any changes you make will sync between the devices and new memos that you record on the Mac should show up on your iPhone as well.
Besides the Voice Memos app, you can access synced recordings in the M4A format and play them using your preferred media player on the Mac. To get to them, open Finder, select Go > Go to Folder, and visit the following location:
~/Library/Application Support/com.apple.voicememos
One thing to note, though. Deleting your voice memos on the iPhone will also remove them from the Mac. To stop that from being an issue, navigate to the above folder and copy the files to a different directory. Or drag and drop recordings from the Voice Memos app to the Mac’s desktop to create separate M4A copies.
Transfer With iTunes (PC & Mac)
If you use a PC, you can transfer your iPhone’s entire library of voice memos by syncing the device with iTunes. That’s also possible on Macs, but only those that run macOS 10.14 Mojave and earlier versions of the system software.
1. Open iTunes on your PC or Mac and connect your iPhone. You might have to unlock your iPhone and tap Trust to proceed.
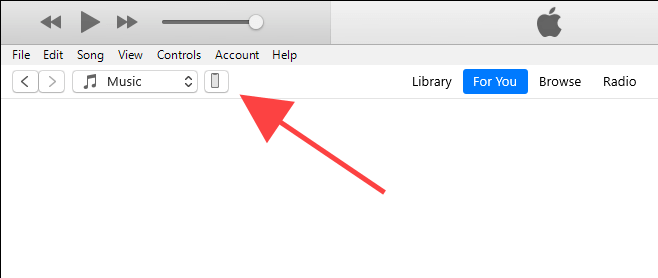
2. Select your iPhone from the top-left of the iTunes window.
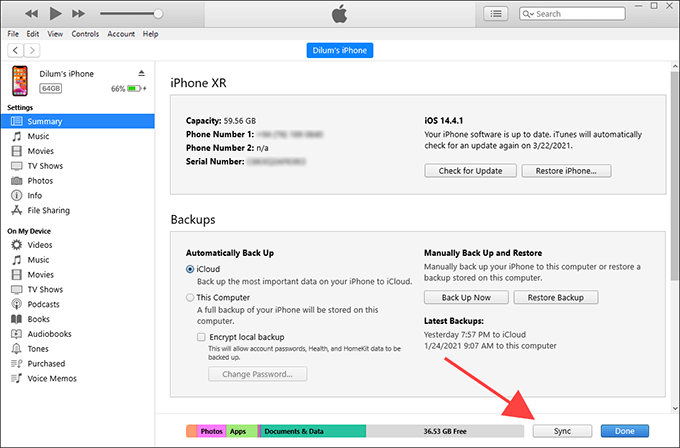
3. Select Sync to start syncing the contents of your iPhone.
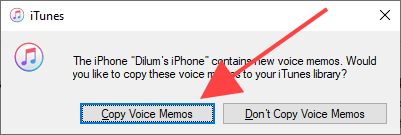
4. Select Copy Voice Memos.
5. Wait for the sync procedure to complete.
6. Disconnect your iPhone.
Once iTunes finishes syncing the iPhone, you can access and play your voice memos by selecting Voice Memos from the application’s sidebar.
You can also open File Explorer or Finder and go to Music > iTunes > iTunes Media > Voice Memos to locate the recordings in the M4A format.
Share Voice Memos Using AirDrop (Mac Only)
If you have a Mac with a different Apple ID to that of your iPhone, or if you want to share a voice memo with a friend or colleague, you can use AirDrop to make the transfer quickly.
1. Open the Voice Memos app on your iPhone and tap the recording you want to share.
2. Tap the More icon (3–dots) and select Share.
3. Select AirDrop and pick the Mac you want to send the voice memo to. Or choose it from the Suggestions bar at the top of the Share Sheet.
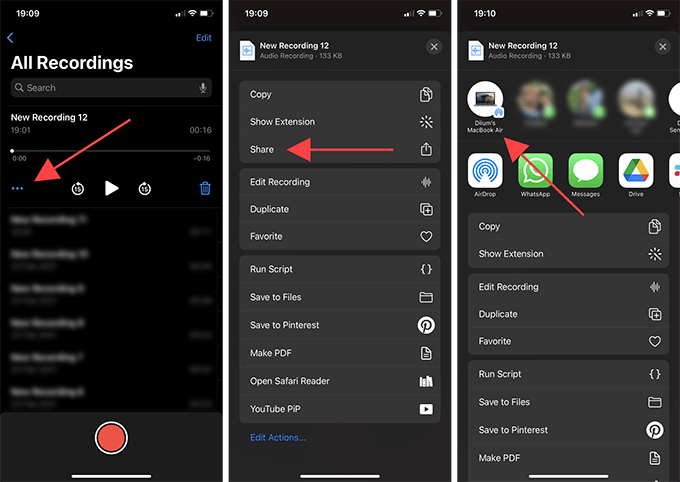
Your voice memo should copy over to the Mac quickly. If you run into any trouble while sharing a recording, here’s how to fix AirDrop not working from iPhone to Mac.
Send via an Email Attachment (PC and Mac)
Another easy way to share a single voice memo with a PC or Mac is to send it as an email attachment. You can also transfer a recording to desktop devices that you own by emailing it to yourself.
1. Tap the recording you want to share on your iPhone.
2. Tap the More icon (3–dots) and select Share.
3. Pick Mail or your iPhone’s default email client.
4. Fill in the recipient’s email address, including any other details you want to add.
5. Send the email.
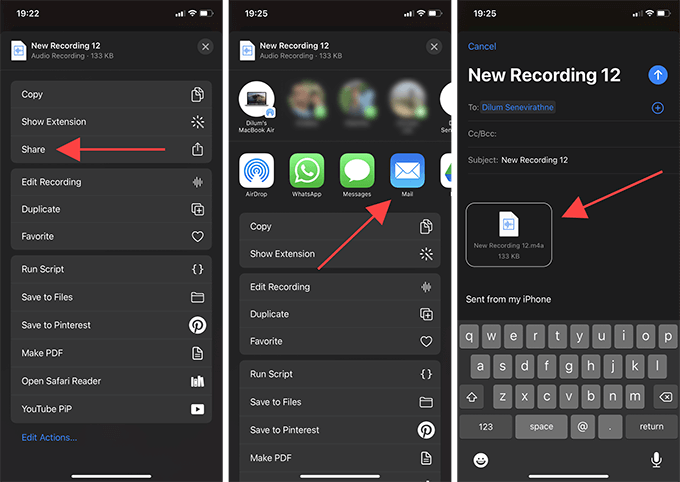
The recipient can then download the attachment from the email to his or her PC or Mac. Emailing aside, you can also send the voice memo as an iMessage attachment to another Mac.
Upload and Access via iCloud (Mac & PC)
You can also upload a voice memo to iCloud Drive (or to a third-party storage service such as Google Drive or Dropbox) and access it from a PC or Mac. That’s different from syncing voice memos to iCloud, where you can’t locate the files directly within iCloud Drive.
1. Select the recording that you want to upload.
2. Tap the More icon (3–dots) and select Share.
3. Select Save to Files and pick iCloud Drive or another cloud storage service.
4. Specify a destination and tap Save.
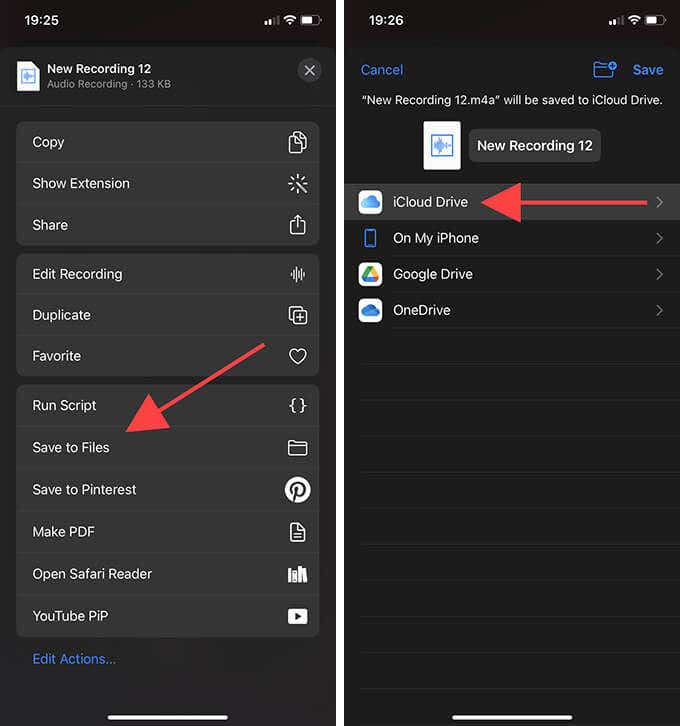
You can then open iCloud Drive or the third-party cloud storage service on your PC or Mac and download the voice memo. Most cloud-storage services also allow you to share files with people in link form.
Back Up Using iTunes/Finder (PC & Mac)
If you’re simply looking to back up voice memos and don’t want to listen to them on a PC or Mac, you can create an iTunes or Finder backup of your iPhone. It should contain all data and documents, including your recordings. That allows you to restore everything in case you lose your data.
1. Connect your iPhone to a PC or Mac.
2. Open iTunes or Finder and select your iPhone.
3. Pick the This Computer or Back up all of the data on your iPhone to this Mac option and select Back Up Now.
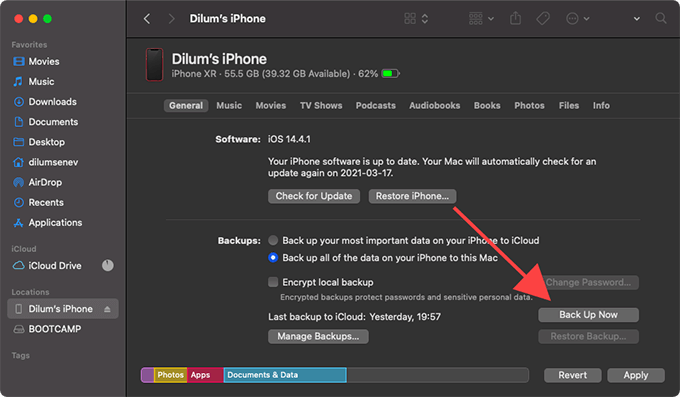
For comprehensive step-by-step instructions, check out this guide about backing up your iPhone to iTunes/Finder.
Back Up to iCloud
Syncing your iPhone’s voice memos to iCloud (as mentioned earlier in this post) not only makes them available on other Apple devices but also acts as a backup if you lose your data. Signing in with your Apple ID (perhaps after a factory reset of your iPhone) will allow you to re-download them from iCloud.
But if you use an iPhone with iOS 11 or earlier, you must rely on regular iCloud backups.
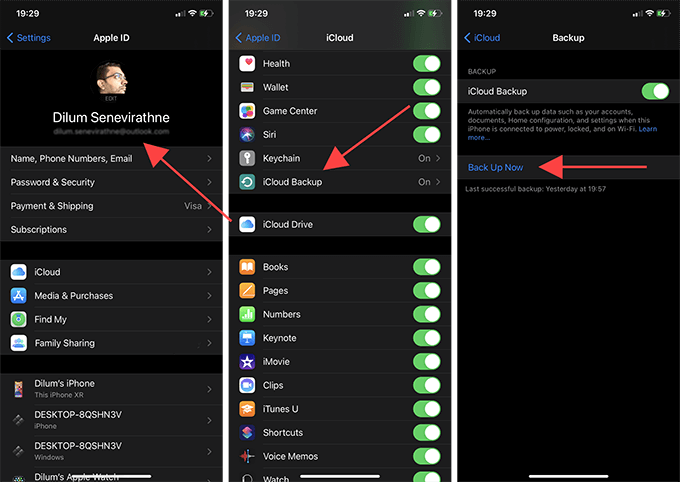
1. Open the Settings app and select your Apple ID.
3. Select iCloud.
3. Scroll down and select iCloud Backup > Back Up Now.
You can then use the iCloud backup to restore your data while setting up an iPhone from scratch.
Backups Everywhere
As you just found out, you’ve got multiple ways to get voice memos off an iPhone to a PC, Mac, or iCloud. Just pick the method that suits you the best, and you should be able to listen, share, or back them up conveniently.
[related_posts_by_tax posts_per_page="5"]