eSIMs are embedded directly into your device, which provides plenty of convenience in many ways, like not having to carry around a physical SIM card (or multiple, if you travel abroad).
Removing an eSIM from your iPhone is easy, too, compared to its physical SIM card counterpart. Instead of using a tool to remove the physical SIM card, you can just remove an eSIM from your Apple device’s settings.
What Is an eSIM?
An eSIM, short for embedded SIM, is a digital SIM that integrates directly into devices. eSIMs eliminate the need for physical SIM cards in mobile devices. This makes switching network providers easier and also offers the option for smaller device designs.
When You Should Remove an eSIM From Your iPhone
An eSIM is not physically removed but instead removed from the device’s settings. You may want to remove an eSIM when you’re gifting or selling your iPhone, troubleshooting network issues (but only if your network provider tells you to), or even if you switch service providers and just don’t need that eSIM anymore.
How to Remove an eSIM From Your iPhone
Ready to remove the eSIM from your iPhone? Here’s what you need to do.
- Open the Settings app.
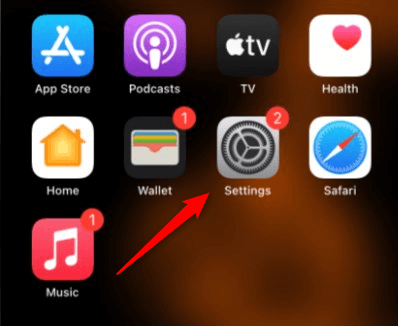
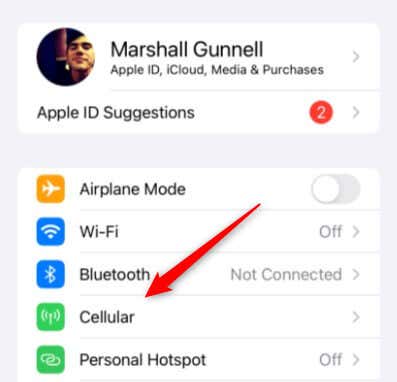
- In the Settings app, tap Cellular. This may also be labeled Mobile Data.
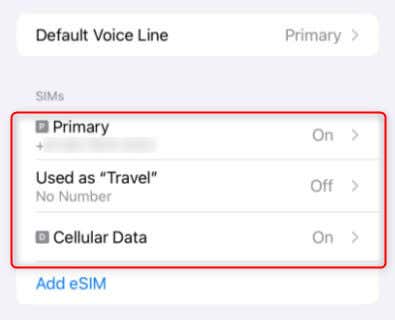
- Tap the eSIM you would like to delete in the SIMs section.
- On the next screen, tap Delete eSIM.
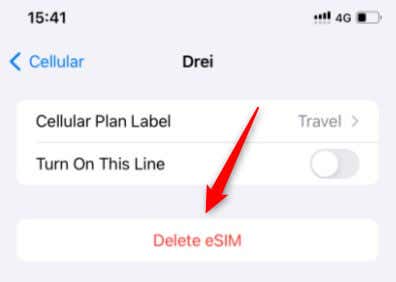
- You’ll be warned that the eSIM will be deleted from your iPhone and that deleting the eSIM does not cancel the cellular plan. Tap Delete eSIM.
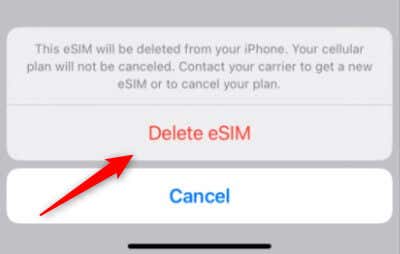
- You’ll receive one final request for confirmation. Tap Delete eSIM to delete the eSIM from your iPhone.
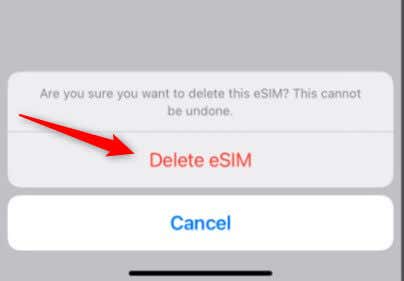
Your phone may take a few moments to wipe the eSIM, so be patient.
eSIMplifying Your iPhone
eSIM technology simplifies mobile connectivity and device design. While removing an eSIM from your iPhone is an easy process involving just a few taps in the device’s settings, remember that this does not cancel your cellular plan. For any service changes, you need to contact your service provider directly.
[related_posts_by_tax posts_per_page="5"]