Is your Mac dangerously close to running out of storage? Usually, you can go on a short disk cleaning spree and free up a lot of space quickly. But sometimes, it’s just not that simple.
A while back, we talked about the somewhat baffling “Other” storage that can end up consuming tens—if not hundreds—of gigabytes of disk space. This time, we shall focus on another perplexing issue: how to reduce a bloated “System” storage on the Mac.
What Is System Storage?
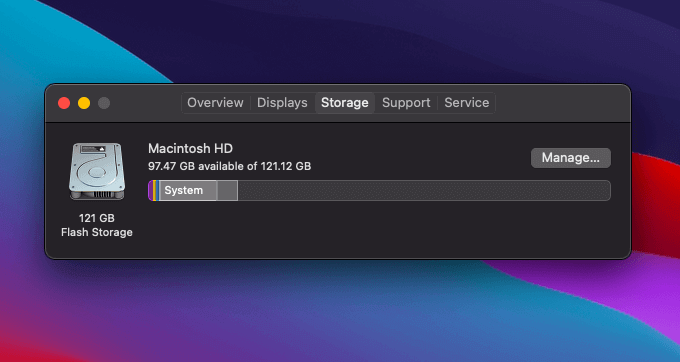
Whenever you go to Apple menu > About This Mac > Storage, the Mac’s internal storage indicator will display the amount of data related to the operating system as “System” storage.
Ideally, it should stay under 20 gigabytes, but you can expect it to keep growing slowly as you keep using your Mac. If it exceeds that by double or triple-digits, however, then here are the most common reasons why that happens:
- Local Time Machine snapshots.
- Large application log files.
- Bloated application or system cache.
- Broken Spotlight Search index.
If your Mac has a very large “System” storage allocation, the pointers that follow should you help reduce it. Don’t forget to clear the Trash and check the Storage screen frequently as you work your way through them.
Remove Local Time Machine Snapshots
If you have Time Machine enabled on your Mac, you may end up with a chunk of “System” storage well beyond the usual size limits. This happens when the operating system fails to clear older Time Machine snapshots from the internal storage. It’s best to check and get rid of them using Terminal.
Note: If possible, create a fresh Time Machine backup with your external backup drive connected before you go ahead.
1. Go to Finder > Applications > Utilities and open Terminal.
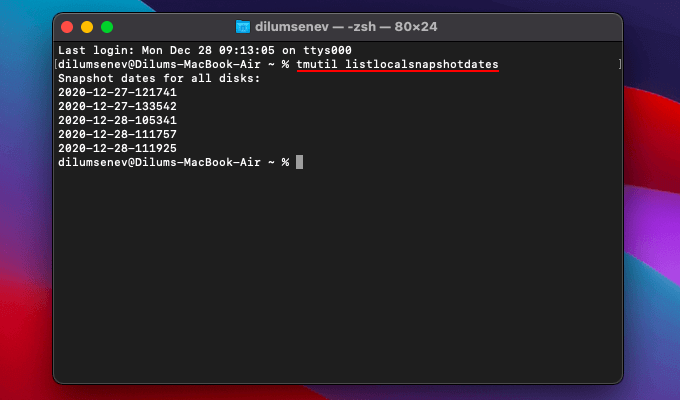
2. Type tmutil listlocalsnapshotdates and press Enter to bring up a list of all local Time Machine snapshots along with their relevant date tags.
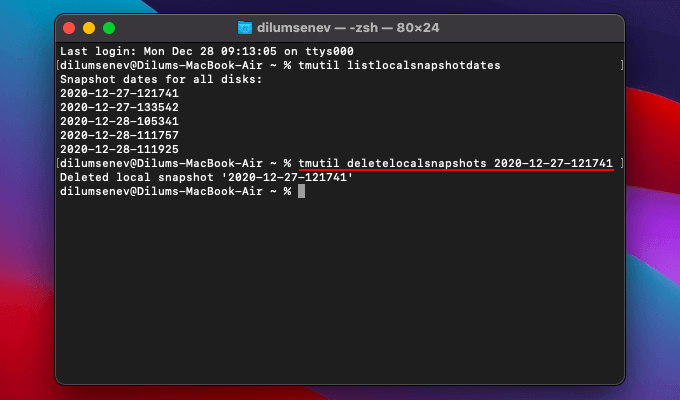
3. You must delete the local Time Machine snapshots individually (starting with the oldest) and check if that reduces “System” within your Mac’s Storage screen.
Type tmutil deletelocalsnapshots followed by the date and name of the snapshot. Then, press Enter to delete it.
Repeat as needed, but avoid deleting the most recent snapshots. If you have your external backup drive around, however, you can safely delete all of them with the following command:
for snapshot in $(tmutil listlocalsnapshotdates | grep -v :); do sudo tmutil deletelocalsnapshots $snapshot; done
Delete Application Log Files
If you’ve used your Mac for some time, it may contain lots of application log files. In some cases, these files can end up consuming multiple gigabytes of storage. You can check and delete them by heading over to the Logs folder within the Mac’s user library.
1. Open Finder. Then, select Go > Go to Folder.
2. Type ~/Library/Logs/ and press Enter.
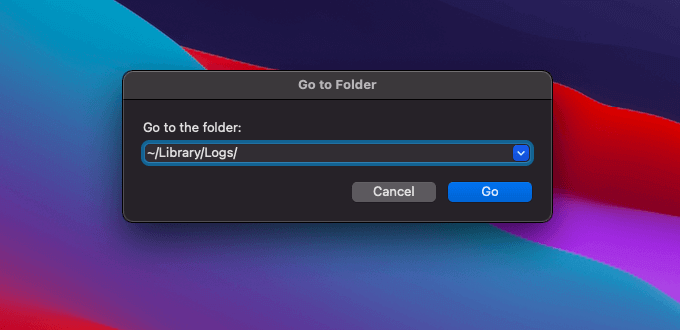
3. Check for any oversized log files and delete them. To make things easier, you can switch to List view (from the top of the Finder window) and use the Size column to sort the log files by size.
Delete Connection Log Files
Application logs aside, your Mac may also contain massive connection log files related to the Mail app. It’s best to check and get rid of them.
1. Open Finder. Then, select Go > Go to Folder.
2. Type the following folder path and press Enter:
~/Library/Containers/com.apple.mail/Data/Library/Logs/Mail
3. Delete any large connection log files inside the directory.
Delete System and Application Cache
Both the operating system and the various applications that run on your Mac frequently cache lots of files. That helps speed things up, but sometimes, the application and the system caches can balloon out of control and ramp up the “System” reading. Try clearing out any large file caches.
Tip: For a complete walkthrough, check how to clear the Mac cache.
1. Open Finder. Then, select Go > Go to Folder.
2. Type ~/Library/Caches/ and press Enter to open the application cache.
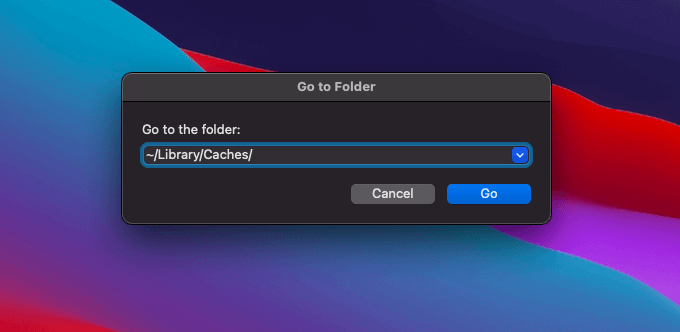
3. Switch to List view and sort the files and folders using the Size column. Then, delete any oversized items within the directory.
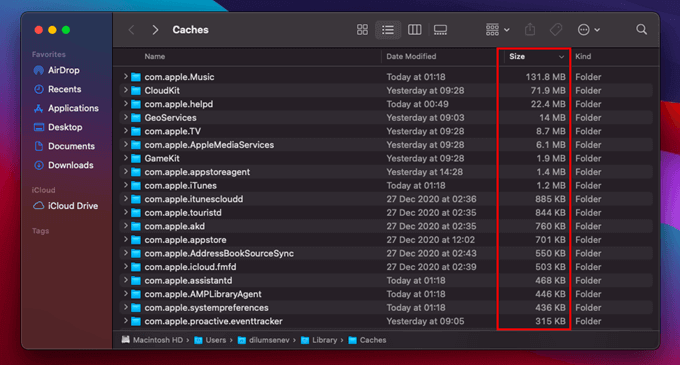
Note: If Finder doesn’t display folder sizes in List view, open View on the menu bar, select Show View Options, check the box next to Calculate all sizes, and select Use as Defaults.
4. Restart your Mac. If everything looks good, clear the Trash.
5. Repeat steps 1–4, but use the path /Library/Caches/ (which opens the system cache) in step 2 instead.
Enter/Exit Safe Mode
Booting into Safe Mode can help remove redundant or obsolete system-related files on your Mac. To do that, start by turning off your Mac. Power it back on, but immediately press and hold the Shift key until you see the Apple logo.
After your Mac boots into Safe Mode, go to Apple menu > About This Mac > Storage. Wait for a couple of minutes until the storage indicator updates itself completely. Then, restart your Mac normally and see if that helped.
Rebuild Spotlight Index
Sometimes, your Mac may display an incorrect “System” storage reading due to a broken Spotlight Search index. Try rebuilding it to help reduce system storage on Mac.
1. Open the Apple menu, choose System Preferences, and select Spotlight.
2. Switch to the Privacy tab. Then, drag and drop the system drive from your desktop inside it.
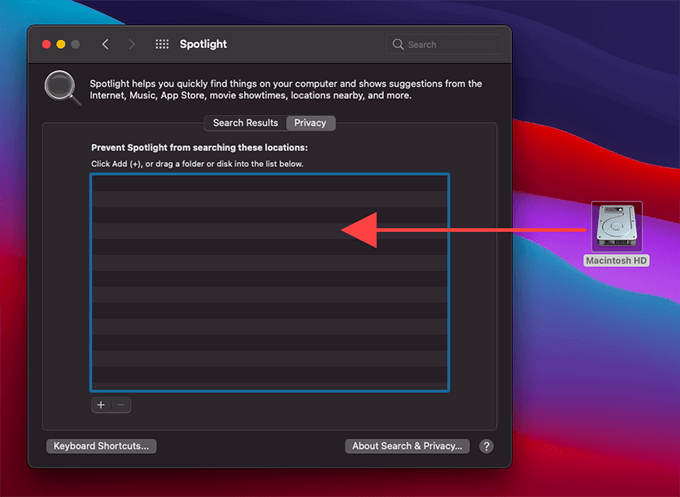
Note: If the system drive is not visible on the desktop, open Finder, and select Preferences on the Finder menu. Then, check the box next to Hard disks.
3. Select OK to confirm that you want Spotlight Search to stop searching the system drive.
4. Wait for a moment. Then, select the system drive that you just added and remove it using the Delete ( — ) button.
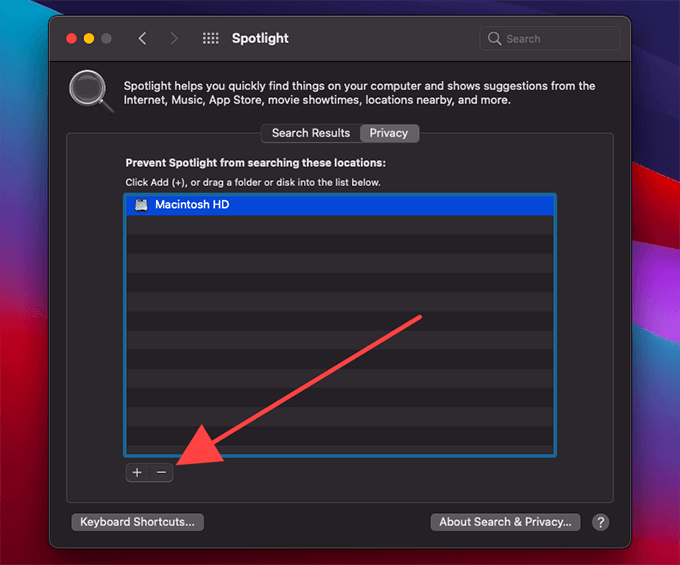
That should prompt Spotlight Search to re-index the system drive.
Too Complicated? Use Onyx
If the methods above to reduce system storage on your Mac seem too tedious, try using Onyx. It’s a completely free application that can quickly delete local Time Machine snapshots, remove outdated log files, clear the application and system caches, and rebuild the Spotlight index.
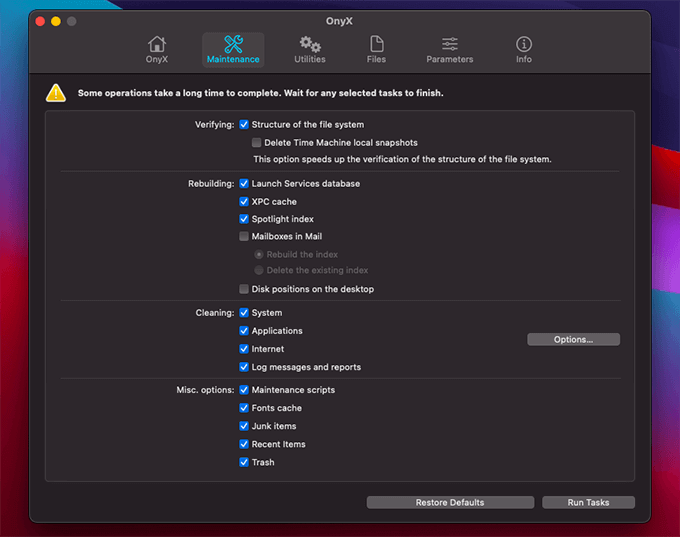
Onyx also works as a junk removal tool. If you keep running into storage-related issues on your Mac regularly, we highly recommend that you use it. Here’s a complete Onyx walkthrough.
[related_posts_by_tax posts_per_page="5"]