From recording a presentation for school or proceedings of a meeting in a conference room to making quick notes for yourself, your Mac can be a handy recording device.
The built-in microphone, together with simple preloaded tools like Voice Memos and QuickTime player, make it easy for you to record audio on Mac.
In this guide, we’ll walk you through how to record audio clips and longer sessions on Mac using built-in tools and third-party apps.

How to Record Audio on Mac
You can record audio on a Mac using preloaded apps like Voice Memos, QuickTime player or third-party tools like GarageBand.
Record Audio on Mac Using QuickTime Player
If you watch videos that you’ve downloaded or synced from your phone to your Mac, you’ve probably already used the pre-installed QuickTime Player app. The app comes with every tool you need to record audio or your entire screen and save the audio file so it’s useful for longer recordings.
QuickTime also comes with screen and audio recording capabilities so you can use it to record FaceTime calls and other VoIP calls on your Mac.
To make your recording, you can use the built-in microphone on your Mac. However, if you don’t like the native microphone’s quality or you’re running your Mac with a third-party monitor, you can use an external mic or use your iPhone as a microphone.
For basic recordings, you can use the native microphone and QuickTime Player. .
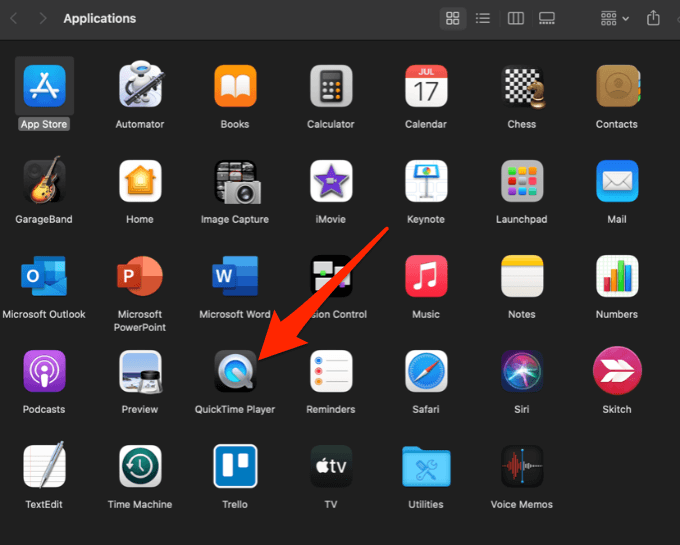
- Select Go > Applications > QuickTime Player.
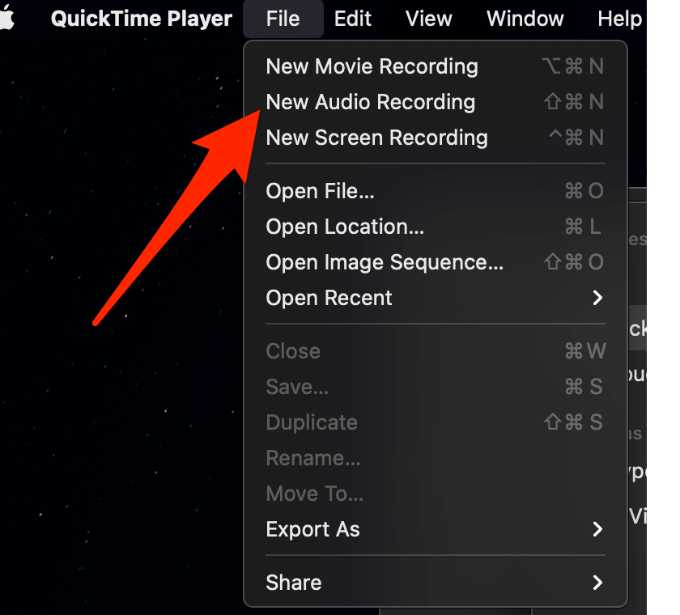
- Next, select File > New Audio Recording.
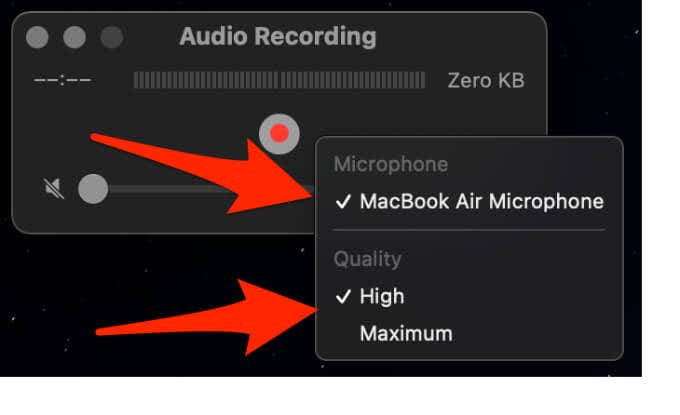
- Select Options, choose a Microphone if you’re using more than one and then choose the recording quality.
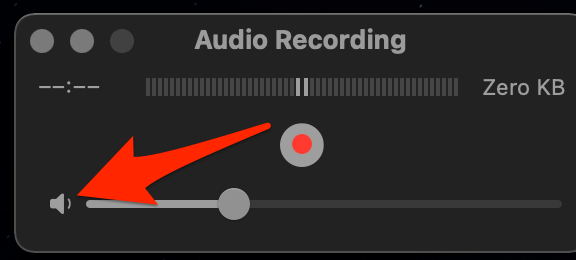
- Next, adjust the volume control so you can hear the audio you’re recording. You can also do this using the Touch Bar on your Mac’s keyboard.
- Select the Record button (red circle) to start recording.
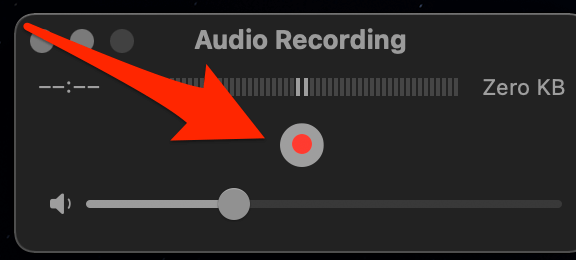
- To stop recording, select the grey Stop icon.
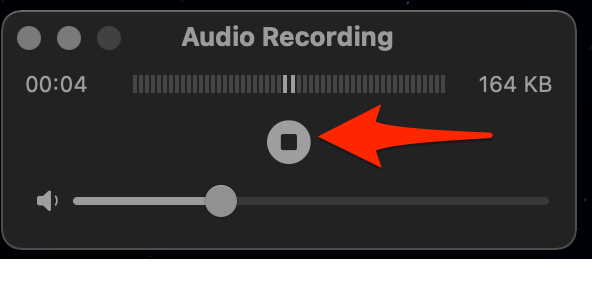
- Select File > Save, name your recording and the location where you want to save it and then select Save.
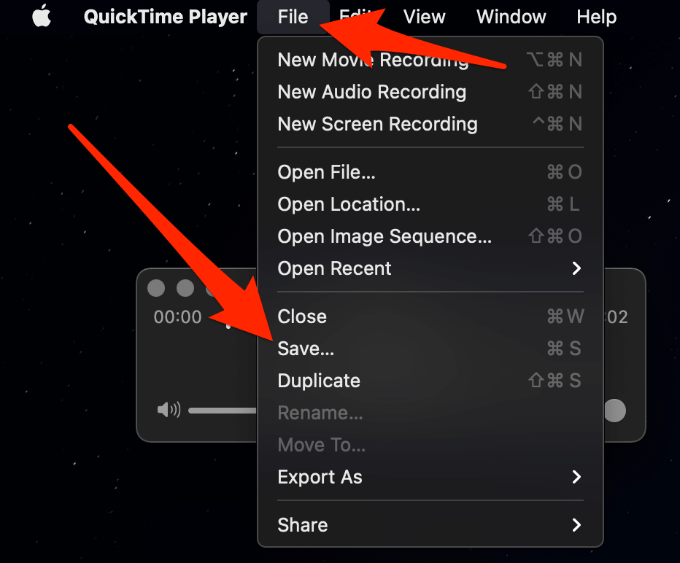
Once you have your audio recording, you can split it into clips or trim it, rearrange the clips or add other audio clips to it. You can also share it via email or other programs that let you upload audio files.
Record Audio on Mac Using Voice Memos
Voice Memos is a preinstalled app that allows you to use your Mac as a recording device. The app uses the native microphone on your Mac to record, but if you want higher-quality stereo recording, you can use an external microphone.
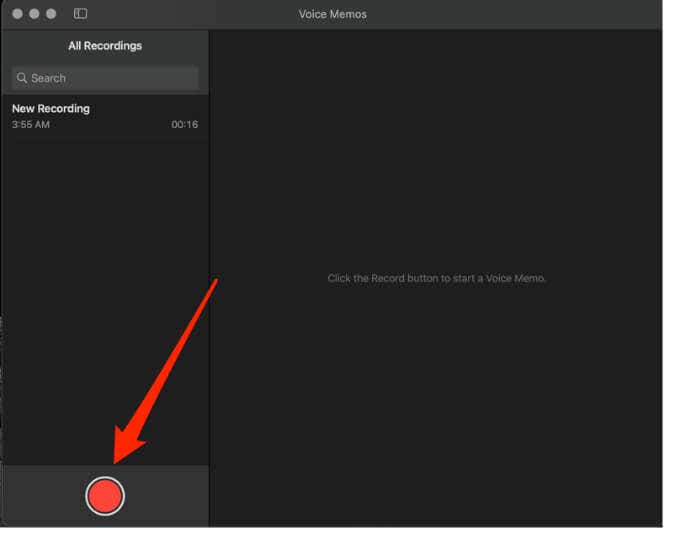
- Select Go > Applications > Voice Memos.
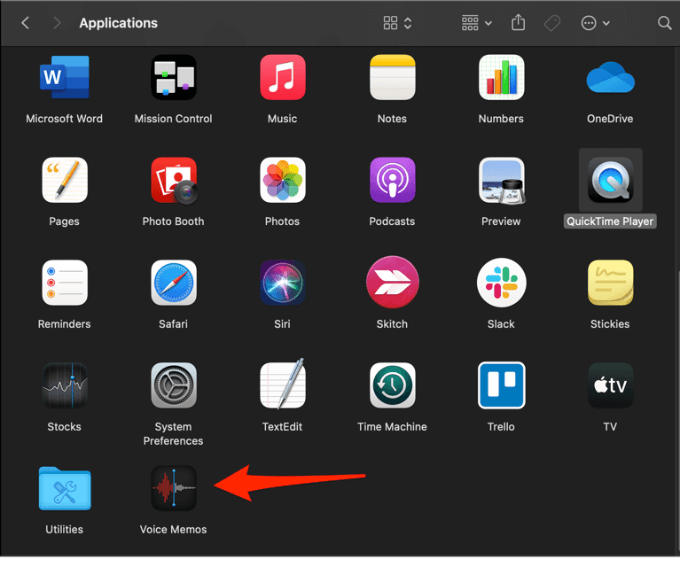
- Select the Record button to start recording your audio.
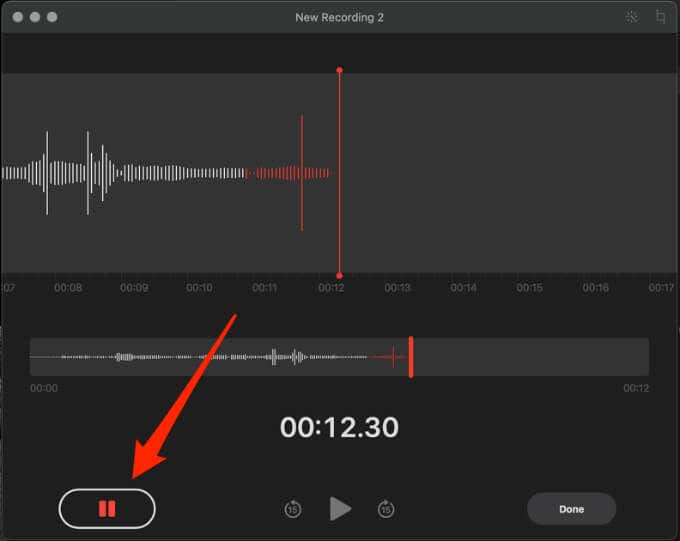
- You can pause your audio using the Pause button and select the same button to resume recording.
- Select Done to stop the recording.
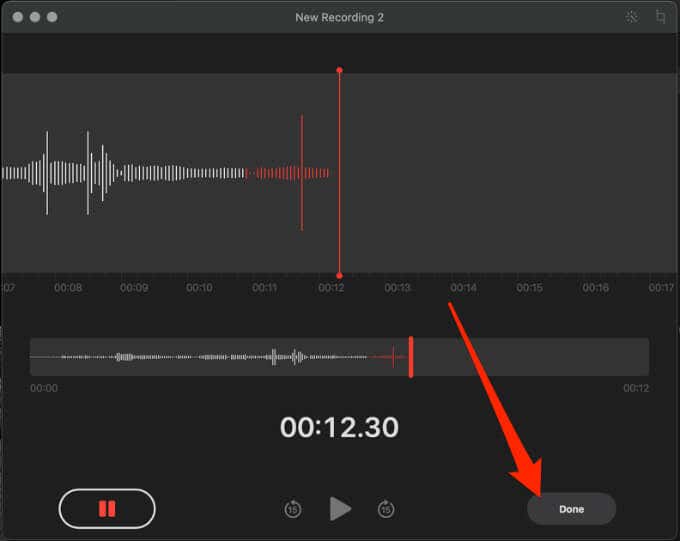
Once you’re done recording the audio, the file will be saved automatically, and you can access it on every device signed into iCloud with your Apple ID.
How to Edit a Voice Memo on Mac
You can edit a voice memo by trimming the recording, replacing a section of the recording, or deleting part of it.
How to Replace Part Of a Voice Memo
- Select the memo you want to edit, right-click and tap Edit recording.
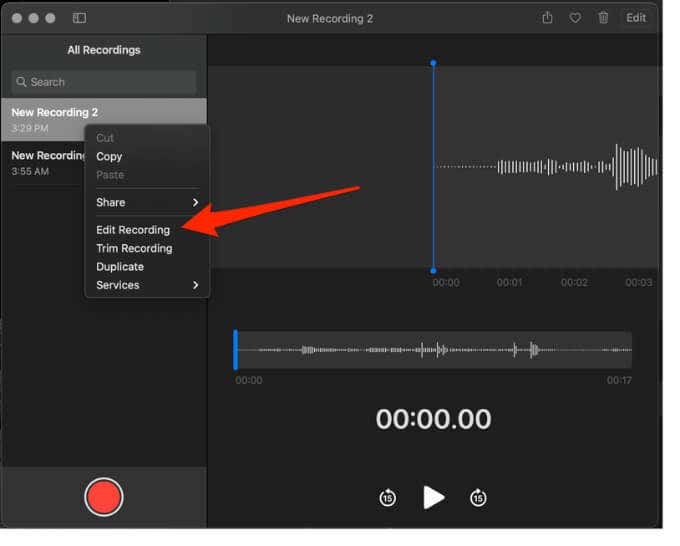
- Position the blue playhead on the recording overview at the bottom to select a starting point.
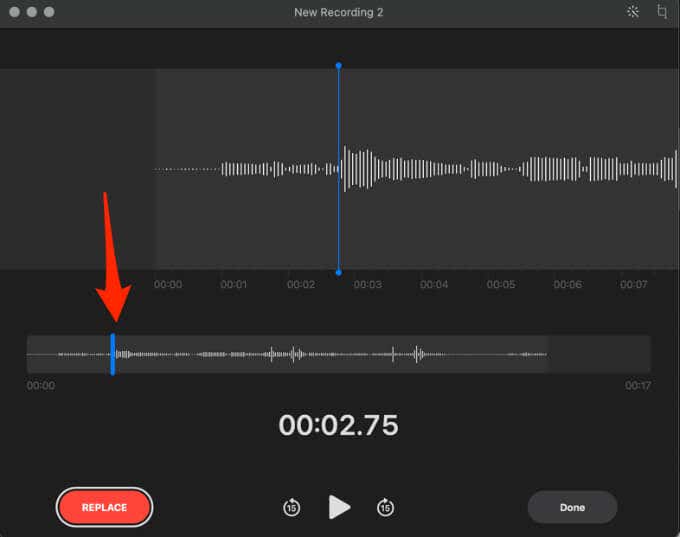
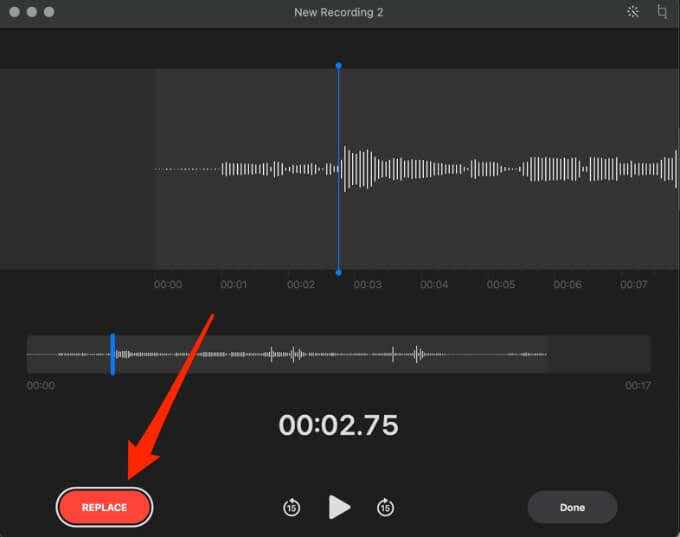
- Next, select Replace to record again over the existing voice memo.
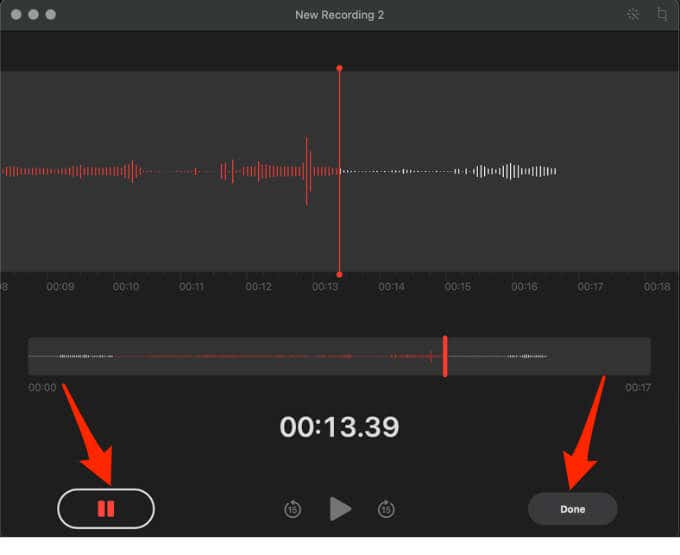
- Select Pause when you finish recording and then select Done to save your recording.
How to Trim a Voice Memo
You can also trim the voice memo from the beginning or end of the recording.
- Select the memo and then select Edit recording.
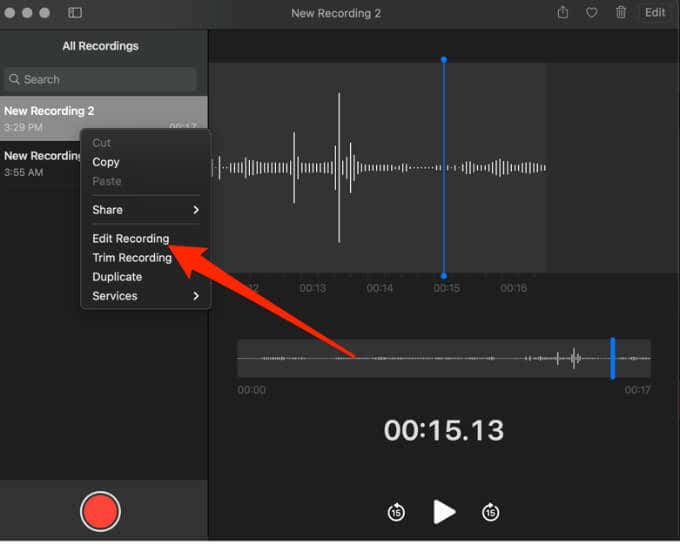
- Next, select the Trim icon at the top right side of the Voice Memos window and then drag the yellow arrow on the left to trim from the beginning. To trim from the end, drag the arrow on the right to your chosen end point and then select Trim.
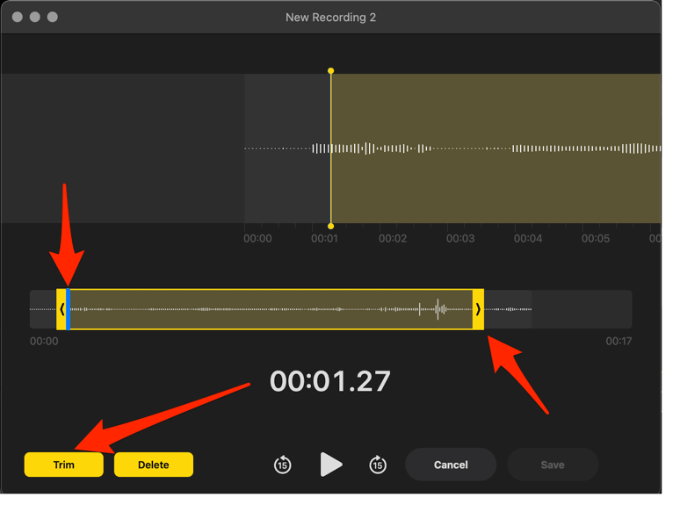
- Select Save or Done if you’ve finished editing the voice memo.
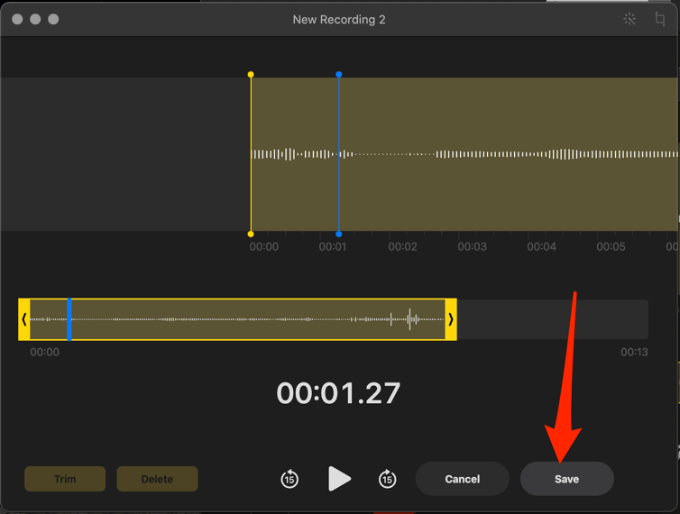
How to Delete Part of a Voice Memo
You can delete a part of a voice memo that you don’t want to appear in the recording.
- Select the memo and then select Edit recording.
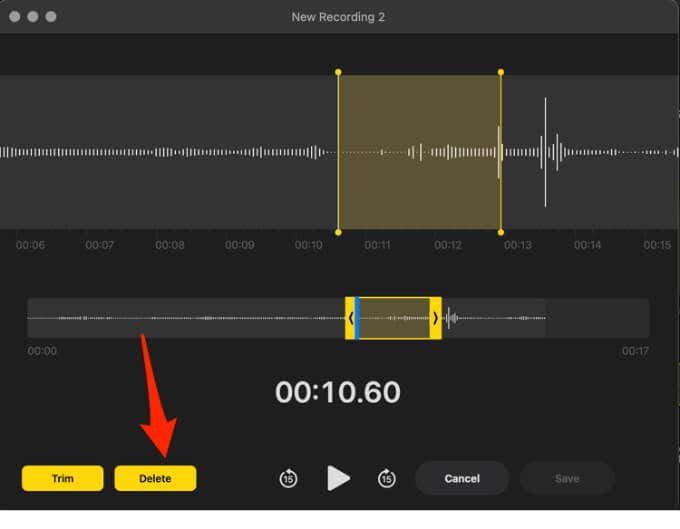
- Next, select the Trim icon, drag the left and right arrows to surround the part of the recording that you want to remove.
- Select Delete and then select Save. When you finish editing the recording, select Done.
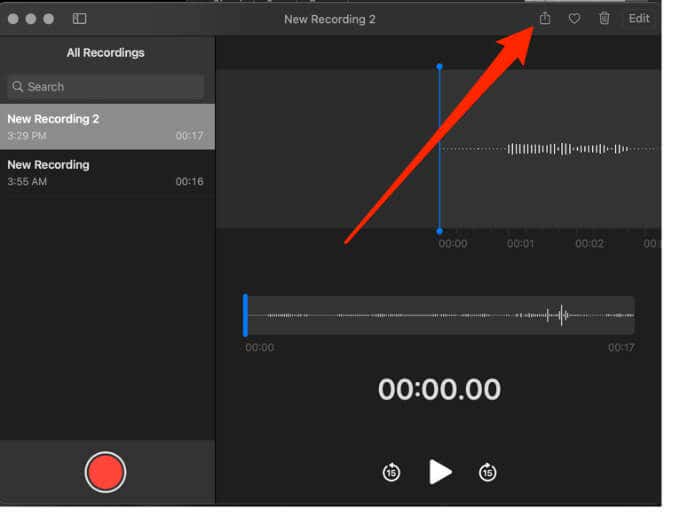
Note: If you want to share your voice memo, select the memo, select the Share icon and then select how you want to send the recording.
How to Enhance or Duplicate a Voice Memo
If your audio recording has some background noise or reverberation, you can enhance it using the Enhance tool in Voice Memos.
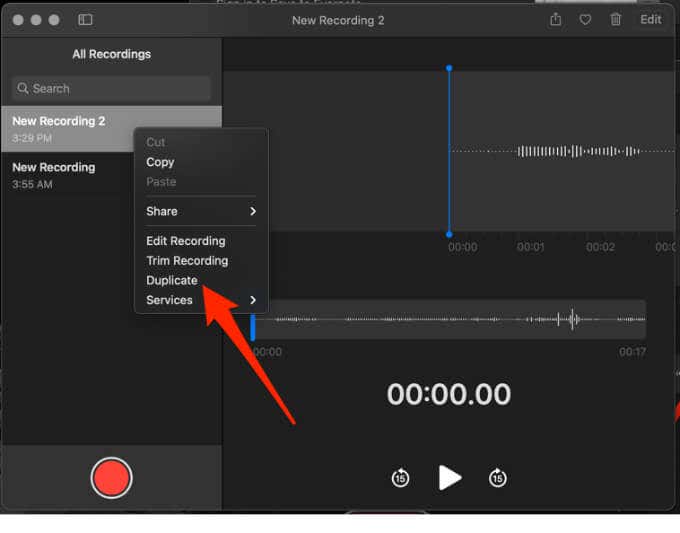
- Right-click the recording and then select Edit recording.
- Next, select the Enhance button.
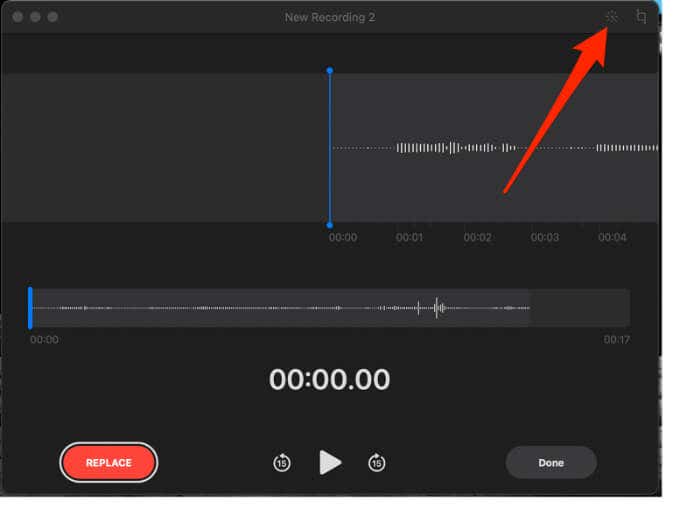
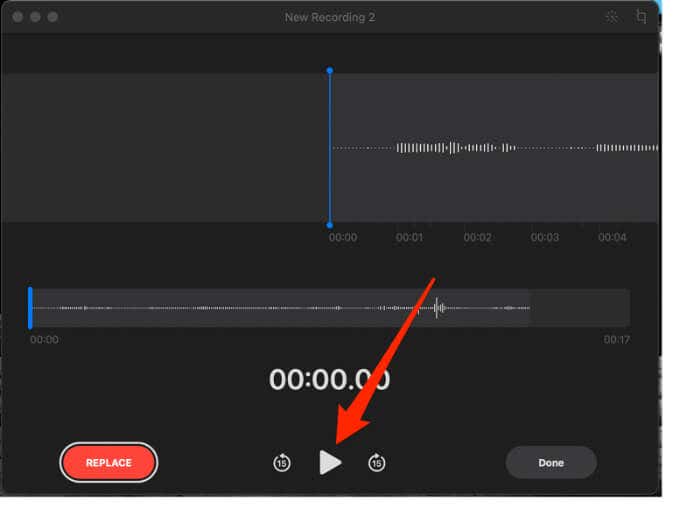
- Select Play to listen to the enhanced audio and then select Done.
- To duplicate your audio recording, right-click the recording in Voice Memos and select Duplicate.
How to Record Audio on Mac Using a Third-Party App
There are several third-party apps you can use to record audio on your Mac such as GarageBand, WavePad or Audacity. Third-party apps offer many options that help you edit, mix and work with audio or sound on your Mac.
Record Audio on Mac Using GarageBand
GarageBand comes preinstalled on all Macs, but if you don’t see it, you can find it for free on the App Store. The music recording app offers more advanced tools than what you’d find on QuickTime Player or Voice Memos.
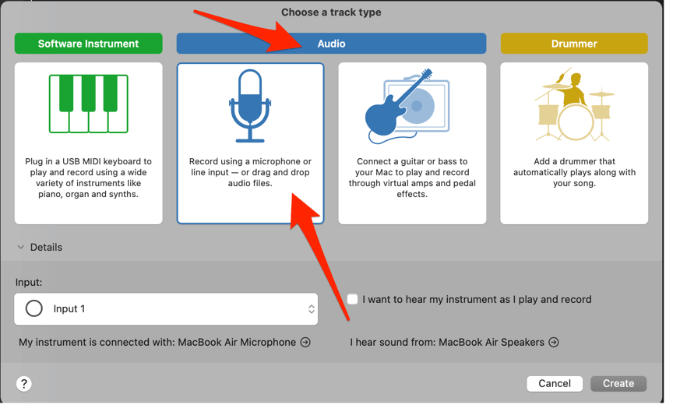
- To record audio on Mac using GarageBand, select Go > Applications > GarageBand and then select Choose to open a new project.
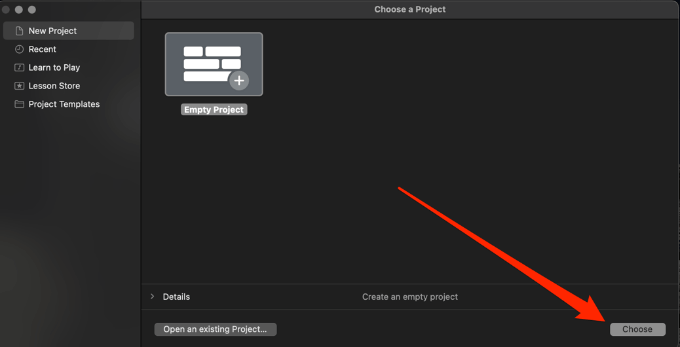
- In the Choose a Track Type window, select Audio > Record using a microphone.
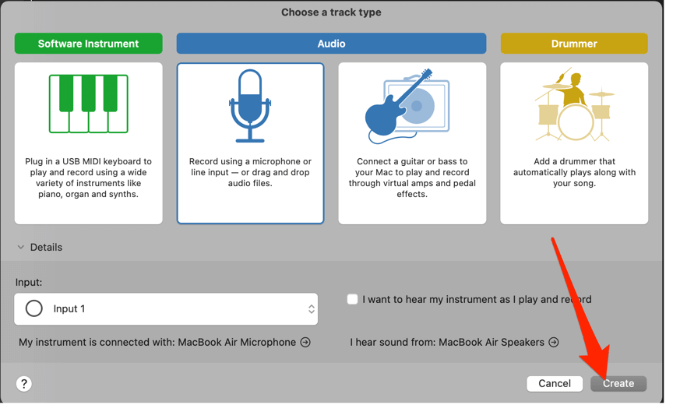
- Next, select Create.
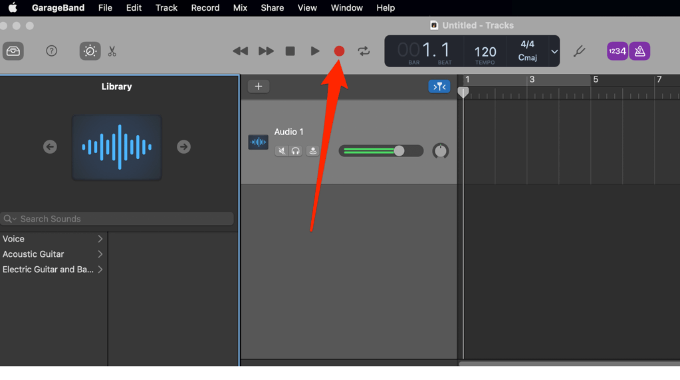
- Select Record.
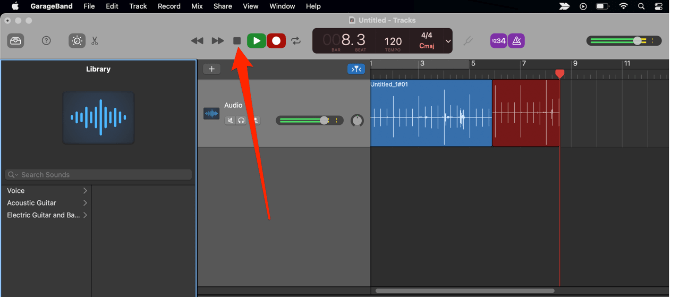
- Select Stop to stop your recording, and then select File > Save to save the audio recording or share it directly by selecting the Share button.
Check out our in-depth guide on how to use Apple’s GarageBand to create basic songs and recordings.
How to Record Screen and Audio at the Same Time on Mac
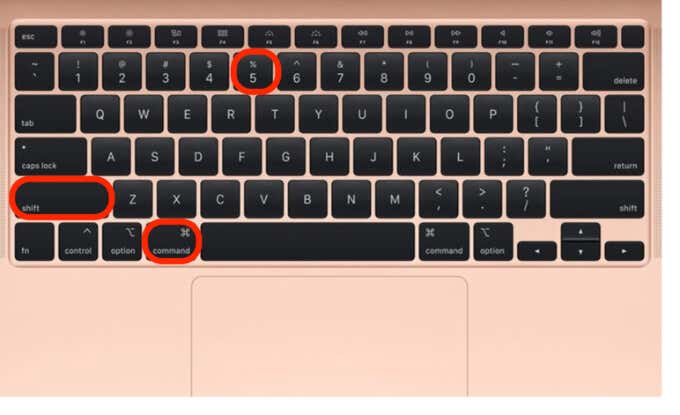
If you want to record your screen together with audio on your Mac, you can do this quickly and easily using a keyboard shortcut.
- Press the Shift+Command+5 keys together.
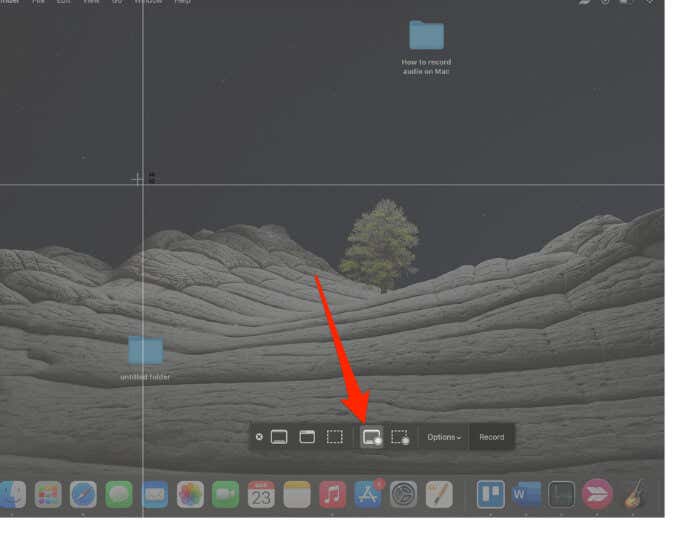
- You’ll see onscreen controls appear around your current screen and you can select whether to record the entire screen, a selected portion or a still image of your screen.
To record the entire screen, select the Record Entire Screen icon and then select Record.
- Select Stop in the menu bar or press Command+Control+Esc to stop the recording.

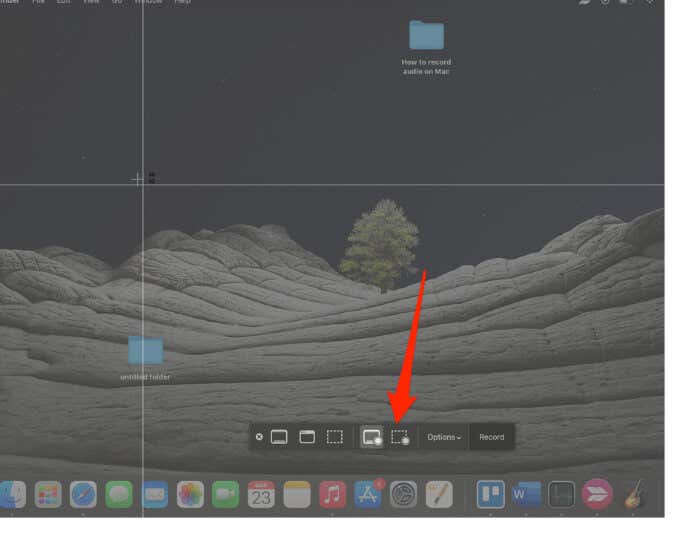
- To record a selected portion of the screen, select the Record Selected Portion button and then drag to select the area of the screen that you want to record. Select Record in the onscreen controls to start recording and then select Stop when you’re done recording.
Create Audio Recordings Easily on Mac
With the right tools, it’s not too difficult to record simple audio on your Mac. Leave a comment below and let us know whether you managed to record audio on your Mac below.
[related_posts_by_tax posts_per_page="5"]