Plus how to fix any issues
Printing something in black and white on a Mac sounds simple but if you’ve ever tried to do it yourself, you know that it’s not as easy as it sounds. There are certain things that need to be modified before your printer prints your documents without any colors.
By default, most printers are set up to use the color cartridges to print your documents. It means that even if your entire document is in black and white colors, it’ll still use your color cartridge as that’s what’s been instructed to do by your Mac.
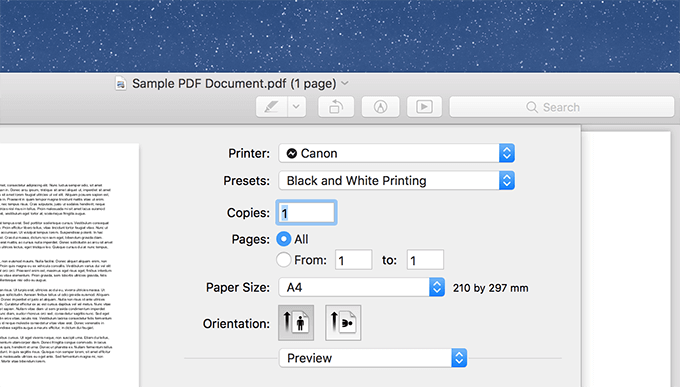
You can change that default behavior, though, and have your printers use their black and white cartridges to print your colorless documents. The option to do so is found in the default printing dialog box on your Mac.
Use The Default Option To Print In Black & White On Mac
The default dialog box that you see when you print a document does have the option to print your documents in black and white. However, the option is hidden for most printers and you need to dig a bit deeper to find and use it on your machine.
This method should work just fine if there are only a few documents that you wish to print without any colors. If you have dozens of files to print, you’re recommended to use the preset method below for more convenience.
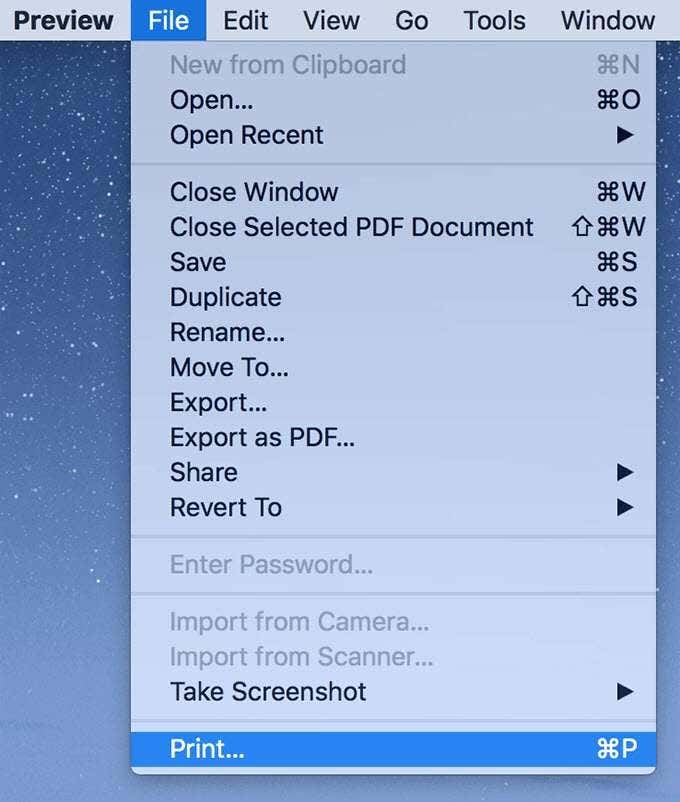
- Open the document you want to print in black and white in any of your favorite apps. Then, click on the File menu and select Print. Alternatively, press the Command + P key combination.
- When the print dialog box opens, you’ll find several options you can configure for your print job. In some cases, you’ll find the tick-box for black and white print on the main screen. Simply tick-mark the box and hit Print to get your document printed.
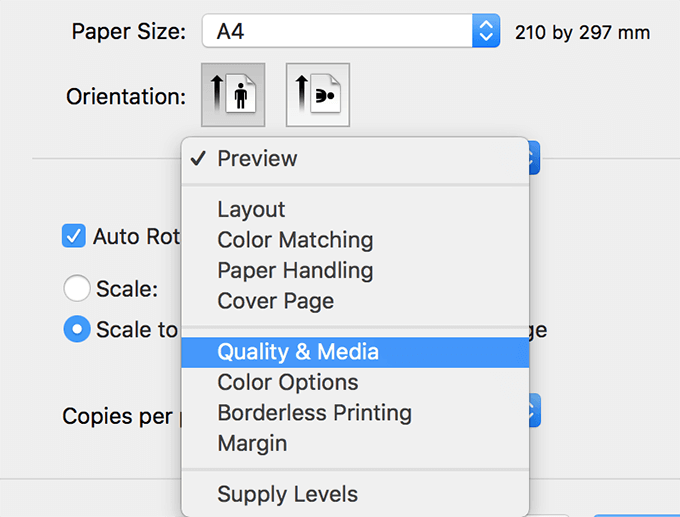
- In case you don’t find the option, it’s located inside the submenus. To get to the option, click on the main dropdown menu where you see various printing options and select the option that says Quality & Media.
- It’ll open a new pane right beneath the dropdown menu. Here you’ll find a tick-box that says Grayscale Printing. Tick-mark the box and the option for black and white printing will be enabled.
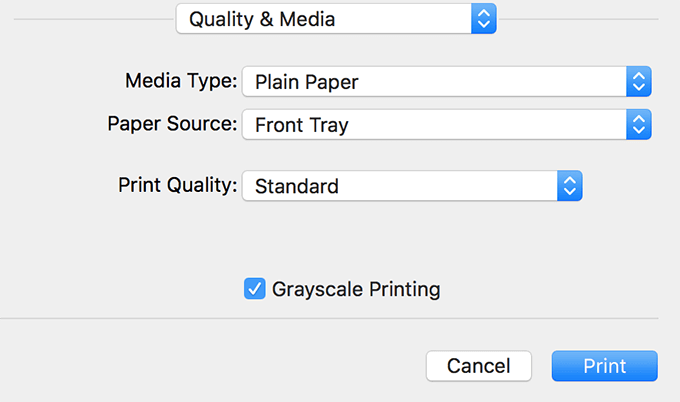
- Hit the Print button at the bottom and your document will be printed in black and white.
There are some apps that have the black and white print option right on the main printing dialog box. Adobe Acrobat Reader, for example, is one of them, and in these cases, you can simply tick-mark the Print in grayscale option and that should do the job for you.

The options you’re looking for should say something like black and white, grayscale, and other similar words — you get the idea.
Create And Use a Preset To Print In Black & White on Mac
A preset is a set of configurations that automatically applies all of your saved settings to the document you’re printing. You can actually create a preset that when selected, prints your documents in black and white on your Mac.
Creating a preset doesn’t require any special skills. All you need to do is select your configuration, save it, and call it a preset.
- Launch your document and press Command + P to open the default print dialog box.
- When the dialog box opens, click on the main dropdown menu and select Quality & Media. It’ll let you choose your print type.
- Enable the option that says Grayscale Printing. It prints your documents in black and white.
- At the top of the dialog box, you’ll find a dropdown menu with the label that says Presets. Click on the menu and then choose the option that reads Save Current Settings as Preset.
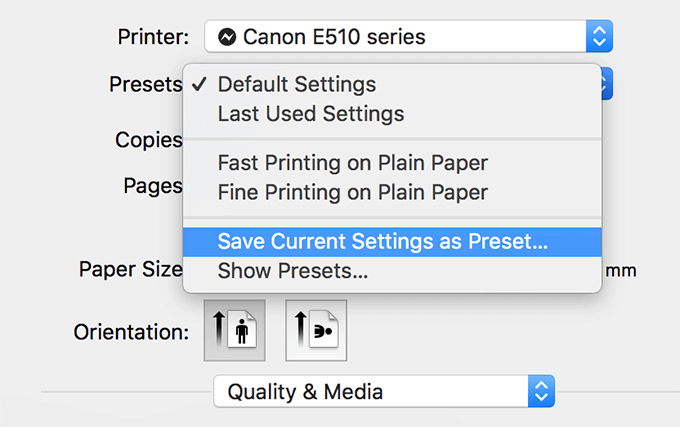
- You’ll be asked to enter a name for your preset and the availability of this new preset.
You can enter any value in the name field but make sure it’s something you can recognize at a later time. In the availability section, you can choose to make the preset available for either all the printers on your Mac or only for the currently selected printer.
Then click on OK to save the preset.

- Next time you want to print something in black and white, simply open the print dialog box, select your preset from the Presets menu, and hit the Print button. It’ll auto-apply your print settings to your print job.
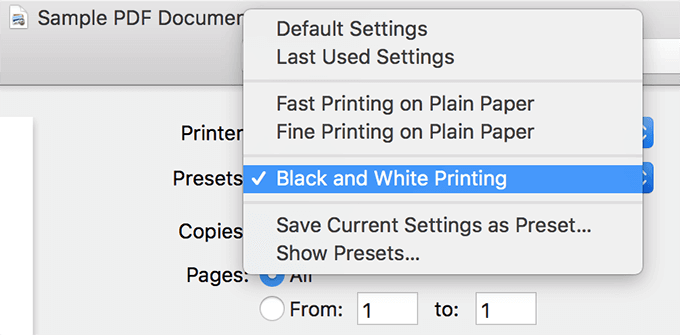
Since the preset is created in the default printing dialog box, it’ll be available for you to use in all the apps where you can open the default print dialog box.
Fix Black & White Printing Issues On Mac
It sometimes happens that your printer refuses to print your documents in black and white. In that case, you can do a few things like the ones mentioned below to get rid of the issue.
Remove The Printer From Your System
One of the ways to fix a broken black and white print feature is to remove the printer and then add it back to your system.
- Click on the Apple logo at the top and select System Preferences.
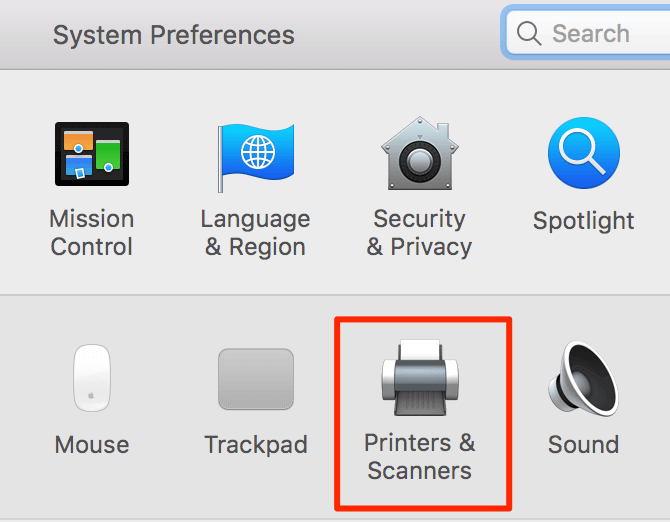
- Click on Printers & Scanners on the following screen.
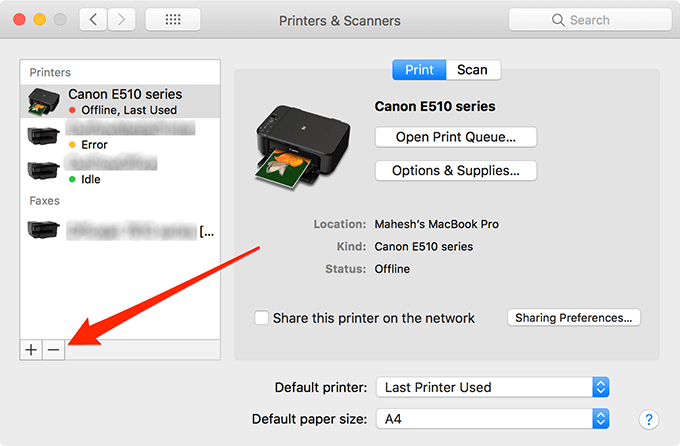
- Select your printer from the list in the left sidebar and then click on the – (minus) sign at the bottom.
- A prompt will appear asking if you’d like to remove the printer. Hit Delete Printer and your printer will be removed.

- Follow the instructions for your printer to add it back to your machine.
Reset The Entire Printing System On Mac
If removing and adding the printer didn’t fix the issue for you, you might want to reset the entire printing system.
- Head into System Preferences and select Printers & Scanners.
- Right-click on any of your printers and select Reset printing system.
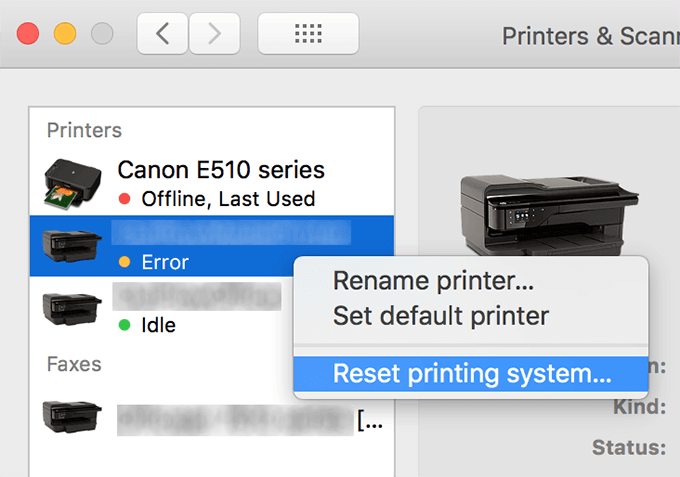
- Choose Reset in the prompt that appears on your screen.

You’ll then need to re-add your printers to your Mac.


