Have a new Apple Watch and need help setting it up? We’re here to help. For starters, you’ll want to find a comfy place to work and set aside about 30 minutes.
You’ll first have to connect your Apple Watch to your phone, and then you’ll need to configure a few of the necessary settings. Once you’re settled in and ready to go, scroll down for step-by-step instructions.
Before You Start
To pair and configure your Apple Watch (Amazon, Best Buy), you’ll need an iPhone with the latest version of iOS. You’ll also need to ensure that your iPhone has Bluetooth turned on and is connected to Wi-Fi or a cellular network.
You can find these settings in Control Center. Last but not least, you should ensure your Apple Watch and iPhone are fully charged.
Step 1: Initiate the Pairing
When you bring a new Apple Watch into the vicinity of an iPhone, the iPhone will recognize it as a new device and prompt you to pair it. This auto-detection simplifies the pairing process. Just remember to keep your Apple Watch, and iPhone close together while you pair the two devices. The pairing process will fail if your iPhone is in a charging cradle across the room.
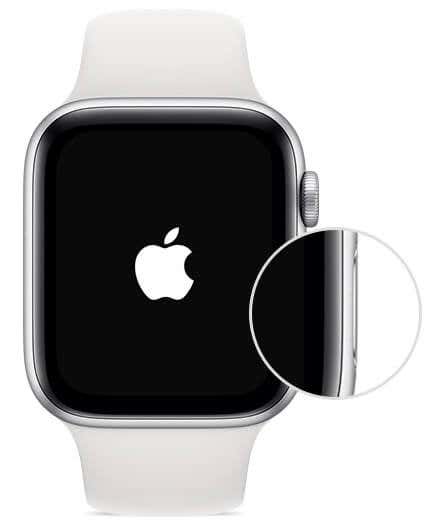
- Turn on your Apple Watch by pressing and holding the side button until the Apple logo appears.
- Place your Apple Watch near your iPhone.
- A Use your iPhone to set up this Apple Watch message should appear on your iPhone. Note: If you don’t see this message, then you’ll need to initiate the pairing process by opening the Watch app on your iPhone, then select All Watches, and select Pair New Watch.
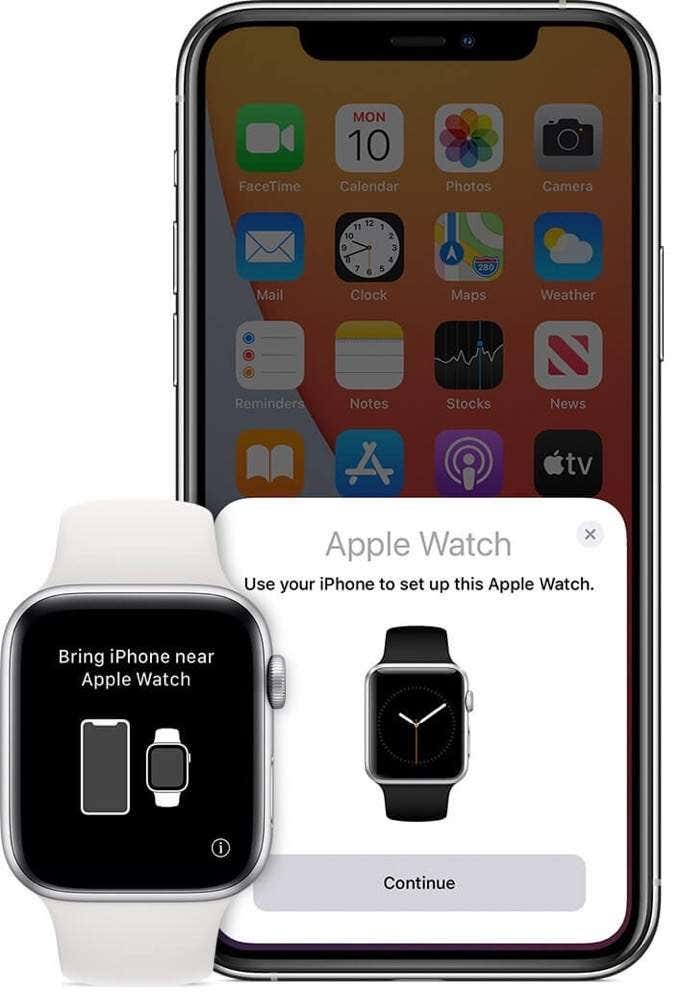
- Select Continue.
- Select Set Up for Myself if this is your personal Apple Watch.
- Or Select Set Up for a Family Member if the Watch belongs to a family member.
- Hold your iPhone camera over the animation on your Watch.
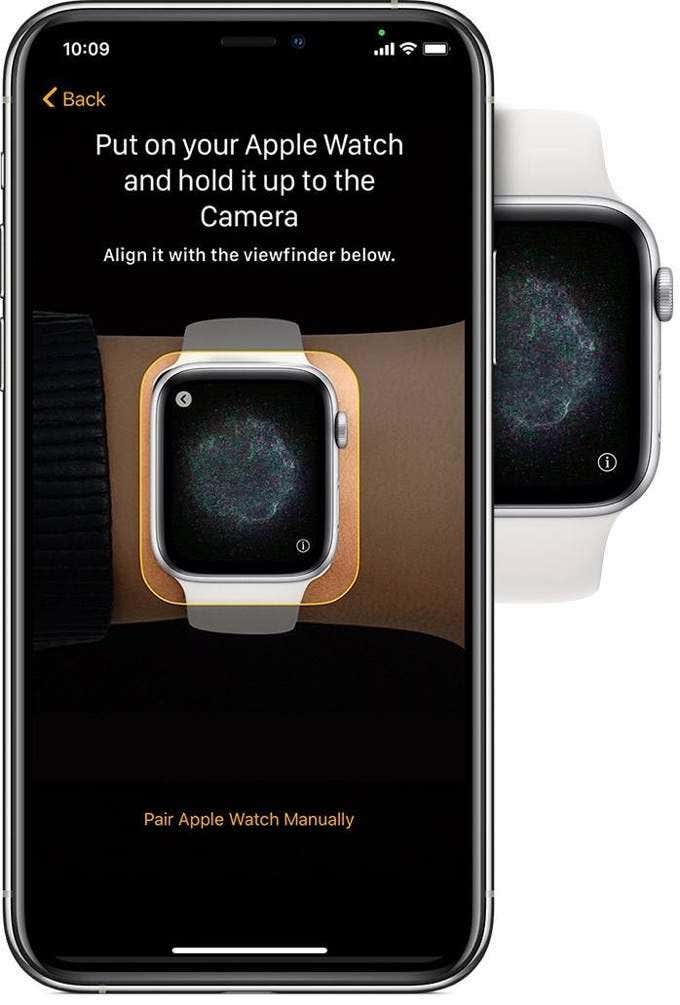
- Center the Watch animation in the center of the camera viewfinder on your iPhone.
- If successful, you will see a message appear that your Apple Watch is paired.
Apple relies on the iPhone camera to pair your Watch with your iPhone. If you can’t use the camera, you can select Pair Apple Watch Manually, then follow the prompts to pair your Watch using this alternative method.
Step 2: Choosing to Set Up as New Device or Restore From a Backup
If this is your first Apple Watch, then you can select Set Up as New Apple Watch. If you’re upgrading from a previous Apple Watch and want to transfer all your apps and settings, you should select Restore from Backup.
If prompted during the setup process, you should also agree to update your Apple Watch to the latest version of watchOS. You also will have to select which wrist you will wear your Watch on.
Step 3: Sign in with your Apple ID
Next, you may be prompted to enter your Apple ID and password. If you have your credentials handy, you should take the time to enter your Apple ID password. If you aren’t ready to enter your Apple ID, you can always sign in later using the Apple Watch app.
- Open the Apple Watch app.
- Select General.
- Select Apple ID.
- Use your Apple ID credentials to sign in.
You may be tempted to skip this step, but some features require you to sign in to iCloud.
Step 4: Setup Activation Lock
You should set up Activation Lock on your Watch during the Apple Watch pairing process. It’ll help you find your Watch if you misplaced it. More importantly, it’ll lock your Watch so a thief cannot resell your Watch if it was stolen.
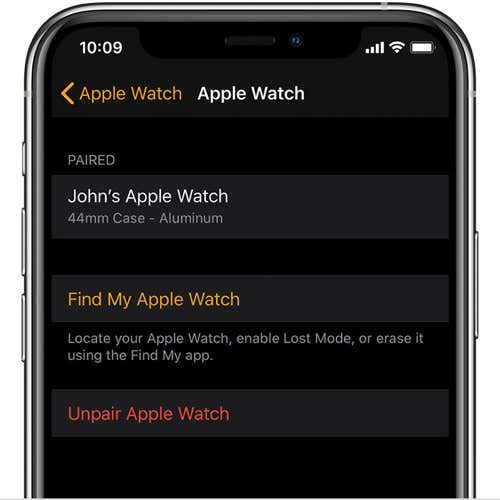
If your iPhone already has Find My configured, then the Apple Watch will use those settings. You’ll only have to enter your Apple Id credentials to continue. If you don’t have Find My enabled on your iPhone, you’ll have to turn on Activation Lock for both devices.
Step 5: Configure Your Apple Watch
In this step, you get to change the settings the Watch shares with your iPhone. Apple automatically turns on Location Services, Wi-Fi Calling, and Diagnostics for your iPhone, but you can disable them if you want. You also can choose to enable Siri, add Route tracking, and change the text size used by Apple Watch.
Step 6: Add a passcode
You can choose to add a passcode to keep your Apple Watch secure from prying eyes or in case of theft or loss.
- Select Create a Passcode to create a passcode for Apple Watch.
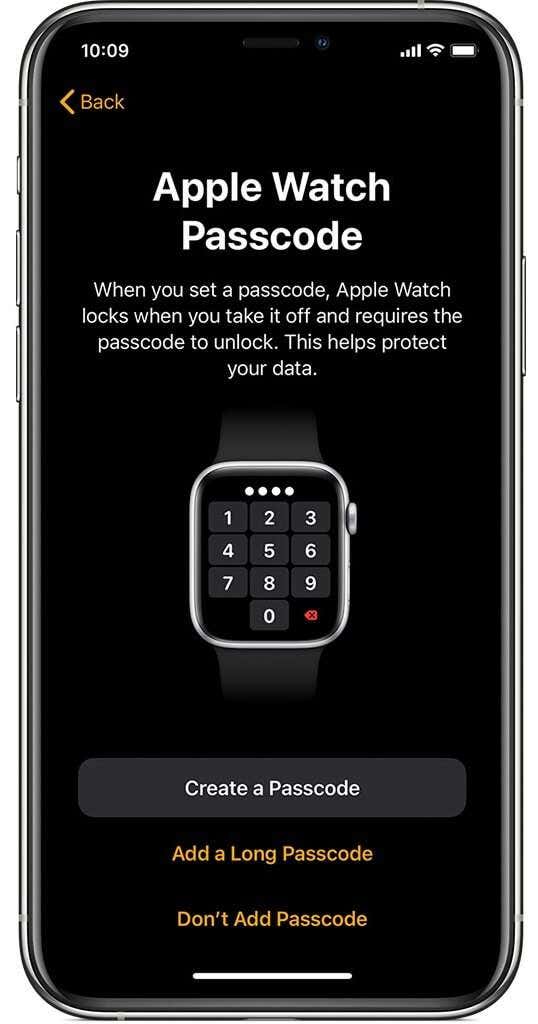
- Select Don’t Add Passcode if you’d rather skip this step.
- If you choose to use a passcode, enter a four-digit passcode or select Add a Long Passcode to add a passcode longer than four digits.
If you choose not to have a passcode on your Apple Watch, you may not be able to use features like Apple Pay.
Step 7: Choose features
Next, you’ll configure features like automatic updates, SOS, and your preferred activity settings. You also can configure Apple Pay if you use the digital wallet on your iPhone. On cellular models of the Apple Watch, you’ll be prompted to set up the cellular connection.
Step 8: Add Apps
In one of the last setup steps, you can choose to install all apps that are compatible with Apple Watch.
- Select Install All to install all available watchOS apps on your iPhone
- Select Later if you’d rather not install all of the available watchOS apps on your iPhone.
If you choose to not install all the available apps, you can add them individually at a later time.
Step 9: Wait for your devices to sync
Last but not least, you’ll need to sync your Apple Watch with your iPhone to save all the settings and install the applications. Be patient, as the syncing process may take a while depending on how much data and apps you have. Be sure to keep your Apple Watch near your iPhone during this process. When syncing is over, you will hear a chime and feel a gentle haptic buzz from your Apple Watch.
[related_posts_by_tax posts_per_page="5"]