You probably look at the Photos app on your iPhone with a bit of dread. It’s got years and years of photos, probably in the thousands. But it’s a mess. When you want to find that one photo from that one trip when that one friend did that really funny thing, well, you’re not able to.
The problem is that the Photos app doesn’t make things easier. Its search and auto-organization features are a far cry from Google Photos. But that doesn’t mean you’ll always be lost in the sea of the ever-growing photo library. You can take charge and do a couple of small things to organize photos in your iPhone library. This way, your most important photos will be easy to access.
How To Organize Photos on iPhone Using Albums
Organizing photos on the iPhone starts with albums. While there’s such a thing as too many albums, you should create albums for your major trips or photos you want to remember for a long time. Once you’ve created an album, adding photos to it is quite easy.
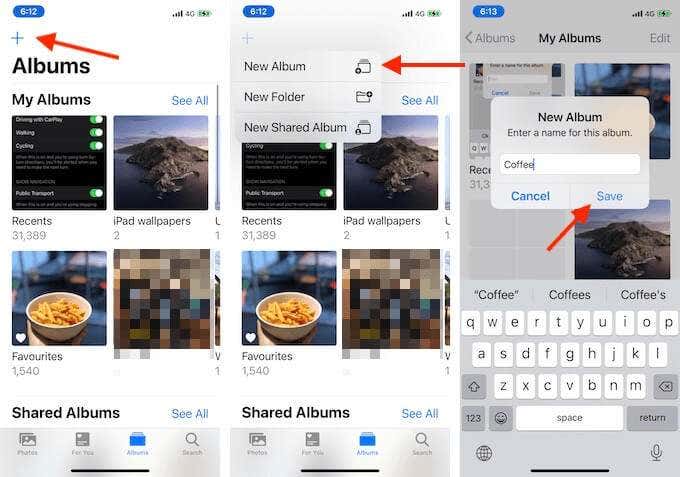
- To create an album, open the Photos app and go to the Albums tab.
- Then tap the Plus button from the top-left corner and choose the New Album option.
- Here, give the album a name, and tap the Save button.
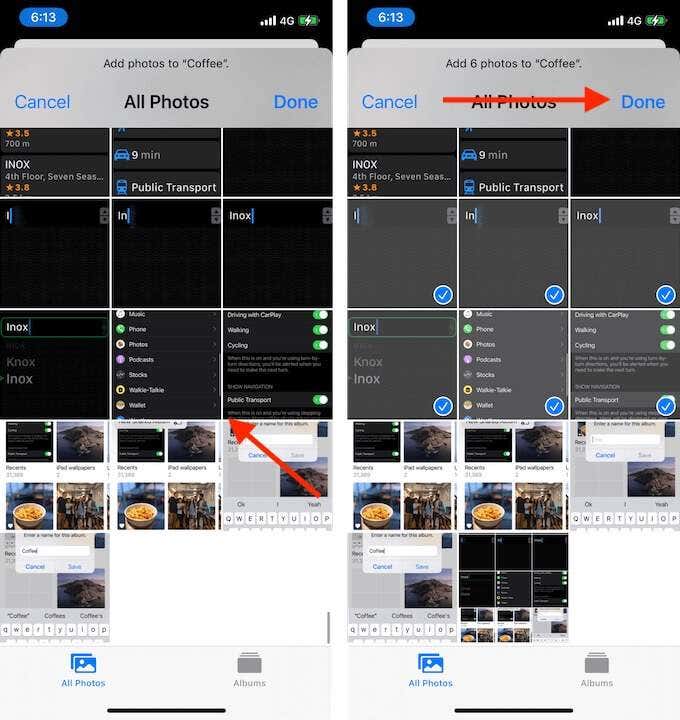
- You’ll now be asked to add photos to the album. You can browse through all photos here or go to the Albums tab to see different media types. If you have a large photo library, you don’t need to do this right now.
- After selecting the photos, tap the Done button to save the album.
You can add photos to an album at any time.
- First, find the photos you want to add to the album. This can be in the Recents album or from a category.
- Then, tap the Select icon, and choose multiple photos.
- Now, tap the Share button from the bottom-left corner, and choose the Add To Album option.
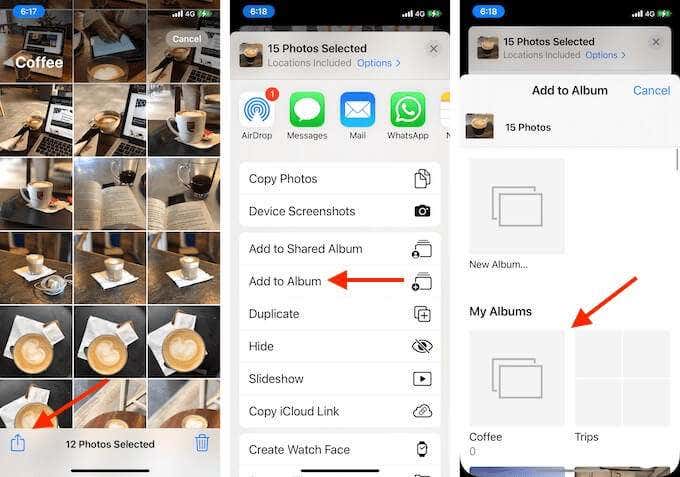
- Now choose the album.
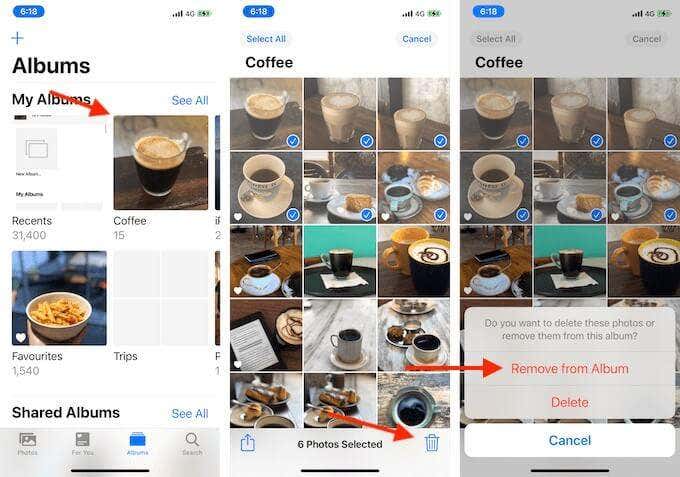
The photos will be added to the album. You can remove photos from an album quite easily.
- Open the album and then select the photos.
- Then tap the Delete button.
- Choose the Remove From Album option.
How To Organize Photos on iPhone Using Faces
You can also organize photos using people and faces. The iPhone is pretty good at recognizing and pooling in photos of the same person. Once you identify a person, the iPhone will create a dedicated section just for them.
- Open the Photos app and go to the Albums section.
- Here, swipe down to the People & Faces section, and select the People option.
- You’ll now see a list of all the faces that the Photos app has recognized. Choose a face to see all photos.
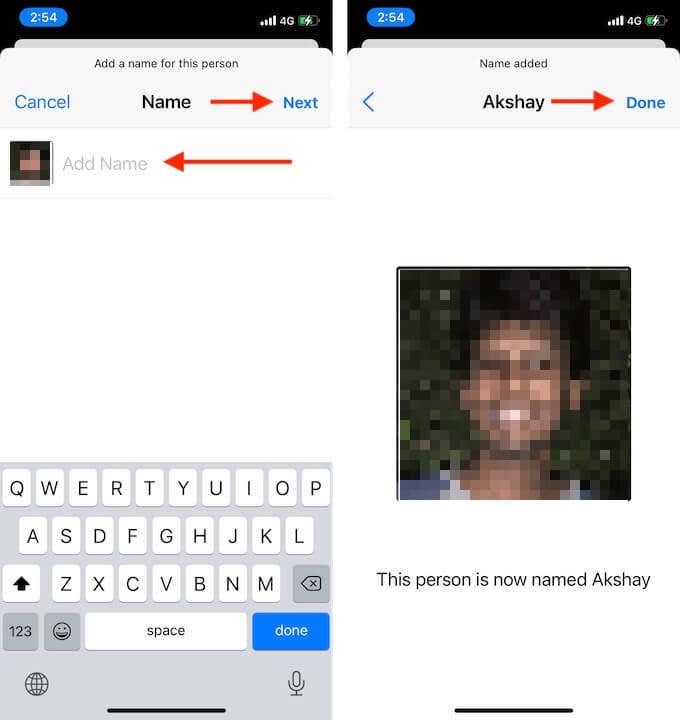
- From the top, tap the Add Name button, and then give the person a name. You can select a contact here as well. Tap the Next button after selecting the contact.
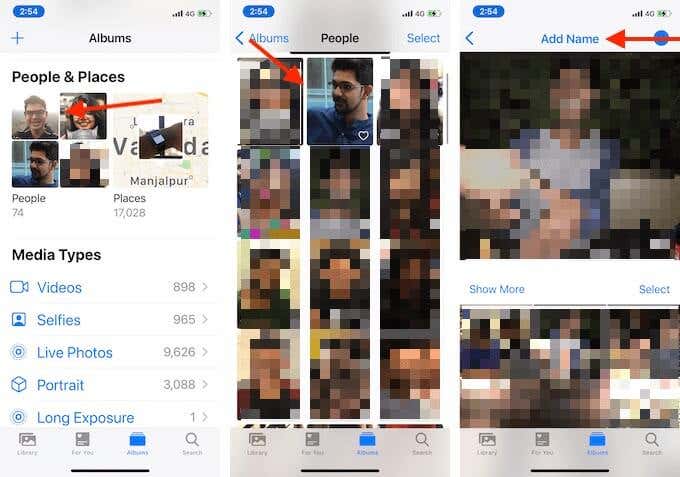
- Tap the Done button to save.
- Now, you’ll see all photos from the contact in this place. The app creates an auto-movie at the top and shows the best photos below. But you can tap the Show More button to see all photos as well.
Related: While we’re on the subject, did you know that you can lift people or pets from your iPhone photos?
How To Organize Photos on iPhone Using Places
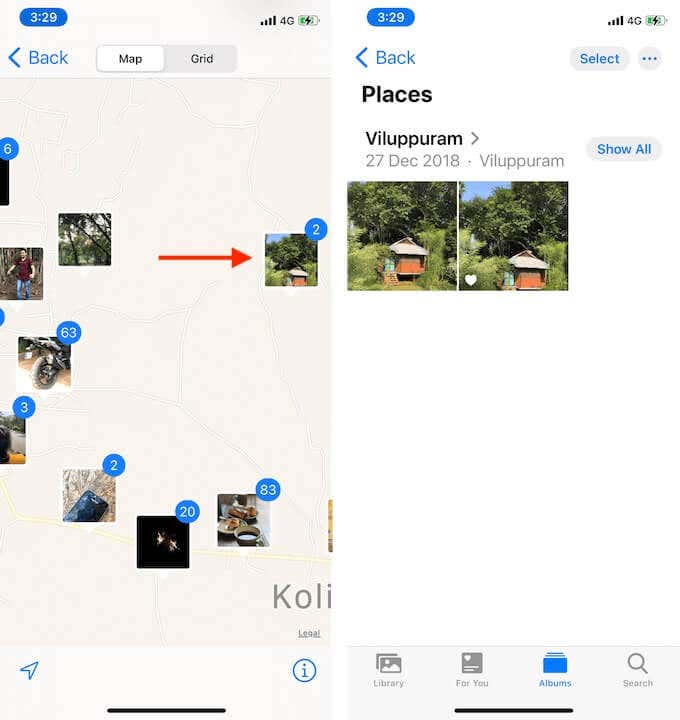
If you don’t want to create albums for each of your trips, you can get around it using iPhone’s location tagging. If enabled, your iPhone records the GPS location for every photo or video. Using the Places feature, you can explore the world map, and see where your photos were taken.
This way, you can quickly see all photos taken in a particular city or even an area.
- Open the Photos app on your iPhone and go to the Albums tab.
- Then tap the Places option in the People & Places section.
- Now, in the Map view, pinch and zoom to go to different areas of the world.
- When you zoom in, you’ll see more details about the photos.
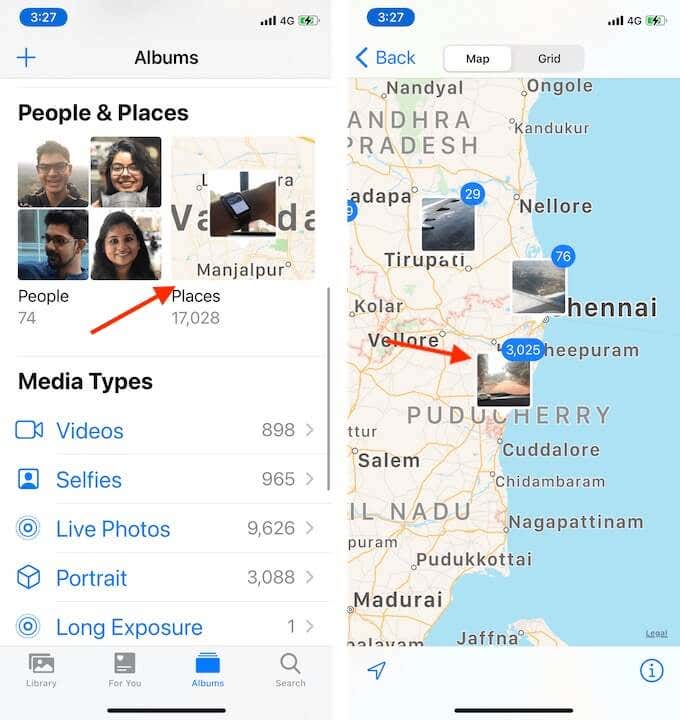
- First, you’ll see photos pooled based on cities or states. Keep zooming in and you’ll find photos from different streets, areas, and landmarks as well.
- Just tap on the photo preview to view the collection of photos.
How To Organize Photos on iPhone Using Favorites
When it comes to highlighting the best photos, there’s one more tool in your arsenal. And it’s quite simple. When you’re viewing a photo that you like, just tap the little Heart button. This will add the photo to the Favorites album.
To access the Favorites album, go to the Albums section, and select the Favorites option.
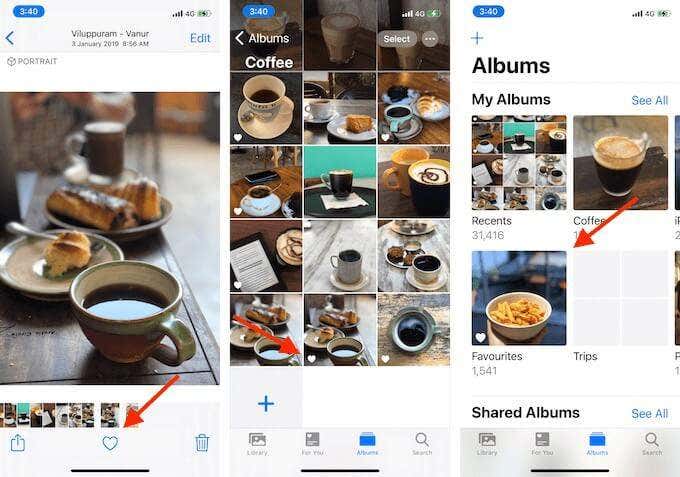
You can now use the Favorites feature as a quick filtering system. After you take dozens or hundreds of photos at the beach, go through them, and just Favorite the ones that you like. Now, tap the Select button, and select all the other photos (The Favorites feature adds a little heart icon to make them easier to spot). Then tap the Delete button to delete all other photos.
This way, only the best photos will stay in your camera roll and you’ll end up saving space on your iPhone as well as your iCloud account.
How do you organize photos on your iPhone? Share with us in the comments below.
[related_posts_by_tax posts_per_page="5"]