When you buy a new computer, the first thing you’ll probably want to do is copy all of your contents from your old computer over to the new one. This ensures you can continue the work that you were doing on your old machine.
One of the things you may want to migrate to your new computer is to move your iTunes library to a new computer. Although Apple has done away with iTunes on the latest Macs, the app is still used on old macOS versions and Windows computers.
Moving your iTunes library to a new computer is pretty easy actually. There are features inside the app itself to help you do it.
Put All Your iTunes Content In a Single Folder
If you know the basics of how iTunes works, you probably know that the app doesn’t need to copy your music files to its folders to play them. Your songs could be anywhere on your machine and you can still find, organize, and play them in the app.
Because of the nature of the app, there’s no one folder that you can copy from your old computer to the new one and get your library migrated. But, there’s a feature in iTunes that lets you put all of your files in a single folder. It’s called consolidating files and you can do it from within the app on your computer.
Your files will continue to exist at their original location and the following procedure will only make a copy of those files in the iTunes folder. You want to make sure there’s enough storage on your computer as you’ll have a total of two copies of each of your iTunes files.
- Launch the iTunes app on your computer.
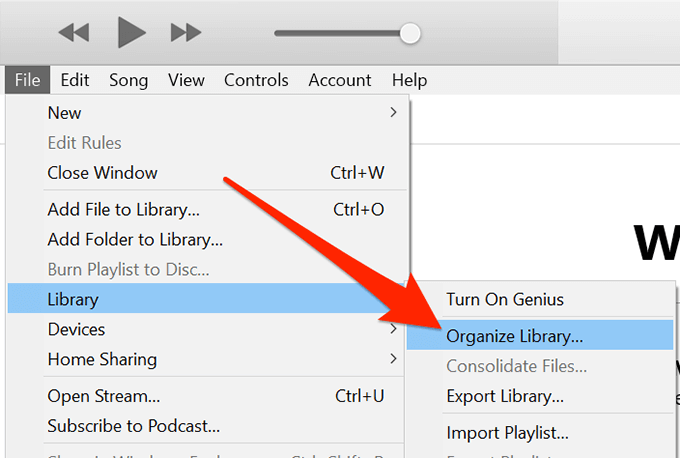
- Click on the File menu at the top of your screen and select Library followed by Organize Library. It’ll let you put all of your iTunes files together.
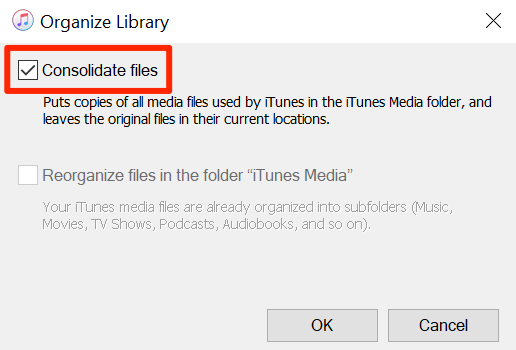
- A box will appear on your screen letting you enable or disable two options. The first option should say Consolidate files and that’s what you need to tick-mark. Enable the option and then click on OK at the bottom.
- It’ll start copying the iTunes library files from wherever they’re on your computer to the iTunes folder. Wait for it to do that.
Once the files are copied, you can delete the original ones from their folders if you want.
Find The iTunes Folder & Copy It To Your External Drive
Once your entire iTunes library is consolidated, you can copy the consolidated folder over to an external drive for migration. However, the iTunes folder isn’t easily accessible as it’s located deep down in various subfolders.
Also, if you or someone has ever changed the original iTunes media folder, it won’t be available at its default location. You’re then going to need to find exactly where it’s stored on your machine.
Fortunately, iTunes provides you with an easy way to find its media folder. All you need to do is access an option in the app and it’ll let you know where your iTunes files are located. Once that’s done, you can copy the folder over to your external drive and start the migration process.
- Open the iTunes app on your computer.
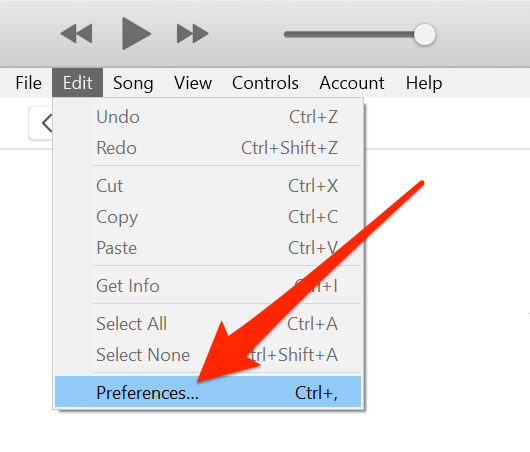
- Click on the Edit menu at the top and then select the option that says Preferences. It’ll open the iTunes settings menu.
- On the settings screen, you want to navigate to the tab that says Advanced as the option you’re looking for is located there.
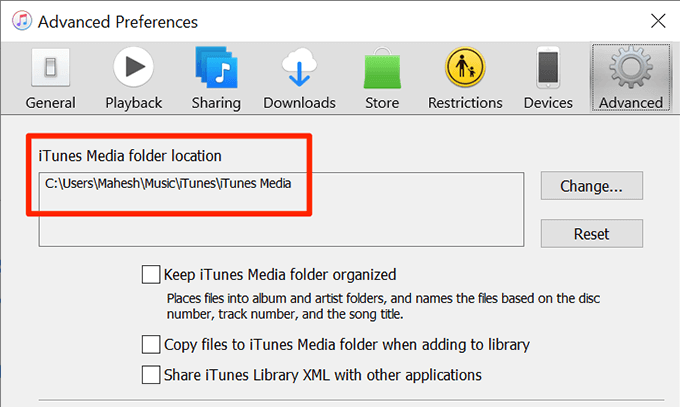
- Once you’re in the Advanced tab, you’ll find a box with the title that says iTunes Media folder location. Note down the path displayed there as you’re going to need it in the following steps.
- Close the iTunes app on your computer.
- Open a File Explorer window and navigate to the path you noted down earlier. You should see a folder titled iTunes, and if you don’t, go one folder back and you should find it.
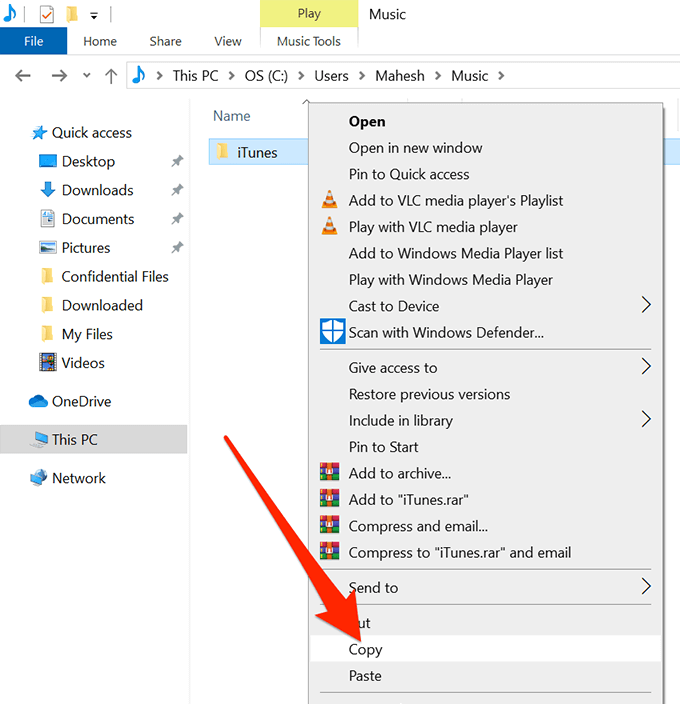
- Once you find the iTunes folder, right-click on it and select Copy.
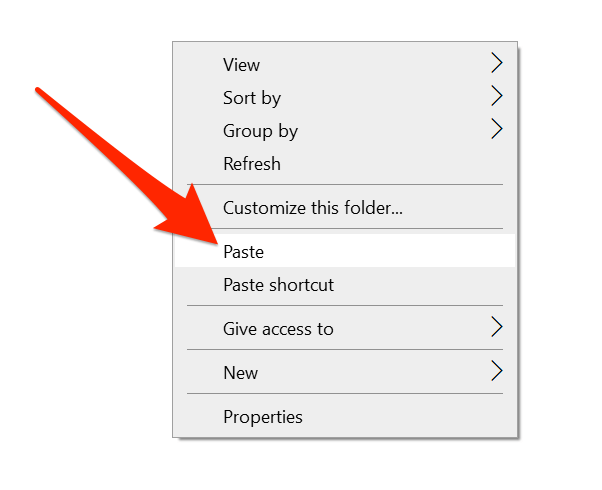
- Open your external drive’s storage, right-click anywhere blank, and select Paste. Then wait for your files to be fully copied.
Restore Your iTunes Library On Your New Computer
Your entire iTunes library should now be available on your external hard drive. All that you need to do now is plug the hard drive into your new computer, copy over the library files, and then let iTunes know about it for it to import the files into the app.
It may sound a bit too technical but it’s not. It’s just basically copying your files and then configuring iTunes to recognize your new library. That’s all.
- If the iTunes app is open on your new computer, close it before you do the following steps.
- Plug in your external drive to your new computer and copy the iTunes folder which is your iTunes library folder.
- Use the File Explorer to find and select a location for the iTunes library on your new computer. This can be anywhere on your system. Then, paste your iTunes folder so it’s saved on the internal storage of your new machine.
- Wait for all of your files to be copied from your external drive to your computer.
- When the files are copied, press and hold down the Shift button on your keyboard and launch the iTunes app.
- It’ll prompt you to either choose an existing library or create a new one to use with the app. You want to click on the button that says Choose Library.

- Navigate to the iTunes folder on your new computer and select the iTunes Library.itl file. The app will then start importing your content.
When your files are all imported, you should see them on the same interface and menu where they were on your old computer.
Did you ever have to move your iTunes library to a new computer? How did the procedure go for you? Let us know in the comments below.
[related_posts_by_tax posts_per_page="5"]