When I was at Frankfurt airport recently, I saw a businessman leave his very expensive MacBook Air laptop on the table to go and get coffee. He was gone for five minutes but in those five minutes, somebody could either have stolen the computer or hacked into it for valuable data.
These days though, hackers don’t need physical access to the machine. Using network sniffers, they can prowl public wifi spots looking for weaknesses, or enter private wifi spots which don’t have passwords.

So from the get-go, you need to protect your macOS computer from these “bad actors”. You have to bear in mind, though, before we continue that you are never going to have 100% iron-clad security, and if you are up against a government agency, these basic steps are nowhere near going to help.
But to stop the casual opportunist? Read on.
Add a Passcode To Your Computer

This is an absolute no-brainer, but I am stunned at the number of people who don’t bother with it. This is like going on vacation and leaving your front door unlocked, and wondering when you got back why you were burglarized.
Adding a passcode is simple. Go to System Preferences – Security & Privacy. In the General tab, you can set a password, as well as specify how long after the computer sleeps the password is required. Obviously immediately is the best option.

You can also add a password hint in case you forget your password, but unless you make the hint extremely vague for anyone else reading it, I wouldn’t recommend doing this. Just make the password something you are guaranteed to remember.
Turn On FileVault
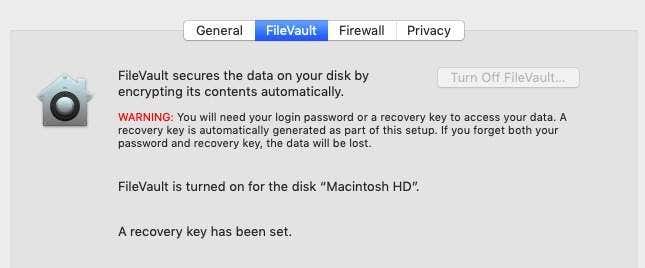
One of the great things about a MacOS device is that when you have it fully powered down, the files contained on the hard drive are totally inaccessible. But for you to take advantage of that, you need to turn on FileVault.
Located in System Preferences – Security & Privacy, FileVault encrypts the hard drive, but the encryption only kicks in if the computer is shut down completely. So try not to use sleep mode too often, especially if you are out and about with your laptop in your bag.
When you switch it on, it will take a few hours for the entire hard drive to be encrypted, but it is totally worth it for peace of mind. If there is only one thing you should do from this article, it is FileVault. The rest is just icing on the cake.
Make Sure The Padlock Is On In System Preferences
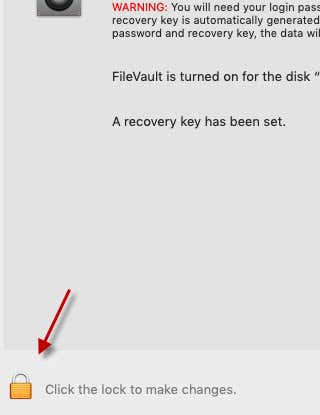
Unauthorized changes to the computer’s System Preferences are prevented by the use of a small padlock icon in the bottom left-hand corner.
If you want to keep System Preferences secure, click the padlock to close it. If you want to open it again to change anything, you will be required to enter the administrator password.
Do Not Log In As An Administrator
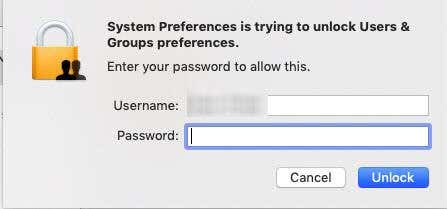
Another no-no is logging into the computer and using it for routine tasks as the “administrator”.
A user with administrator privileges is able to do everything on the computer. Installing and removing software, as well as adding and removing users being just two of them. If anyone that got into your computer is already logged in as the administrator, it hands them the keys to the kingdom.
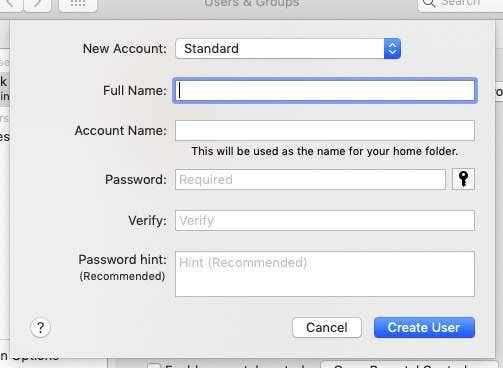
The solution to this is to make an ordinary non-administrator account and use that for everyday routine computer usage. Leave the administrator account alone and use those login details only when the computer requests them.
To make a new user, go to System Preferences – Users & Groups. Make sure the padlock is unlocked at the bottom then click the “+” below Login Options. Make the new account a Standard one.
Disallow Guest Users
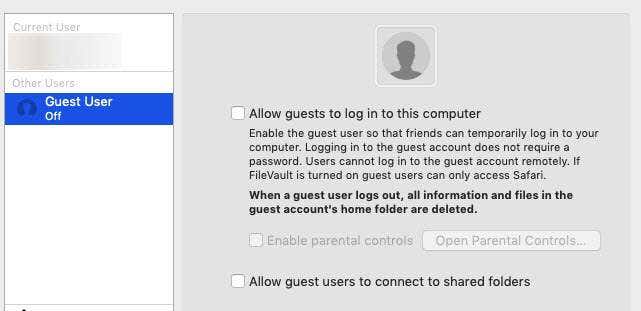
A lot of people say it is a good idea for you to have a guest user account for other people to use your computer. But I take the opposite view.
Although the guest user has much more restricted access to your computer, they still have access to two important areas. First, they have access to all the installed applications which they can use to perform any manner of malicious action.
Second, they also have access to the tmp directory where malicious scripts and malware can be stored.
So go to System Preferences – Users & Groups and turn off the Guest User option.
Make Sure Automatic Updates Are Turned On
Like any other operating system, Apple pushes out MacOS updates on a regular basis. The same with software – if a patch is needed, the developer will make one and send it out.
So it is pointless if the patch is sitting there ready to be installed and you don’t have automatic updates switched on. Unless you like to manually check every single day and who has time for that?
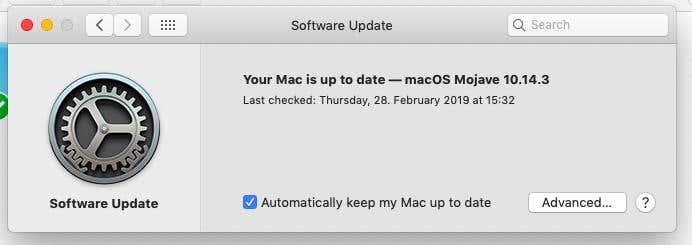
To switch on Automatic Updates, go to System Preferences – Software Update. Tick the box that says Automatically keep my Mac up to date.
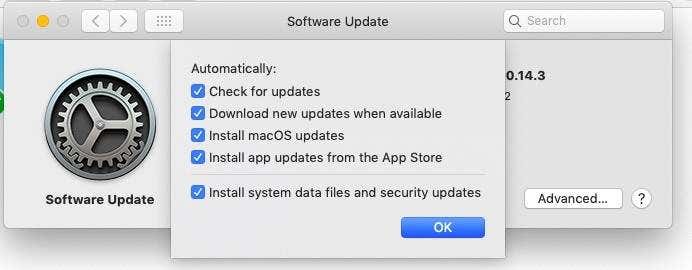
If you then click the Advanced box, you will see the options available. I suggest you tick all of them.
Turn On The Firewall
This one is also a bit of a no-brainer, but again, many people just don’t bother.
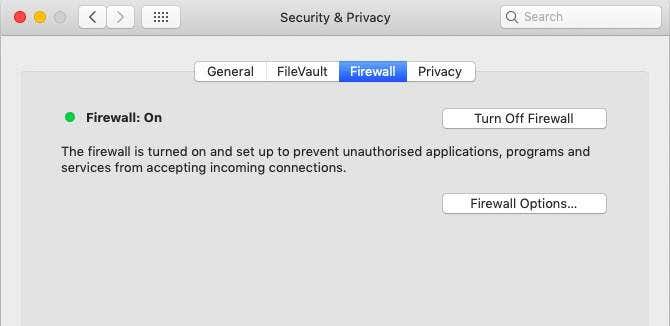
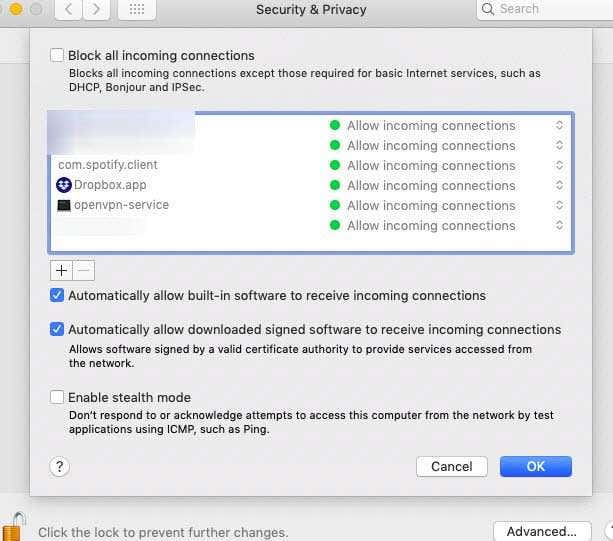
Compared to Windows firewalls, which can involve a lot of tweaking, macOS firewalls are a one-click deal. By going to System Preferences – Security & Privacy, and then the Firewall tab, you can switch the firewall on with one click. And that is really it.
I have never had to touch anything in the Firewall Options section. I will shortly be doing an article on MacOS Firewall’s “Stealth Mode”, but in general, keep things as they are in the screenshot below.
Anonymize The Network Name Of Your Computer
This is one which was suggested to me by a friend not that long ago, and it was something I had never really previously considered.
If someone hacks into your network, they are going to obviously see the names of all the devices connected to that network. If there is only one device (your MacOS device), well then this is going to have limited to no effect. But if you have multiple devices in your network, you can try to camouflage your MacOS device by anonymizing the name of it.
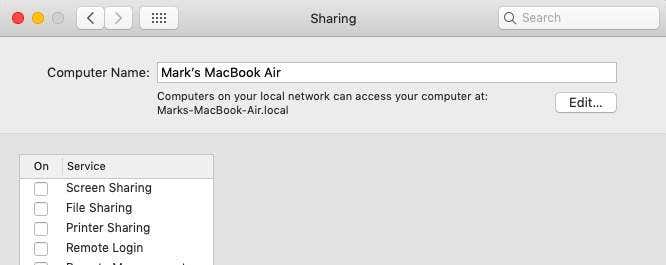
For example, until I was advised of this, my computer’s name was “Mark’s MacBook Air”. I mean, I may as well have put up a sign saying “Come on in! Get all my files here!”. But by changing the name to something innocuous, it is now sitting amongst all of my other connected devices.
Obviously, this is not foolproof. Anyone can check each device one by one but it will take them longer and make things more of a hassle for them.
Go to System-Preferences – Sharing and at the top, you will see the name of your computer. Click the padlock at the bottom of the screen, enter your administrator password and the edit button next to the computer name will suddenly become active. Click it.
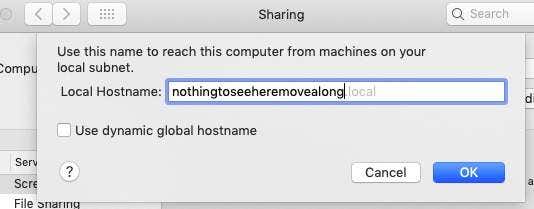
You will now be invited to change the name to whatever you want. Keep “Use dynamic global hostname” unchecked.
Turn Off Sharing
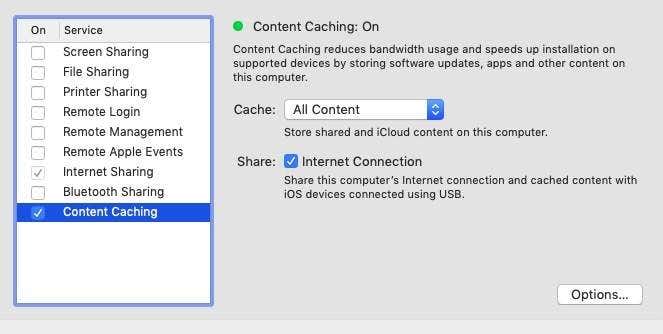
While you are in the Sharing section, it’s time to turn off all of these options – except for one – content caching.
From what I have been able to find, Content Caching is fine and seems to actually benefit you. This in turn turns on Internet Sharing, so I guess you can leave that one too. But the others, such as Screen Sharing, File Sharing, Remote Login – switch them off (unless you have a huge need to have them on).
Conclusion
As I stated at the beginning, these measures are only going to stop the casual snooper at the coffee shop, or a thief looking to snatch your laptop for some quick cash.
If you are being assaulted by a government agency or another form of professional, these measures will slow them down – but only for a very short while.
But nevertheless, better than nothing, right? Why make it easy for them?
[related_posts_by_tax posts_per_page="5"]