By default, macOS saves all Wi-Fi networks it connects to and automatically joins them whenever you’re nearby. Luckily, it’s easy to forget Wi-Fi networks on Mac and clean up that list.
However, over time, this can lead to a lengthy list of Wi-Fi networks, most of which you’ll probably never need again. You may also want to avoid reconnecting to networks that offer poor internet speeds or aren’t secure.
Luckily, macOS makes it easy to remove unwanted Wi-Fi networks. This tutorial will show you how to forget Wi-Fi networks on newer and older macOS versions.
How to Forget Wi-Fi Networks in macOS Ventura and Later
If your Mac runs Apple’s macOS Ventura or later, you can use the System Settings app in macOS to forget Wi-Fi networks. Here’s how:
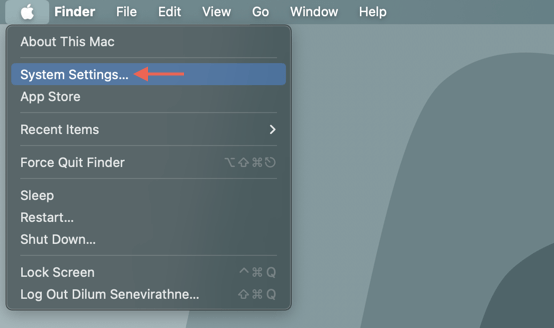
- Open the Apple menu and select System Settings.
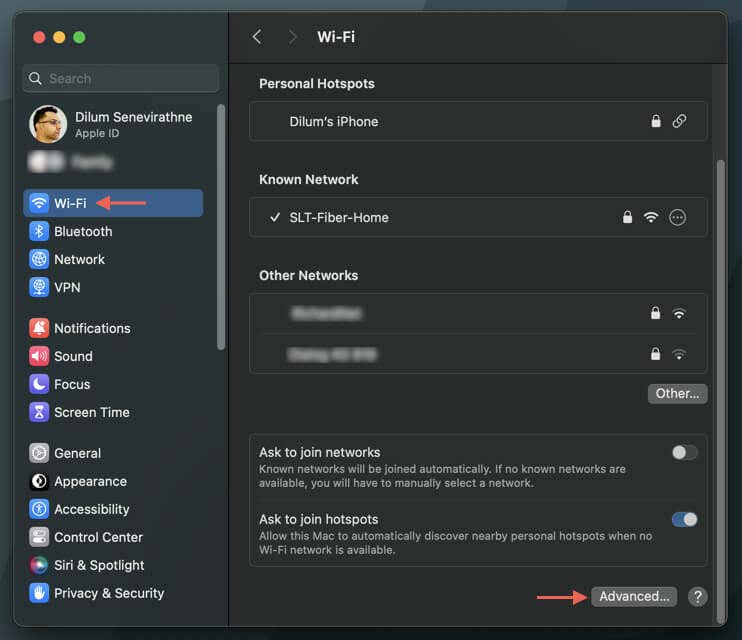
- Choose Wi-Fi on the System Settings sidebar, followed by the Advanced button on the bottom-right of the window.
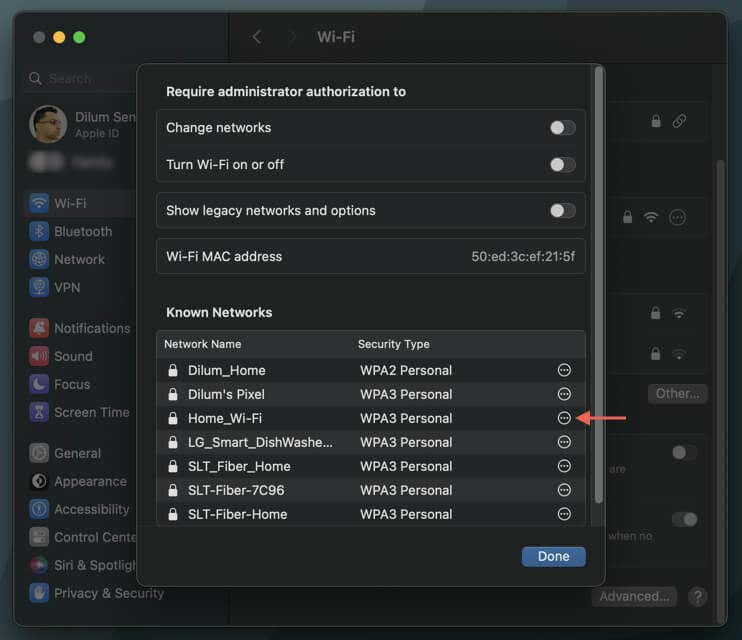
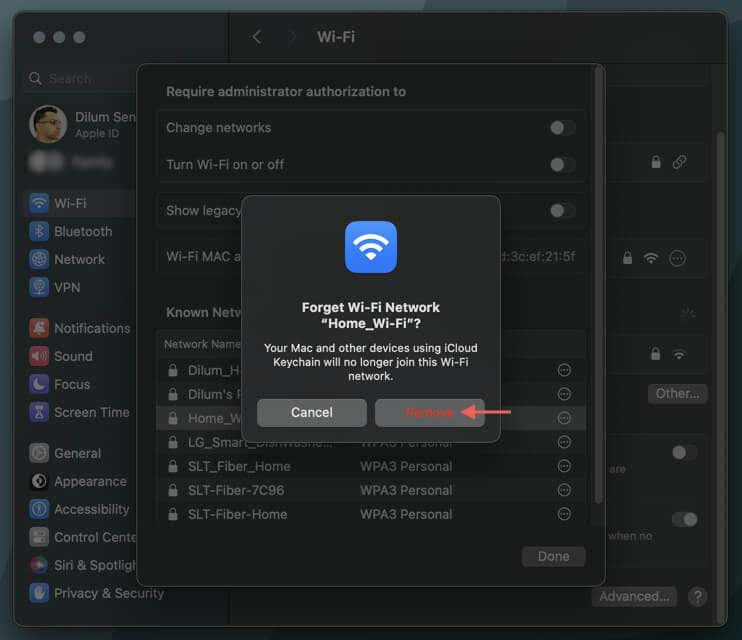
- A complete list of networks will appear under the Known Networks section, along with the security type of each network. Select the More icon (three dots) button next to the network you want to forget.
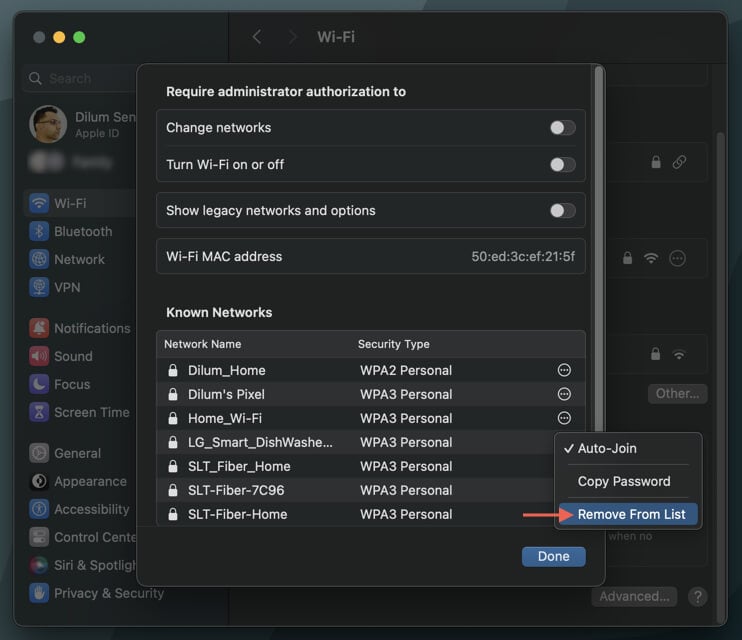
- Select the Remove From List menu option.
- Select Remove on the “Forget Wi-Fi Network?” confirmation pop-up.
- Remove any other networks within the list and select Done.
If a network is nearby, it should appear under the Known Networks section within the main Wi-Fi settings screen. In that case, select the More icon next to the network name and choose Forget This Network.
How to Forget Wi-Fi Networks in macOS Monterey and Older
The steps to forget a Wi-Fi network are slightly different on macOS Monterey and older Mac system software versions. You must:
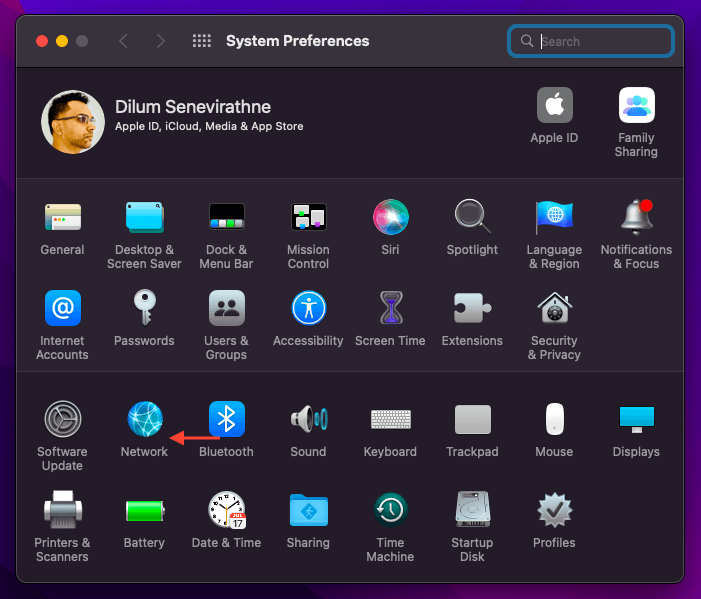
- Open the System Preferences app via the Apple menu or Dock and enter the Network category.
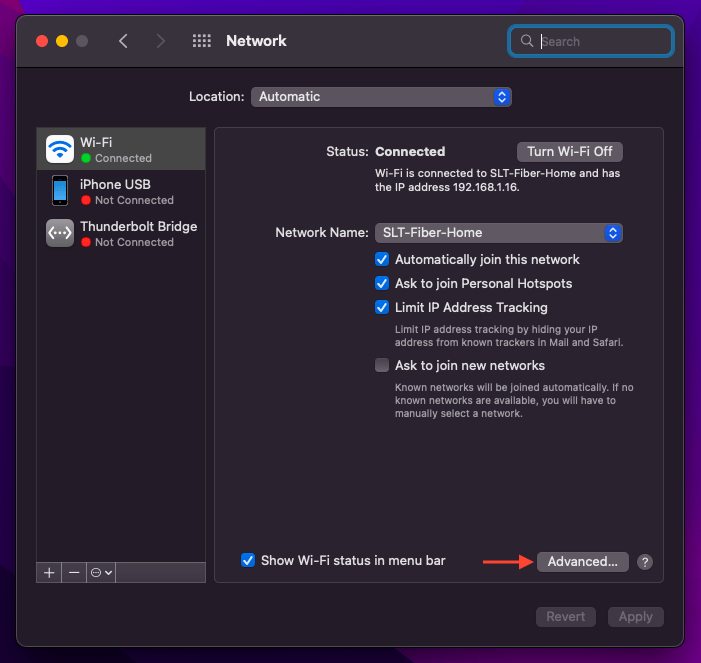
- Select the Advanced button on the bottom right of the window.
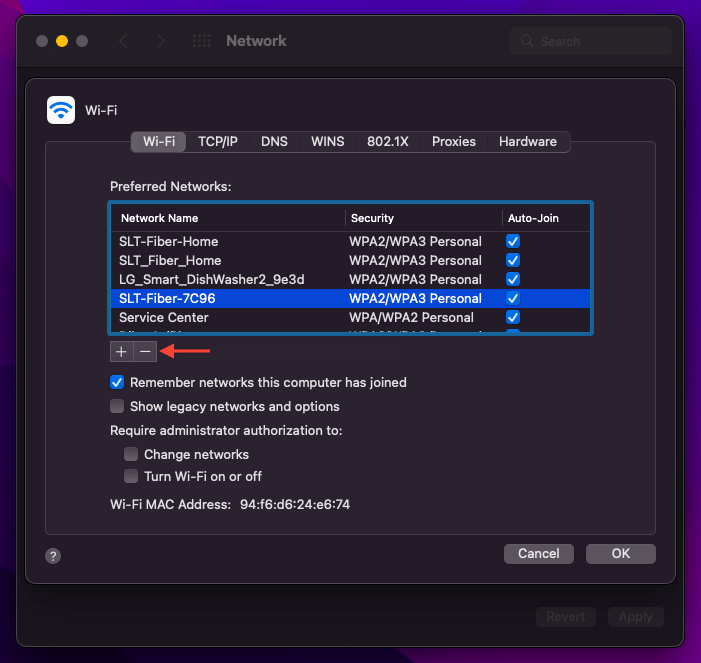
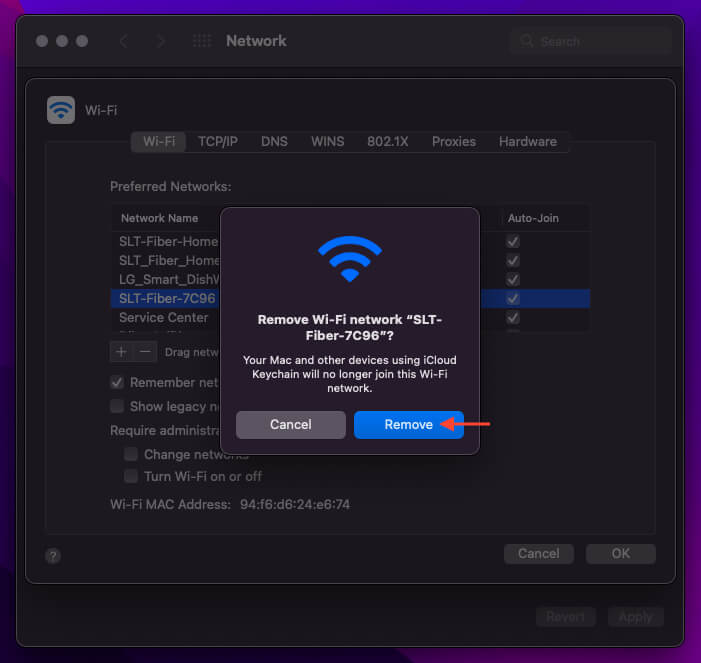
- You will see a list of networks your Mac has previously connected to under Preferred Networks. Highlight the network you want to forget and select the Minus button.
- Select Remove on the confirmation pop-up.
- Remove any other networks you want and select OK > Apply to save the changes.
How to Stop macOS From Auto-Joining Wi-Fi Networks
If you use iCloud Keychain on your Mac, forgetting a Wi-Fi network will remove it from all Apple devices you own. You can opt to stop your macOS device from auto-joining the network if that’s a concern.
- macOS Ventura and Later: Go to System Settings > Wi-Fi > Advanced, select the More icon next to a network, and disable Auto-Join.
- macOS Monterey and Earlier: Go to System Preferences > Network > Wi-Fi > Advanced, locate the network in question in the list of preferred networks, and uncheck the box under the Auto-Join column.
Streamline Your Mac’s Wi-Fi Connections List
Regularly managing your Mac’s list of saved Wi-Fi networks can reduce clutter and make connecting to frequently used networks easier. It can also improve security by preventing automatic connections to potentially unsafe networks. If you’re experiencing persistent connectivity issues, forgetting and rejoining networks can be an effective troubleshooting step.
