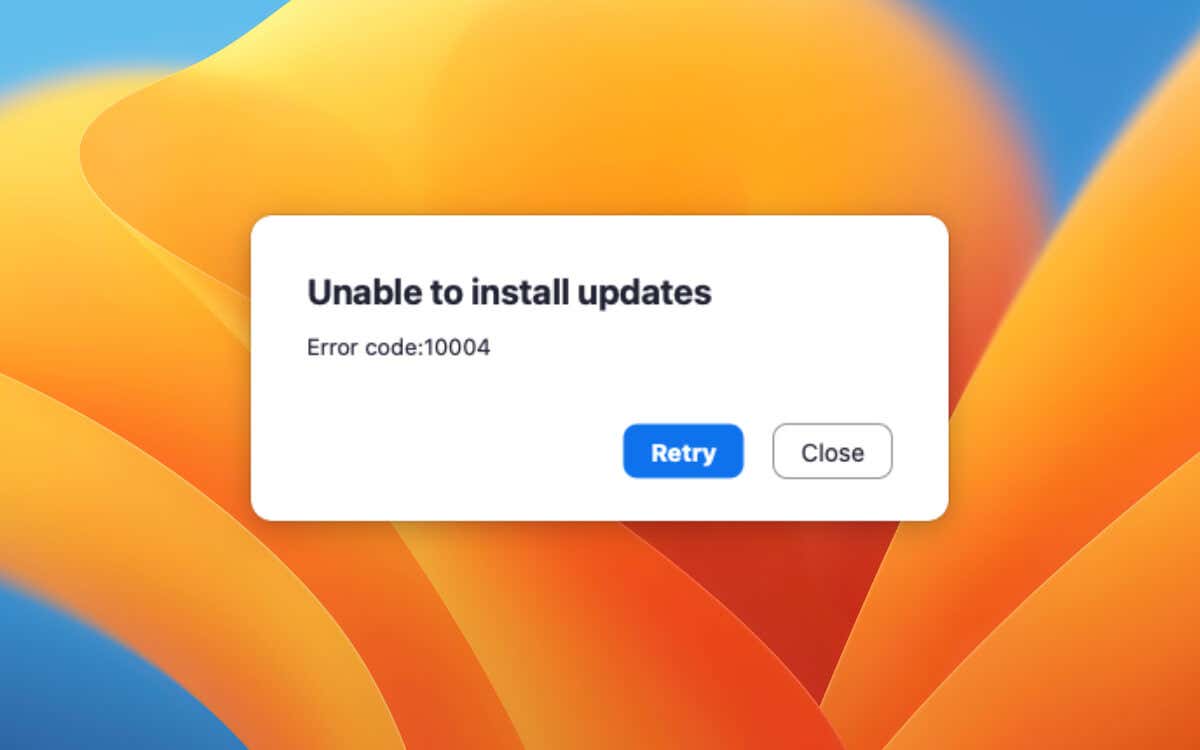
Are you encountering “Error code: 10004” while updating Zoom’s desktop client on your Mac? It shows up because of compatibility and permissions-related problems between the operating system—macOS—and the Zoom application.
This troubleshooting tutorial will explain the reasons behind Zoom update error code 10004 and what you can do to fix it on your MacBook, iMac, or Mac mini.
Reasons Why Zoom’s Error Code 10004 Shows Up
Zoom error code 10004 appears during automatic and manual updates, indicating the application has encountered obstacles during the update process. Possible reasons include:
Incompatibility With the System Software
Your current macOS version isn’t fully compatible with the Zoom app. That could happen if you’re using an older or beta system software version. E.g., macOS 13 Ventura Public Beta 5 is known to trigger error code 10004 in Zoom.
The solution is to install all pending macOS updates. If that fails, you must re-install Zoom.
Version-Specific Issues with Zoom
The version of Zoom you’re currently on could be the problem. E.g., Zoom has officially acknowledged versions 5.11.6 through.12.0 to result in error code 10004.
To deal with that, provide Zoom additional permissions to complete the update process or remove and install an up-to-date copy of the application.
Firewall and General Connectivity Issues
The macOS Firewall or a third-party antivirus application is blocking Zoom from connecting to the Zoom servers. Additionally, weak or spotty internet can cause connectivity issues with the Zoom servers and prompt updates to fail.
You must check your firewall settings to identify possible obstructions or troubleshoot your Wi-fi or Ethernet.
The following sections will consider all the reasons above and provide a logical set of solutions to work through. We recommend following them in the order they appear.
Install Pending macOS Updates and Retry
It’s best to kick things off by updating macOS to its latest version. This should eliminate known compatibility issues between the system software and the Zoom app, potentially resolving the problem immediately. Here’s how:
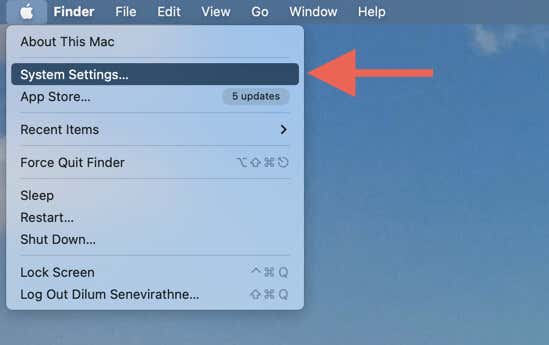
- Open the Apple menu and select System Settings.
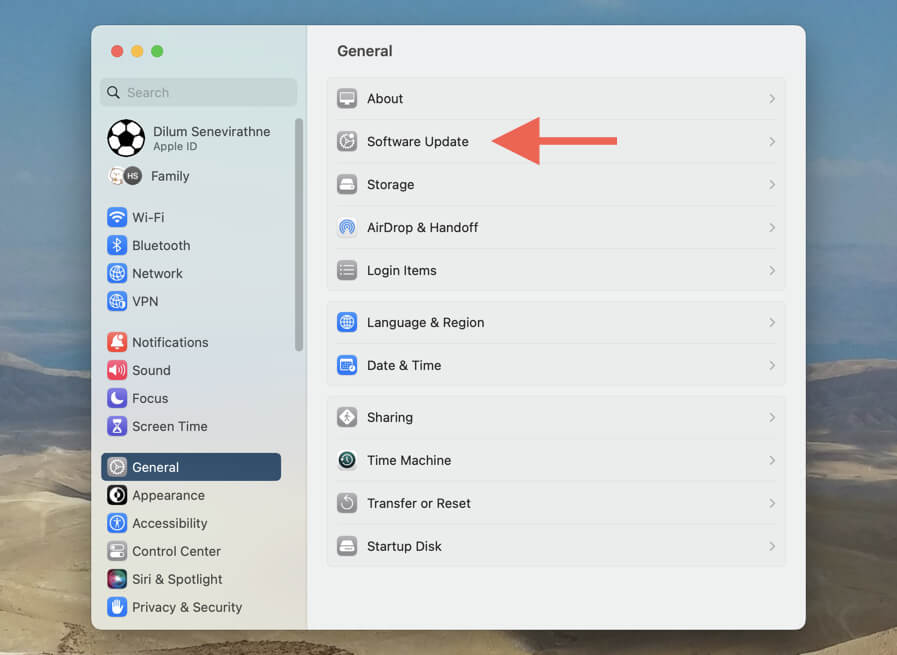
- Go to General > Software Update.
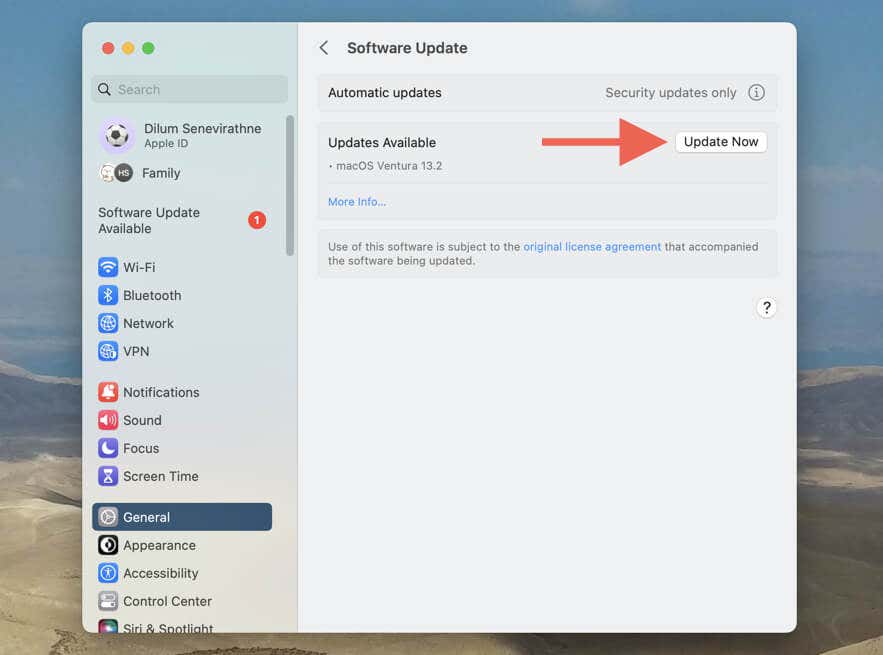
- Select Update Now to install all pending updates.
Note: If you’re on macOS Monterey or earlier, select System Preferences on the Apple menu and choose Software Update to update the operating system.
After updating macOS, wait until the next Zoom auto-update kicks in to check if the error recurs. Or, open Zoom, select your profile portrait on the top-right corner of the Zoom window, and choose Check for updates to initiate a manual update.
If there are no pending updates, restart your Mac instead. To do that, select Restart on the Apple menu, uncheck the box next to Reopen windows before logging back in, and select Restart again.
Check Your Mac’s Firewall
Next, check the macOS Firewall to ensure that the Zoom application on your Mac has unrestricted access to the internet. To do that:
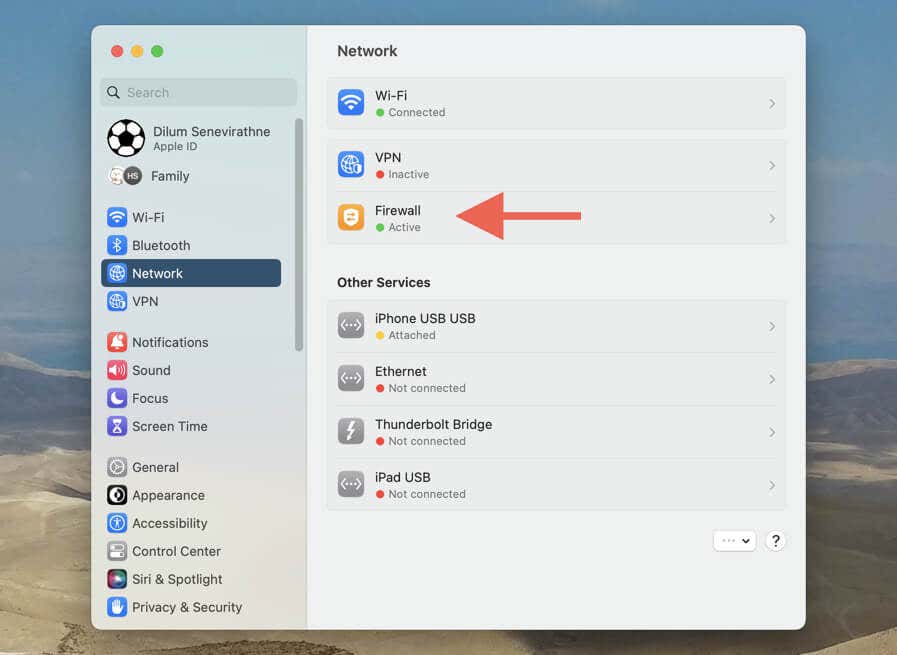
- Open the System Settings app, select Network on the sidebar, and choose Firewall.
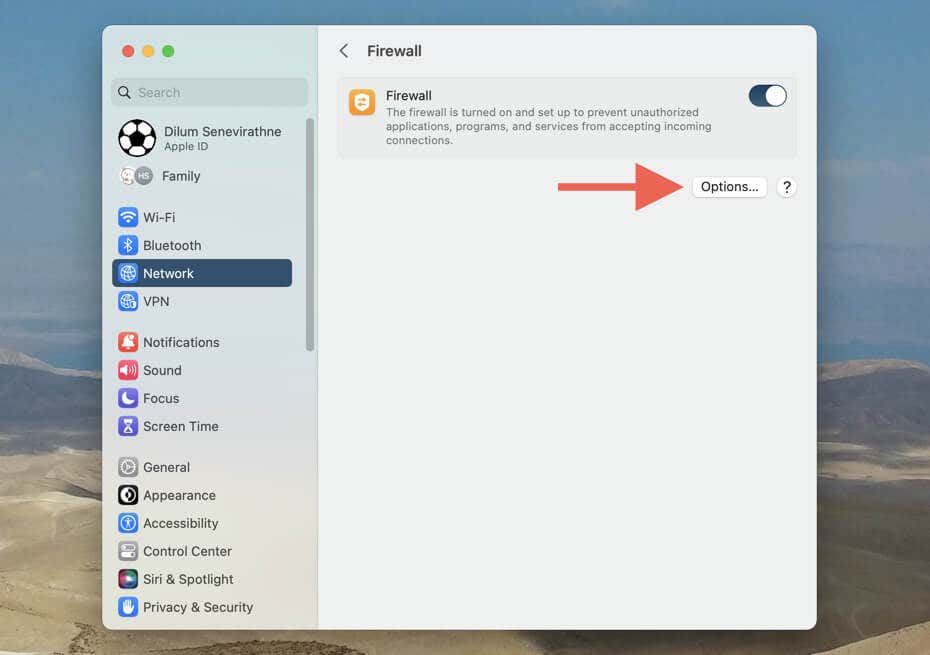
- Select the Options button.
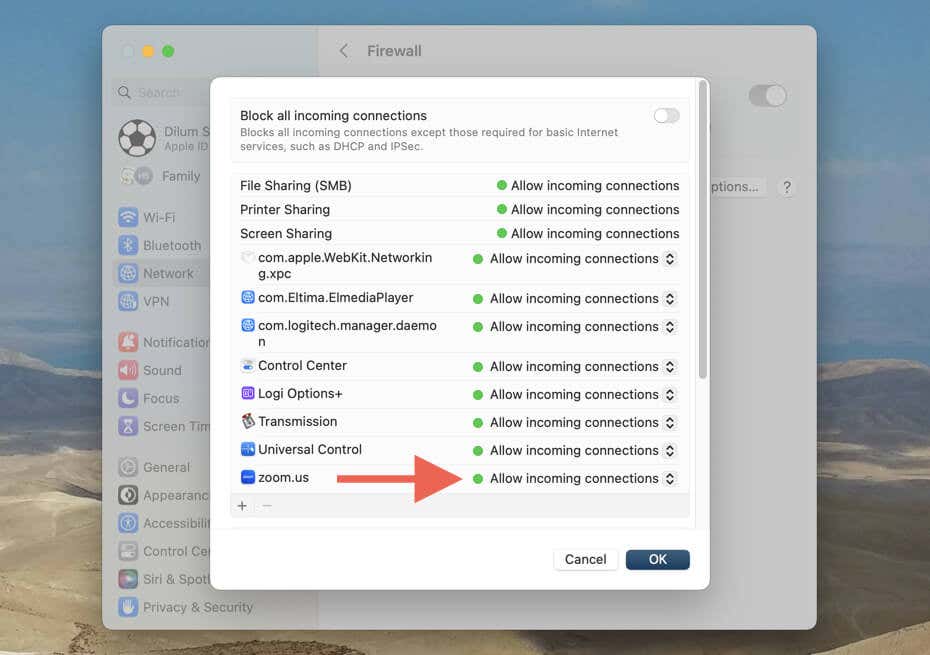
- Set Zoom.us to Allow incoming connections and select OK.
If the app is not listed within the macOS Firewall, select the Plus icon, add Zoom.us from your Mac’s Applications folder, and select Allow incoming connections.
Note: On a Mac running macOS Monterey and older, open the System Preferences app and go to Security & Privacy > Firewall to manage your firewall preferences.
If you use third-party antivirus software on your Mac, check its firewall settings and lift any restrictions preventing the Zoom app from communicating with its servers.
Check Your Network Connection
Confirm there’s nothing wrong with your internet connection before you move on. Restarting the router is a quick way to resolve persistent slowdowns and other random connectivity issues.
Allow Zoom Full Disk Access to Your Mac
If there’s nothing wrong with the Mac’s firewall or internet, briefly provide the Zoom desktop client full disk access to your Mac and check if that bypasses error code 10004.
To do that, quit Zoom, and then:
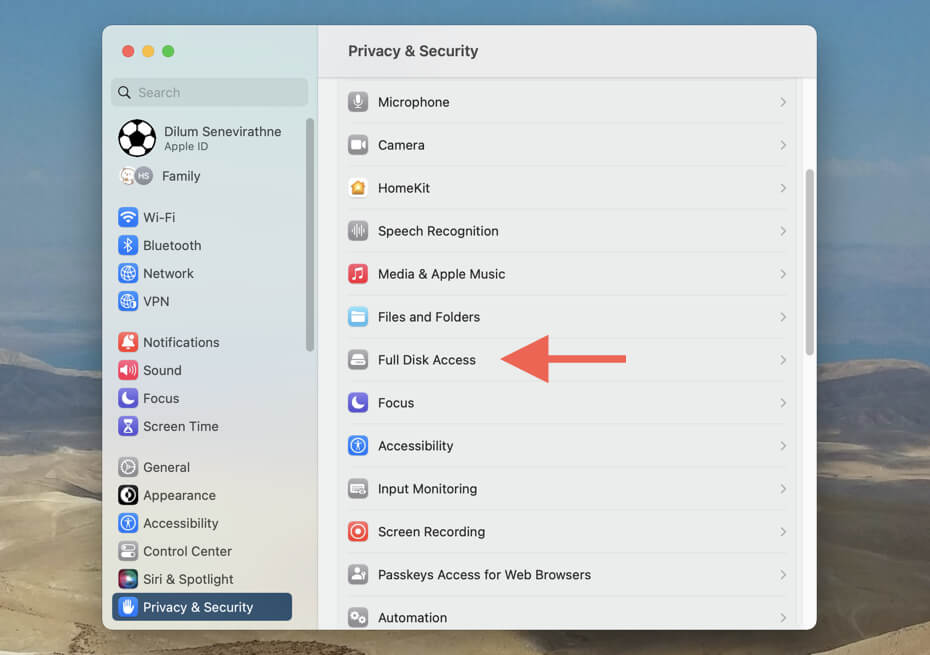
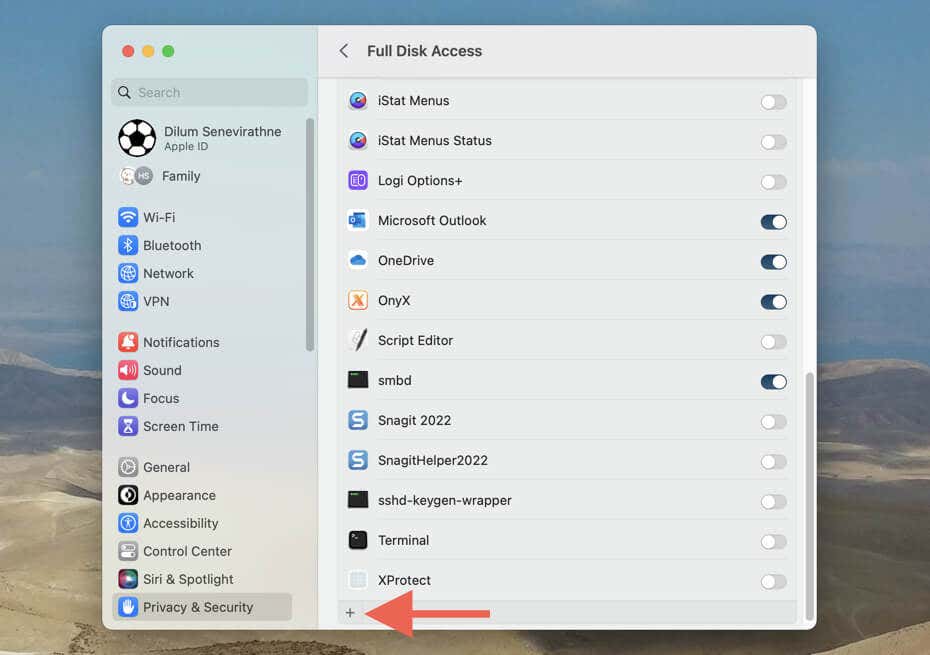
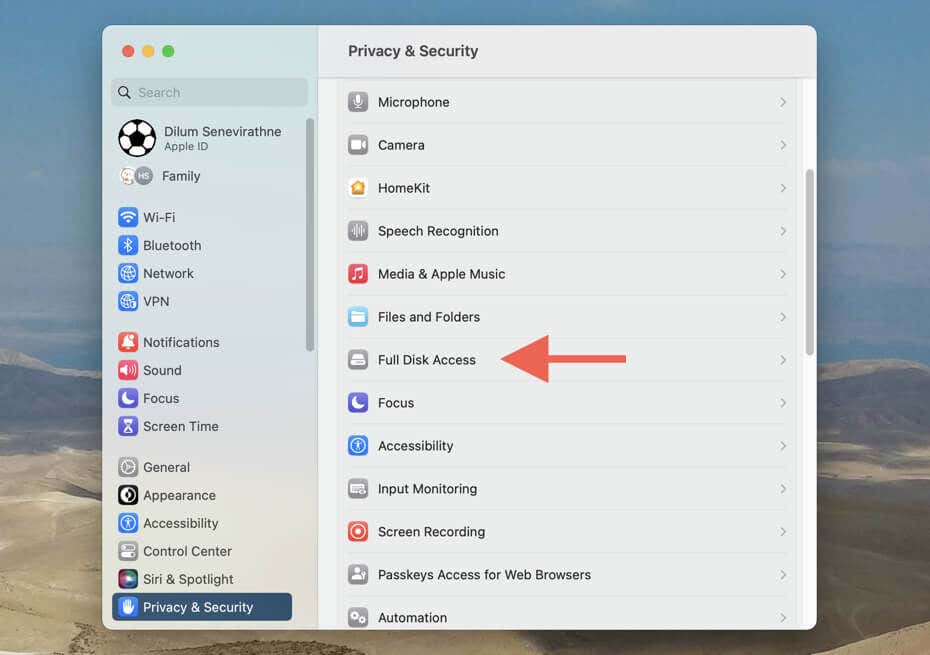
- Open System Settings, select Privacy & Security on the sidebar, and choose Full Disk Access.
- Select the Plus icon underneath the list of apps.
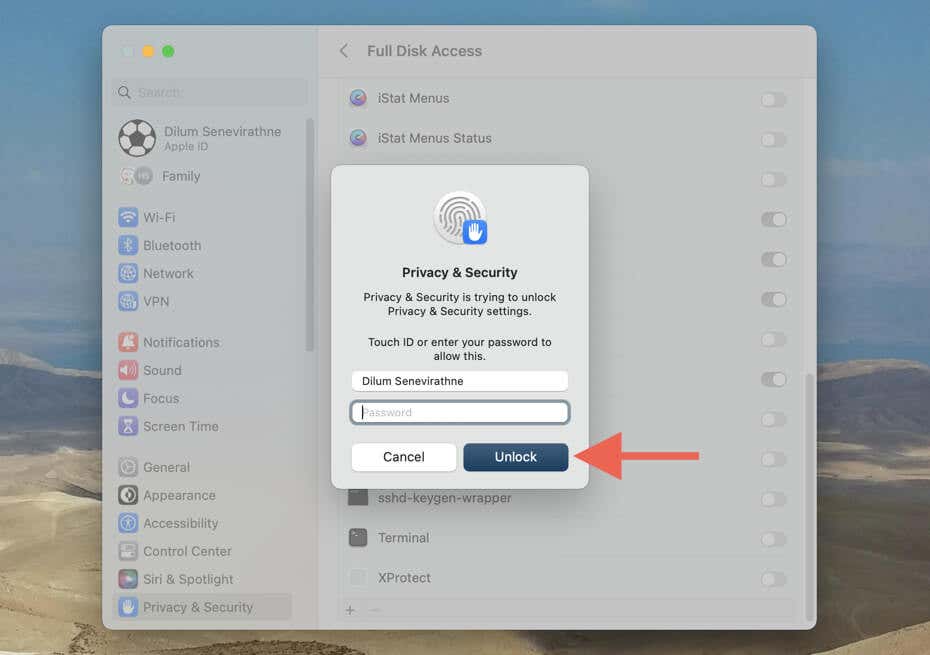
- Enter your Mac user account password to proceed.
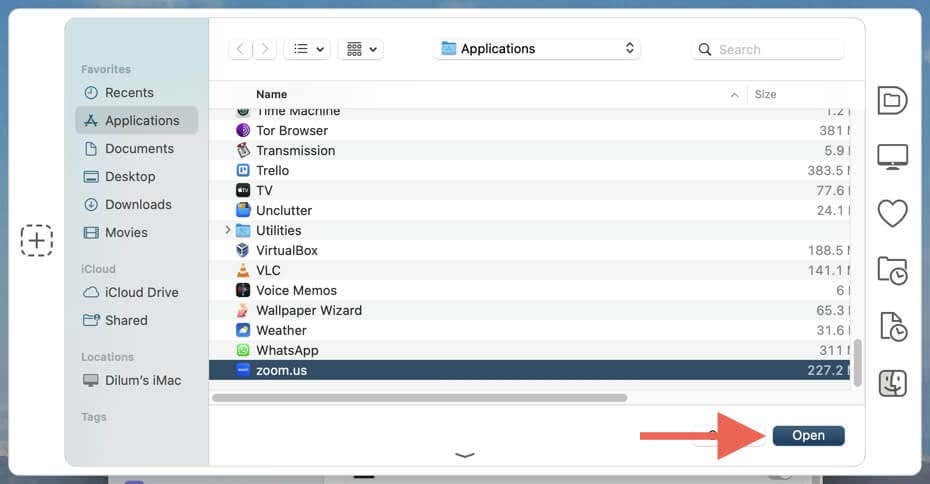
- Select Zoom.us from the Mac’s Applications folder and choose Open.
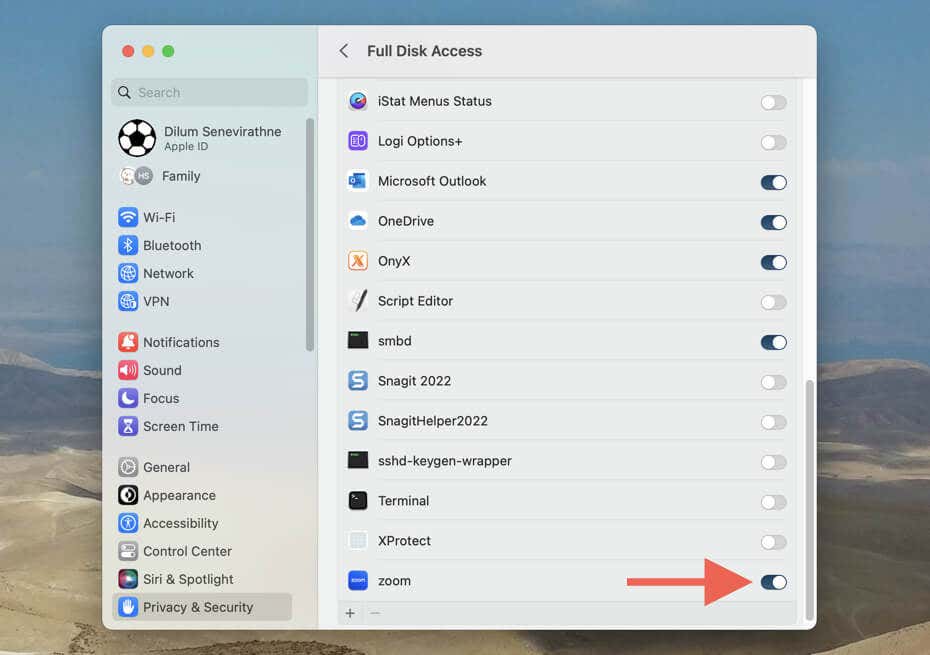
- Enable the switch next to Zoom.us.
Note: In macOS Monterey and earlier, open System Preferences and go to Security & Privacy > Privacy > Full Disk Access to provide Zoom with full disk access.
To stop Zoom from having unrestricted access to your Mac’s internet storage later, re-visit the Privacy & Security pane, select Full Disk Access, and turn off the switch next to Zoom.us.
Uninstall and Reinstall the Zoom App
If “error code 10004” persists, the only way to update Zoom is to uninstall the program and install its latest version on your Mac from scratch.
Instead of moving Zoom to the Mac’s Trash like any ordinary application, use the built-in uninstaller to remove the program and all its leftovers. Here’s how:
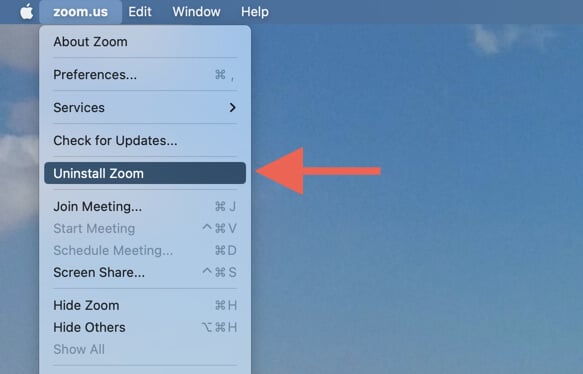
- Open the Zoom app and select Zoom > Uninstall Zoom on the menu bar.
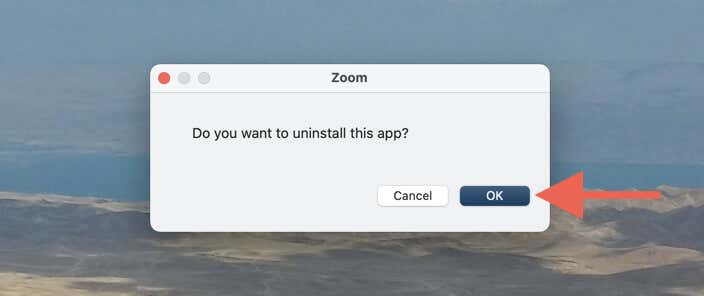
- Select OK.
- Enter your Mac user account password and select OK.
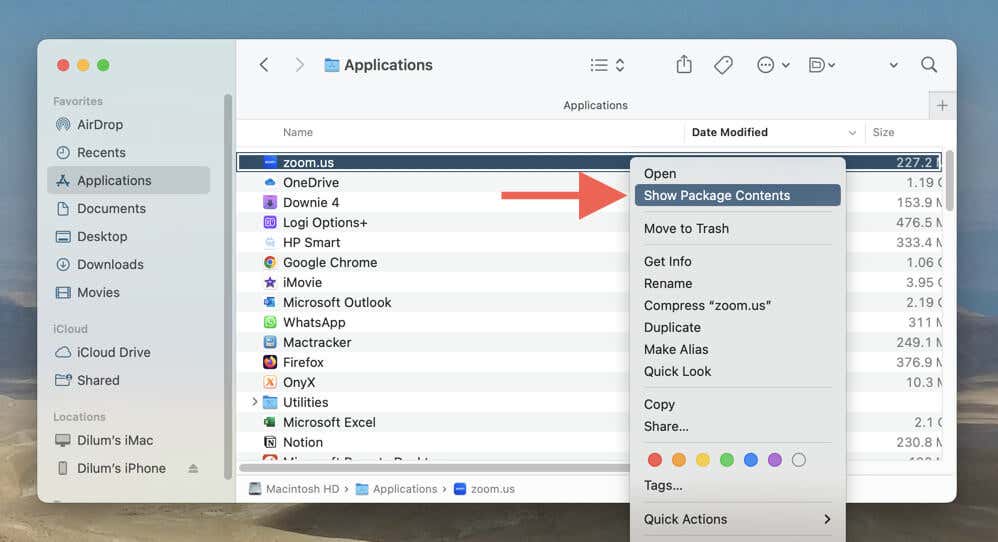
If you have trouble opening Zoom, an alternative way to access the uninstaller is to:
- Right-click Zoom.us within the Applications folder in macOS and select Show Package Contents.
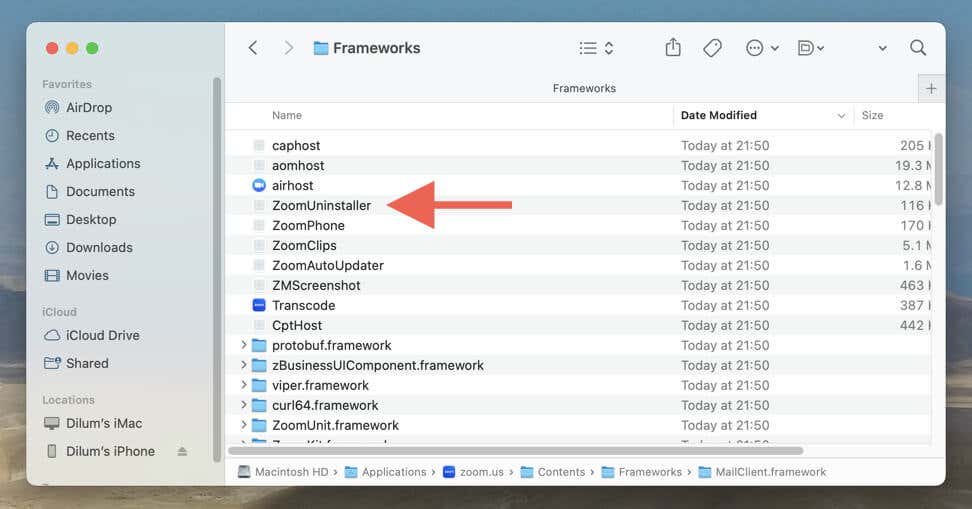
- Go to Contents > Frameworks and double-click the ZoomUninstaller file.
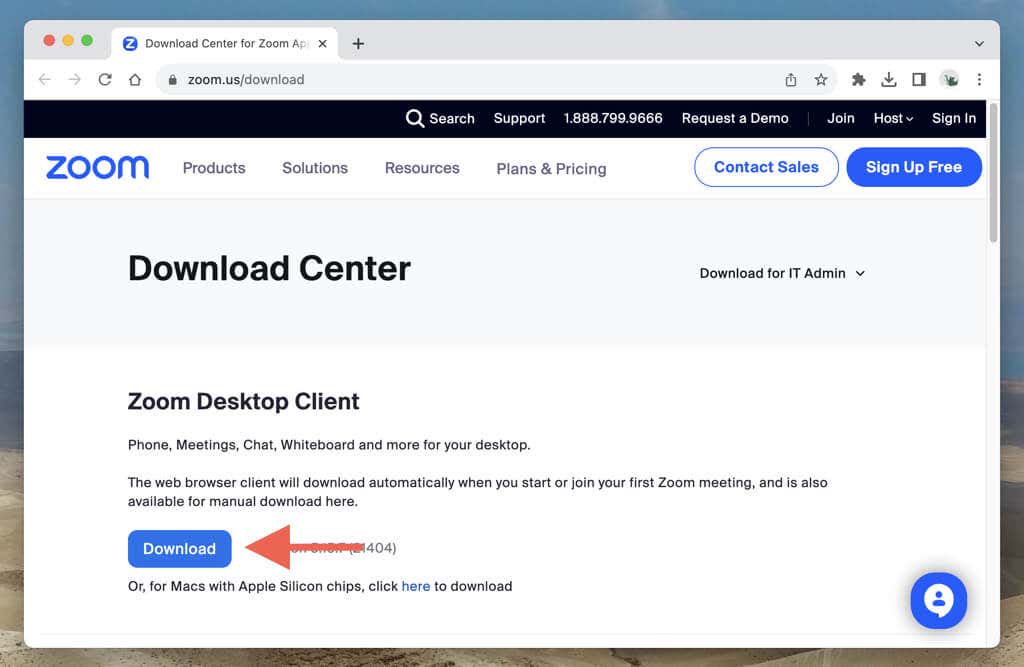
After uninstalling Zoom, open your web browser, visit the Zoom Download Center and download and install the latest version of the Zoom desktop client for your Mac.
If you use a Mac with an Apple Silicon chipset, make sure to download the correct version of the program. Then, run the downloaded file and follow all on-screen instructions.
Provide Elevated Installer Permissions and Retry
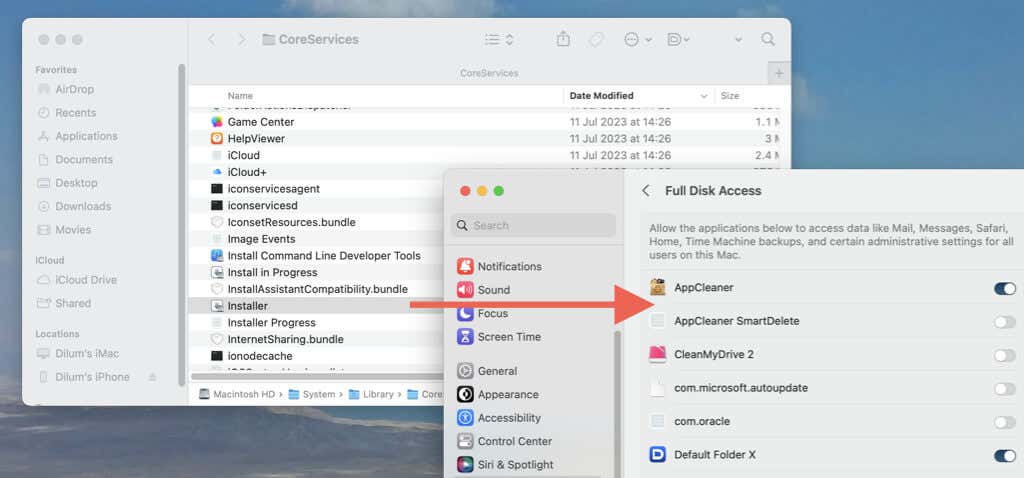
If the Zoom reinstallation process fails, provide the macOS Installer full disk access permissions and try again. To do that:
- Visit your Mac’s Privacy & Security console (Security & Privacy in macOS Monterey and older) and select Full Disk Access.
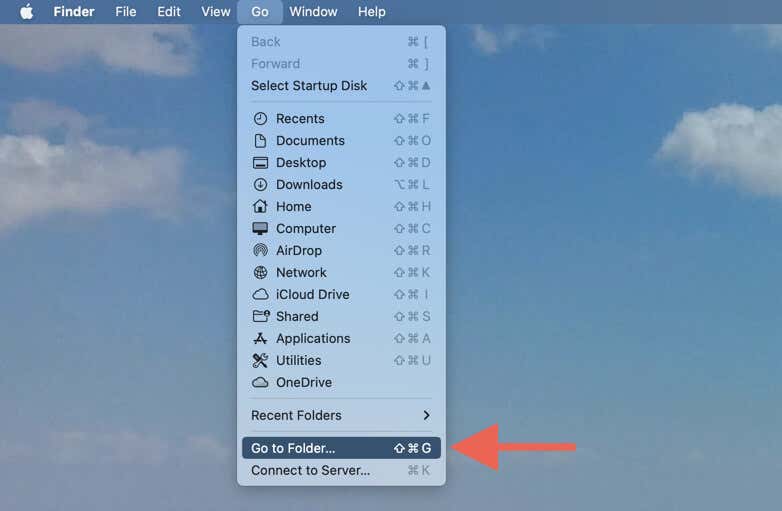
- Open a Finder window and select Go > Go to Folder on the menu bar.
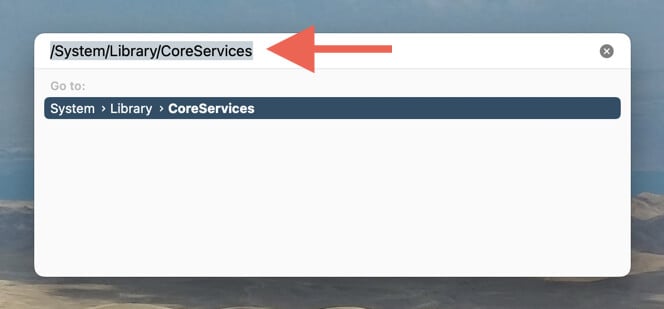
- Visit the following directory:
/System/Library/CoreServices
- Drag and drop Installer into the Full Disk Access console.
- Enter your Mac user account password to authenticate the action.
Attempt to reinstall the Zoom client again and revoke full disk access permissions to the macOS Installer after installation.
Fix Zoom Error Code 10004 on Mac
Zoom update error code 10004 is an annoying troubleshooting issue, given its complicated underlying nature, and you’ll likely have to uninstall and reinstall the application to circumvent it. You may also have to repeatedly work on the fixes above for future updates until Zoom’s development team comes up with a permanent fix. Contact Zoom Support and report the problem if it recurs on your Mac.
[related_posts_by_tax posts_per_page="5"]