Updating your Mac is essential if you want a long and happy life for your computer. Luckily, most of those processes are automatized on Mac and you don’t have to worry about installing updates. However, if something goes wrong, you’ll get a “macOS could not be installed on your computer” error message, and that’s something that you should worry about.
This error can be caused by a few different issues. The good news is, they’re all pretty easy to fix yourself. Learn what could be causing the “macOS couldn’t be installed on your computer” error and how to troubleshoot this issue on your Mac.

Why the macOS Couldn’t Be Installed Error Appears
There are quite a few different reasons why a macOS installation might fail. Some of the most common reasons why you’ve been getting this error include:
- Not having enough free space on your Mac
- Problems with your startup disk
- The macOS installer file’s corrupted
The error message that pops up normally comes with a message underneath it that gives you an explanation of what went wrong. The message might say “the path/System/Installation/Packages/OSInstall.mpkg appears to be missing or damaged”, “an error occurred while verifying firmware”, “unable to unmount volume for repair”, or something different. While these messages don’t offer too many details on what the problem is, they give you an idea of what stages of the installation process couldn’t be completed.
No matter what caused the error message to appear on your Mac, you can fix it by following the troubleshooting steps described below.
How to Prepare Your Mac for Troubleshooting
Before you begin troubleshooting the macOS installation error, you might want to protect your data and make sure you don’t lose any important information in the process.
It’s best if you make it a habit to back up your Mac before installing any major updates. Major macOS updates affect the files in your operating system. Should something go wrong, you’ll need to erase your Mac to fix it, meaning you’ll lose any files that aren’t a part of your most recent backup.
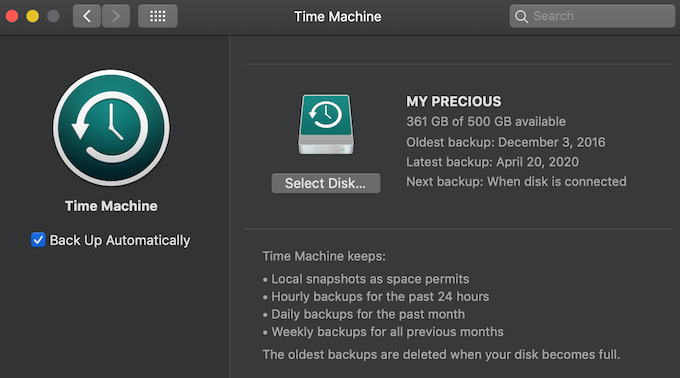
You can backup your Mac using Disk Utility or Time Machine before updating your computer. It’ll keep your data safe and allow you to restore the important files from the date of your choice in case something goes wrong and you have to erase your entire Mac.
How to Troubleshoot the Error: macOS Couldn’t Be Installed on Your Computer
After you’ve backed up your Mac, you can proceed to troubleshoot the error and complete installing the macOS update. As there are plenty of things that could be causing issues with your macOS update, any of the following methods might fix the problem. We recommend that you give all of them a try, starting with the easiest and quickest ones from the top of the list.
Restart Your Mac and Retry Installation
Restarting your Mac and trying to do the thing that just failed might seem silly, but sometimes all your Mac needs to sort any issues out is a restart.
To restart your computer, open the Apple menu in the upper-left corner of your screen and select Restart. If your Mac’s frozen, you can use the Power button to force a shutdown and then restart the computer. After that, attempt the installation again and see if it works.
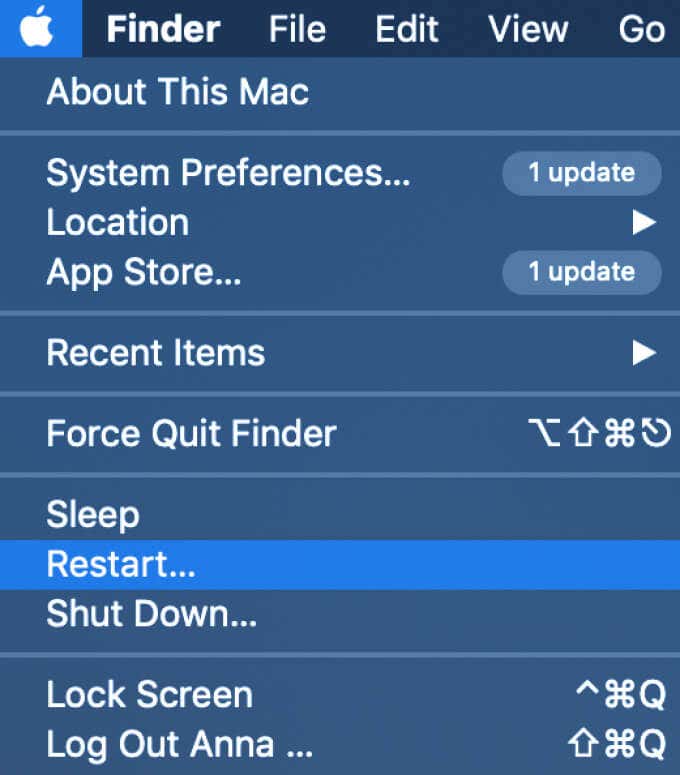
If it doesn’t work and your Mac’s stuck on a loop launching macOS installer upon restart, you might need to boot up in Safe Mode before you can move on to the next step. To do that, press and hold the Power button until your Mac shuts down. Then press and hold Shift when restarting your computer. When you boot up your Mac in Safe Mode, the installer won’t launch upon startup.
Check Your Date & Time Settings
Check the Date & Time settings on your Mac. If the date or time is wrong (i.e. doesn’t match the reality), this could be causing the problems when connecting with Apple’s servers and lead to an error installing the macOS update.
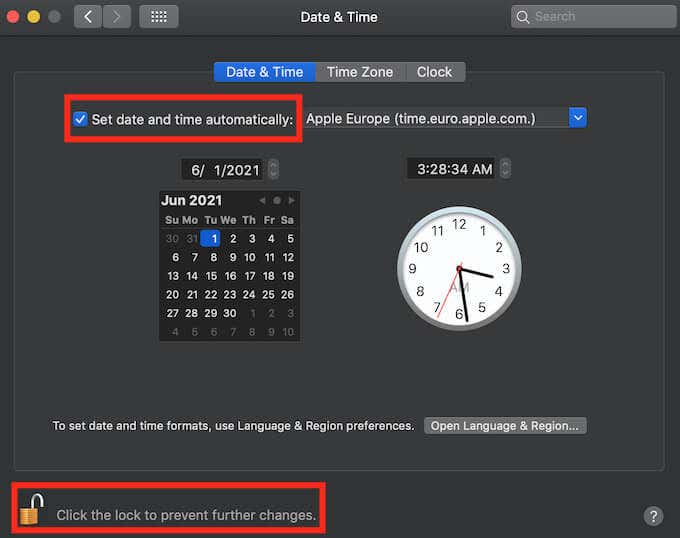
To fix your Date & Time settings, follow the path Apple menu > System Preferences > Date & Time. Select the lock icon and enter your password to make changes. Then set the date and time manually or select Set date and time automatically. After you’re finished, run the installation again and see if it works.
Free Up Space on Your Mac
Even though most macOS installers take up around 5GB of storage, your Mac needs to have about 20GB of free space to complete an installation. It’s because the macOS installer needs extra storage to work and unpack files and folders.
Check how much free space your computer has before trying to install the update. Follow the path Apple menu > About This Mac > Storage. The free space is marked Available on the right side of the bar. Select Manage to see which files are using the most space in detail.

If you find that there isn’t enough space to complete the macOS installation, you can use various methods to free up storage on your computer.
Download a New macOS Installer File
Since the installation process was interrupted, the macOS installer might have become corrupt. The next step is to move the installer file to Trash and replace it with a new one.
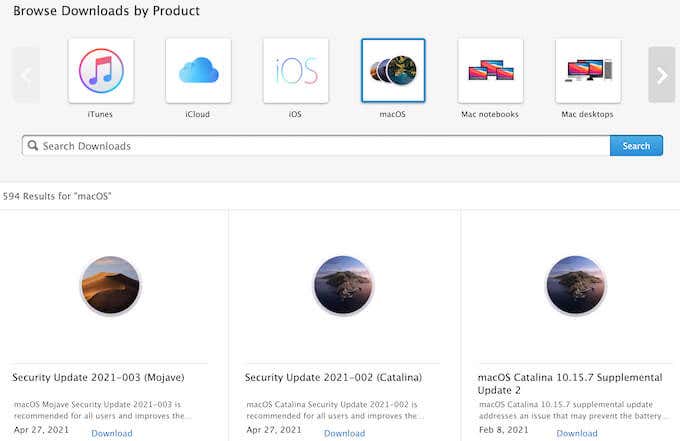
You can download a new copy of macOS installer directly from Apple’s support page, or by using the App Store or System Preferences on your computer. Once you’ve downloaded the new macOS installer, try to launch the installation process again.
Reset the NVRAM
The NVRAM stores various settings such as the time, screen brightness, monitor resolution, and the startup disk on your Mac. When these settings change and errors occur, this may cause problems with your macOS installation process.
The solution here is to reset your NVRAM and attempt the installation again. To do that, restart your Mac and hold Option + Cmd + P + R while it starts (about 20 seconds). Then try installing the macOS update again.
Run Disk Utility’s First Aid
One of the possible causes for the error in the macOS installation process is disk permission or fragmentation errors on your startup disk. They’re easy to fix using the pre-installed app on your Mac called Disk Utility.
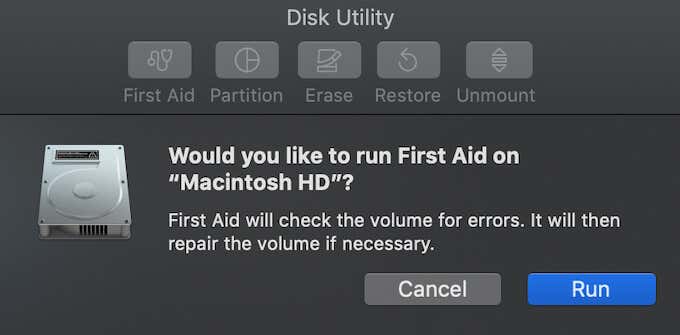
To do that, follow the path Applications > Utilities > Disk Utility. Then select your Mac’s startup disk from the sidebar (ex. Macintosh HD) and select First Aid. Disk Utility will scan your startup disk for errors and repair them. This fix is particularly useful if you’re getting the “unable to mount volume” error when trying to install the macOS update. After it’s done, try to install the macOS update again.
Reinstall macOS on Your Mac
This one’s probably the most time-consuming method, but if you’re still getting the same error during the macOS installation you might have to reinstall the whole operating system on your Mac.
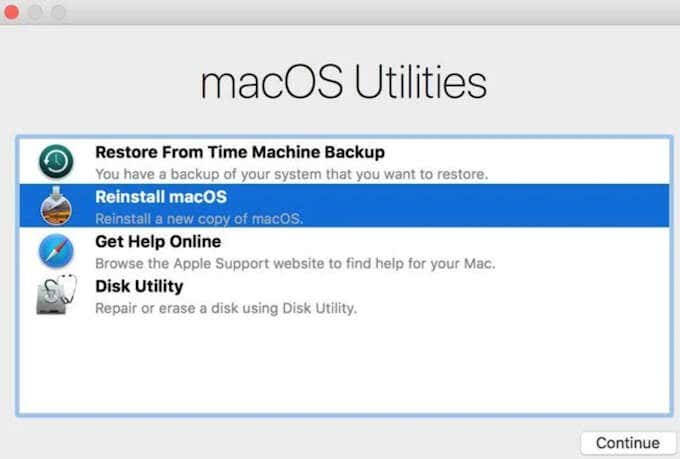
To reinstall macOS, you’ll need to restart your Mac and boot up in Recovery Mode by holding Option + Cmd + R while your computer starts. After about 20 seconds you’ll see an Apple logo – you can now release the keys. From the macOS Utilities window, select Reinstall macOS to install the latest version of macOS on your computer. Make sure to allow some time for this, since your Mac will first need to download the new software and then install it.
Restore from a Backup
If nothing else works, the last troubleshooting method is to erase your startup disk and reinstall macOS from scratch. After that’s complete, you can restore all of your data from a backup. Unfortunately, you’ll lose anything that’s not included in your most recent backup.
What to Do to Prevent Future macOS Errors
Getting an error message that interrupts your macOS installation is annoying. While you can easily troubleshoot this, it still delays your computer’s updating process and can be extremely time-consuming.
There are plenty of diagnostic tools for Mac that you can use to find and resolve any future issues before they even become a problem. It’s much easier and quicker to prevent any errors from disrupting your computer’s work in the first place.
Have you ever had to deal with the error “macOS could not be installed on your computer”? Which troubleshooting technique worked for you? Share your experience with installing macOS updates in the comments section below.