Cellular carriers use a unique 10-digit Mobile Identification Number (MIN) to identify you and your device on their networks. For wireless networks, a Media Access Control (MAC) address is the unique metric used to identify and differentiate your device from other users.
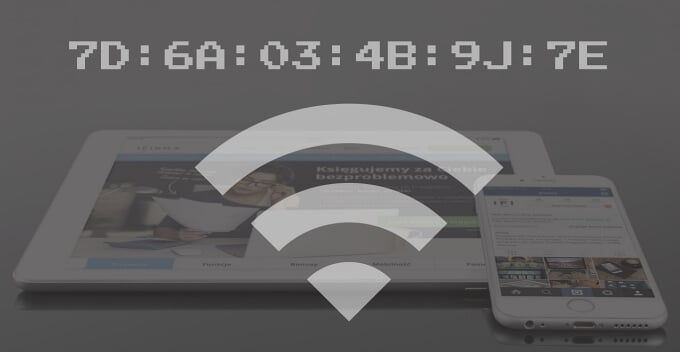
A MAC address consists of an alphanumeric combination of twelve hexadecimal characters grouped into pairs by a column. Some devices separate the paired characters with a hyphen or dash (-) while others simply leave a space between the pairs.
There are many reasons why you’d need your iPhone or iPad’s MAC address. It could be to track data usage on your home network. When setting up a Quality of Service (QoS) filter on your router, you’ll always need the MAC address of the device you want to prioritize. Want to allow only a specific device on your network? Your router may require the device’s MAC address.
Let’s look at the several ways to find the MAC address of an iPhone and iPad.
1. Check the iPhone or iPad Info Menu
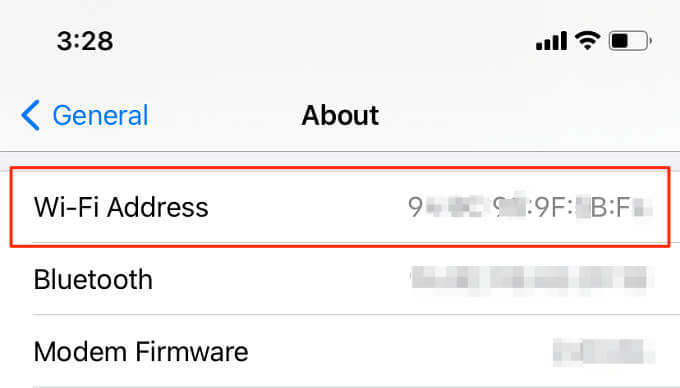
Open the Settings app and navigate to Settings > General > About and scroll to the network section of the page. You’ll find your iPhone’s MAC address in the Wi-Fi Address field.
2. Check the Network Settings Menu
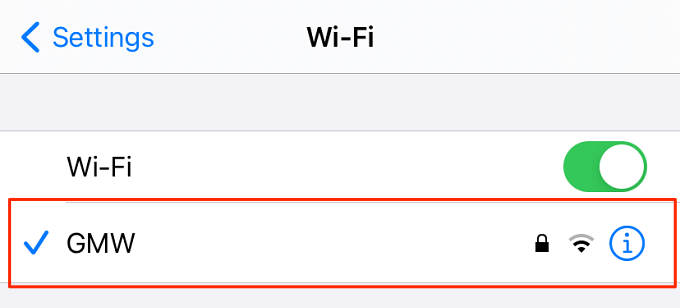
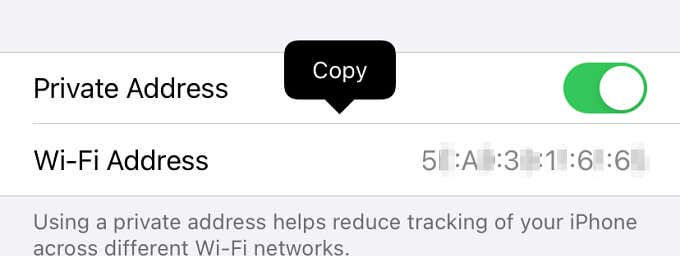
This setting is the easiest way to check your iPhone or iPad’s MAC address. Open the iOS or iPadOS Wi-Fi settings from Settings > Wi-Fi, and tap the active Wi-Fi network.
You’ll find your iPhone’s MAC address in the Wi-Fi Address field.
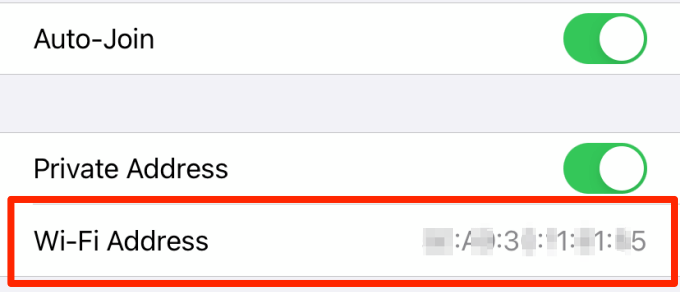
Quick Tip: To copy your device’s MAC address, long-press the Wi-Fi Address field and tap Copy.
3. Check Your Router’s App
If your Wi-Fi router has a dedicated app for iOS, you should be able to check your iPhone’s MAC address via the app. The steps to finding your iPhone’s MAC address through a router app may vary depending on your router’s brand, model, as well as the app’s design, interface, or version.
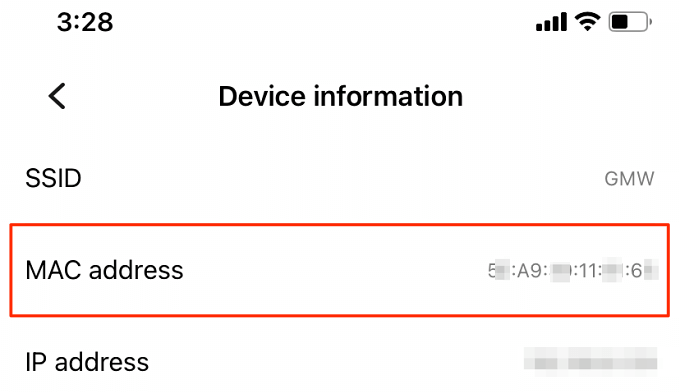
Nonetheless, we’re confident that you’ll find the information you need in the device management menu of your router’s app. Check the list of devices connected to your Wi-Fi router and select your iPhone. Go through the device information page and check for a MAC address field—or an alphanumeric combination of twelve characters.
Can’t find your iPhone on the list of connected devices? Disable your iPhone’s Wi-Fi, rejoin the network, and check again. Closing and reopening the app could also fix the problem. Finally, and most importantly, ensure the app is updated—open the App Store and check if there’s an update available for in the App Store and check if there’s
4. View MAC Address From Your Smart Home App
If you have linked the router to your smart home app, you should be able to check the MAC addresses of devices connected to the router. I use Huawei’s AI Life app to manage devices on my smart home network. The app has a “Device information” section that displays the IP address and MAC address of all devices connected to my Wi-Fi router.
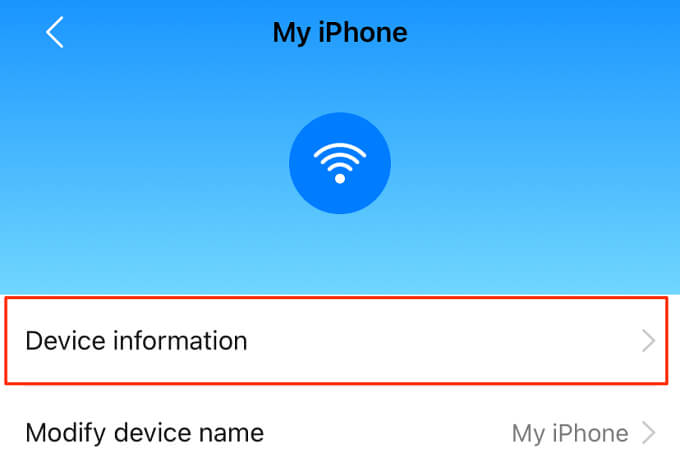
Connect your iPhone to your home network and go through your smart home app settings or device management menu.
5. Using a Web Browser
Your router’s administrative console grants you the power to manage how devices interact with your network. You can change your network configurations, disable internet access, check the MAC addresses of connected devices, and so on.
Go through the router’s instruction manual or contact the manufacturer to learn how to access the admin panel. You’ll need to visit a unique IP address on your web browser and enter the router’s administrative credentials (i.e., username and password).
When you log in, head to “WLAN Settings,” “Wi-Fi Settings,” “Wi-Fi Status,” or the “Device Management” menu to view devices connected to the network. Locate your iPhone on the list and check its MAC Address.

Again, it’s worth mentioning that we cannot accurately list the steps to access your router’s admin panel. That’s because the procedure may differ based on your router’s brand, admin panel gateway, internet service provider, among other factors.
iOS Private MAC Address Explained
The MAC address in your iPhone’s settings menu should correspond with the MAC address on your router. That’s how it has always been until the introduction of iOS 14. Apple believes that using the same Mac address across several networks makes it uber-easy for internet service providers (ISPs) and other related parties to track your location and monitor your activity over time.
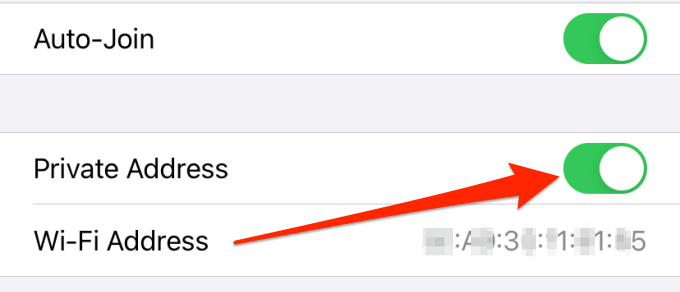
To prevent that from happening, Apple introduced “Private Wi-Fi Addresses” on iOS 14, iPadOS 14, and watchOS 7. This feature is enabled by default on all devices running the aforementioned operating system.
This iOS feature assigns a unique MAC address for every Wi-Fi network. Meaning your iPhone or iPad will have different MAC addresses for network A, network B, network C, and so on.
It’s a brilliant, privacy-focused concept, no doubt. But not all networks support devices using a private address. If you’re having difficulties accessing the internet on a Wi-Fi network, Apple recommends disabling the Private Address for that network.
Go to Settings, select Wi-Fi, tap the affected network, and toggle off the Private Address option.
Obsolete Method: Third-Party Network Apps
Before now, many iPhone and iPad users checked their device’s MAC address on network monitoring tools and Wi-Fi analyzer apps. Things changed when Apple launched iOS 11 and blocked third-party applications from reading MAC addresses.
Do you know any other built-in technique or third-party tool for checking MAC addresses on iPhone or iPad? Share with us in the comments below.
Related Posts
- How to Delete Multiple Apps (At Once) On Your iPhone/iPad
- How to Restore the Missing Phone Icon on iPhone/iPad
- How to Dismiss the “Update Apple ID Settings” Notification on iPhone and Mac
- How to Change Your Game Center Nickname (iPhone, iPad, and Mac)
- Guided Access Not Working on iPhone/iPad? Try These 9 Fixes Now