Your Mac lets you configure both native and third-party programs to load alongside macOS. So add any frequently-used apps into your list of login items, and you get to start using them immediately after booting into the desktop area.
But on the flip side, having lots of programs launching at startup can be detrimental to your Mac’s performance. They may result in lengthy macOS boot times, and the increase in system resource usage could also create slowdowns and delays during regular use.

In this tutorial, you will learn how to manage startup programs in macOS. You’ll start by figuring out how to enable or disable startup apps on your Mac. Then, you’ll explore multiple ways to disable programs and processes that launch at startup despite not appearing in your login items list.
Enable or Disable Startup Programs in macOS
It’s possible to set up any program to launch alongside macOS by adding it to the list of login items on your Mac. You can use the System Preferences app or Dock for that. Optionally, various applications may provide built-in options that you can activate to make them load at startup.
If you want to stop programs from loading as your Mac boots, all you’ve got to do is remove them from the login items list using the same set of instructions.
Access the Login Items List in the System Preferences App
The System Preferences app on your Mac lets you add applications to a list of startup items related to your user account. You can also use it to disable programs from loading at startup.
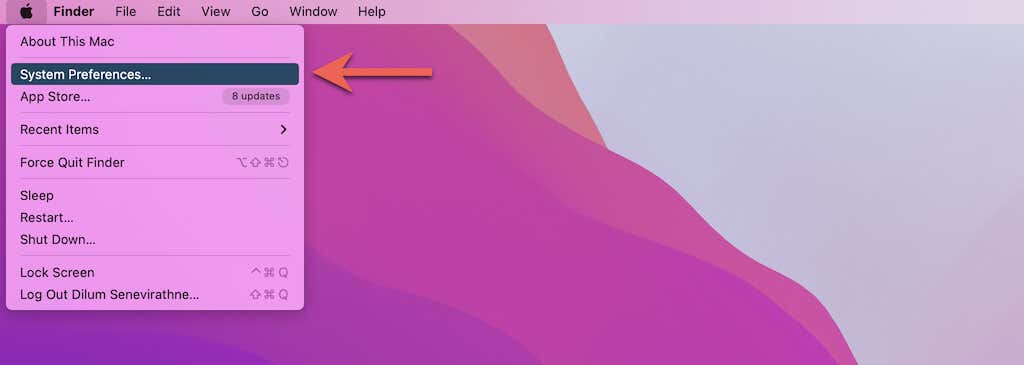
1. Open System Preferences via the Apple menu or Dock.
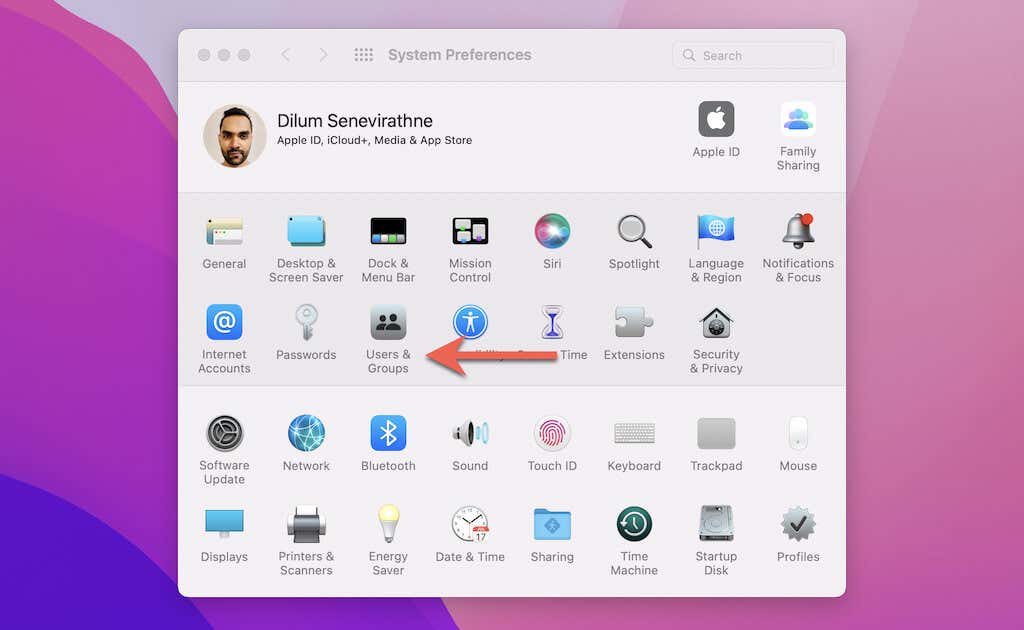
2. Select Users & Groups.
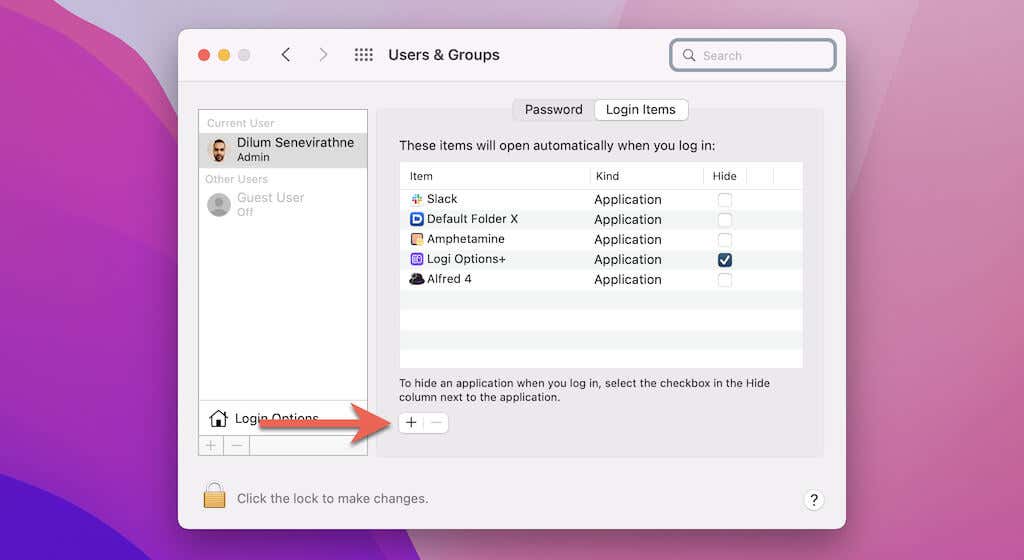
3. Select your user account and switch to the Login Items tab.
4. Select the Add (+) button underneath the login items list.
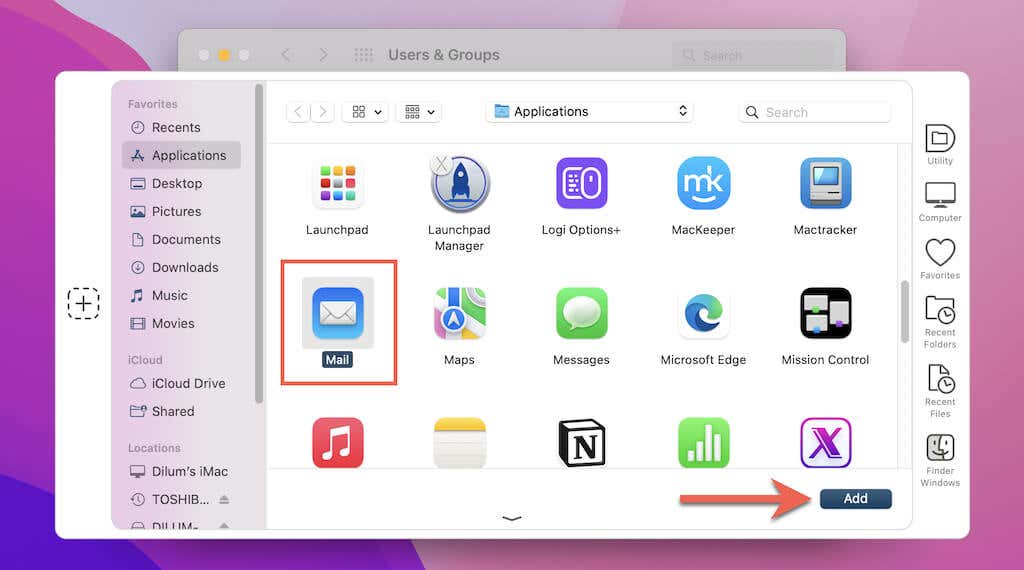
5. Select Applications on the Finder sidebar. Then, pick an application you want your Mac to load at startup—e.g., Mail.
6. Select Add.
You’ll then see the program appear as a Mac startup app within the login items list. Select the checkbox under the Hide column if you want your Mac to hide the program after loading it at startup.
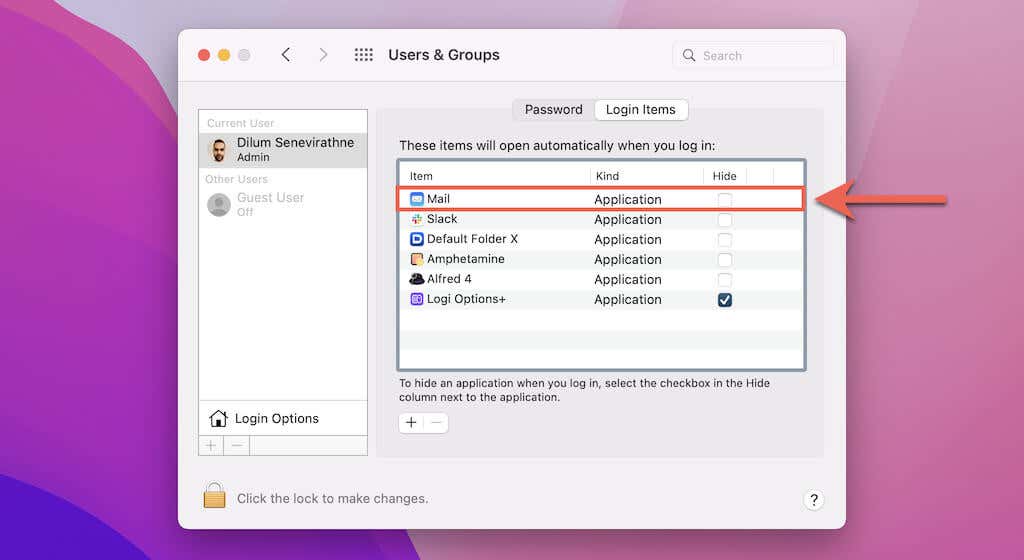
If you want to disable a startup program within the list of login items, simply highlight it and select the Minus button.
Use the Mac Dock to Add & Remove Startup Programs
A faster way to add an application to your Mac’s startup programs list is by interacting with it via the Mac’s Dock. You can also use the same steps to remove applications from the list.
1. Control-click or right-click the program’s icon on the Dock. If it’s not present, launch it first via the Launchpad.
2. Point to Options.
3. Activate the sub-option labeled Open at Login.
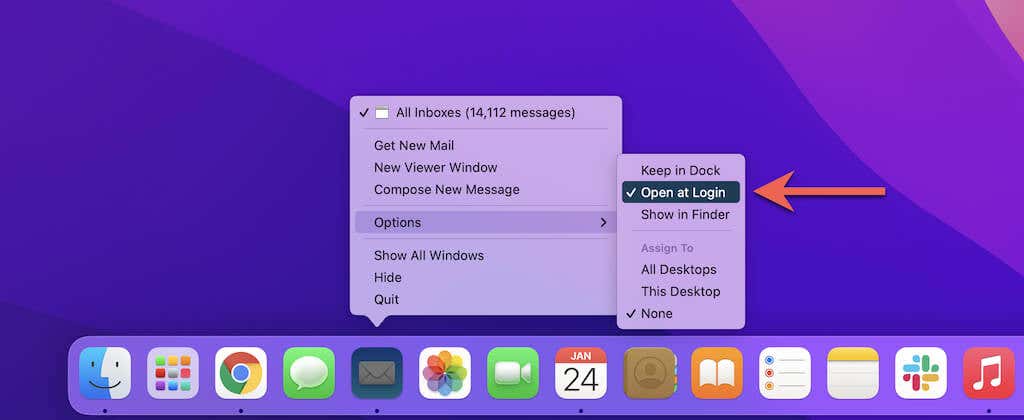
If you want to disable the program from launching at startup, select Open at Login again to deactivate the menu option.
Look for Startup Option in the Application Preferences
Various apps—such as programs that reside on the menu bar—may offer built-in options capable of enabling or disabling them from loading automatically at Mac startup.
1. Launch the program on your Mac.
2. Load the application’s Settings or Preferences pane via the menu bar.
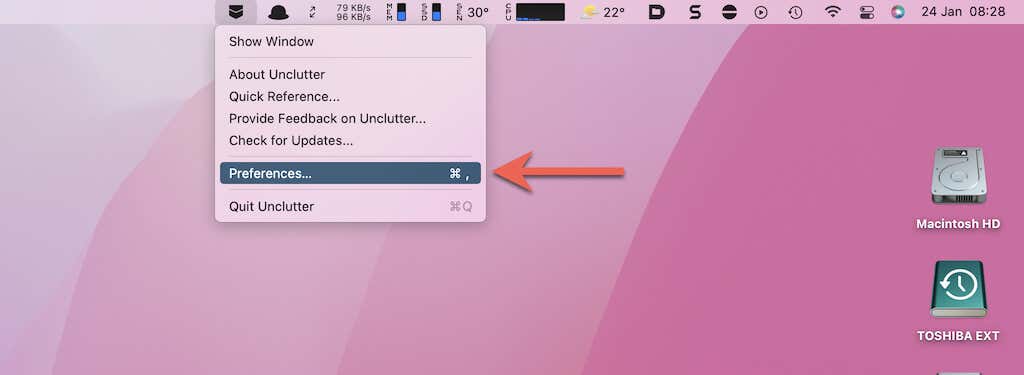
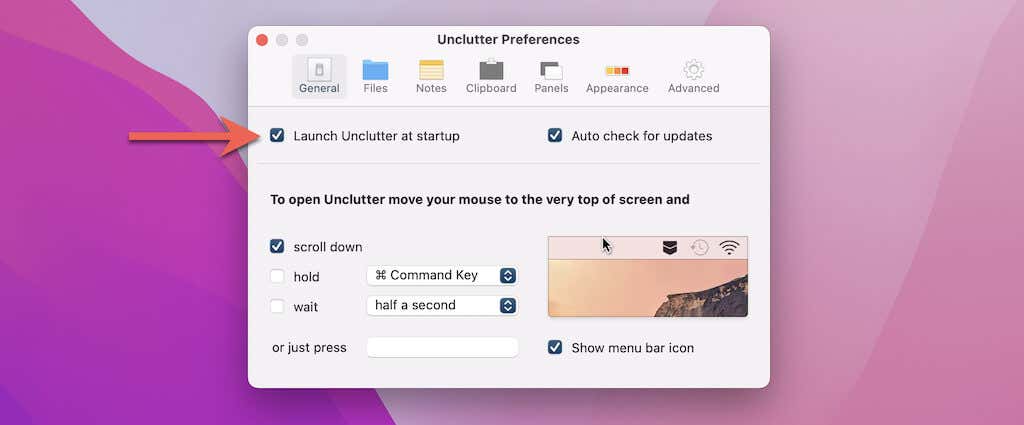
3. Locate and activate the option that allows the app to launch itself at startup. If you want to disable it as a startup program, deactivate the option. For example, Unclutter features a Launch Unclutter at startup option under the General tab that you can turn on or off.
Additional Ways to Disable Startup Programs
Some programs and third-party services (such as application auto-updater tools) will launch automatically at startup despite not being included in your Mac’s login items list. If they hurt the Mac’s startup time, use the methods below to remove them.
Check Your Mac for Launch Agents and Daemons
Installed programs Mac can use launch agents and daemons (through PLIST files) to launch themselves at startup. These files are present in multiple locations, and deleting them may lead to system instability. But it’s generally safe to remove PLIST files from the LaunchAgents and LaunchDaemons library folders inside your Mac’s user account. Regardless, it’s best to create a Time Machine backup of your Mac before going ahead.
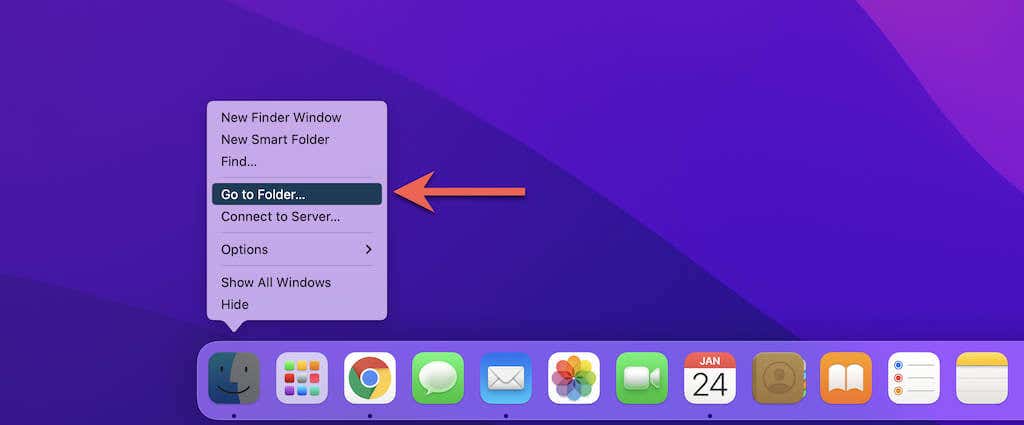
1. Control-click the Finder icon on the Dock and select Go > Go to Folder.
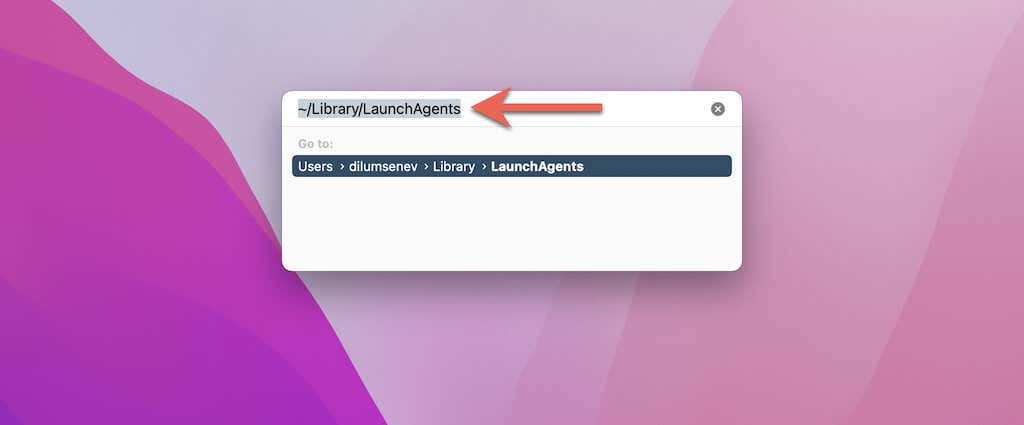
2. Type the following path and press Enter:
~/Library/LaunchAgents
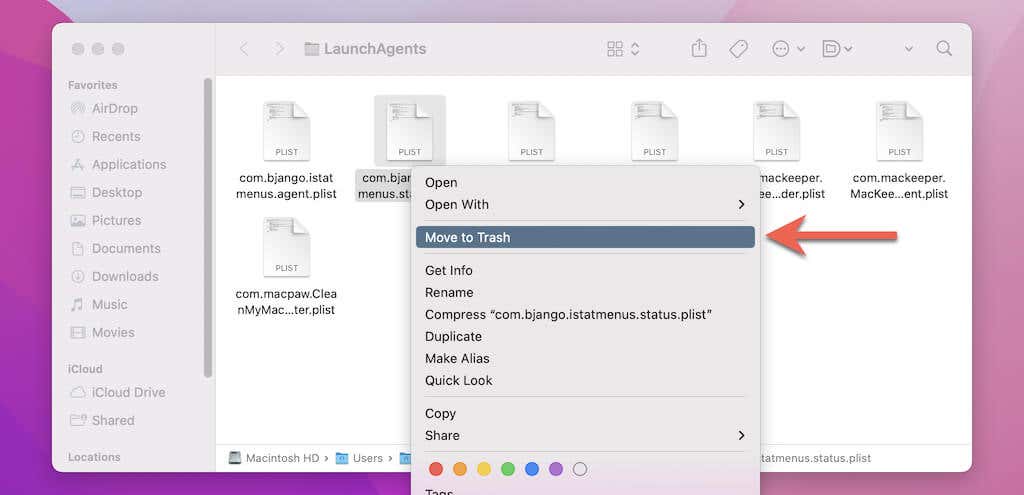
3. Identify any PLIST files related to the programs. Then, Control-click or right-click each file and select Move to Trash.
4. Visit the following directory next:
~/Library/LaunchDaemons
5. Delete any additional PLIST files related to the startup program.
Disable Startup Programs Using Third-Party Utility
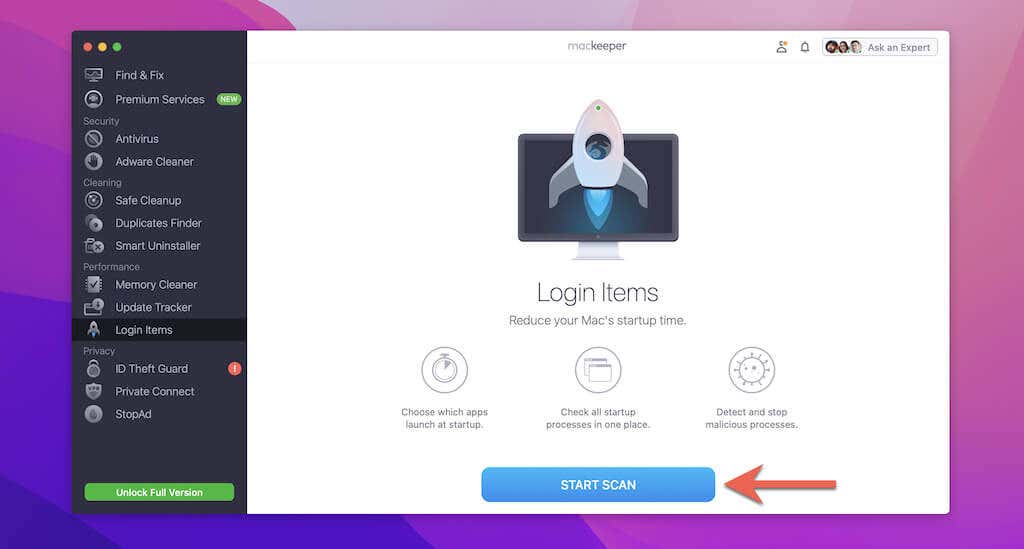
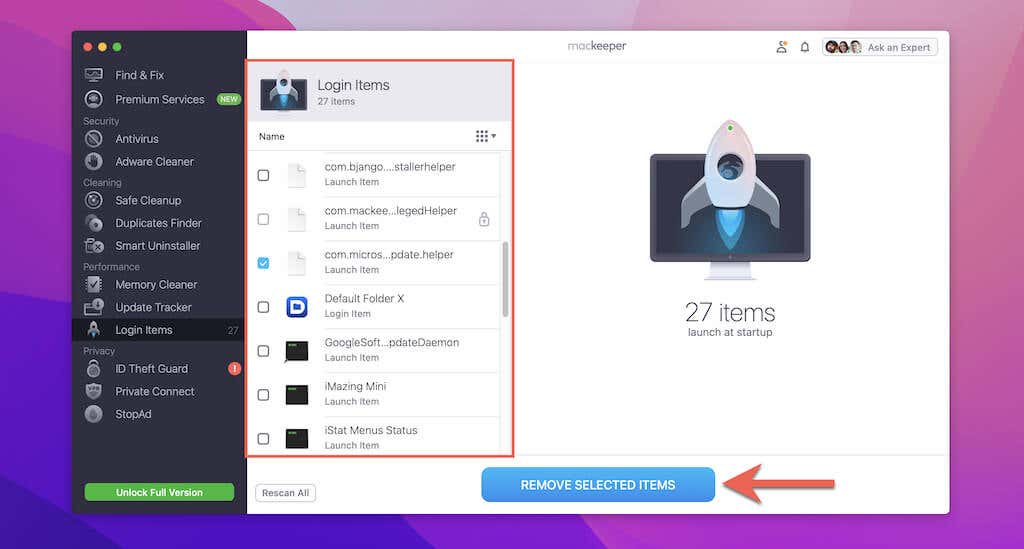
If you find it challenging to remove launch agents and daemons of a program using Finder, try using the free version of a third-party Mac optimization tool such as MacKeeper, CleanMyMac X, or Nektony instead. As an example, here’s MacKeeper in action.
1. Download and install MacKeeper. When prompted, provide the program access to your Mac’s user account folders.
2. Switch to the Login Items tab on the sidebar. Then, select Start Scan.
3. Review the list of apps and services that load at startup.
4. Place a checkmark next to each program you want to remove.
5. Select Remove Selected Items.
Perform a Thorough Scan for Malicious Software
Suppose an unusual program or process continues to load alongside macOS at startup. In that case, it’s generally good practice to rule out a possible malware infection by running a thorough scan for malicious software. Malwarebytes is an excellent malware removal utility that can help you do that.
1. Download and install the free version of Malwarebytes on your Mac.
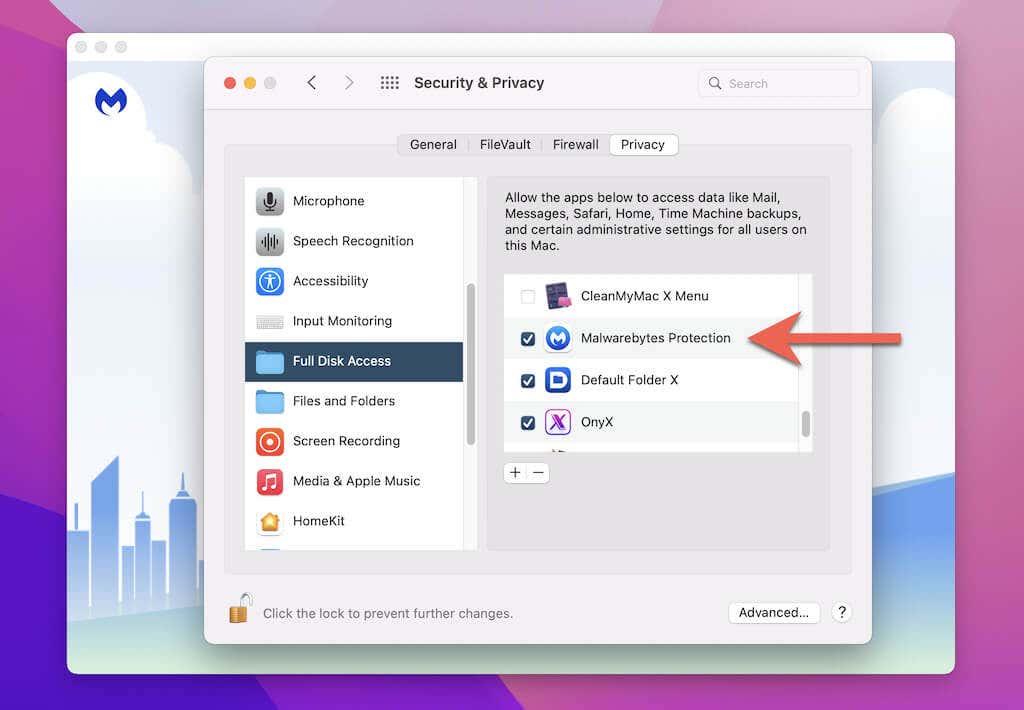
2. Open Malwarebytes and provide the utility permissions for Full Disk Access.
2. Select the button labeled Scan.
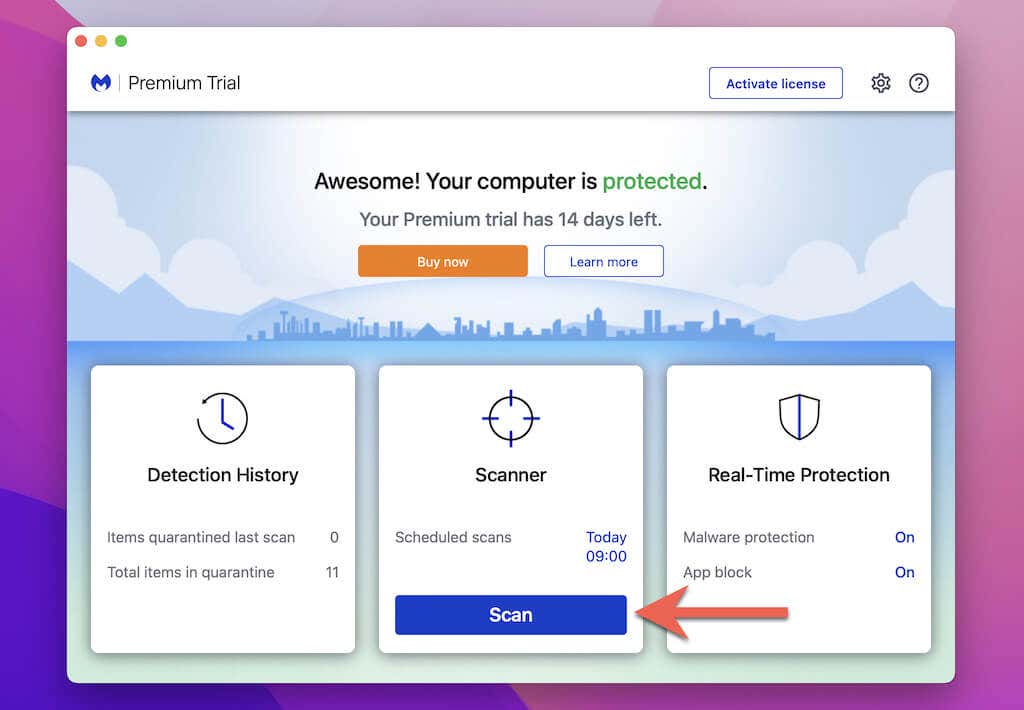
3. Wait until Malwarebytes finishes scanning your Mac for malware. Then, follow any on-screen instructions to remove malicious programs and startup processes.
Repeat Above Instructions in Safe Mode
If you still keep running into issues with a particular startup program, it’s best to repeat the above instructions by entering Safe Mode on your Mac. It’s an environment that only loads the bare essentials to keep your Mac functioning, and that makes it easier to troubleshoot and remove adamant applications from loading with macOS. Apple Silicon and Intel Macs require different processes to enter Safe Mode.
Enter Safe Mode on Apple Silicon Macs
1. Turn off your Mac.
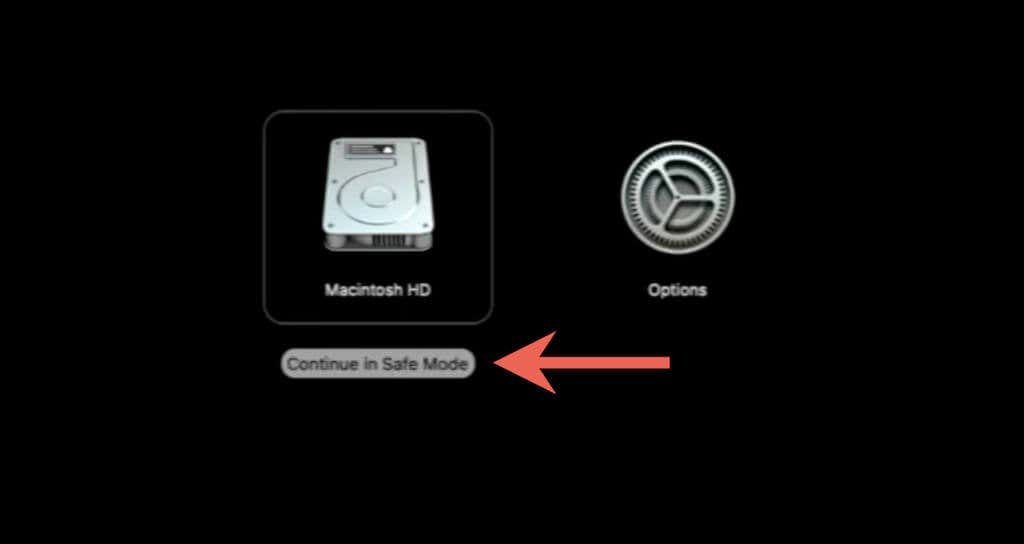
2. Press and hold the Power button until you get to the startup options screen.
3. Hold down the Shift key and select Macintosh HD > Continue in Safe Mode.
Enter Safe Mode on Intel Macs
1. Turn off your Mac.
2. Hold down the Shift key and press the Power button.
3. Release the Shift key once you get to the Mac’s login screen.
After Booting Your Mac Into Safe Mode
In Safe Mode, work through this tutorial again to disable startup programs. Begin by checking your login items list, looking for built-in startup preferences, and searching for launch agents in the library system folders. Then, try using a third-party startup manager or run a scan for malware. Refer to our guide to entering and using Safe Mode on Mac for more information.
[related_posts_by_tax posts_per_page="5"]