Google Chrome is a popular web browser known for its fast performance, clean interface, and numerous built-in features. If you’re stuck using Safari, it might be time to consider installing Chrome on your Mac.
It’s not difficult to download and install Chrome on a Mac, but you may need to consider some things before (such as your system requirements) and afterward (such as any extra configuration). To get started, follow the steps below.

System Requirements for Chrome on a Mac
Before downloading and installing Google Chrome on your Mac, ensure that your system meets the necessary requirements. This will ensure that the browser runs smoothly and efficiently on your device.
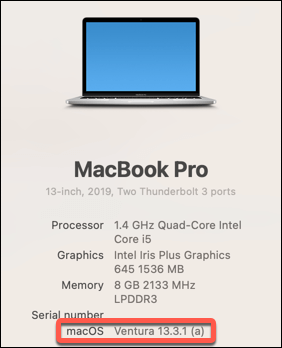
The main system requirement for Google Chrome on a Mac is that you’re running macOS 10.13 (High Sierra) or later. High Sierra was released back in 2017, so a modern Mac should run Chrome.
If you’re unsure, check what macOS version you’re running first before you download Chrome. If you aren’t running High Sierra, you’ll need to update your Mac to a newer version.
Alternatively, you can try and download an older version of Chrome, but this isn’t recommended. Browser updates come with important security and bug fixes that could leave your Mac exposed to malware, so you should always try to run the latest version of Chrome on your Mac.
Downloading Google Chrome on a Mac
Before you can install Chrome, you’ll need to download the installation file for it first. Before you begin, ensure that you have a stable internet connection and you’re able to access the internet using Safari or another web browser.
One word of warning however. You should always make sure that you download the latest version of Chrome and only download it from the official Google Chrome website. Only the installer from Google itself is one that you can trust—otherwise, you may end up downloading malware instead.
To download Chrome, follow these steps.
- Open the official Google Chrome website in Safari or another web browser on your Mac.
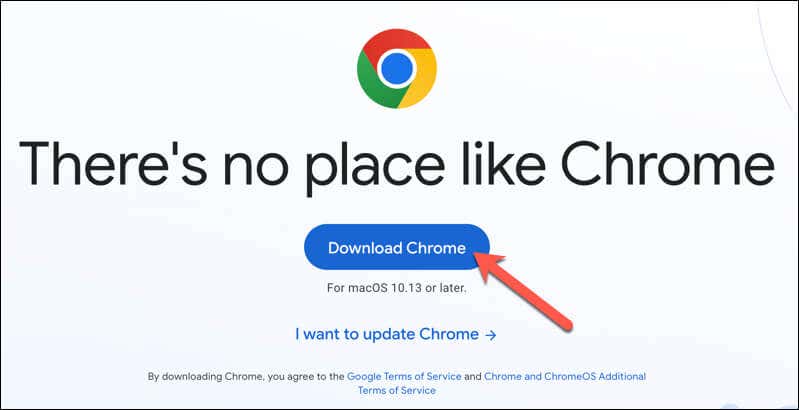
- You’ll see the option to download Google Chrome on the page—press the Download Chrome button to begin.
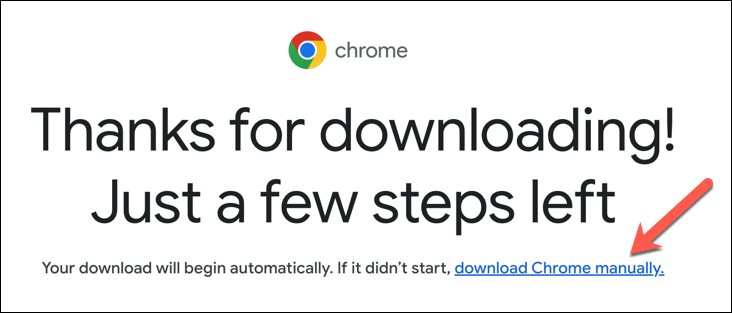
- Chrome will begin to download the googlechrome.dmg file. If it doesn’t, press the download Chrome manually link.
- Once it’s complete, run the installer file to begin the installation.
Installing Google Chrome on a Mac
To download and install Google Chrome on your Mac, follow these simple steps.
- If you haven’t already, download the installation file from the Google Chrome website using the steps above.
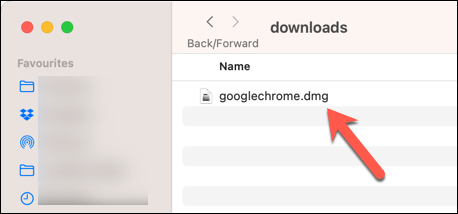
- Locate the downloaded file (usually in your Downloads folder) and double-click on the googlechrome.dmg file to open it.
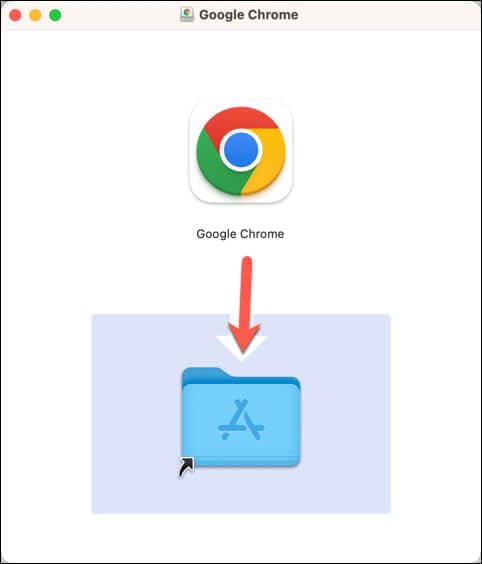
- A window containing the Chrome icon will appear—drag the Chrome icon into your Applications folder, which should also be visible in the same window.
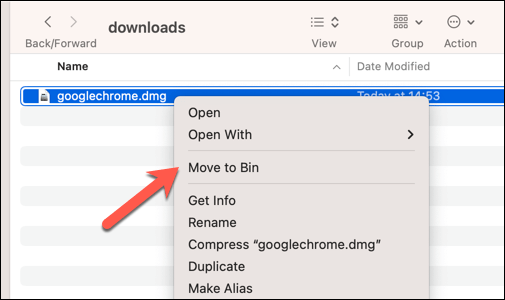
- Once the installation is complete, you can clean up the installer files. Go to Finder > Downloads and drag the googlechrome.dmg file to the Trash folder (also called the Bin folder in certain locales). Alternatively, right-click the file and select Move to Trash (or Move to Bin).
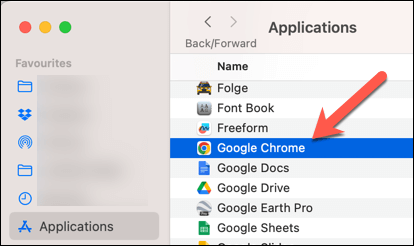
- To launch Google Chrome, navigate to your Applications folder and double-click on the Chrome icon. Your Mac may ask whether you want to open the app for the first time–press Open to confirm.
At this point, you’ll have successfully installed Google Chrome on your Mac. Remember to update the browser regularly to enjoy its latest features and security enhancements.
Configuring Google Chrome
Once you’ve successfully downloaded and installed Google Chrome on your Mac, you can configure it according to your preferences.
This includes signing in with your Google account, adjusting various browser settings, and making Chrome the default browser on your Mac.
Sign in with your Google Account
To sync your Chrome bookmarks, history, and other data across all your devices, you’ll need to sign in to your Google Account using the steps below.
- Open Chrome and press the profile icon next to the three-dot menu.
- In the menu, select Turn on sync.
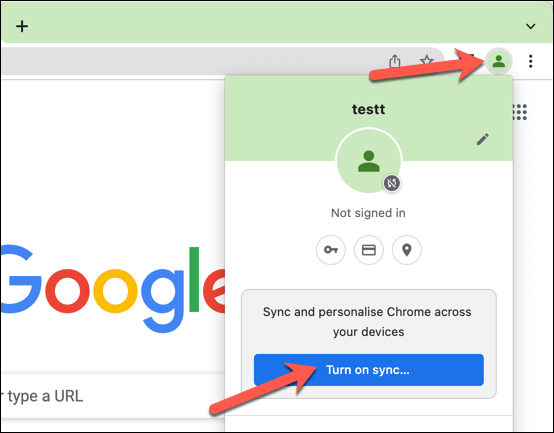
- When prompted, enter the email address and password for your Google account and press Next.
Once you sign in, your Chrome profile will begin to sync with your Google account. Any changes you make will save to your profile, allowing you to use it across different devices.
Adjust Chrome Browser Settings
You can also customize various elements of your Chrome browser. For instance, you can customize the browser’s appearance, configure privacy settings, choose an alternative search engine, and more. To do this, follow these steps.
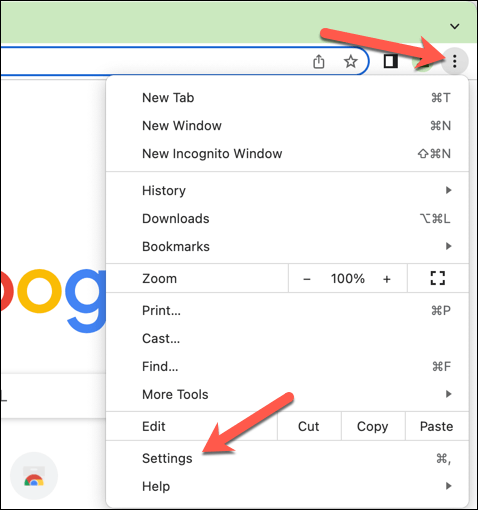
- Open Chrome and press the three-dot menu icon in the top-right.
- From the menu, select Settings.
- Select one of the settings options on the left, which include appearance, search engine, privacy and security, and more.
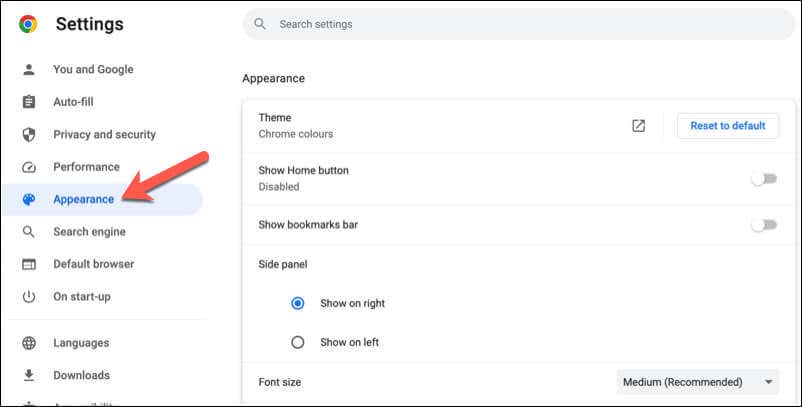
- In the menu, make any changes (as required) to your settings. Any changes you make will be applied immediately.
Make Chrome the Default Browser on Your Mac
If you want to use Google Chrome as your Mac’s default browser, you’ll need to configure macOS first so that any external links automatically open in Chrome.
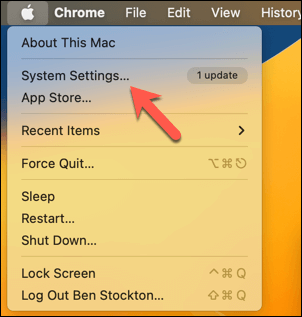
- To do this, press the Apple menu on the menu bar and select System Settings (or System Preferences on older macOS versions).
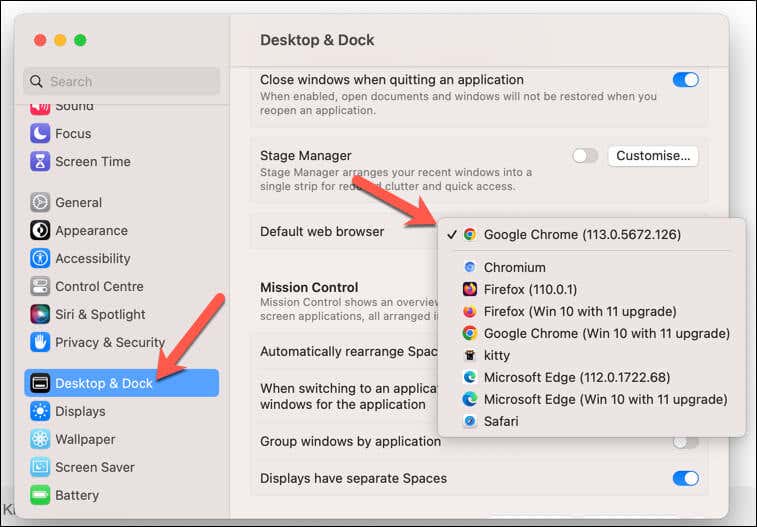
- Next, select Desktop & Dock (on Ventura or later) or General (on older macOS versions).
- In the Default web browser drop-down menu, choose Google Chrome from the list.
Troubleshooting Google Chrome Installation Issues on macOS
You may face occasional issues while downloading or installing Google Chrome on your Mac. To help you, we’ve listed some common installation problems and their solutions to help you get Chrome up and running on your Mac.
- Ensure your macOS version is compatible with Google Chrome: First, make sure that your Mac’s operating system is compatible with the latest version of Google Chrome. At present, Chrome supports macOS 10.13 (High Sierra) and later versions. If your macOS doesn’t meet this requirement, consider updating your system.
- Download the correct version for your Mac: It might sound obvious, but make sure you’re downloading the appropriate version of Chrome for macOS. The website should auto-detect your device and provide a download link accordingly, but if it doesn’t, scroll to the bottom of the download page and select Other platforms, then choose the correct version from the pop-up.
- Make sure Chrome is correctly installed: Don’t be tempted to double-click the Chrome icon in the pop-up Finder window when you run the googlechrome.dmg file. This will only run Chrome temporarily, not install it. If you’ve done this, repeat the installation process again to install Chrome properly.
- Make sure you have permission to install: Only system administrators have the permission to install new applications on macOS. If you can’t install, switch to a user account on your Mac that has the necessary permissions.
- Perform a clean uninstall and reinstall: If Chrome isn’t working correctly after installation, you can try uninstalling it completely and then reinstalling it. To do this, drag the Google Chrome icon from Applications to the Trash folder, then empty the Trash. After this, download and install Chrome again using the steps above.
Using Chrome on a Mac
Thanks to the steps above, you can ditch Safari and quickly install Google Chrome on your Mac. Once you’ve installed Chrome, make sure to check that Chrome is automatically updating to get the latest bug fixes. You can also clear your browser cache to reduce any potential slowdowns.
Can’t decide which new browser to go for? If you’re considering Edge over Chrome, for instance, try out the browser’s speed, integration with other services (such as Google or Microsoft), and the usability of the browser interface before you make a decision.
