Customizing the Finder sidebar on an Apple Mac is a great way to make navigating your files easier. With just a few clicks, you can resize it the way you want, add your favorite locations for quick access, create shortcuts to custom files and folders, and more.
This tutorial will walk you through various customization tips and tweaks to personalize the Finder sidebar on a Mac computer.
Resize the Mac Finder Sidebar
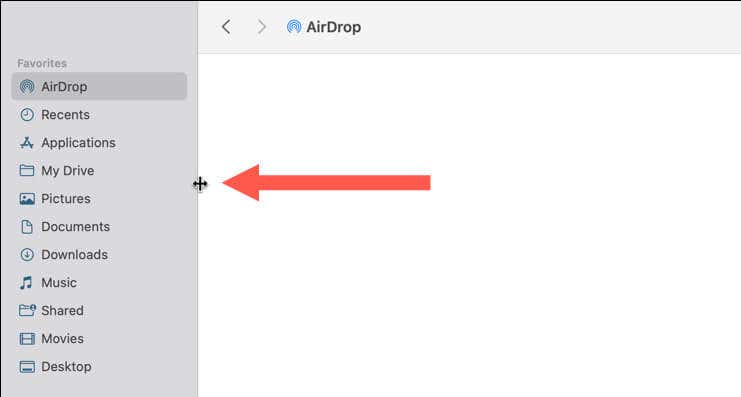
The Finder sidebar shows up on the left side of every window you open, but you may not like its default size. Thankfully, you can resize it however you want.
To do that, open Finder and hover the cursor over the dividing line. When the pointer changes to a double-sided arrow, click and drag it to the left or the right.
Hide and Show the Finder Sidebar
You may run into instances where you want to maximize the amount of available space on a Finder window. Hiding the sidebar is one way that can help you with that.
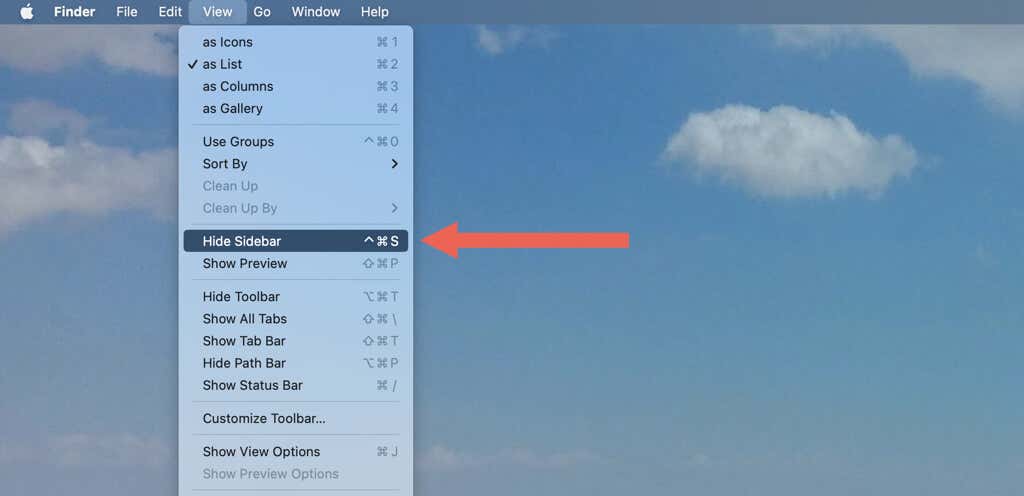
Just select View > Hide Sidebar on the menu bar (or use the Control + Command + S keyboard shortcut) to make the Finder sidebar disappear. You can also click and drag the dividing line all the way to the left to hide it.
Tip: Select View > Hide Toolbar (or press Option + Command + T) to hide both the Finder sidebar and its toolbar at the same time.
When you want to get the Finder sidebar back, select View > Show Sidebar or press Control + Command + S again.
Hide/Unhide Items in a Section of the Finder Sidebar
The Finder displays several shortcuts to directories within your Mac’s user account, such as your Pictures, Movies, and Downloads folders, underneath the Favorites category of its sidebar.
If you use iCloud Drive, you’ll also find shortcuts to iCloud Drive, your Shared folder, and other folders you choose to sync to iCloud under a section labeled iCloud.
An additional section—labeled Locations—lists external hard drives, connected iOS devices (iPhone, iPad, and iPod touch), third-party cloud-storage services, etc. You also have access to your file and folder tags at the bottom of the sidebar.
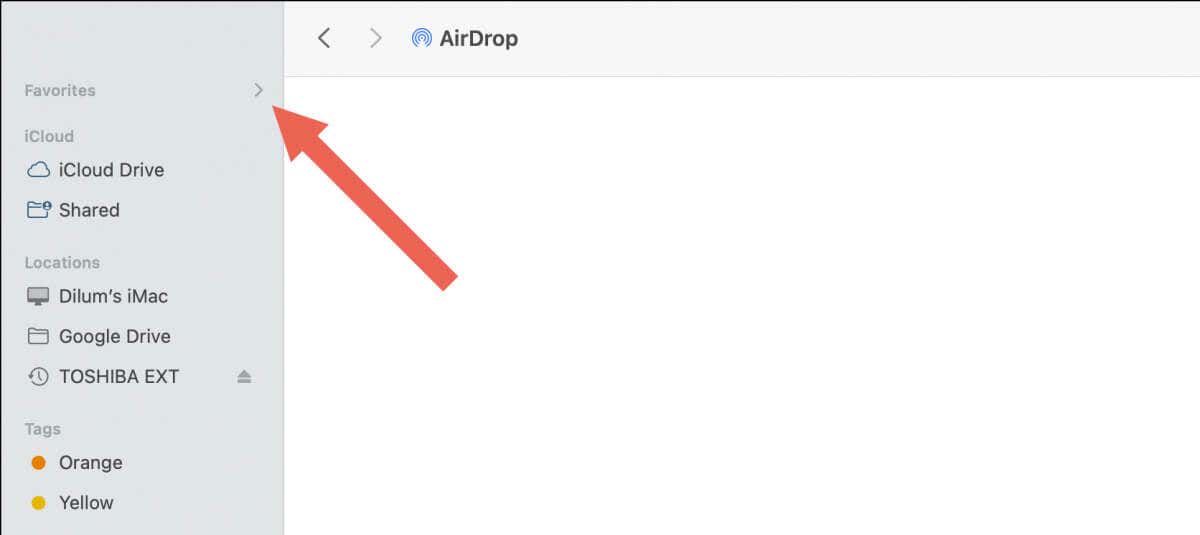
All of these items can make the sidebar appear too long. You may wish to hide categories that you don’t use often.
To do that, just select the Arrow icon next to a category. Select it again whenever you want to reveal its contents.
Manage Sidebar Items in Mac Finder
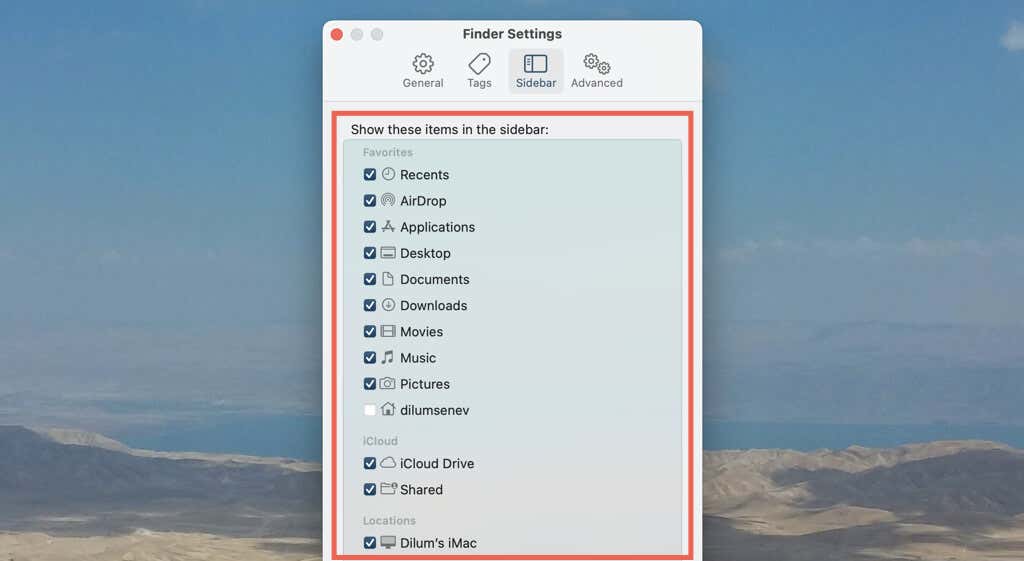
If the sidebar appears too cluttered or you find an item missing, you can manage what appears inside it via the Finder Preferences.
- Select Finder > Preferences in the menu bar (or Finder > Settings if use macOS Ventura or later).
- Under the Sidebar tab, you can select or deselect the items you want to appear under the following sections of the sidebar—e.g., Favorites, iCloud, Locations, and Tags.
For example, if you want to see the Home folder of your Mac account, check the box next to your username.
Add Custom Folders to the Finder Sidebar
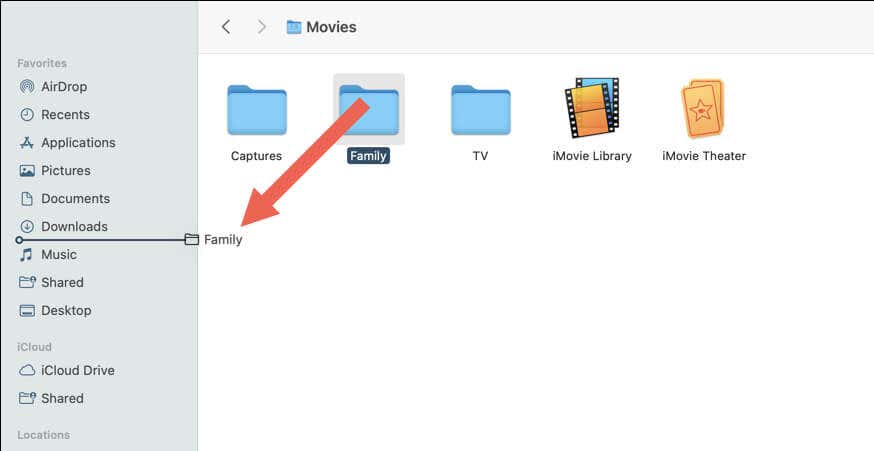
You can add any folder on your Mac to the Finder sidebar. All you need to do is drag it into the Favorites section and release it when you see a line between two existing items.
After adding a custom location to the sidebar, you can enter it immediately by selecting it. You can also move files and folders into it via drag and drop.
If you want to rename a custom folder on the sidebar, just Control-click and item and select Rename. That will also change its name in the original location.
Add or Remove Files and Apps
Folders aside, you can also add files and apps to the Finder sidebar. Again, drag the item you want to add, but press and hold the Command key. Then, release when you see a line between two existing items.
Change Default Finder Sidebar Folder
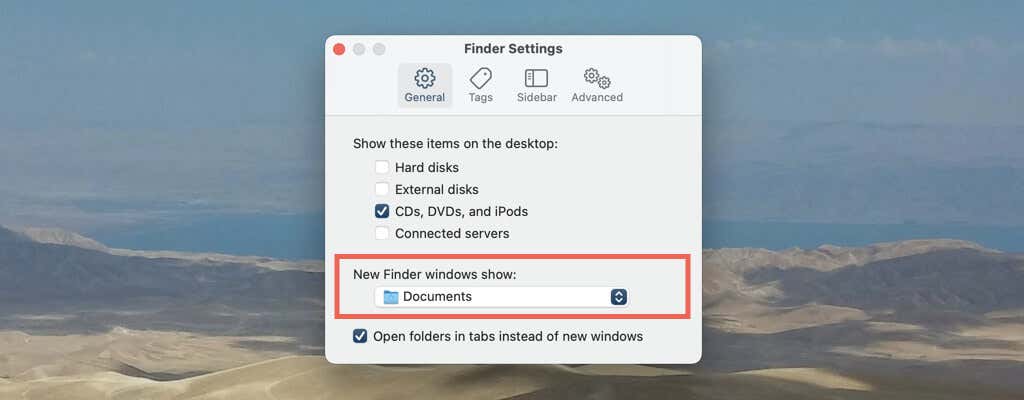
By default, whenever you open a new Finder window, it automatically opens the Recents folder on the sidebar. You can change that to a different location—e.g.Documents—or a custom folder. To do that:
- Open a new Finder window and select Finder > Settings on the menu bar.
- Open the pull-down menu under New Finder windows show.
- Pick the sidebar location you want Finder to open by default. Choose Other if you want to pick a custom folder on your Mac.
Add Saved Searches to macOS Finder
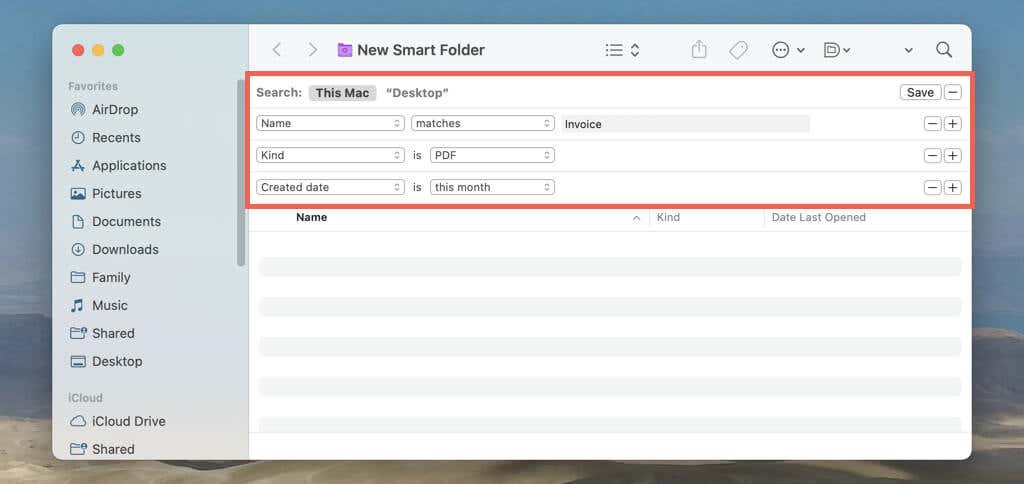
Smart Folders in macOS are basically saved searches that let you filter files and folders based on various pre-set criteria. Any Smart Folder you create gets automatically added to the Favorites section of the Finder sidebar. To create one:
- Right-click the Finder icon on the Dock and select New Smart Folder.
- Select the Plus icon on the top right of the window to set up your filtering criteria—name, file type, size, etc.
- Select Save, add a file for the Smart Folder, and select Save again.
Learn more about setting up and using Smart Folders on Mac.
Rearrange or Remove Items From the Sidebar
You can rearrange items within a category on the Finder sidebar whenever you want. Just click and drag them up or down.
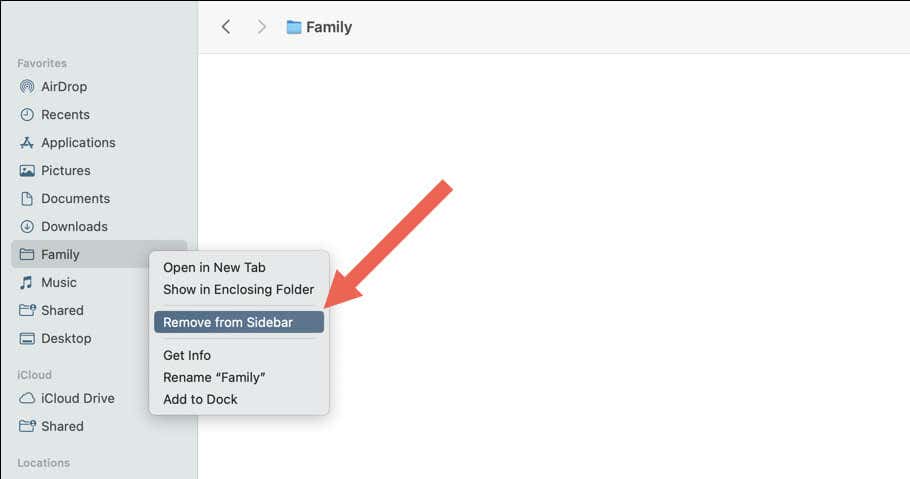
You can also remove items from the Finder sidebar. Control-click and select Remove from Sidebar to delete items; this will not delete the folder, file, or app from its original location.
Set Up the Finder Sidebar the Way You Want
Customizing the Finder sidebar is one of the first steps to getting the most out of your Mac’s file management system. Check out 20 other ways to ramp up your Finder experience next.
[related_posts_by_tax posts_per_page="5"]
