As a Mac Terminal user, you know it’s not the most attractive app on macOS; however, you can spruce up its appearance in various ways. You can change the background color or use an image, pick a different font style, choose complementary text colors, and update the cursor style. These simple changes might make your workflow more enjoyable as you use Terminal to open files or enter Git commands.
Open Terminal on Mac
To customize the appearance of Terminal on a Mac, open Terminal as usual or use one of the quick methods below.
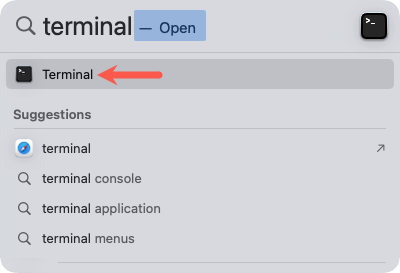
- Open Spotlight Search, type “Terminal,” and press Enter or choose the Terminal app in the list.
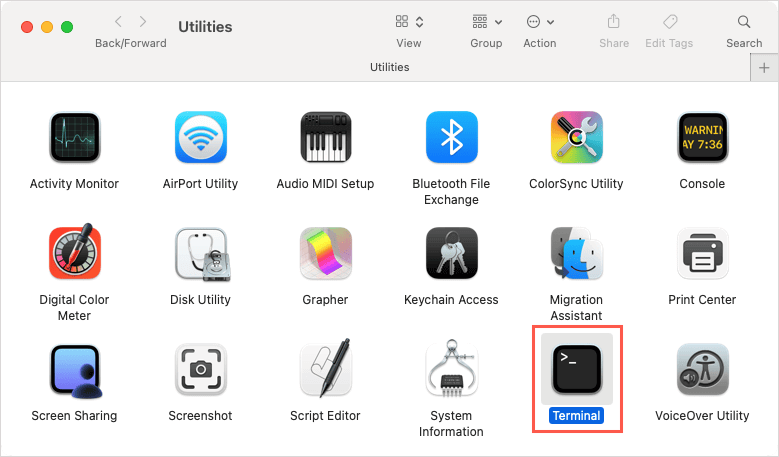
- With Finder active, select Go > Utilities in the menu bar. Then, double-click Terminal.
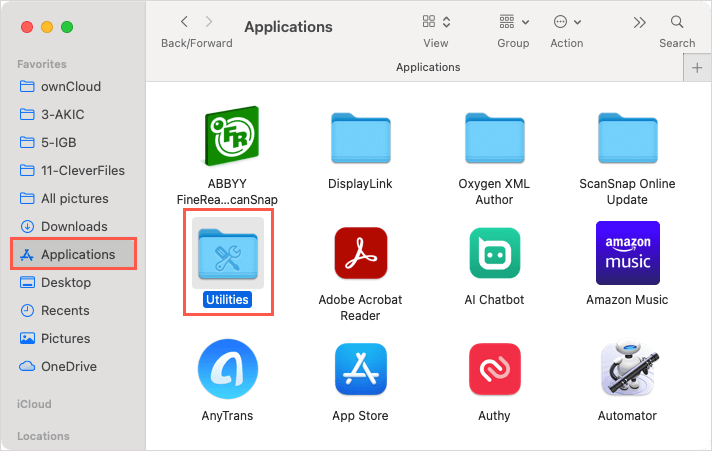
- With Finder active, pick Applications in the sidebar, open the Utilities folder, and double-click Terminal.
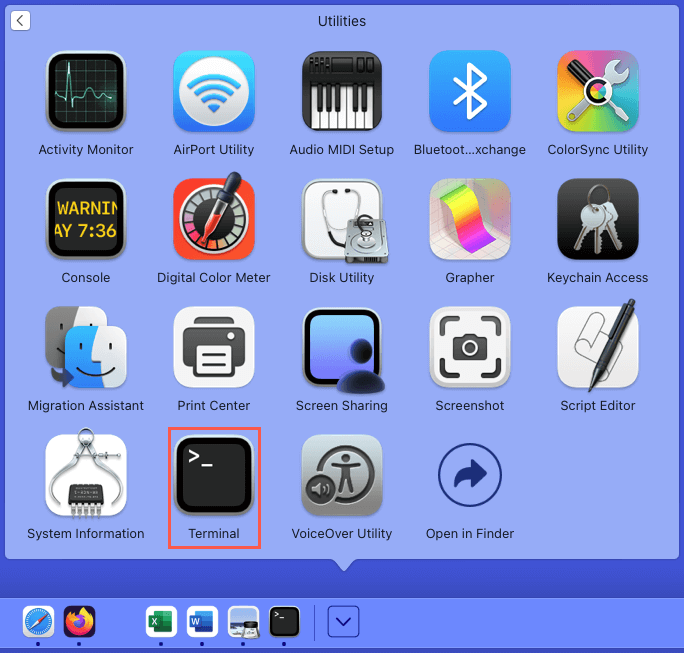
- Open the Applications folder in your Dock, select Utilities, and double-click Terminal.
View or Edit a Premade Terminal Profile
With macOS Terminal, you can choose a built-in group of configurations called Profiles, which is like a Terminal theme. You can see all appearance settings, open a live preview, and edit the current settings.
Note: A Terminal profile can include more than just visual settings; however, we’ll only walk through the appearance options for this tutorial.
- After you open Terminal, select Terminal > Settings in the menu bar.
- Go to the Profiles tab.
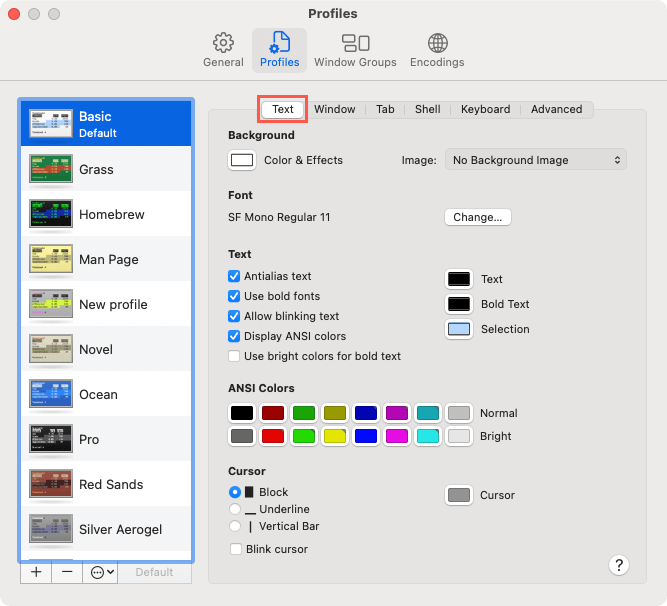
- You’ll see several premade profiles on the left, like Grass, Homebrew, and Ocean. Select one to view its settings on the Text tab to the right, including the Background, Font, Text, ANSI Colors, and Cursor. We’ll explain these settings in more detail below.
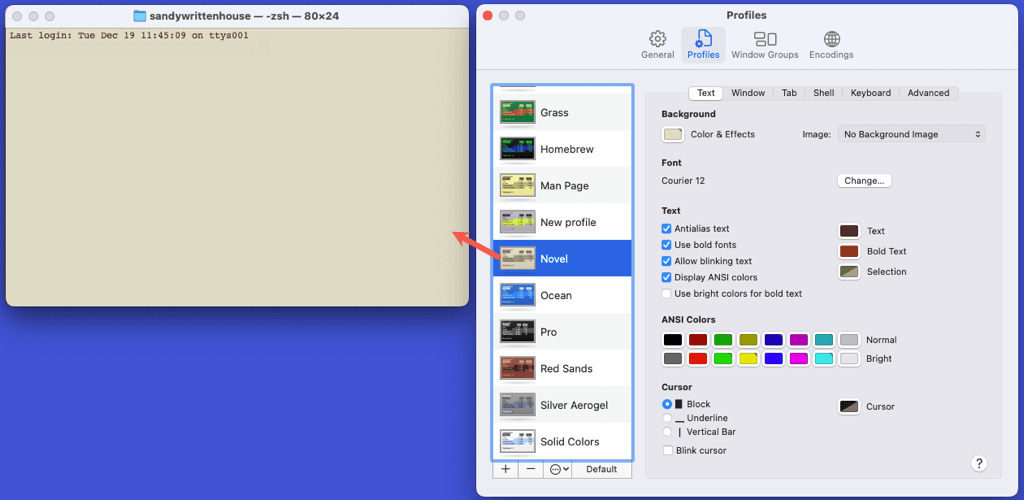
- To see a live preview of a profile, double-click its image in the list. You can even enter text in the command line to get a feel for the profile.
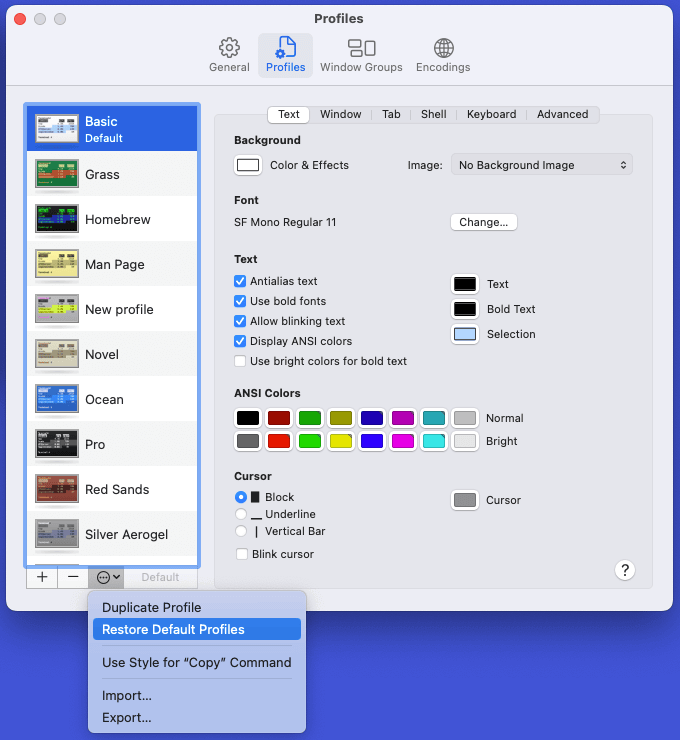
You can make changes to a premade profile if you like. Just keep in mind that your adjustments save automatically. If you make changes you want to revert, you can restore the default profiles to their original settings.
Open the three-dot menu at the bottom of the profile list and choose Restore Default Profiles.
If you prefer to keep the premade profiles as-is, you can create your own, which we’ll describe next.
Create a Custom Terminal Profile
To set up a custom Terminal profile, you’ll start with the Basic profile. However, you can also duplicate an existing profile and customize it instead. The latter is handy if you like many settings of a particular profile, like the color scheme, but just want to change a few things.
- Begin with one of the following to create the profile:
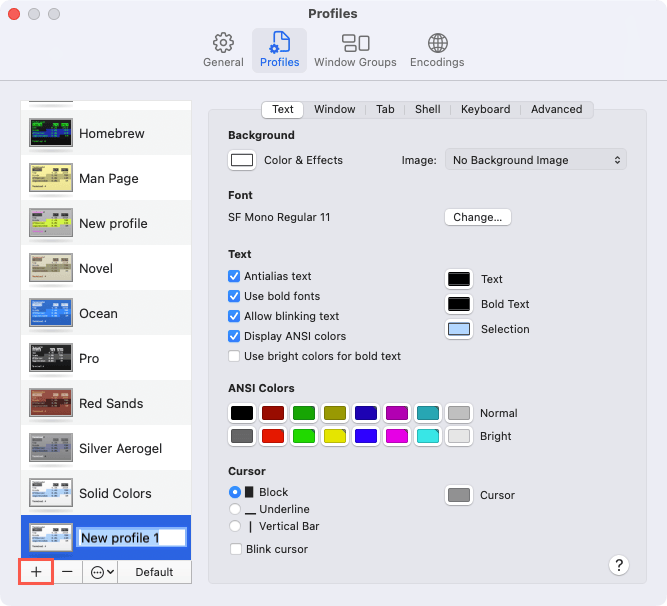
- To create a profile using the default style, select the plus sign at the bottom of the profile list. Enter a name for the profile and press Return.
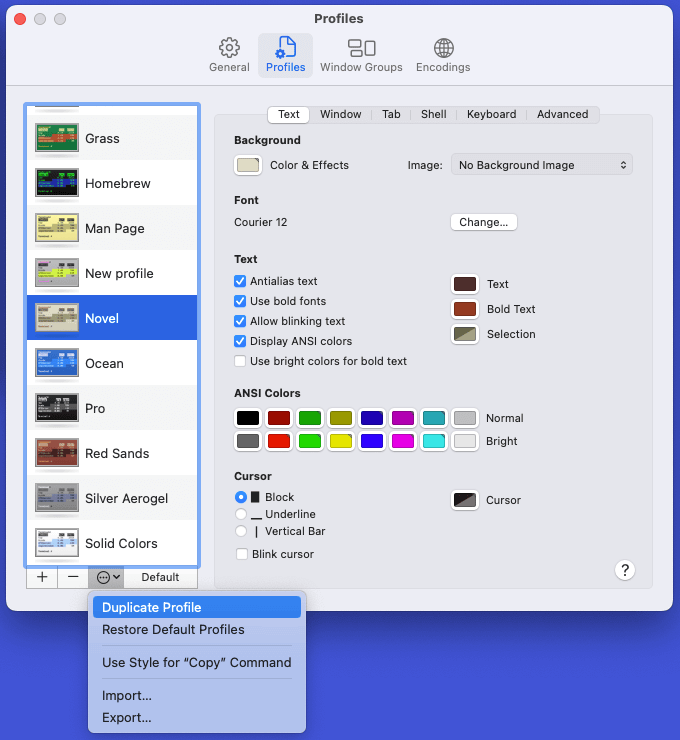
- To create a profile using a copy of another, select the profile you want to use. Open the three-dot menu at the bottom and choose Duplicate Profile. When the duplicated profile appears, enter a name and press Return to save it.
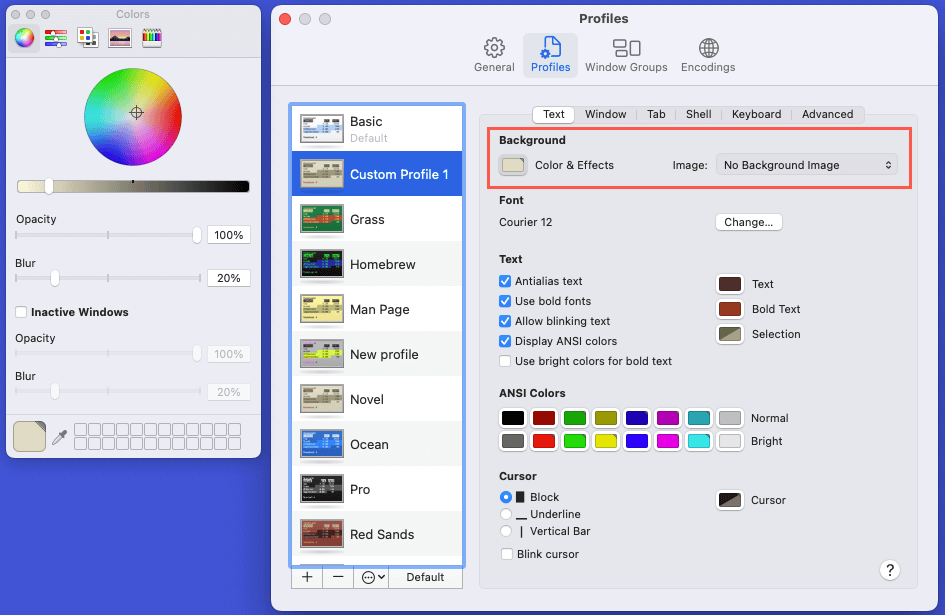
- Once you create the profile, use the Text tab to the right to customize its appearance. To begin, you can use a background color or an image from your Mac.
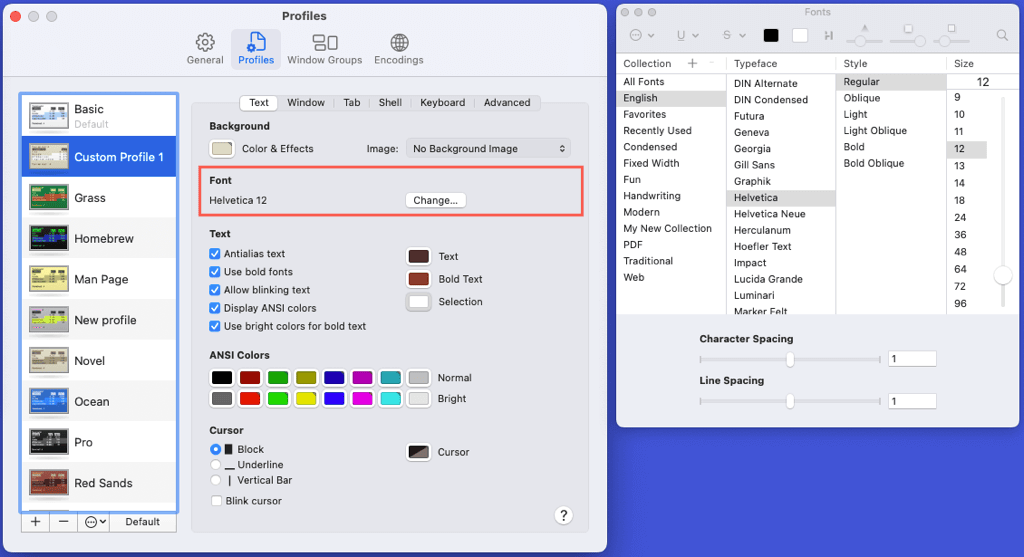
- Next, you can choose the font typeface, style, and size.
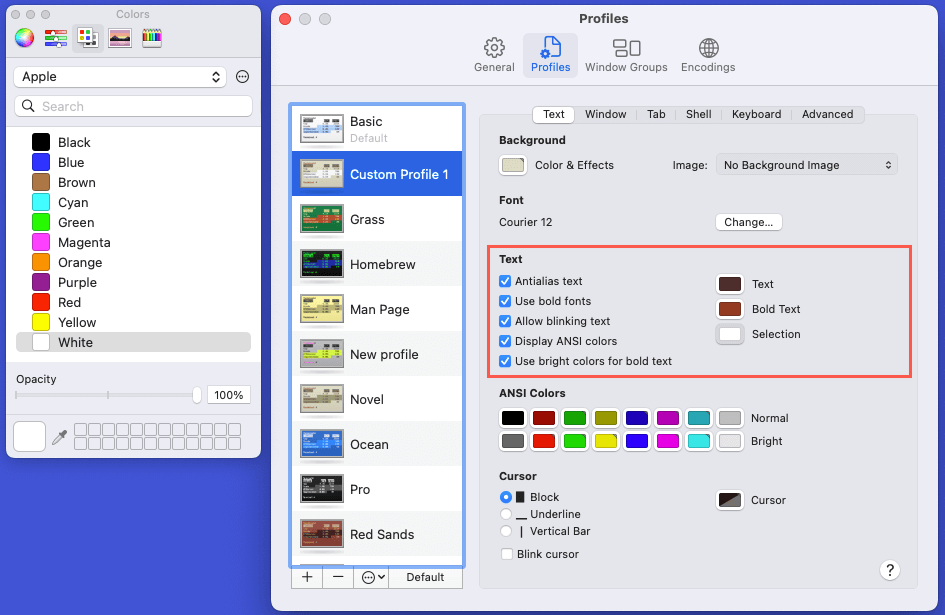
- Now, you can decide how the text should look. Check the boxes for options like allowing blinking text or using bold fonts. Then, select the color palette buttons to the right to pick the text, bold text, and selected text colors.
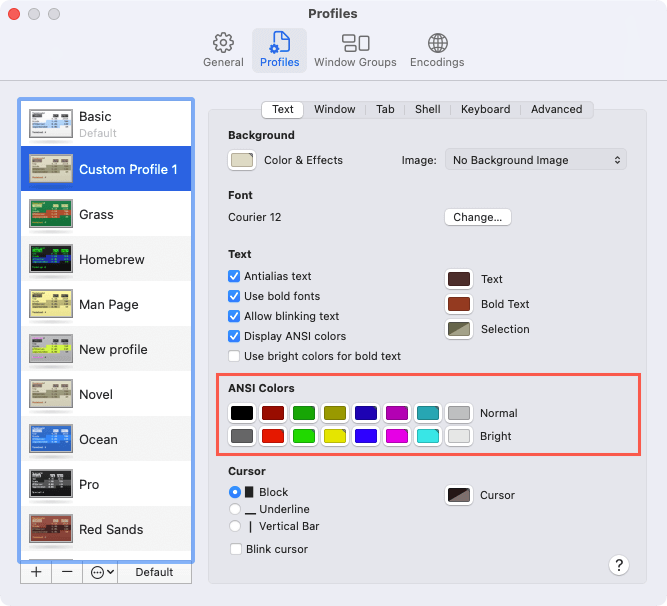
- If you want to adjust the ANSI colors, you can choose each palette button and pick the color you prefer.
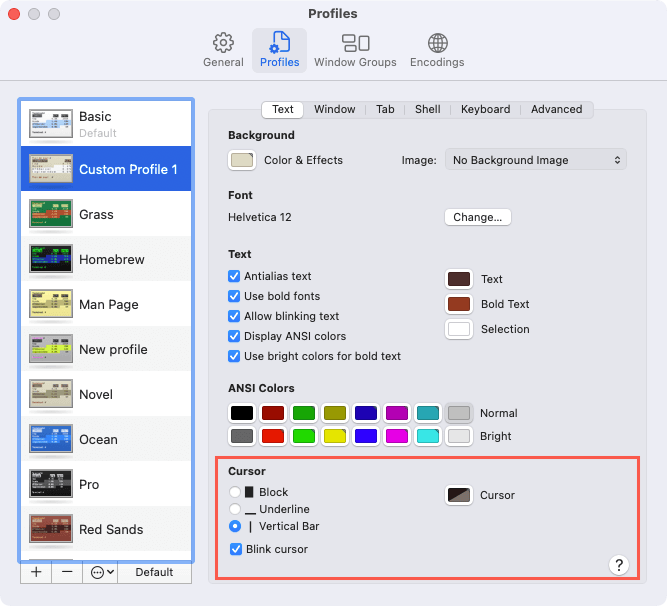
- Finally, you can choose how to display the cursor. Select the style, use the palette button to pick the color, and optionally check the box to blink the cursor.
Again, your changes are saved automatically and refreshed in the Terminal window live preview. This lets you try out various themes to find the best fit.
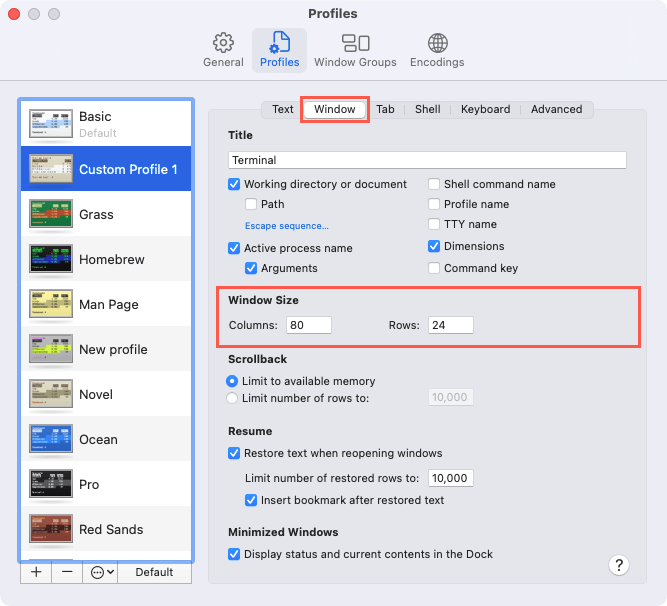
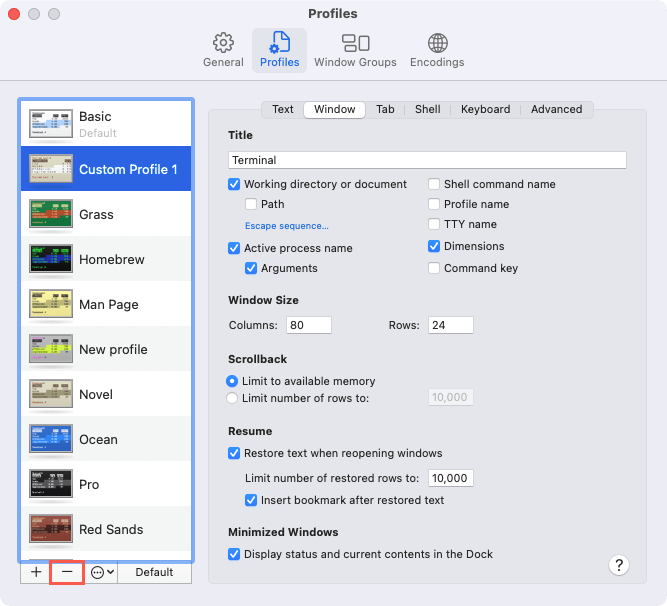
Tip: Do you want to set the default size for the Terminal window and customize its appearance? Choose a profile, select the Window tab on the right, and enter the dimensions (Columns and Rows) below Window Size.
Remove a Terminal Profile
If you want to delete a custom profile that you create, this is easy and keeps your profile list neat and clean.
Choose a profile and select the minus sign button at the bottom of the list.
macOS won’t prompt you to confirm, so be sure you want to delete the profile before hitting that button.
Set the Default Terminal Profile
You can choose a default profile when you open new Terminal windows, tabs, or restore a window. Remember that this differs from a Terminal startup window, which we’ll describe below.
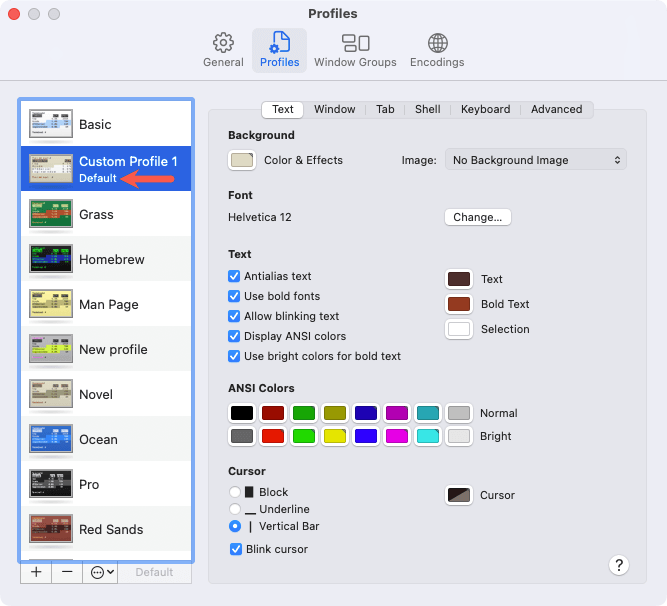
On the Profiles tab, pick the profile and select Default at the bottom of the profile list. You’ll then see your selected profile show “Default” beneath the name.
Launch Terminal Using a Profile
Along with setting the default profile, you can choose one to use on the start up of the Terminal app. This includes both premade and custom profiles.
- With Terminal open, select Terminal > Settings in the menu bar.
- Go to the General tab.
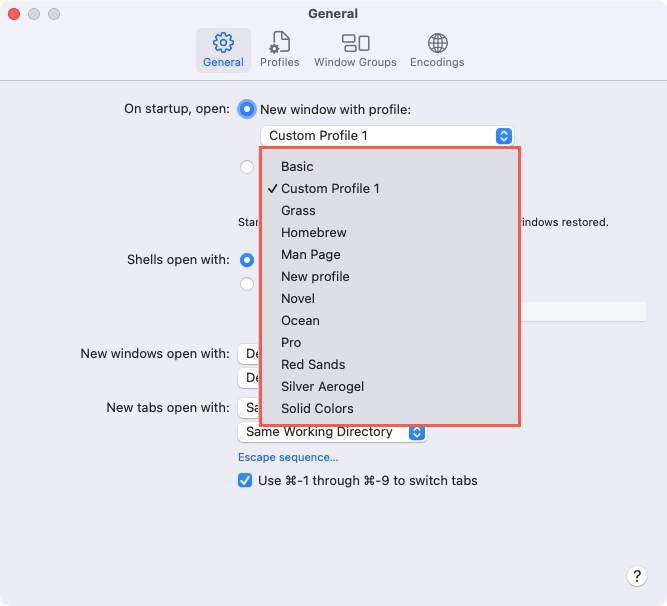
- Beside On startup, open and below New window with profile, use the drop-down list to pick the profile you want to see each time you launch Terminal.
Note: If you open a Window Group instead, you cannot pick a startup profile.
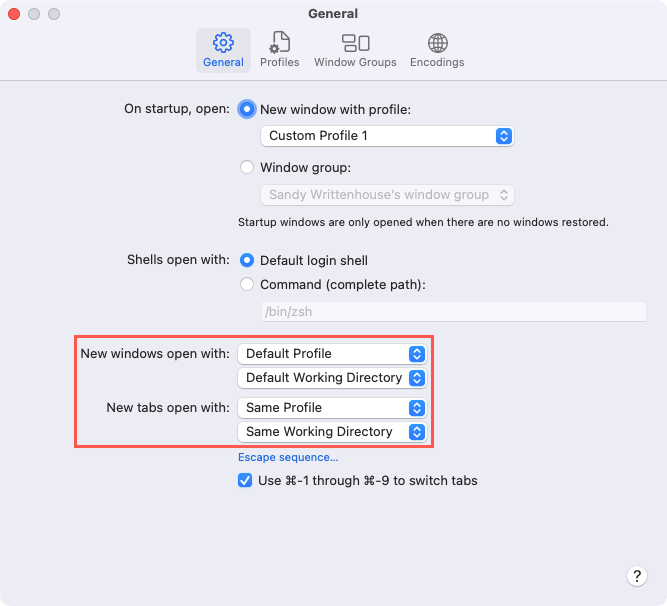
- You can next select which profile to use for new Terminal windows and tabs. Beside each option, use the drop-down menu to pick either the Default Profile as described earlier or Same Profile as the active window or tab.
When you finish adjusting or creating a profile and selecting the one you want to use, you can close the Terminal settings using the X on the top left.
Will You Customize Your Mac Terminal App?
If you use Terminal regularly, it’s worth a few minutes to make it fit your style or mood.
Now that you know how to customize your Terminal app on a MacBook or iMac, look at how to run a Terminal command using a keyboard shortcut.
[related_posts_by_tax posts_per_page="5"]